• Home
  • Blog
  • Featured on Etsy
  • About the Dollmaker
  • About the Handmade Dolls
  • About the Doll Clothes
  • Scrappy Phoebe's Page
  • Reviews
  • Shop
  • My Etsy Shop
  • Doll Dressmaking Series
  • Teaching A Child to Sew
  • Dress Patterns for your Phoebe Doll
  • Scrappy Phoebe's Page (Copy)
  • Contact
  • Shop
Menu

Phoebe&Egg

Street Address
City, State, Zip
Phone Number
handmade dolls and doll clothing

Your Custom Text Here

Phoebe&Egg

  • Home
  • Blog
  • About
    • Featured on Etsy
    • About the Dollmaker
    • About the Handmade Dolls
    • About the Doll Clothes
  • Scrappy Phoebe's Page
  • Shop and Reviews
    • Reviews
    • Shop
    • My Etsy Shop
  • Doll Dressmaking
    • Doll Dressmaking Series
    • Teaching A Child to Sew
    • Dress Patterns for your Phoebe Doll
    • Scrappy Phoebe's Page (Copy)
  • Contact
  • Shop

Doll Dressmaking Tutorial: Creating a Cute Bodice with Elastic

June 20, 2016 Lisa Press
Doll Dressmaking Series

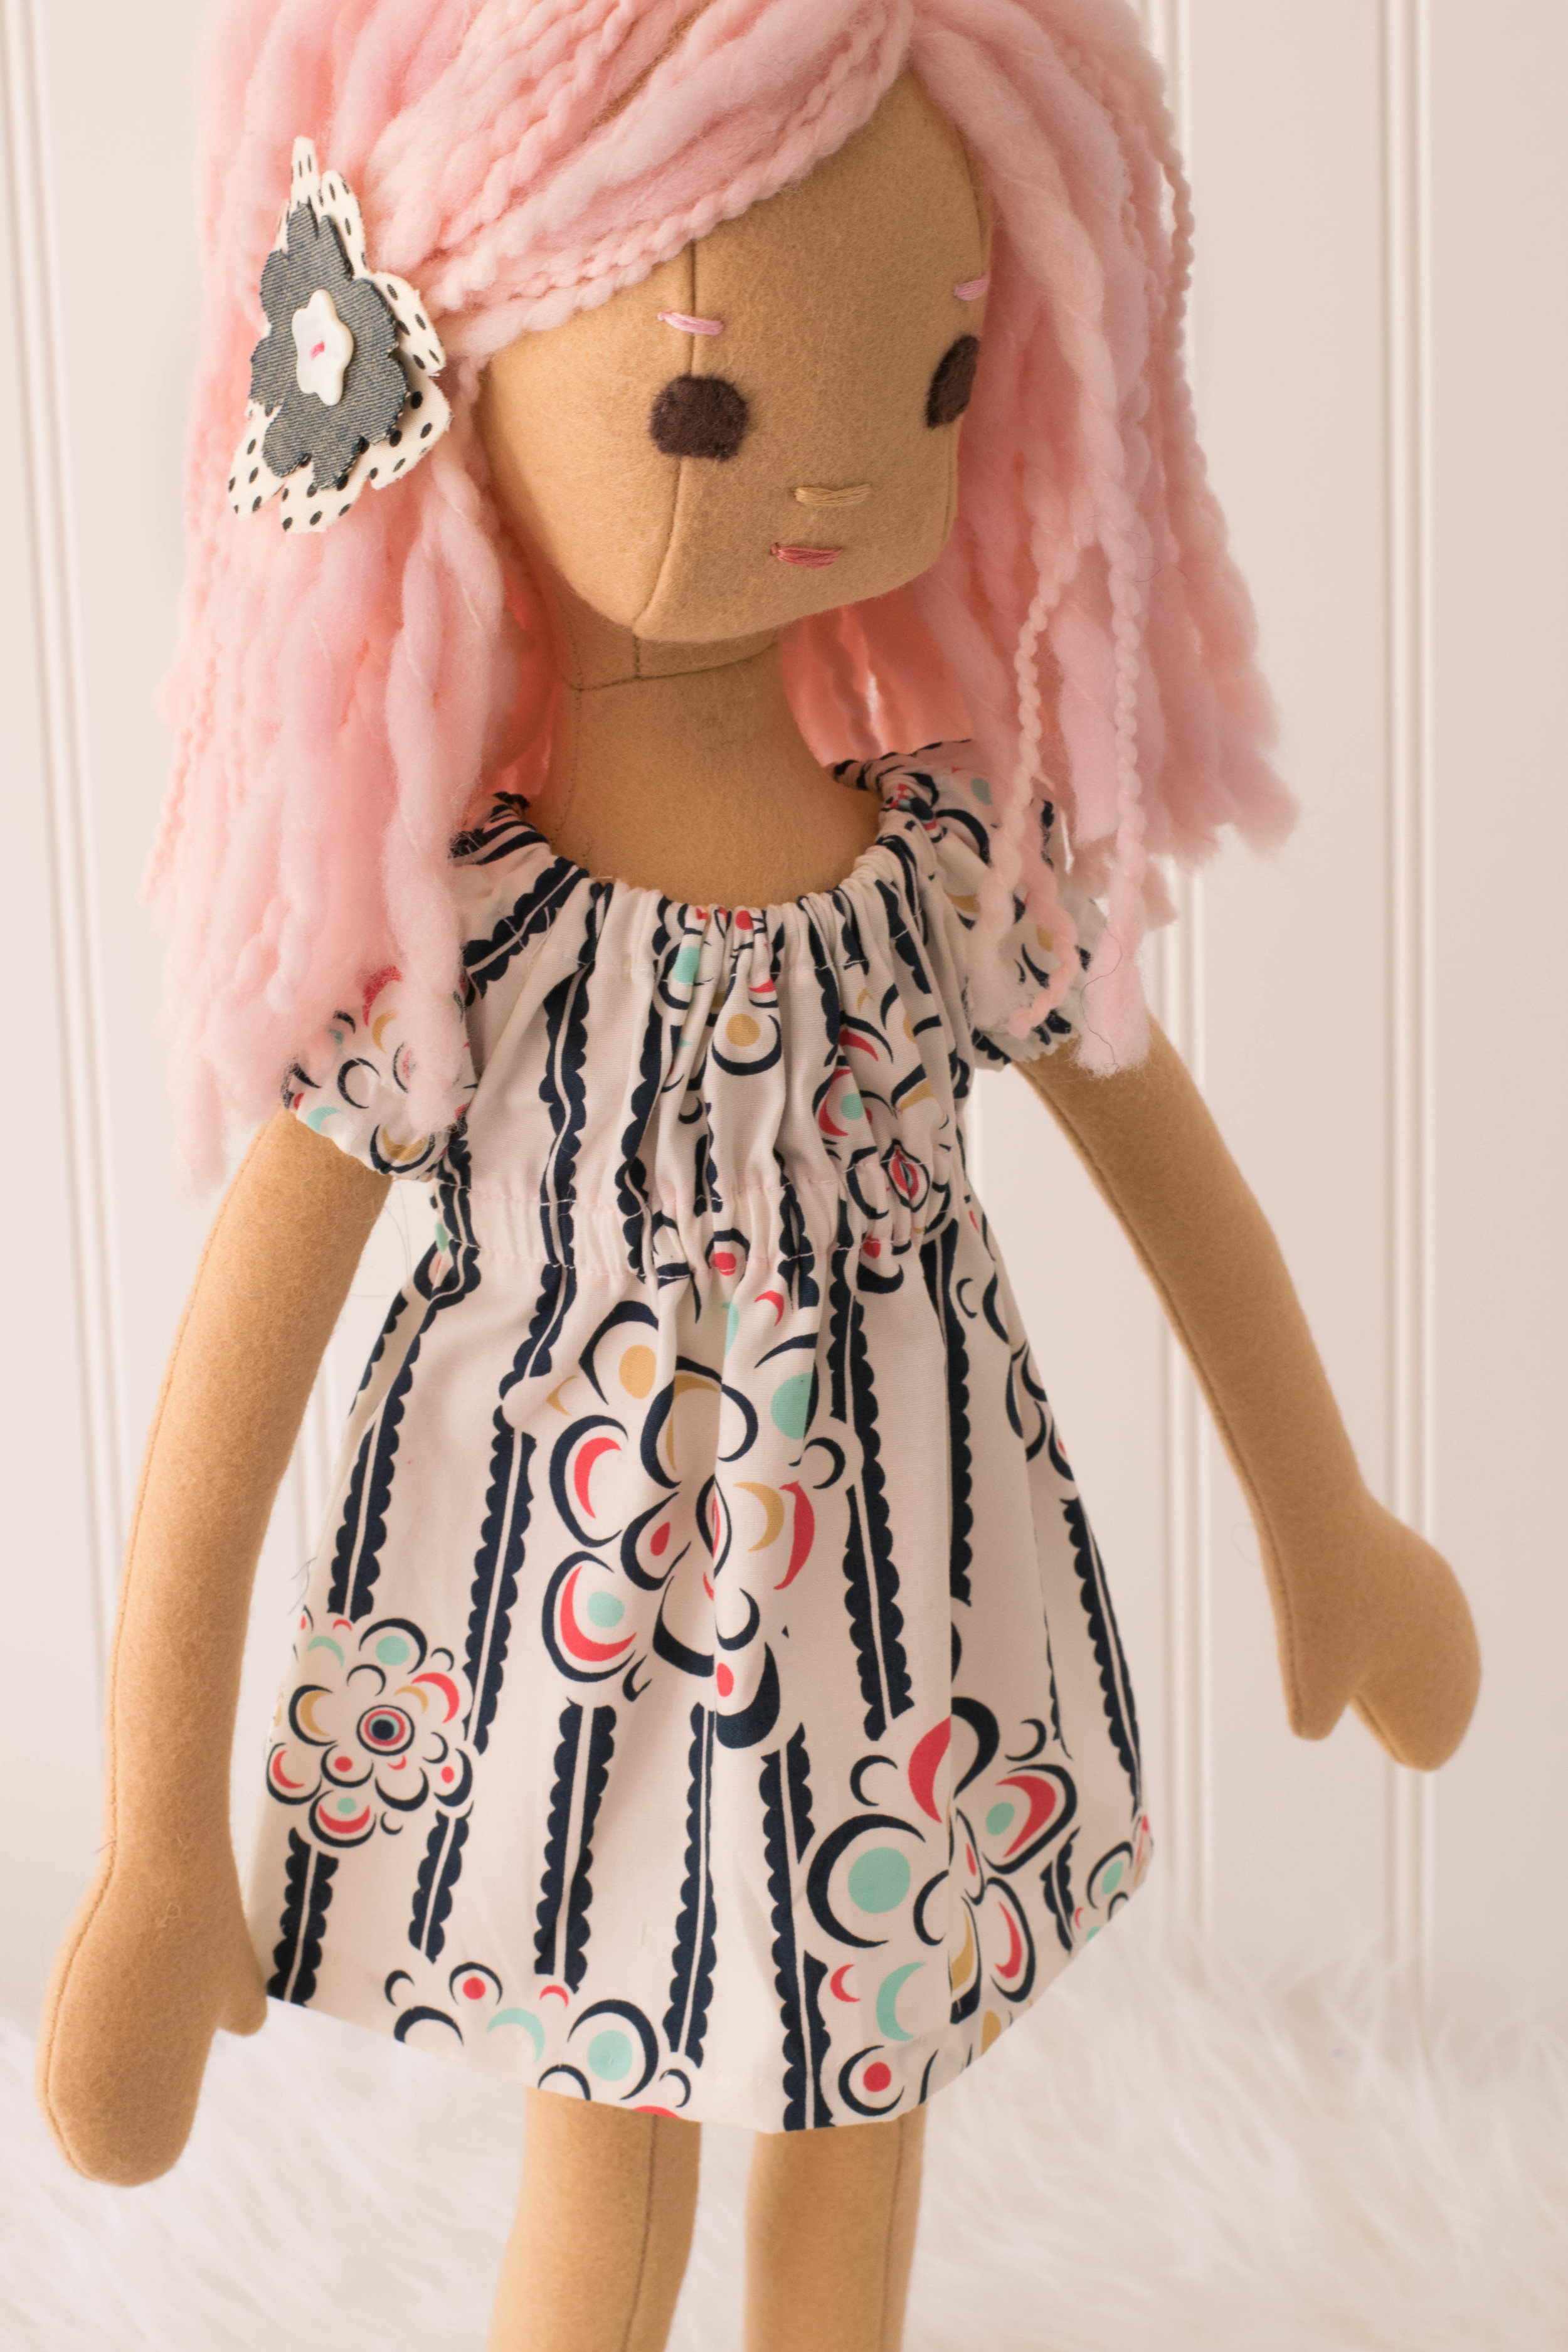
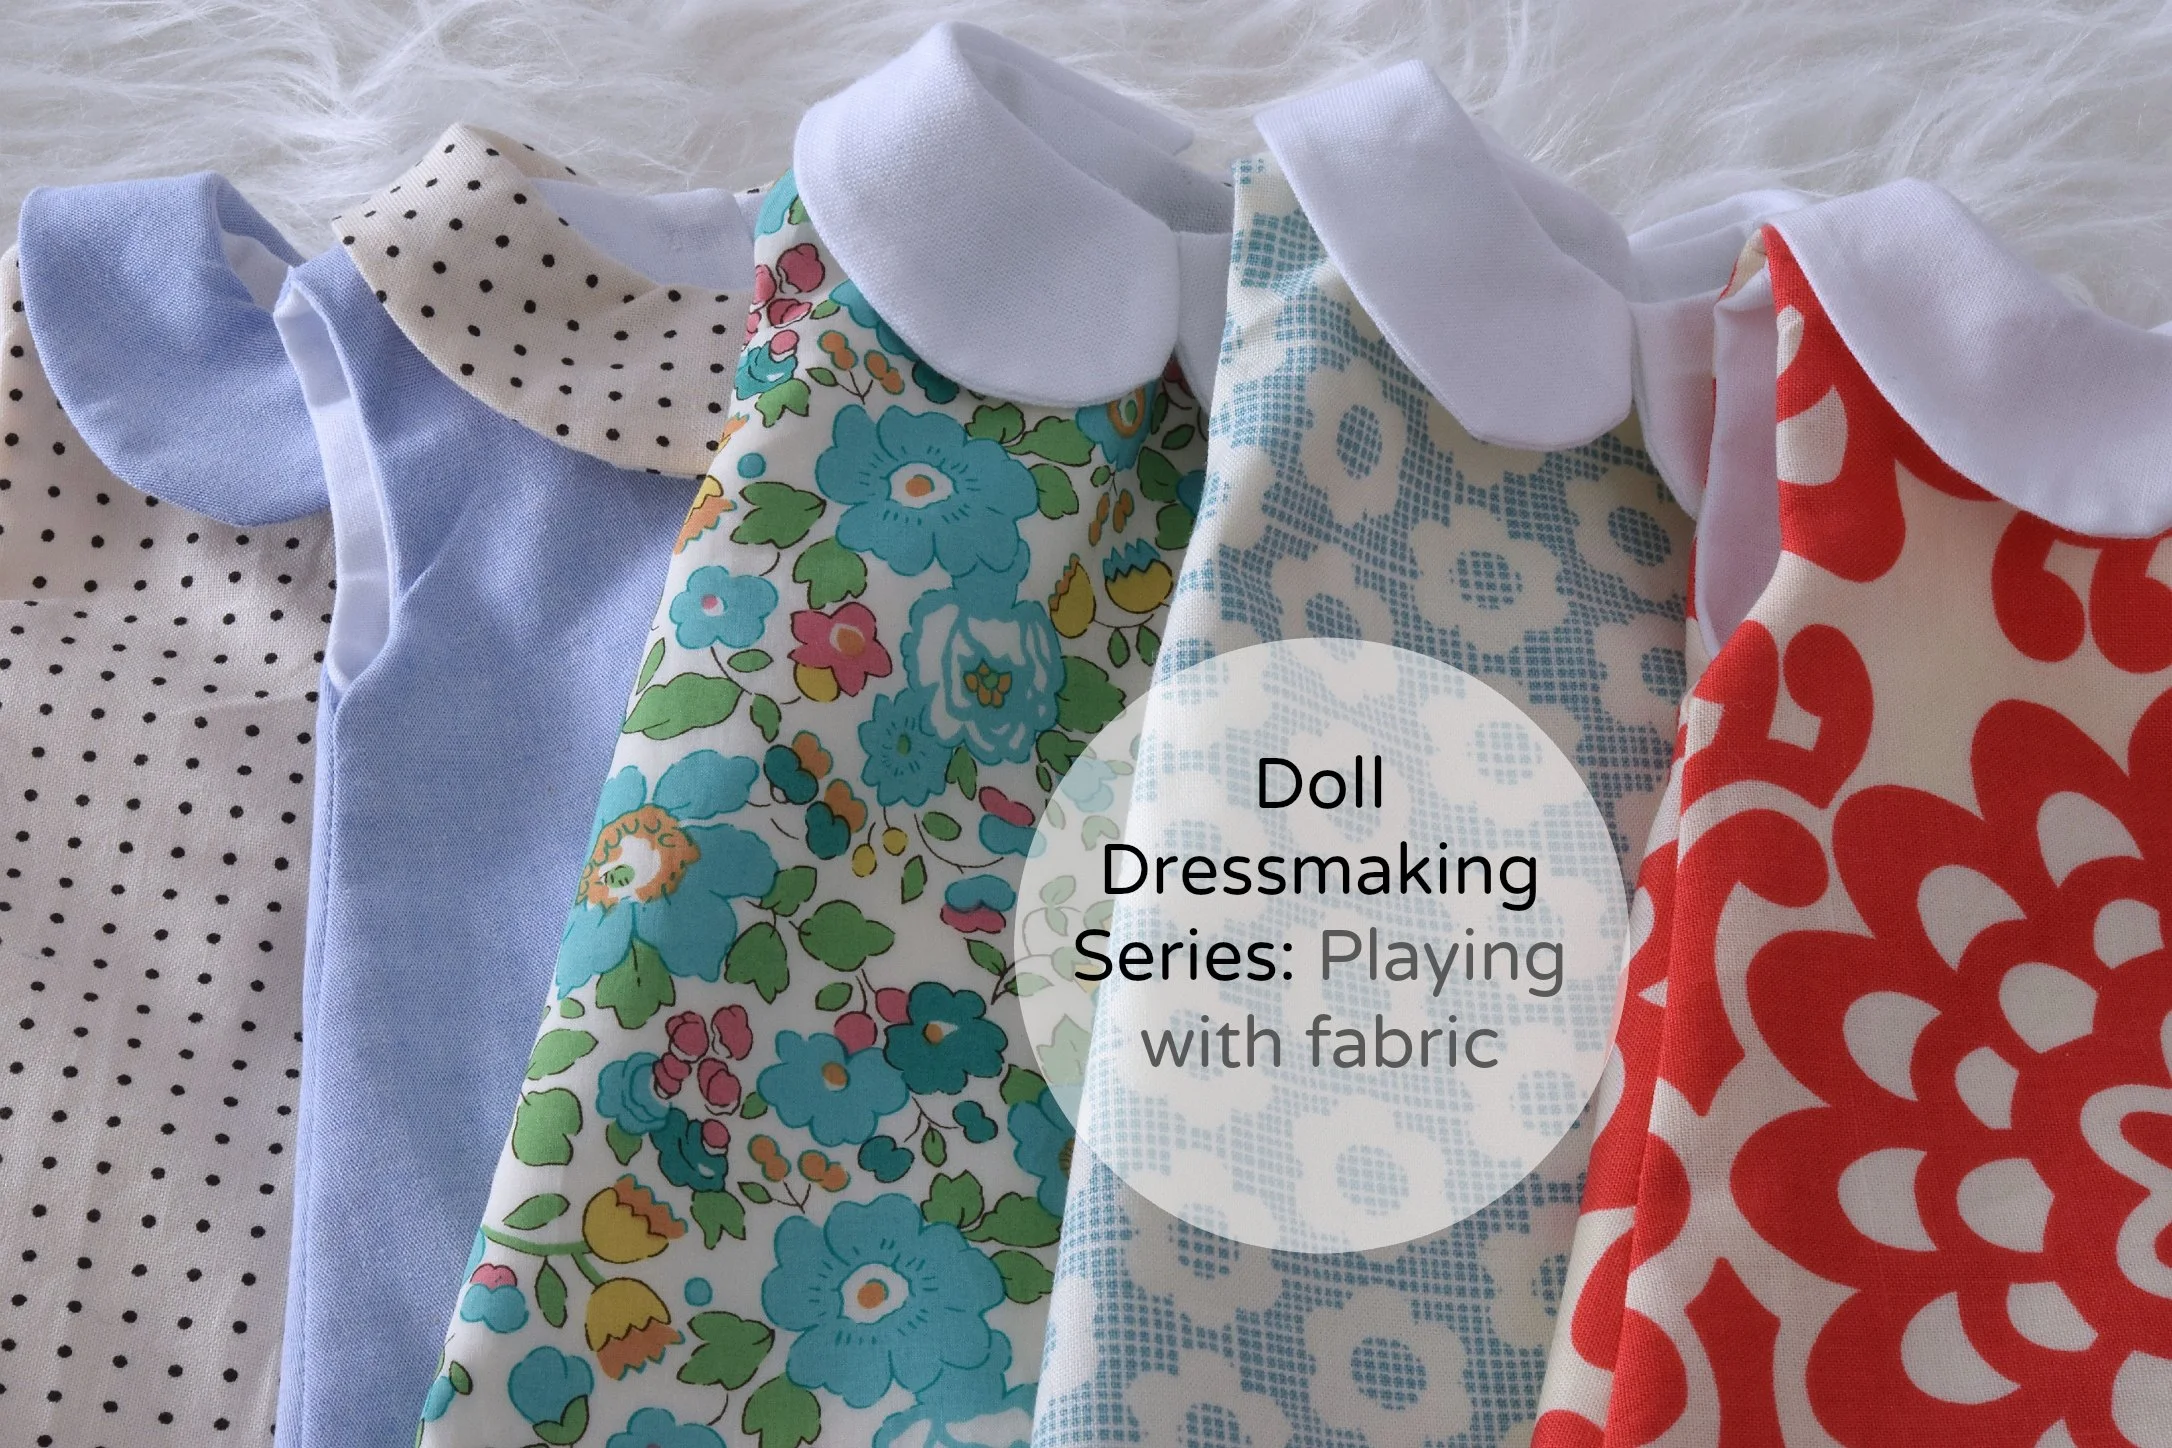
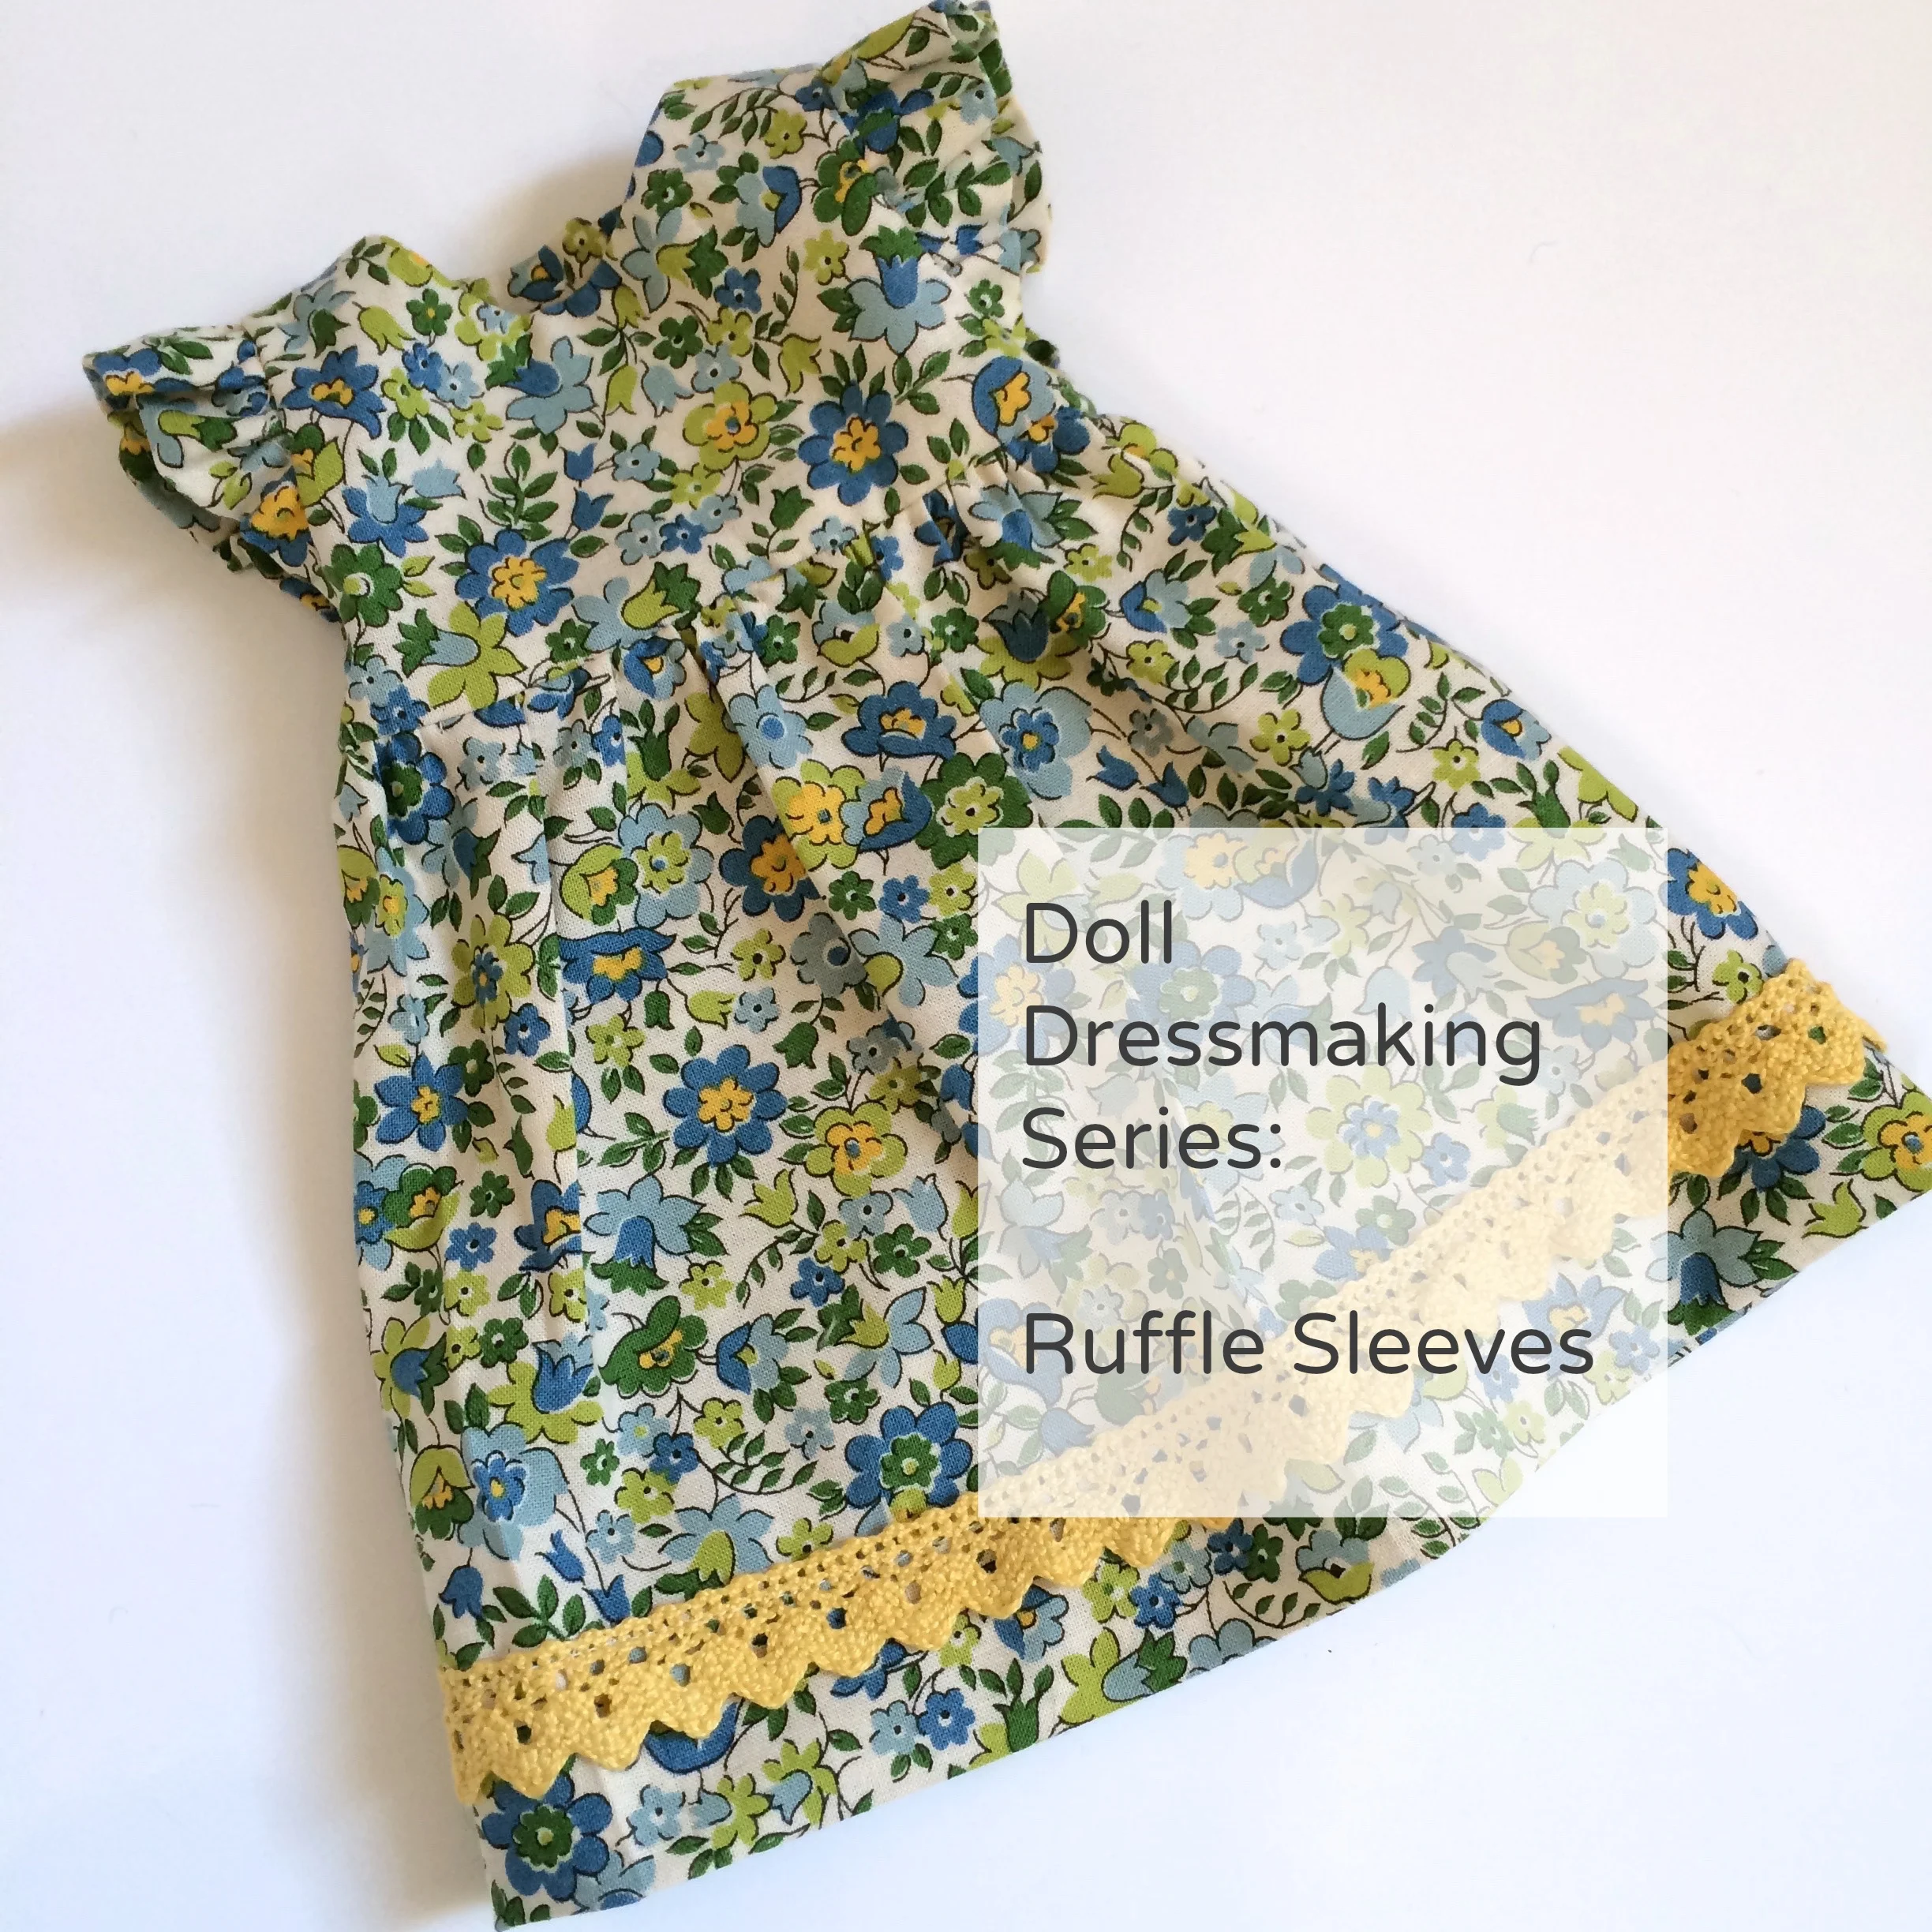
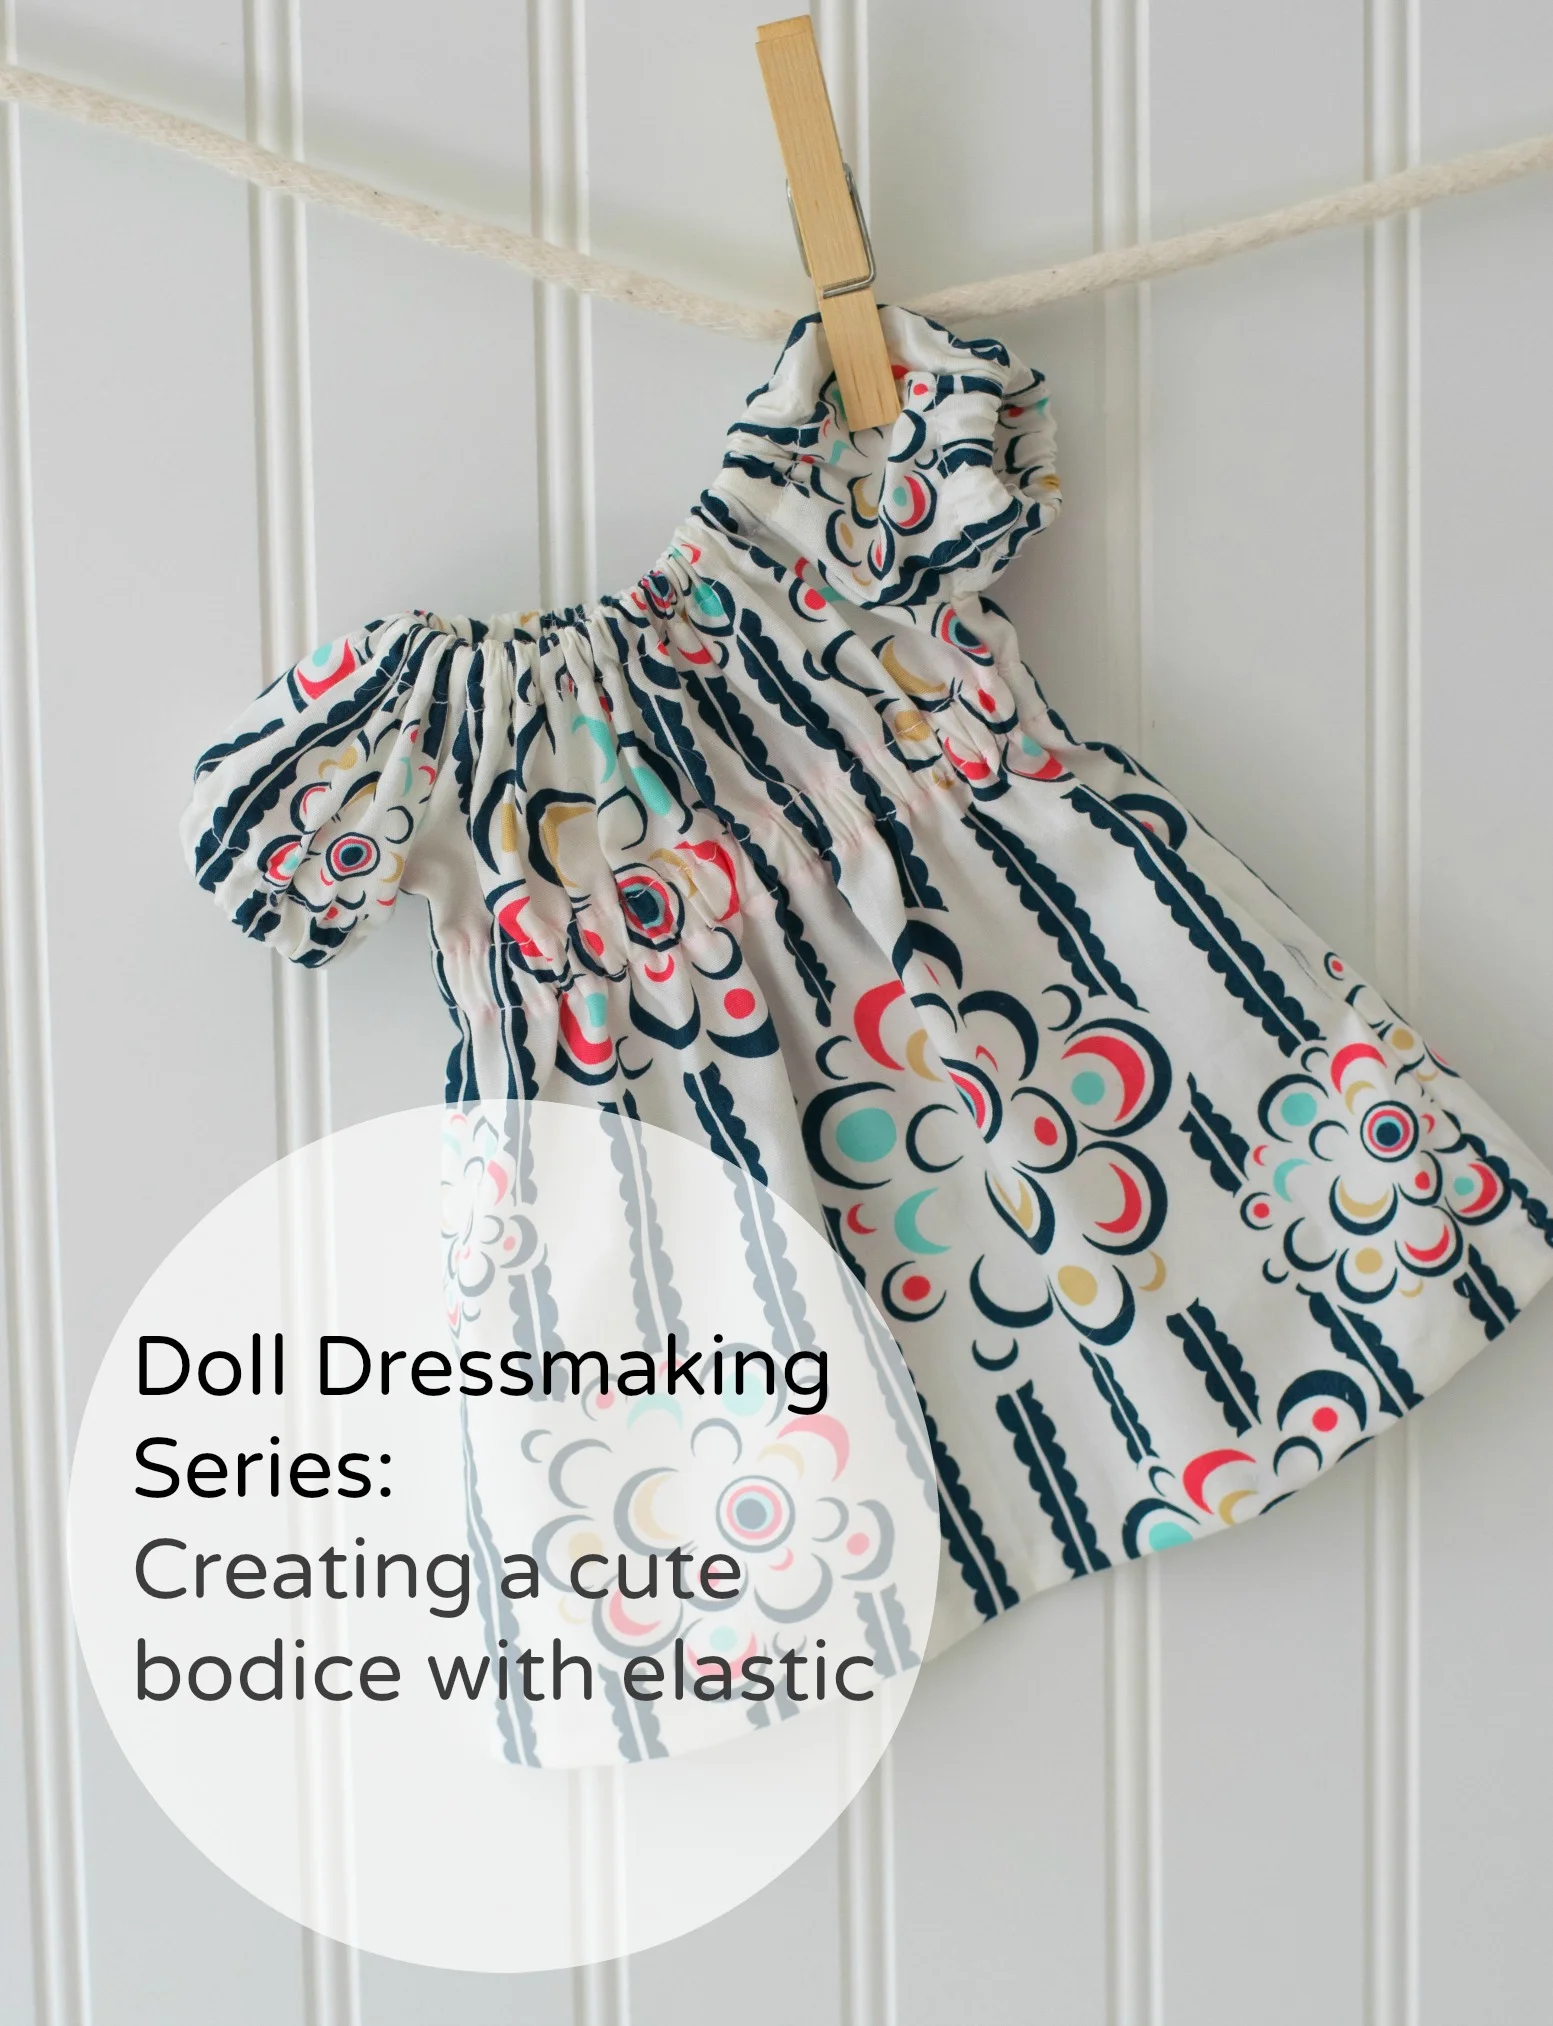
There a number of ways to alter the basic peasant/raglan dress pattern to give it a different look. One is by adding an elastic cinching to the bodice. It makes the dress more fitted and can be used for both creating a modern or a retro look (this was big in the early 70s).

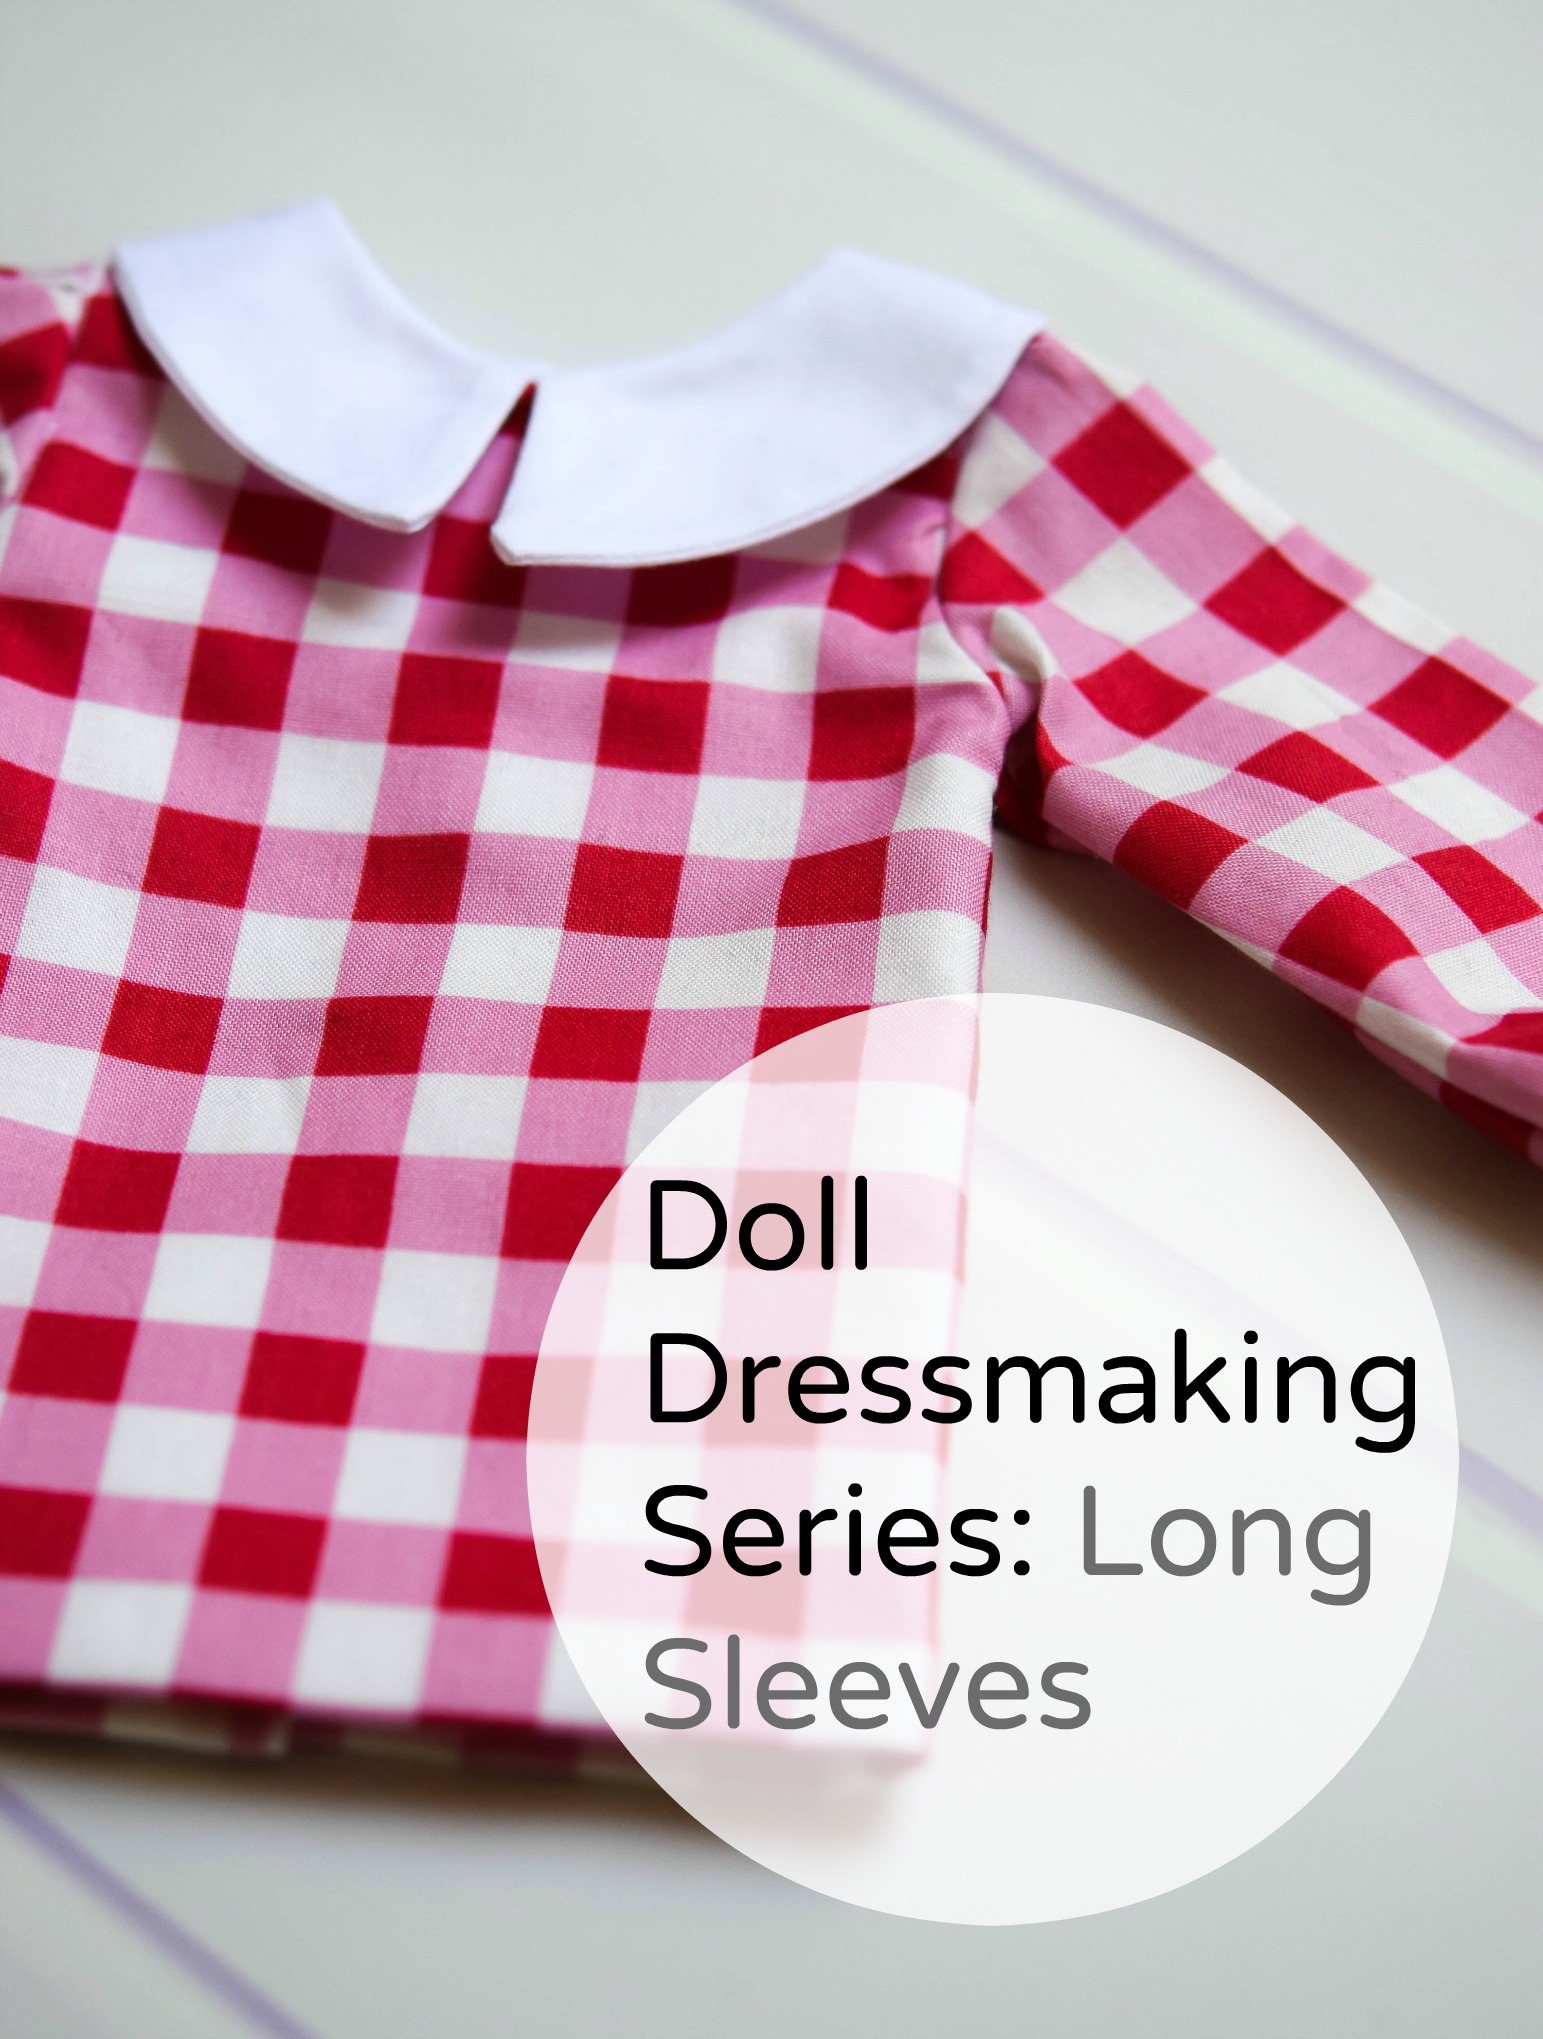
To make this dress you will need to use both the instructions here and some of the instructions in the original raglan blouse tutorial, which is here. 

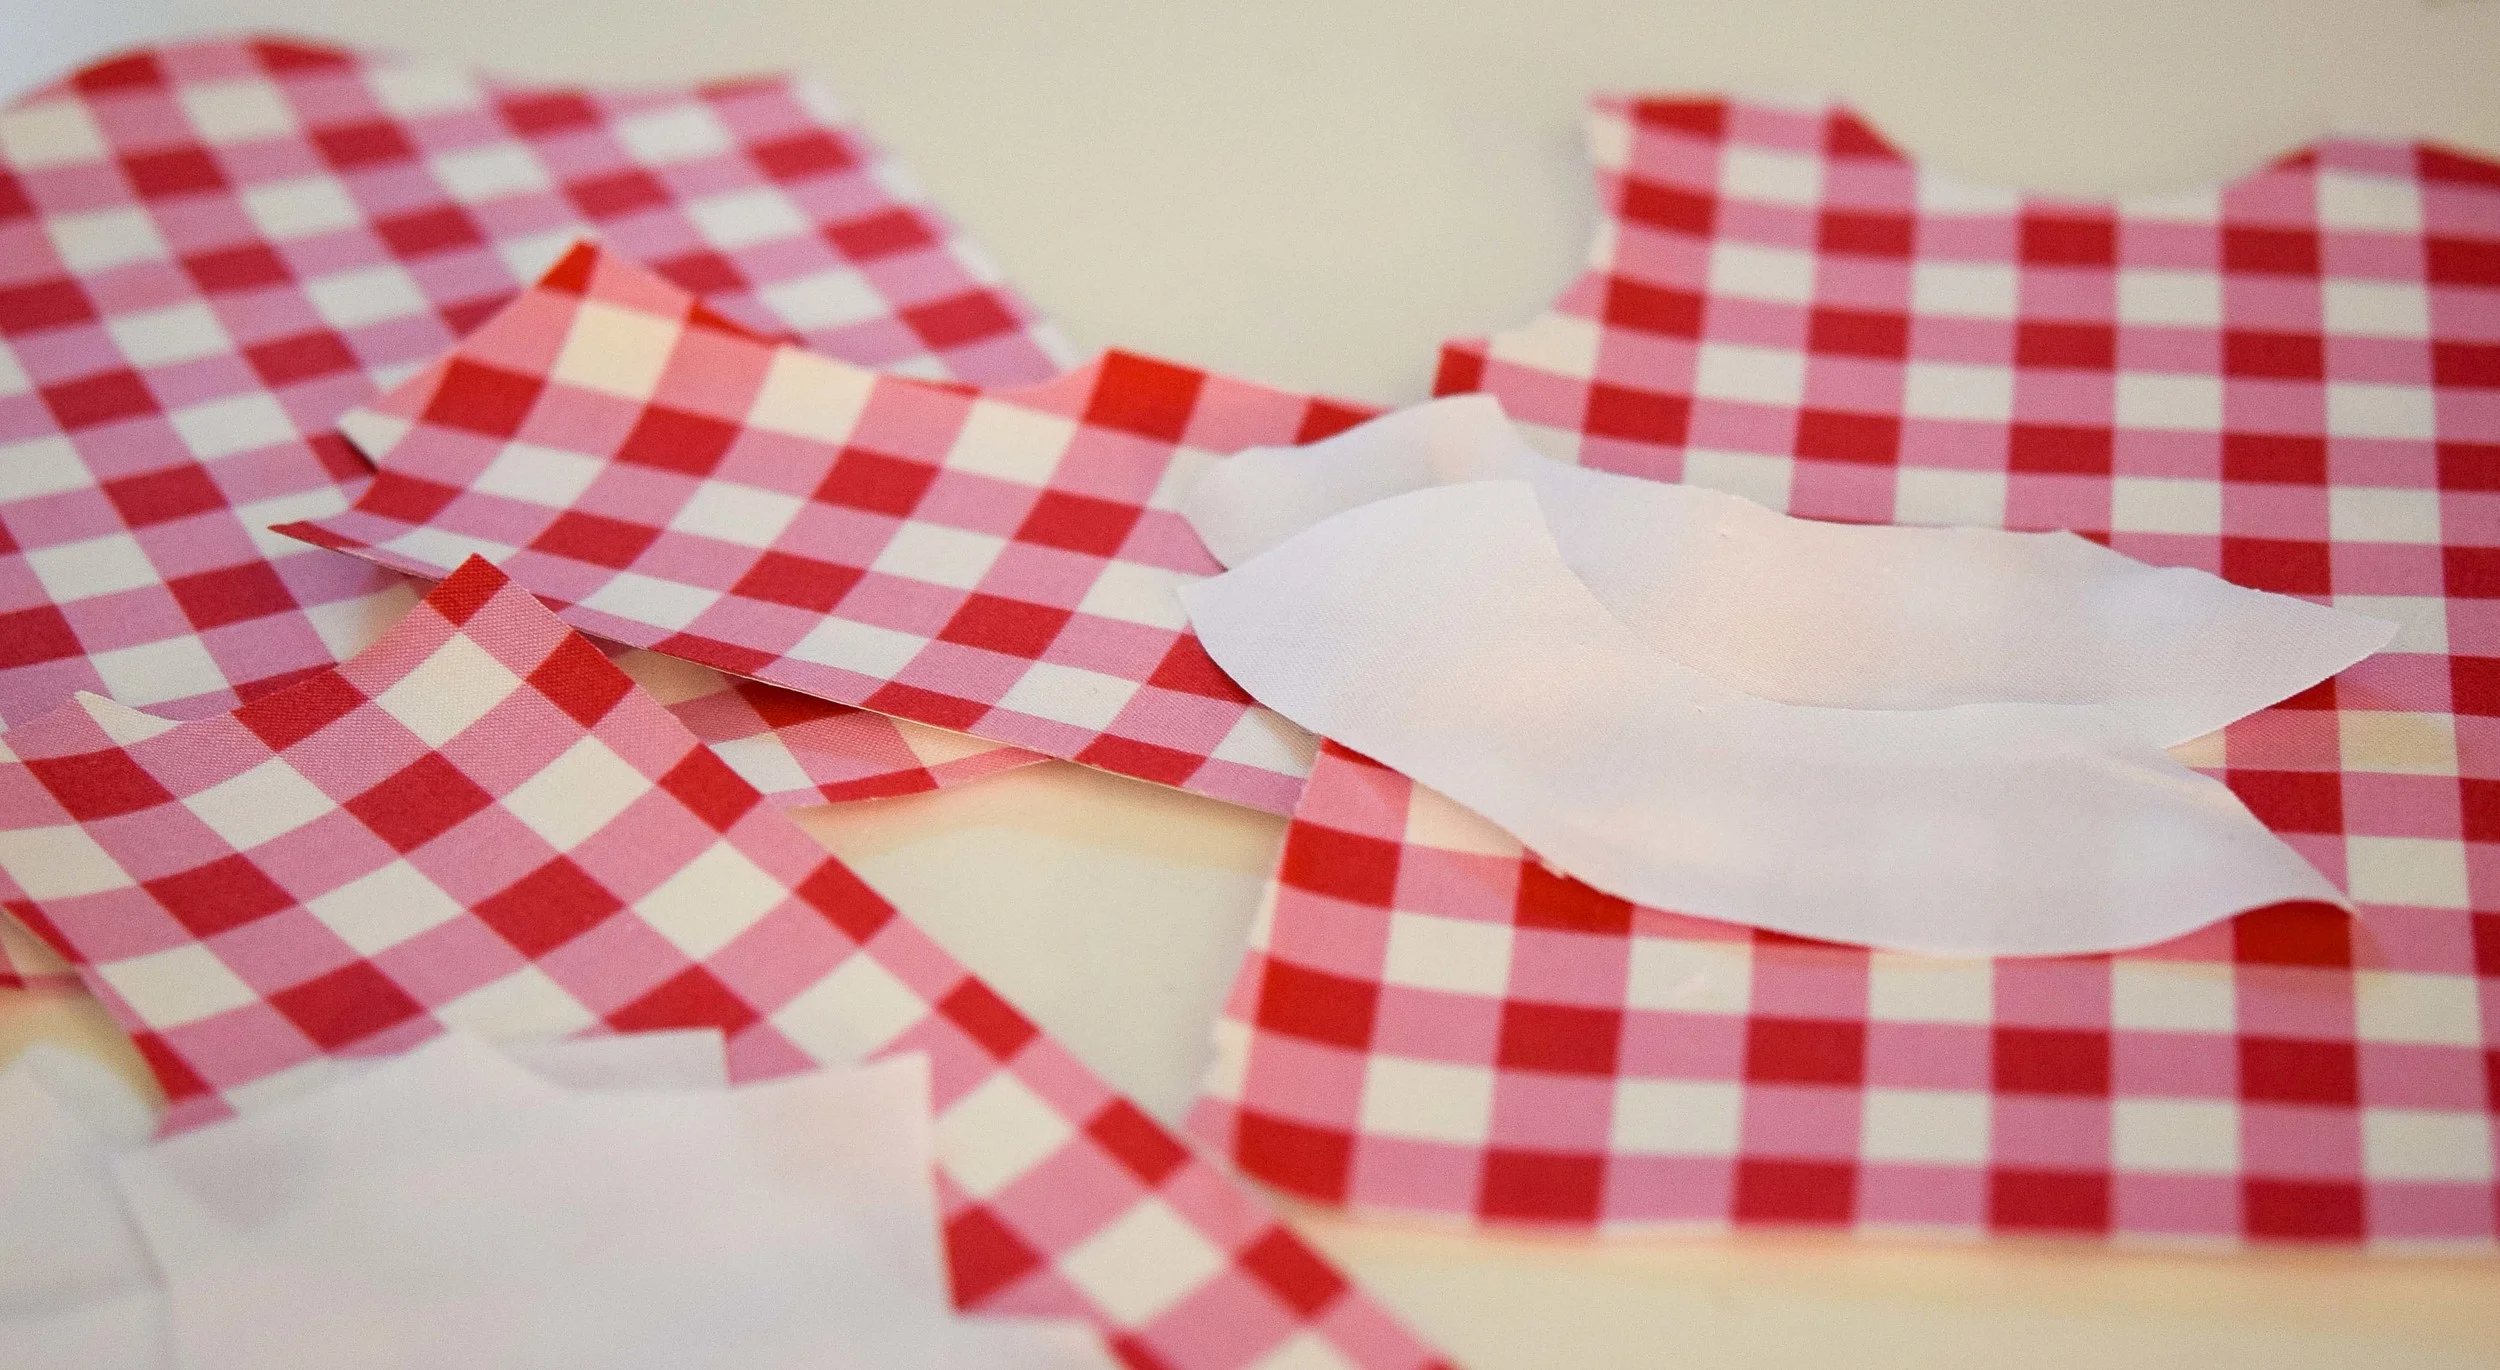
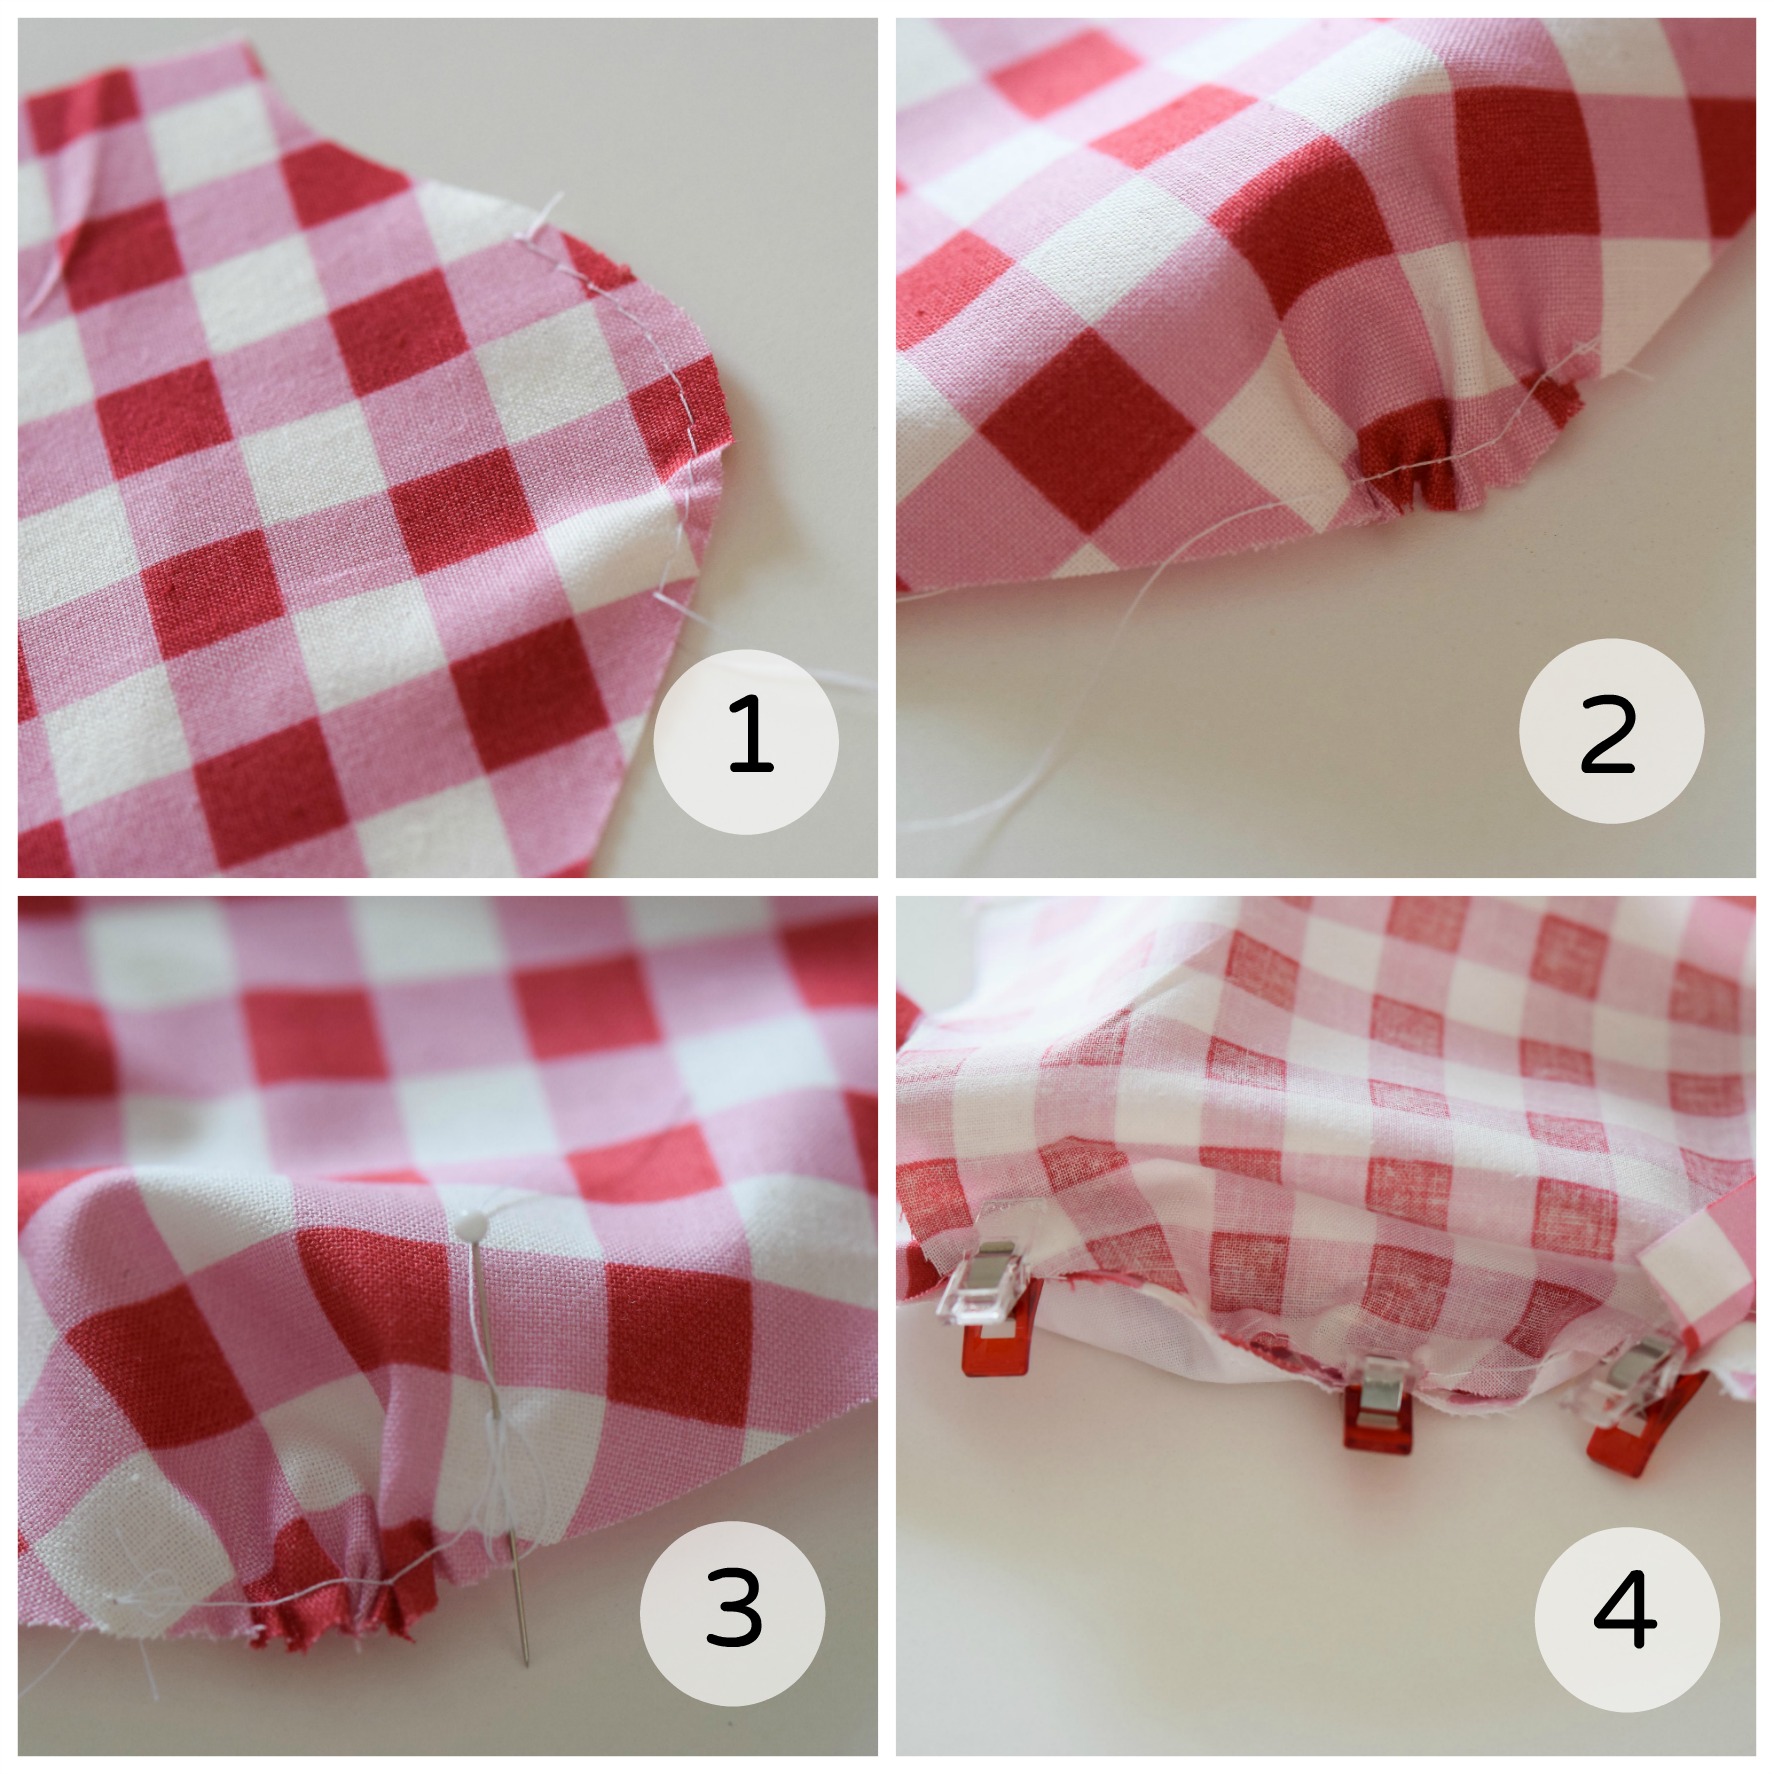
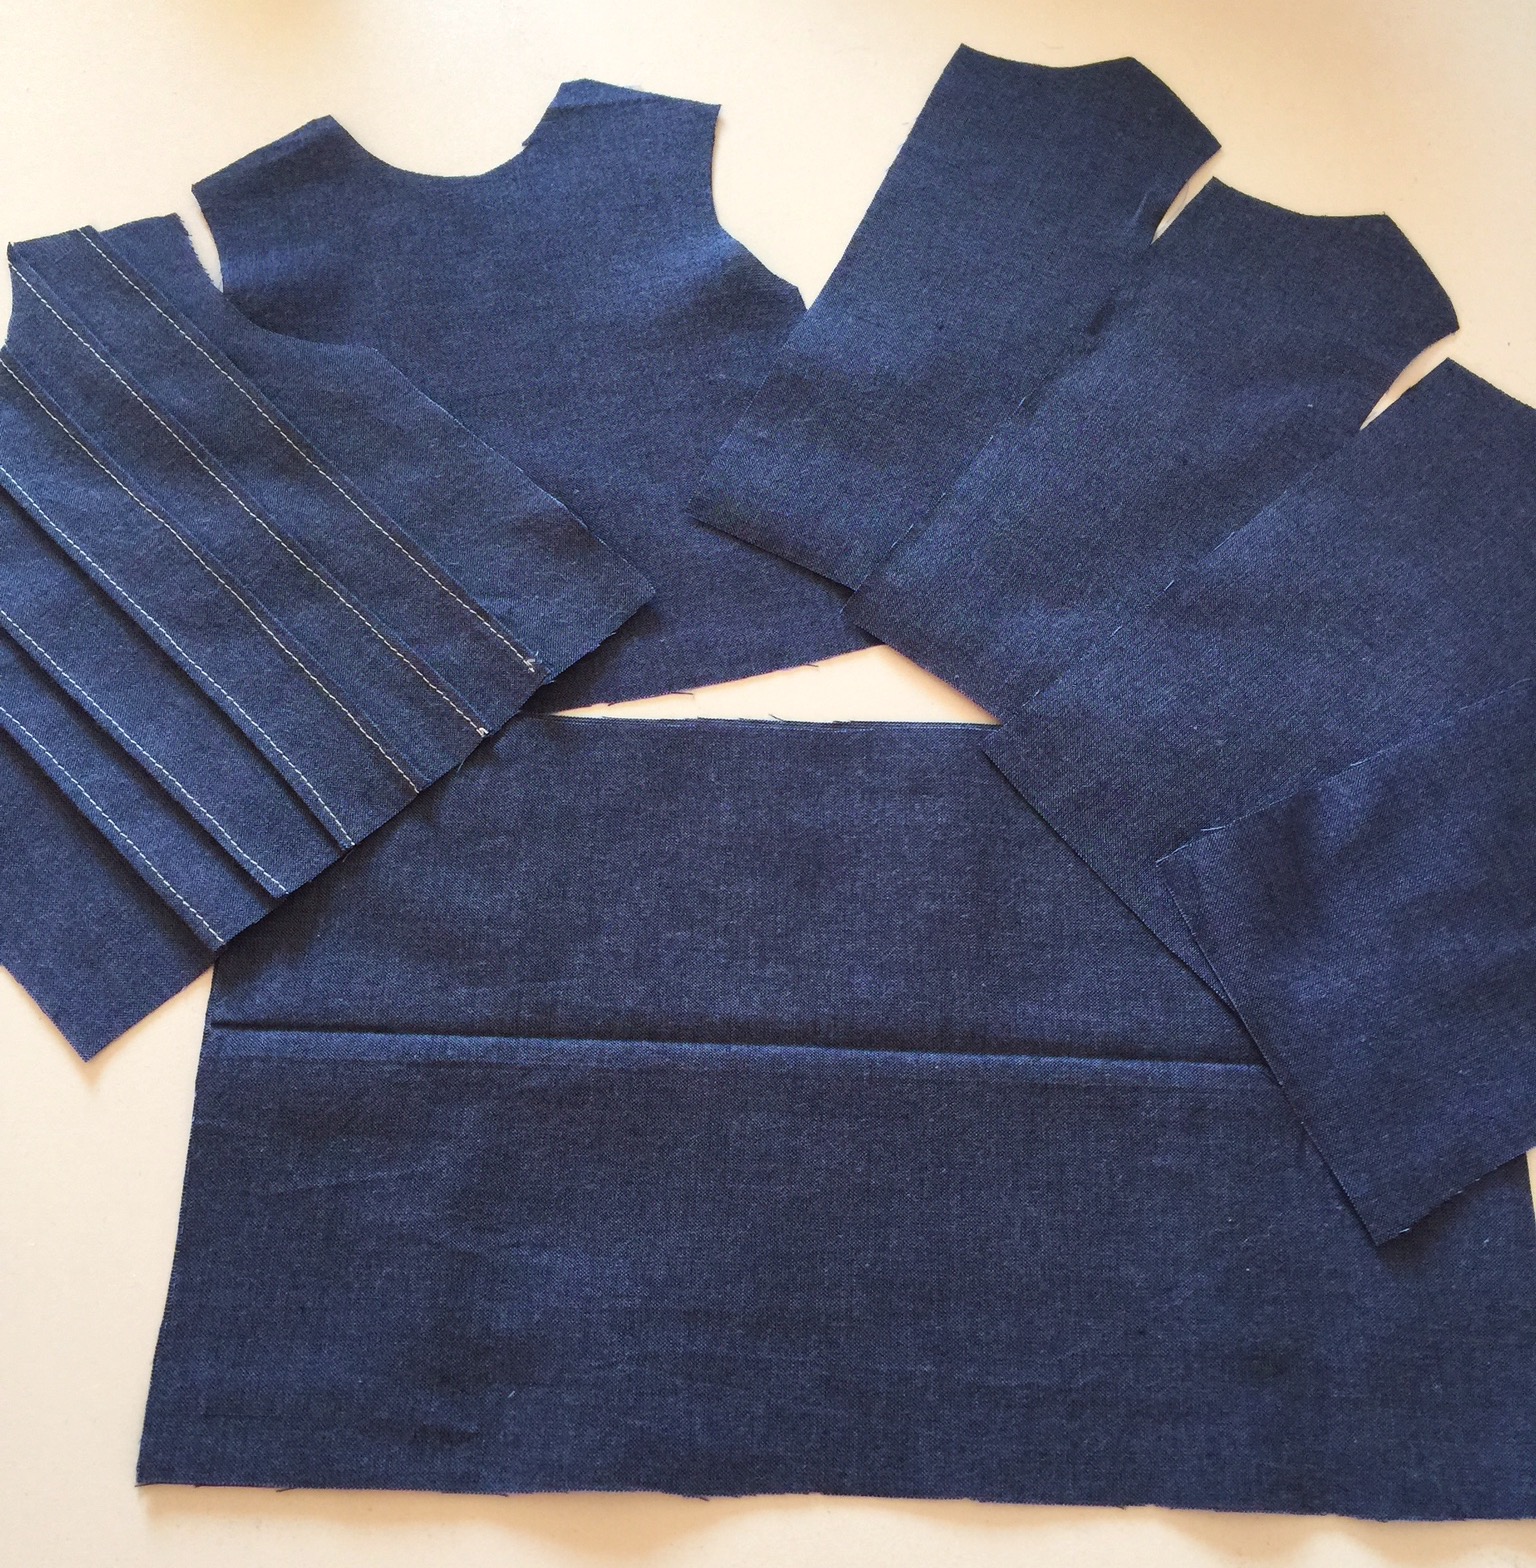
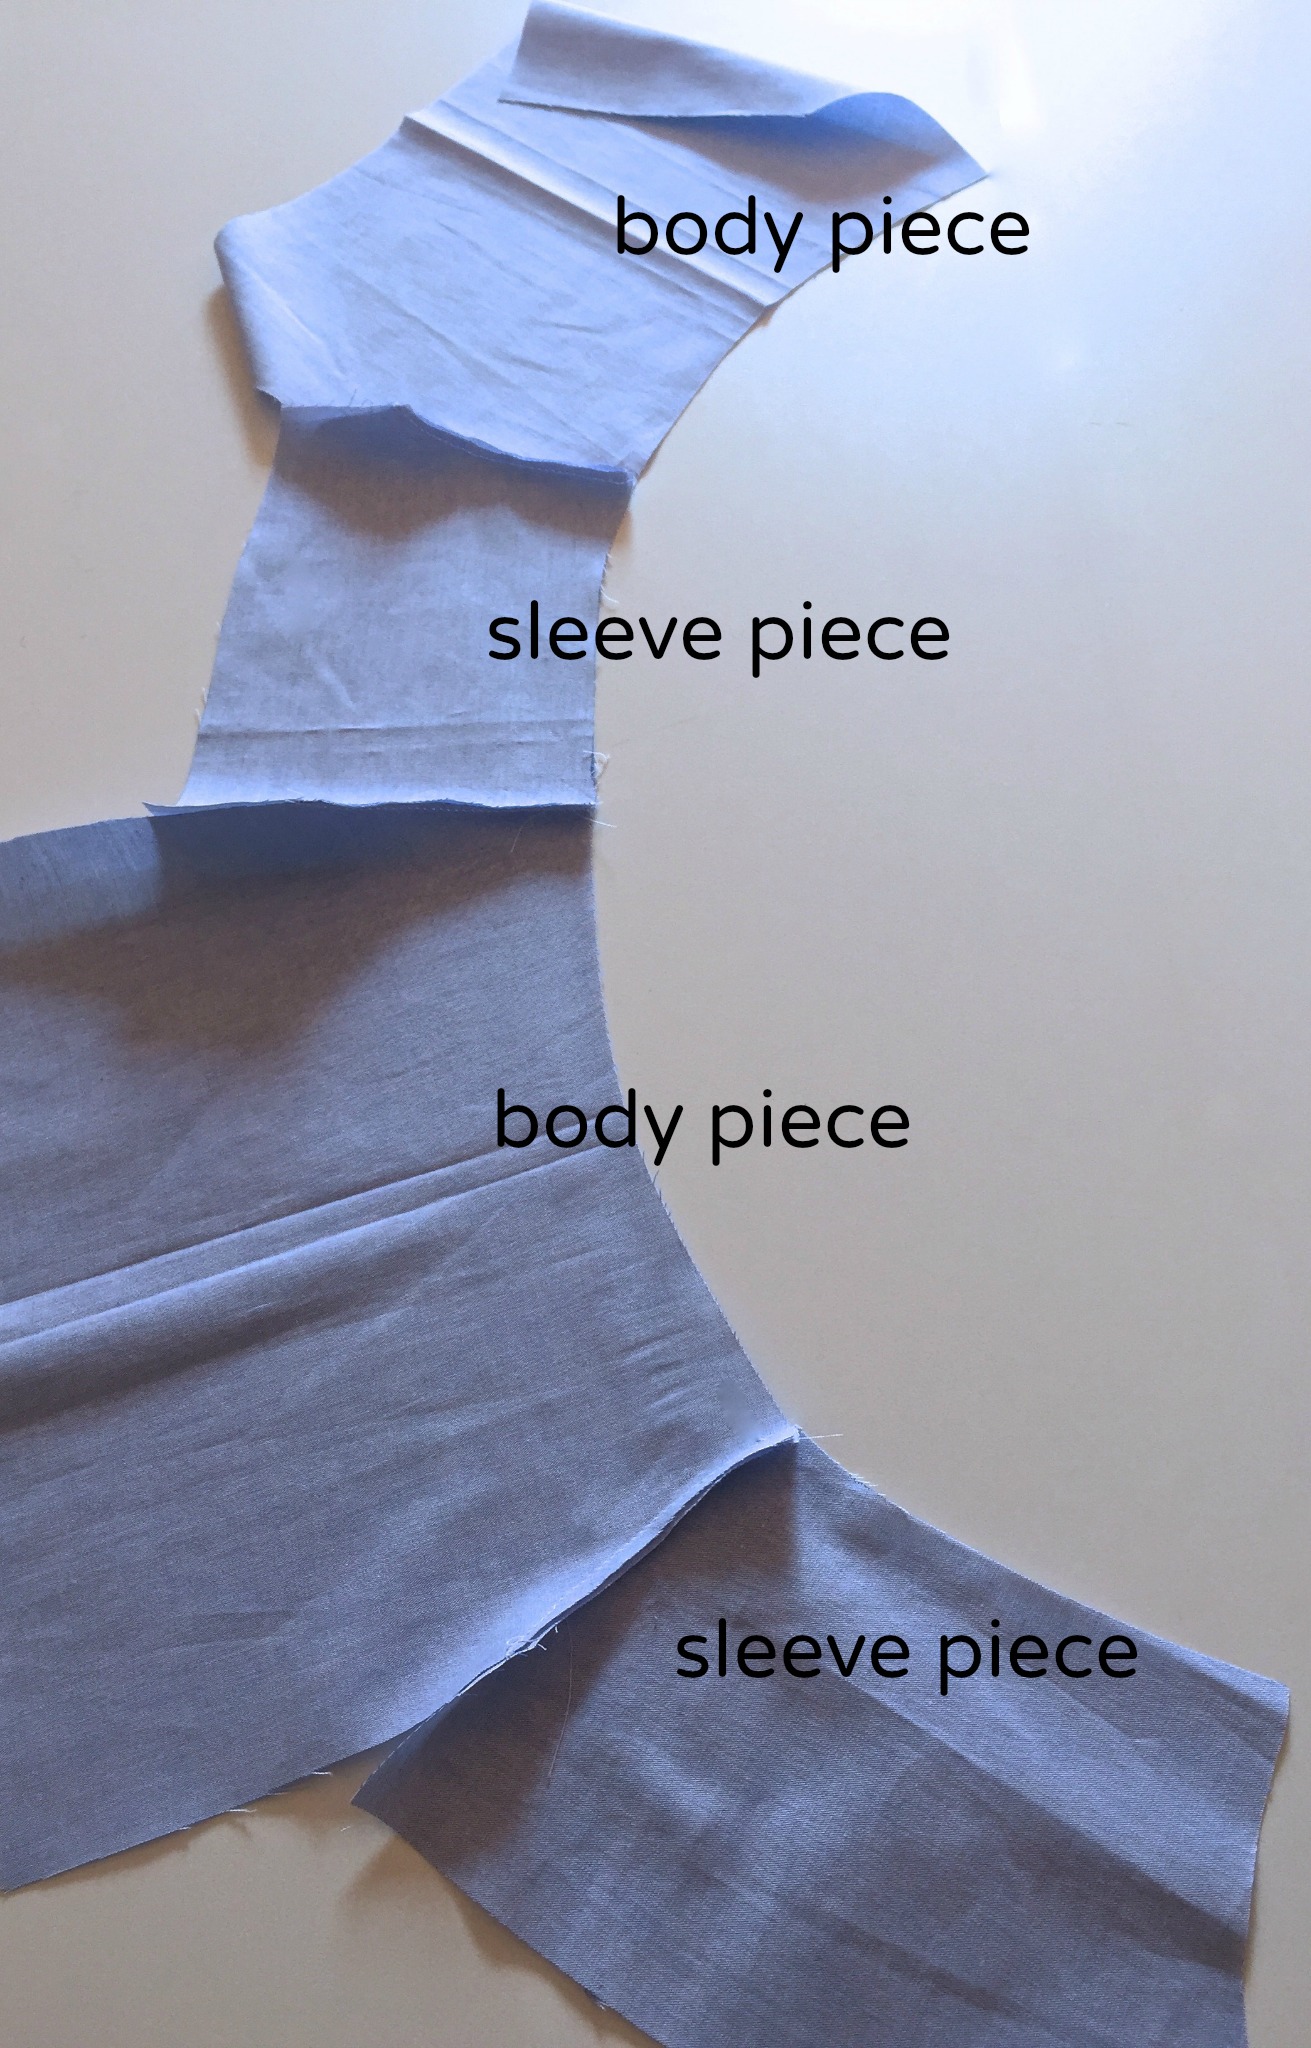
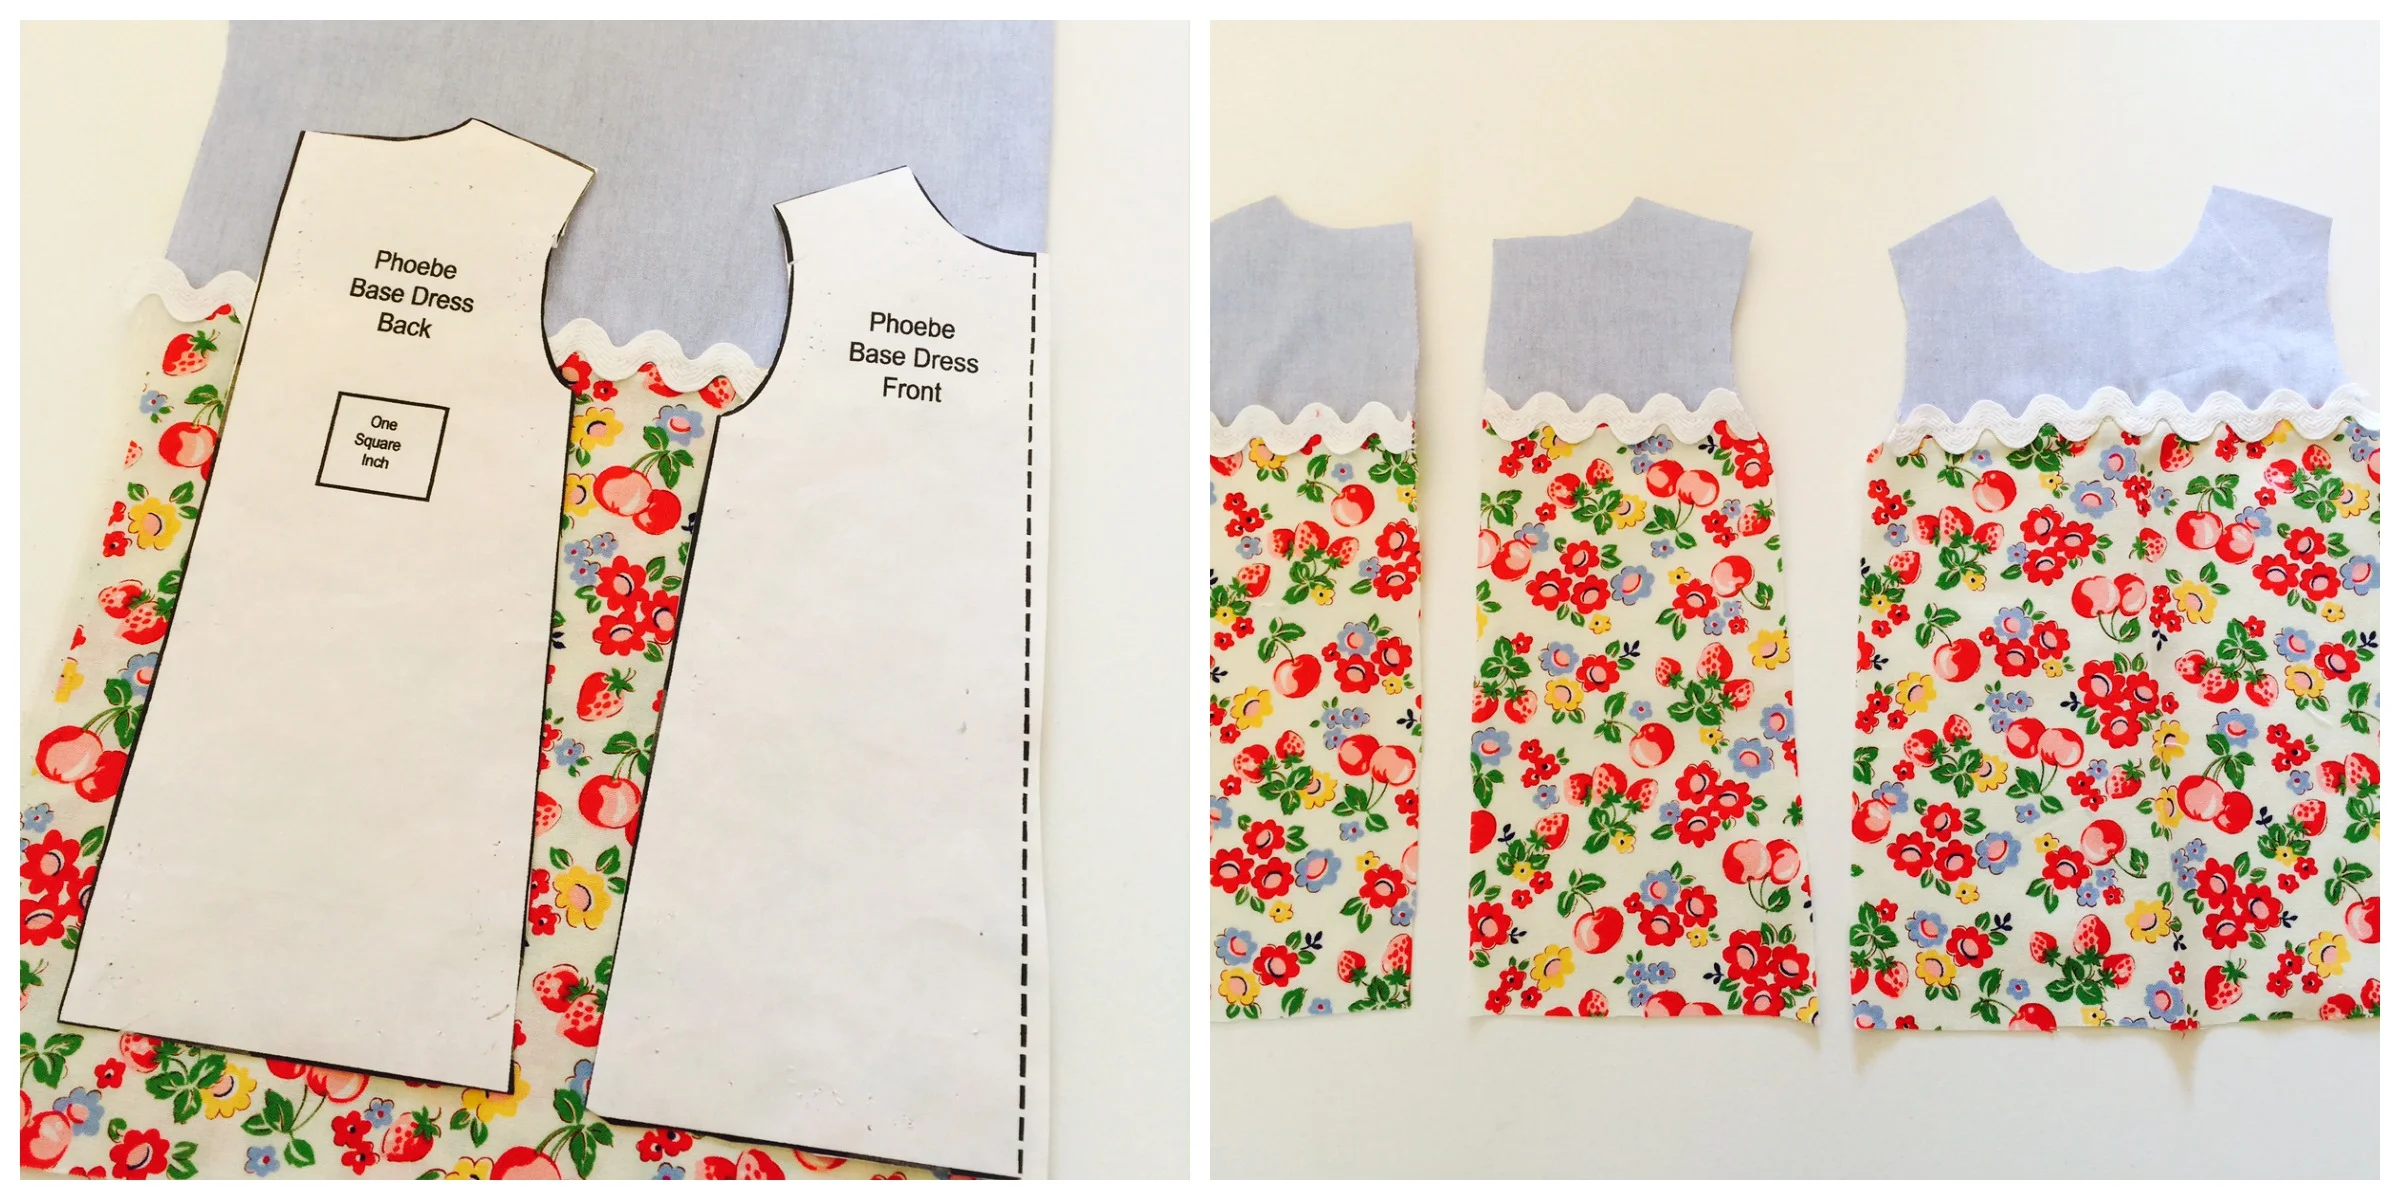
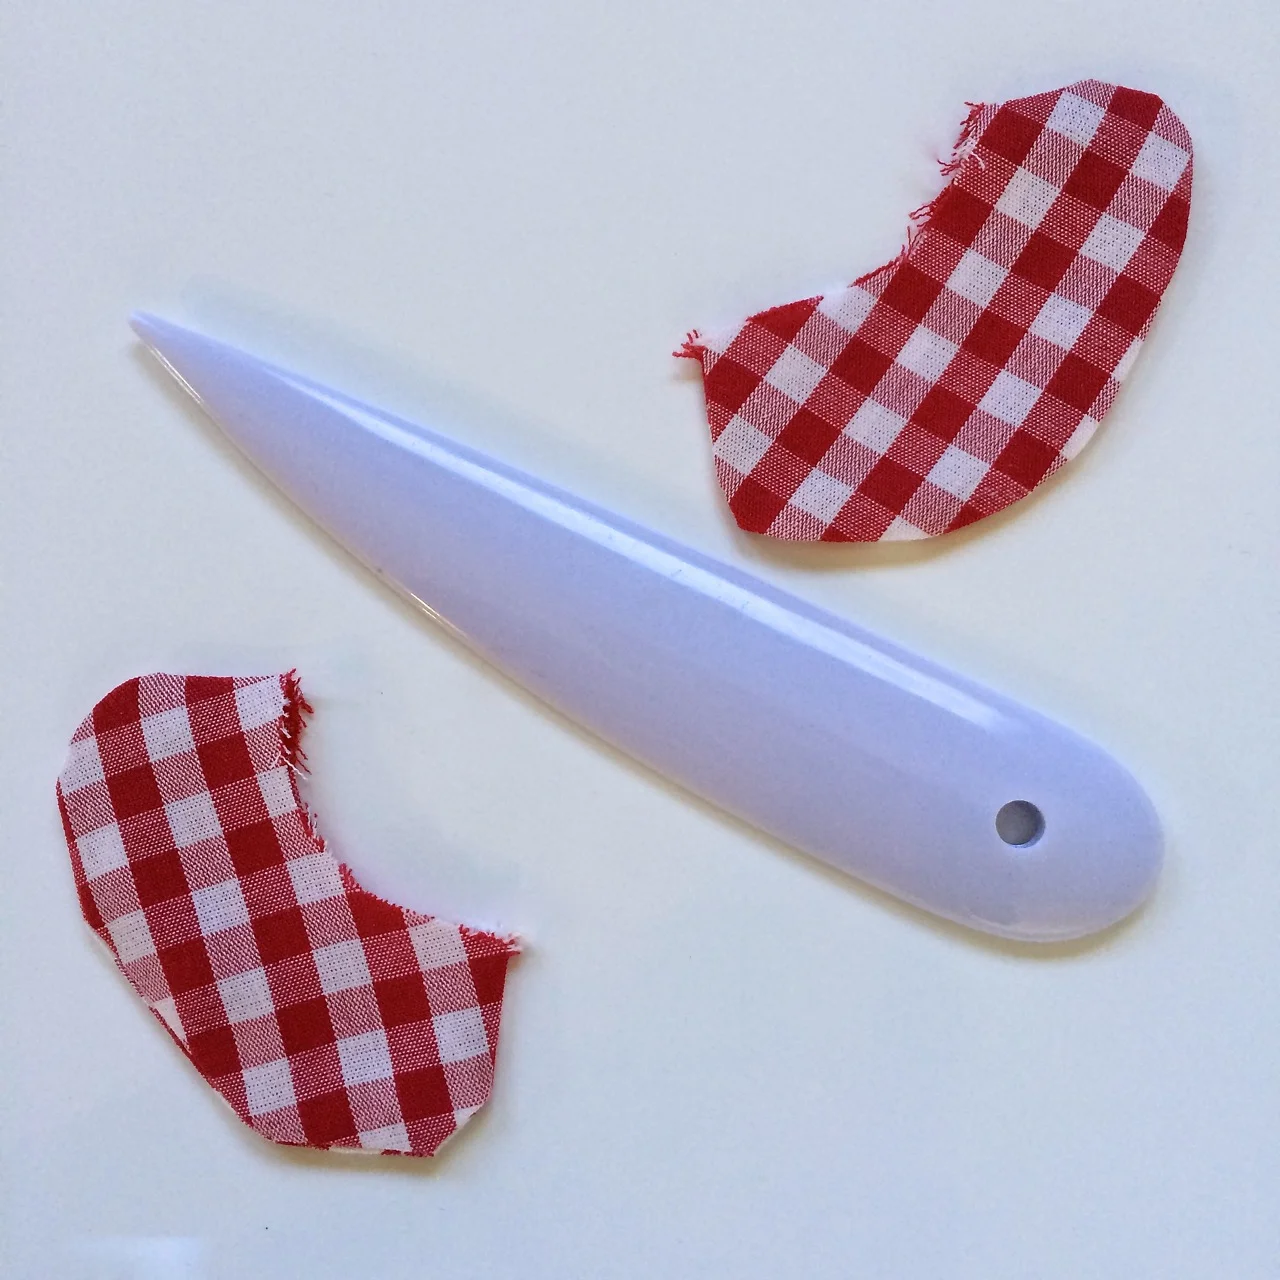
When you cut out the pieces, you will want to somehow mark where you will place the casing for the bodice elastic. I make small snips where the elastic will hit on the side seams. Pencil makrks within the seam allowance will also work.

cut and mark bodice casing placement. click to enlarge

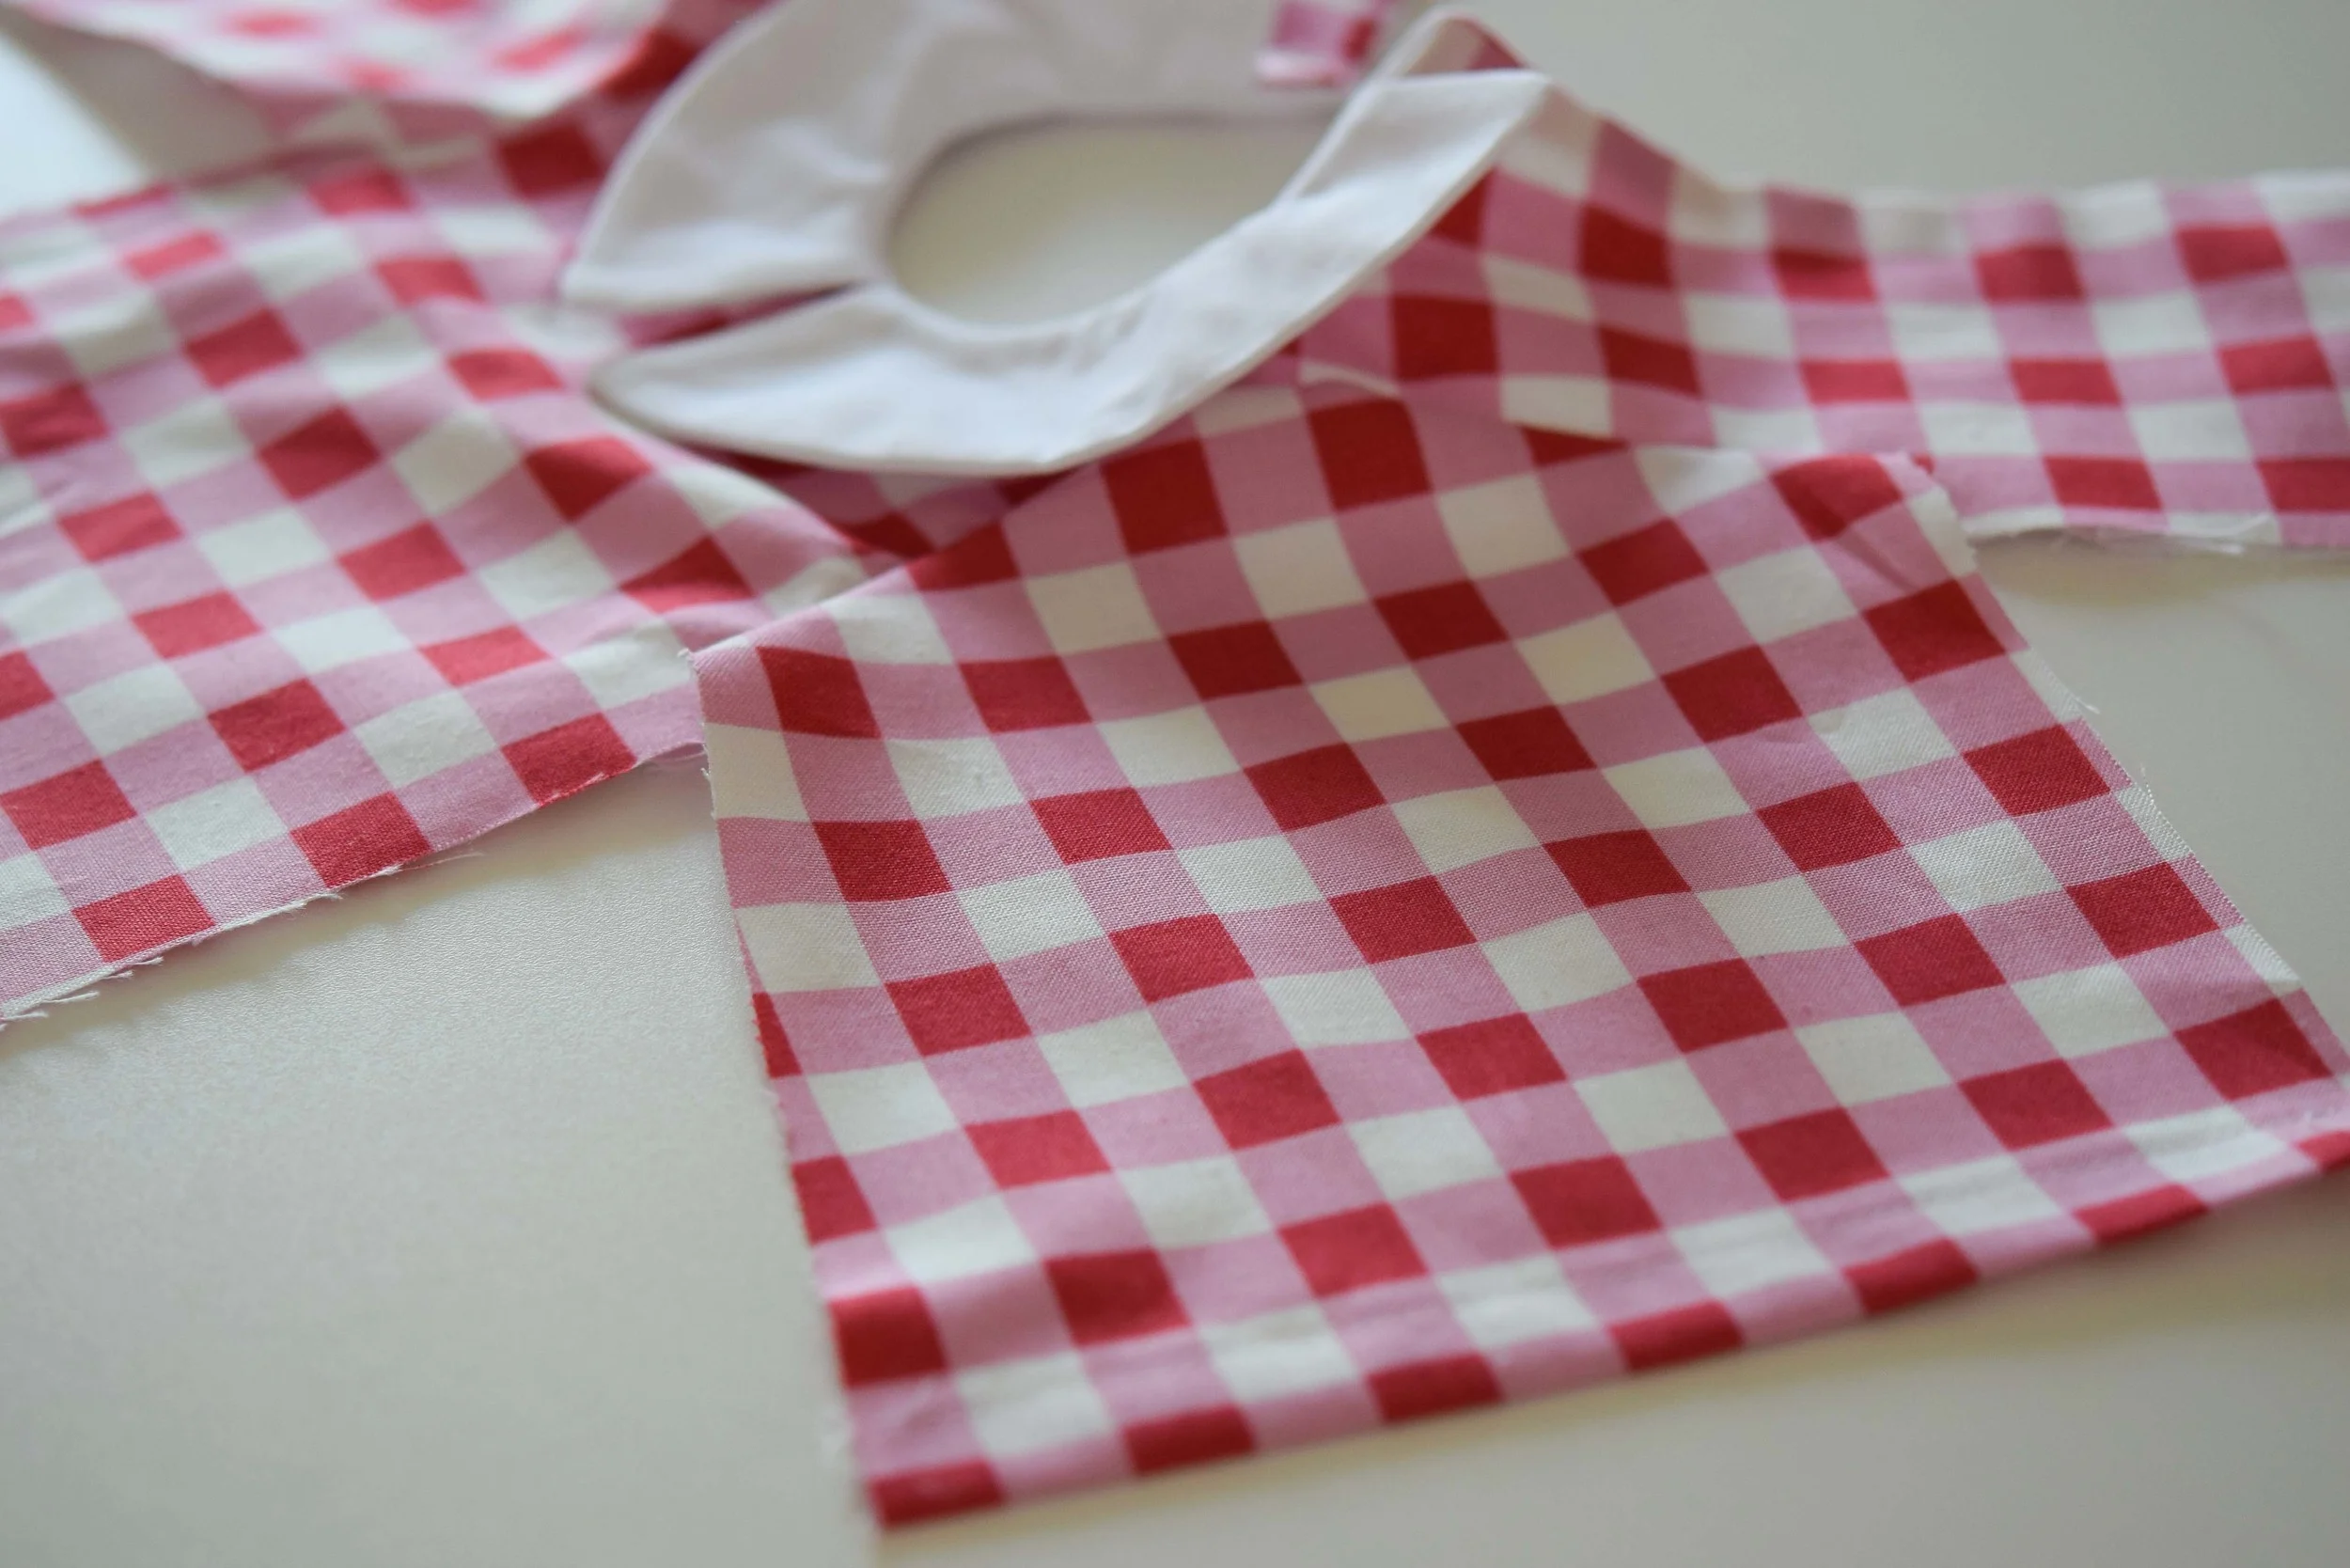
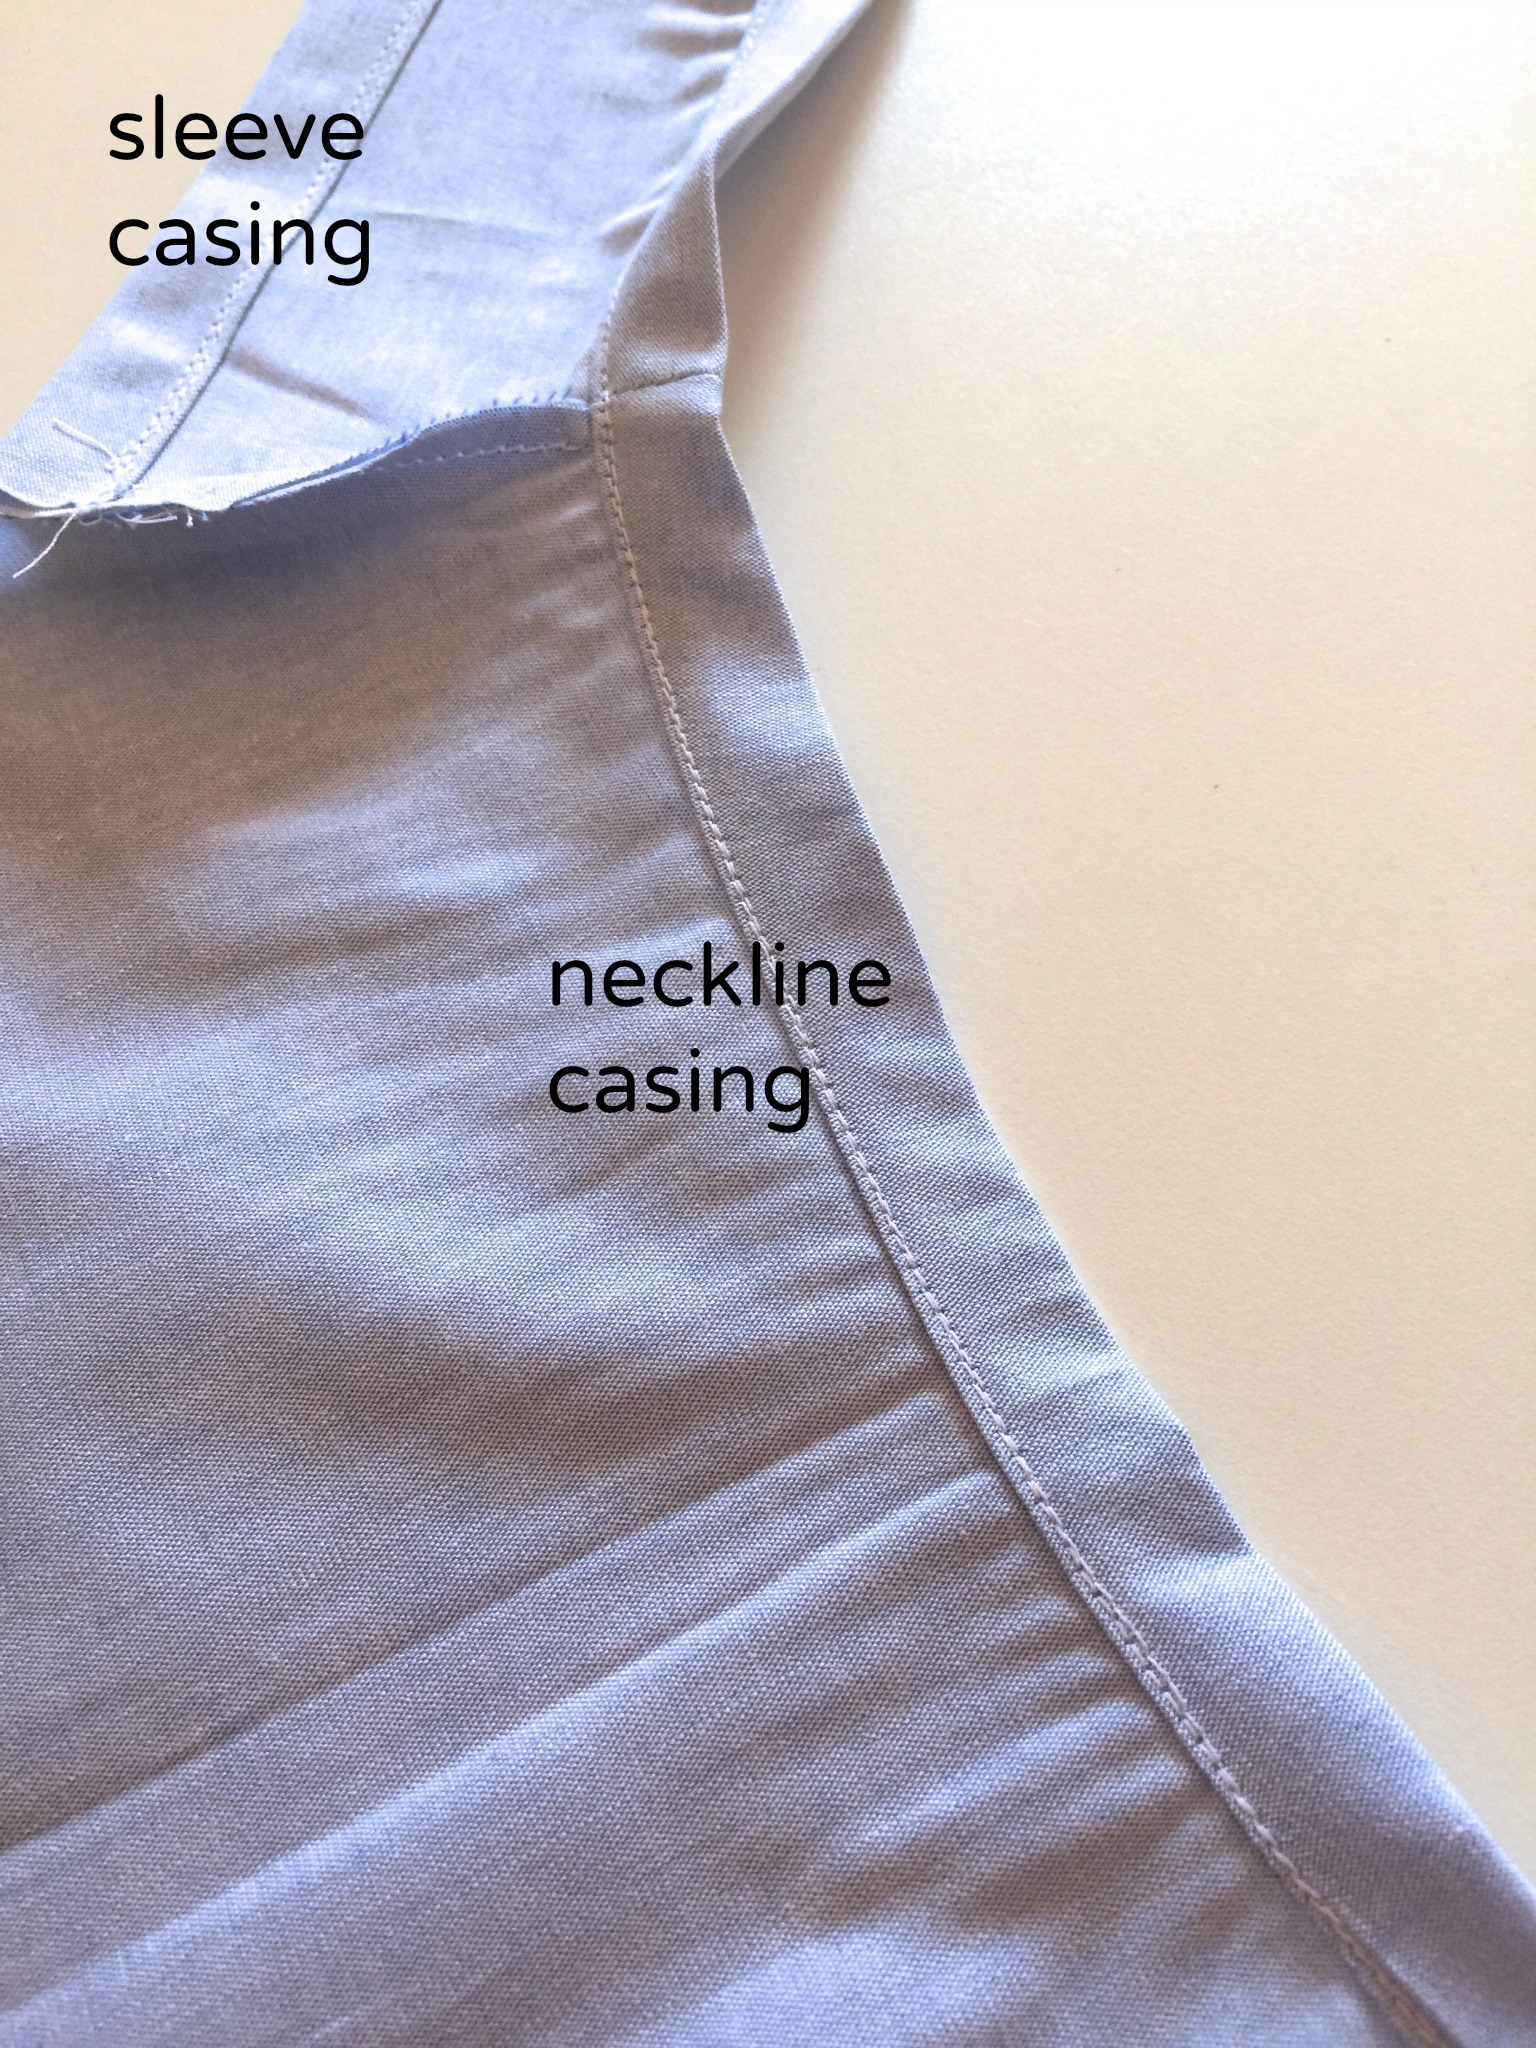
Next follow the instructions in the peasant/raglan blouse tutorial: sew the sleeves to the bodice pieces and make the sleeve and neck casings. 

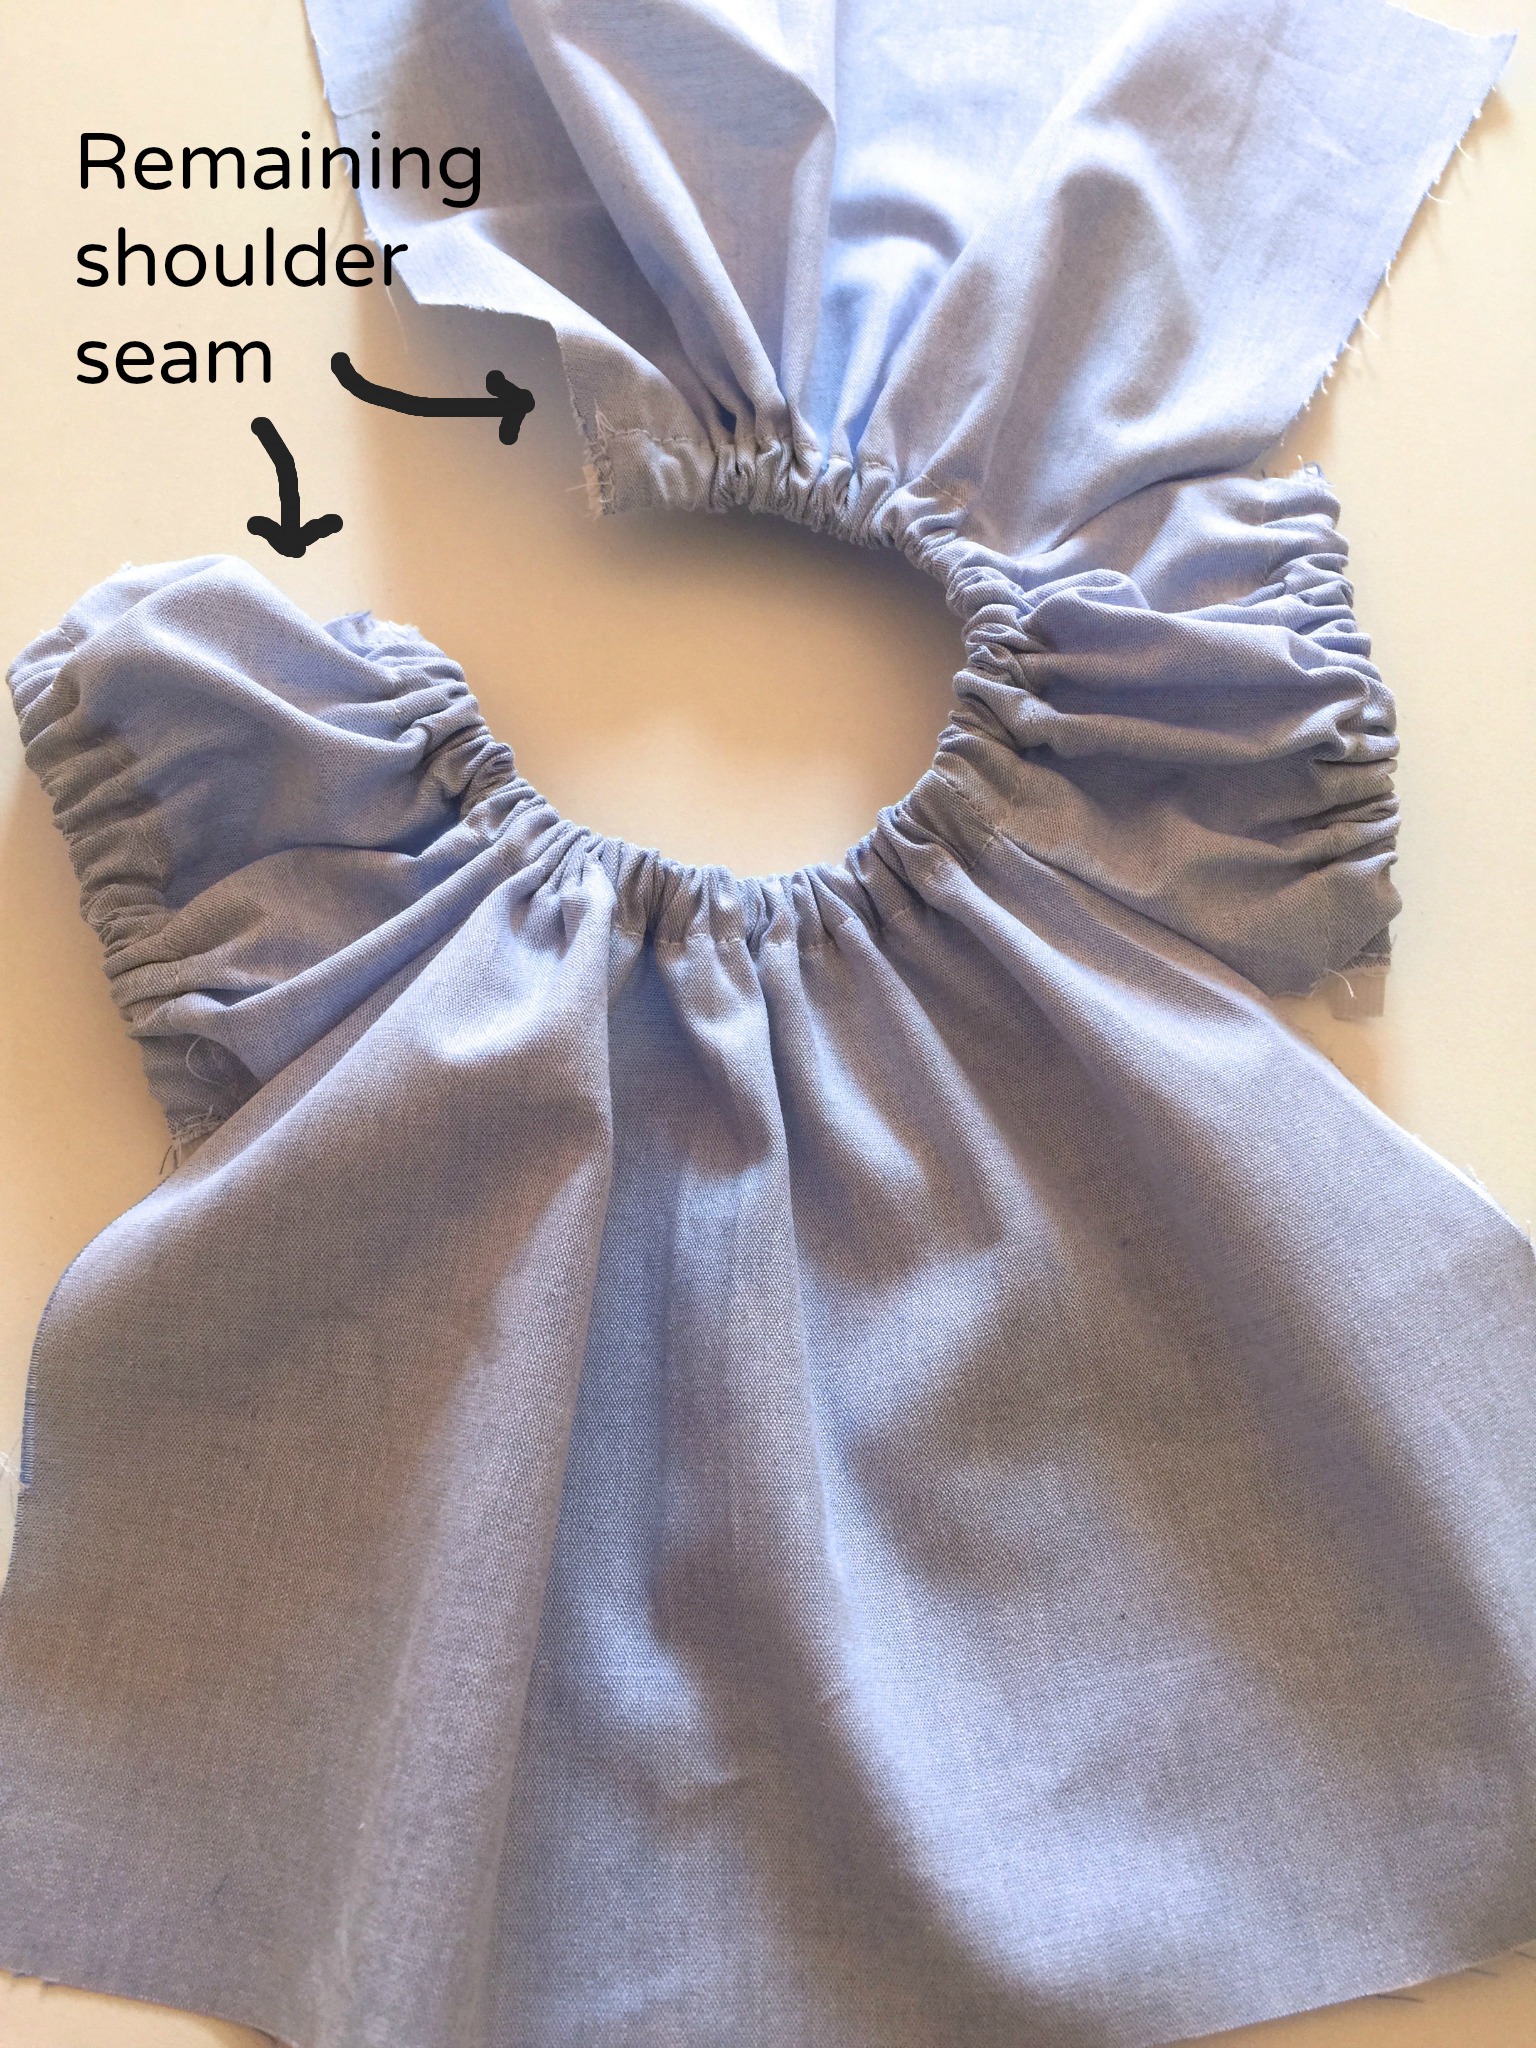
next add the elastic to the sleeve bottoms. DO NOT add elastic to the neck yet. 

Click to enlarge

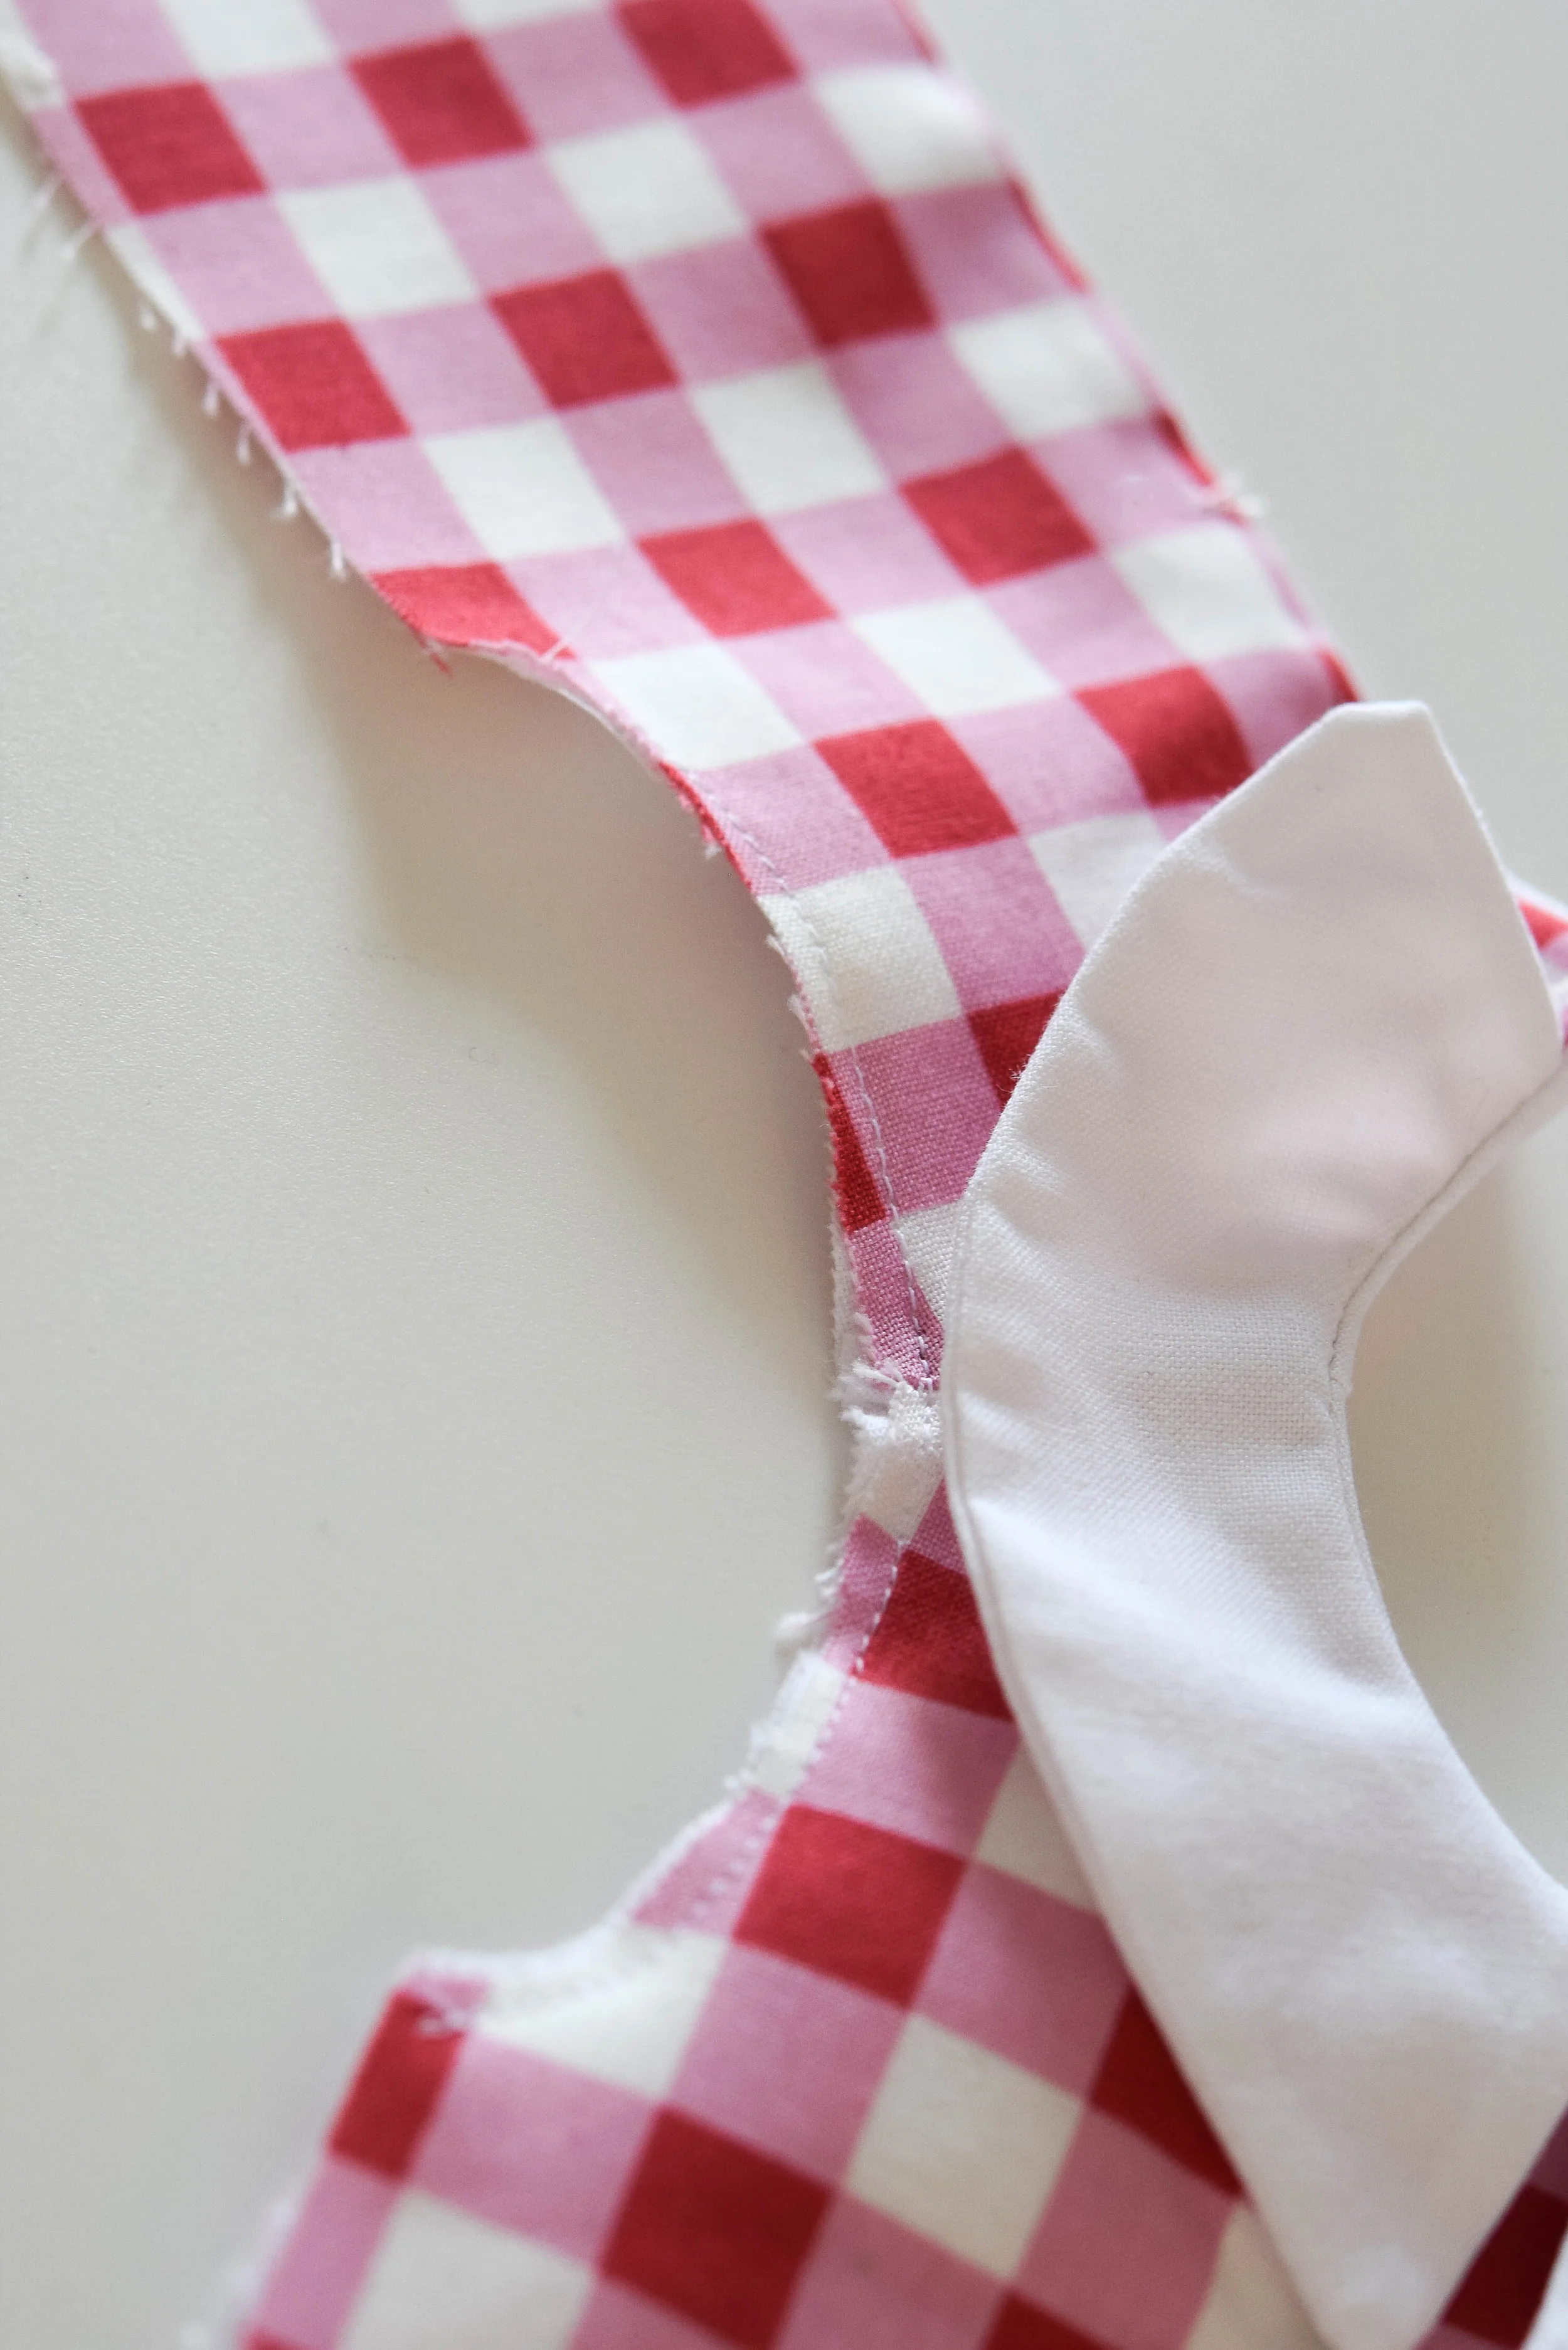
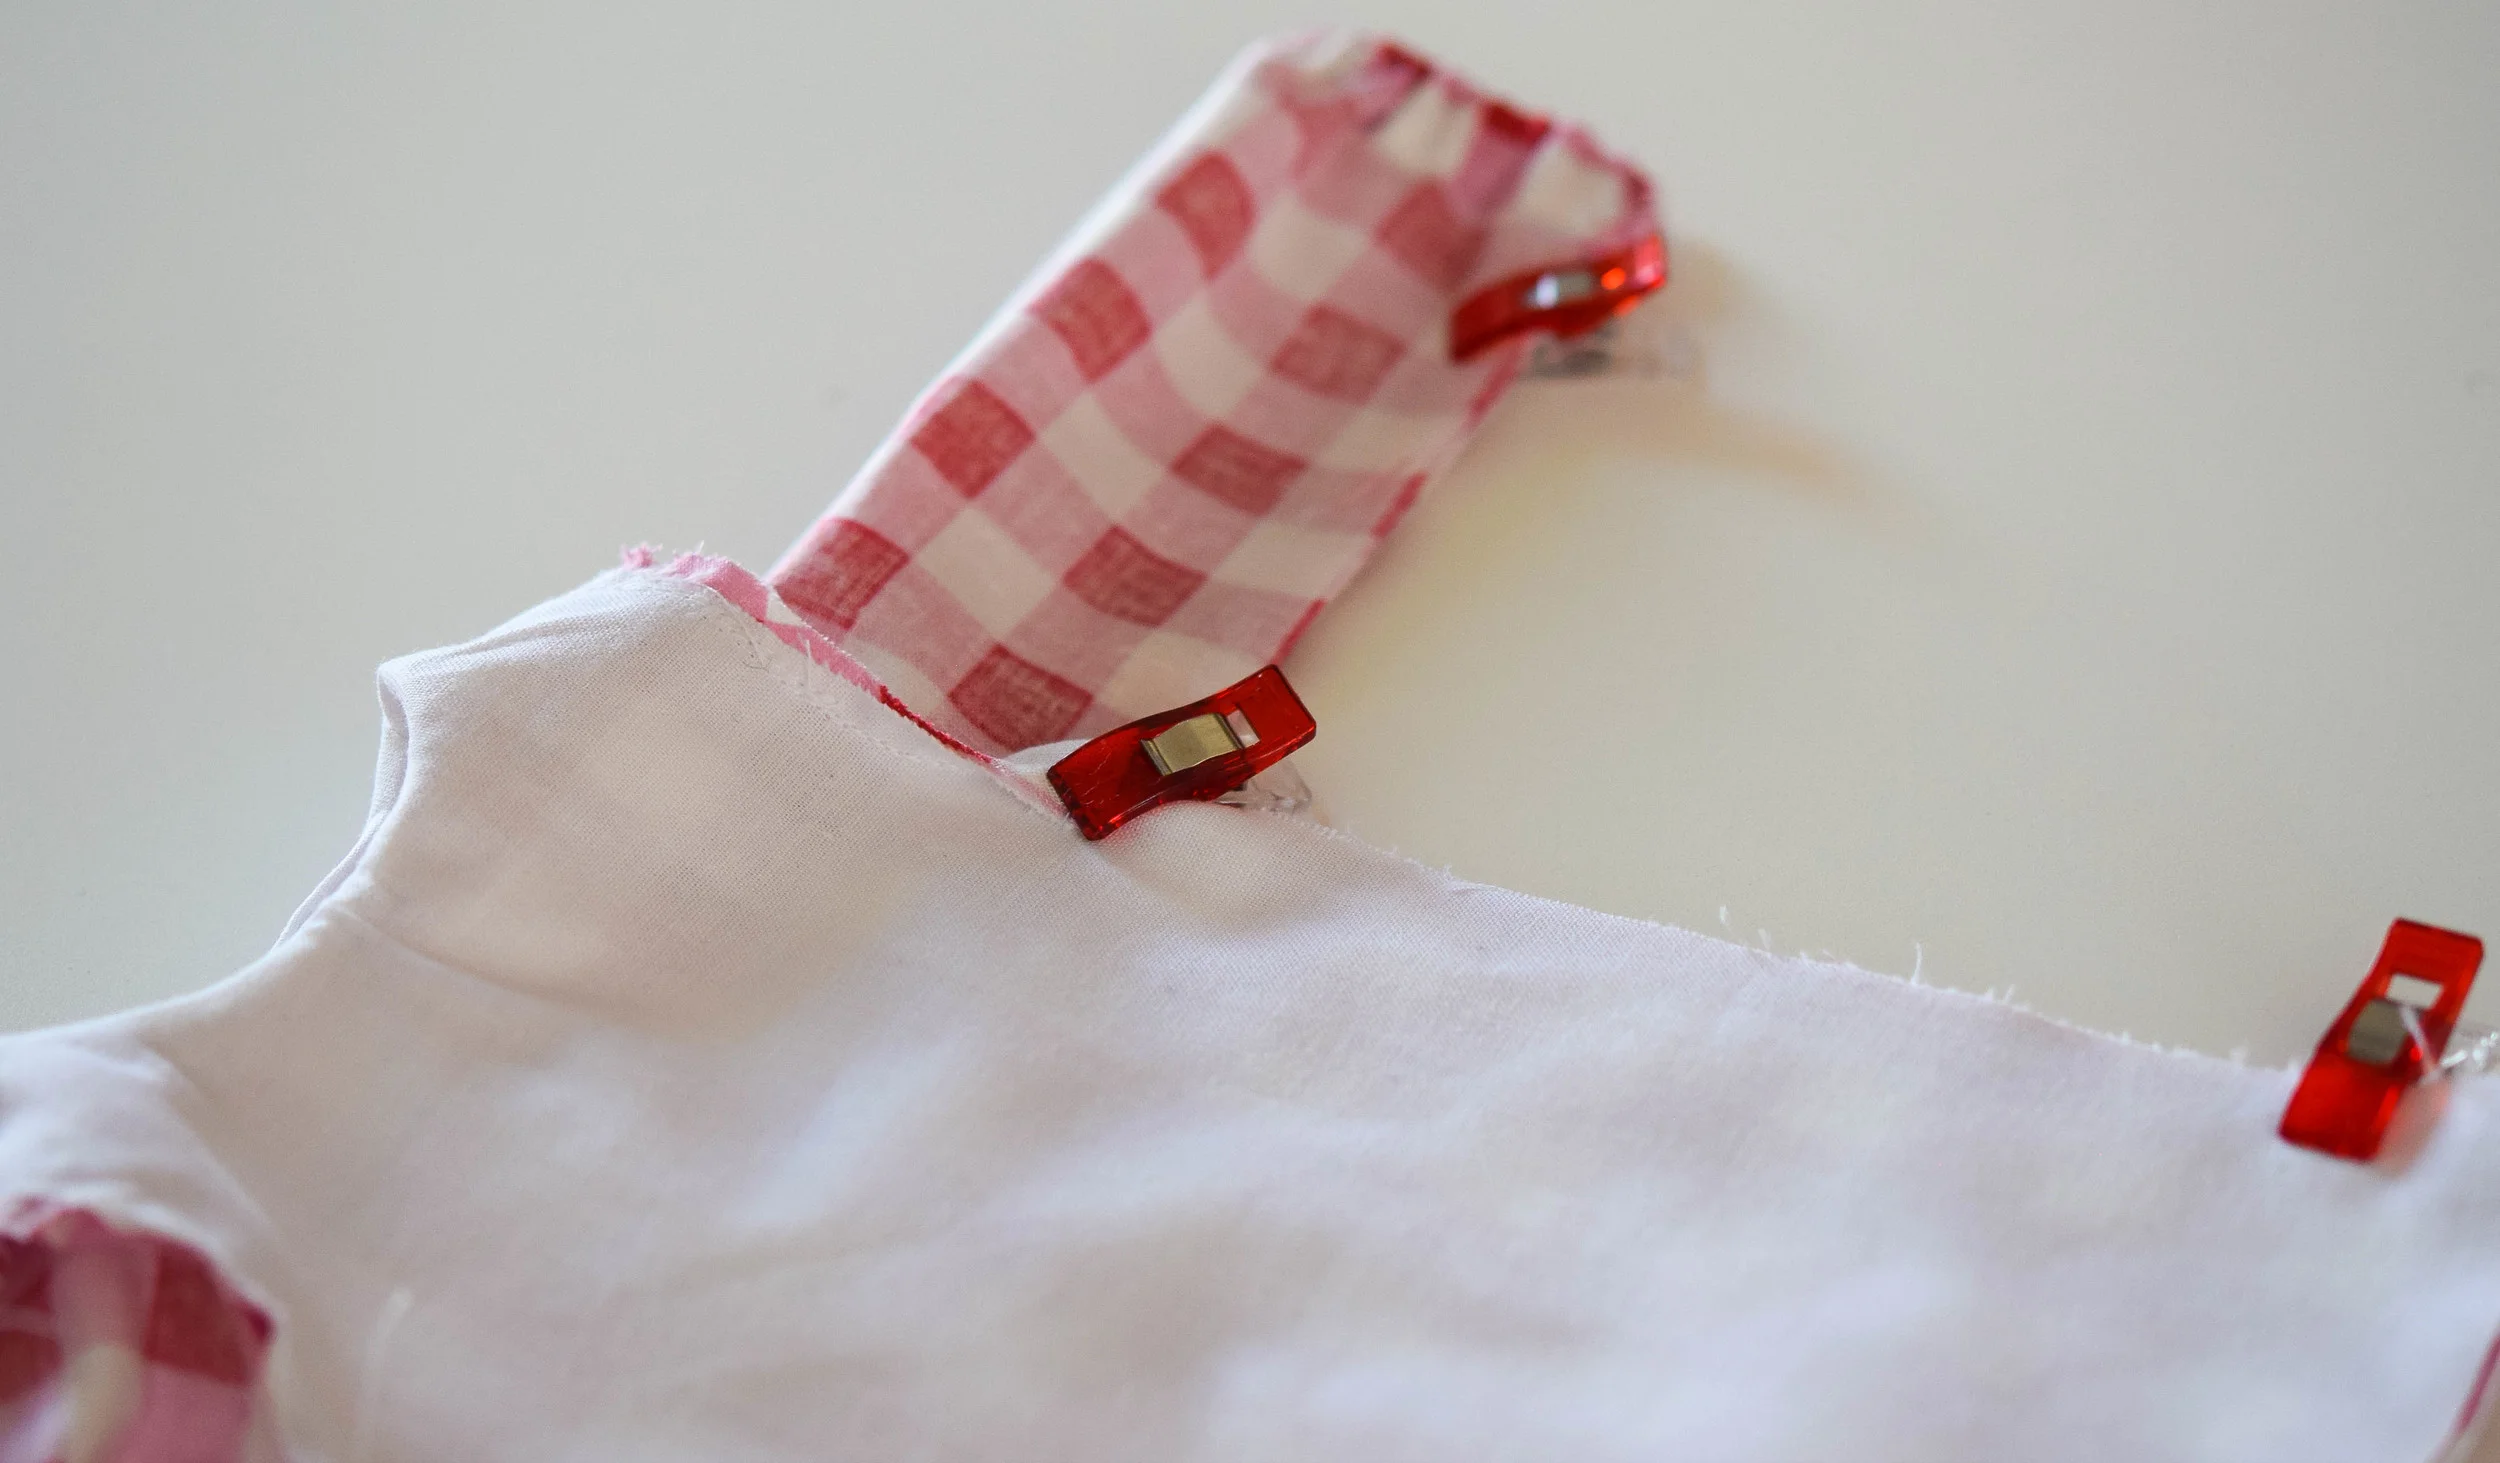
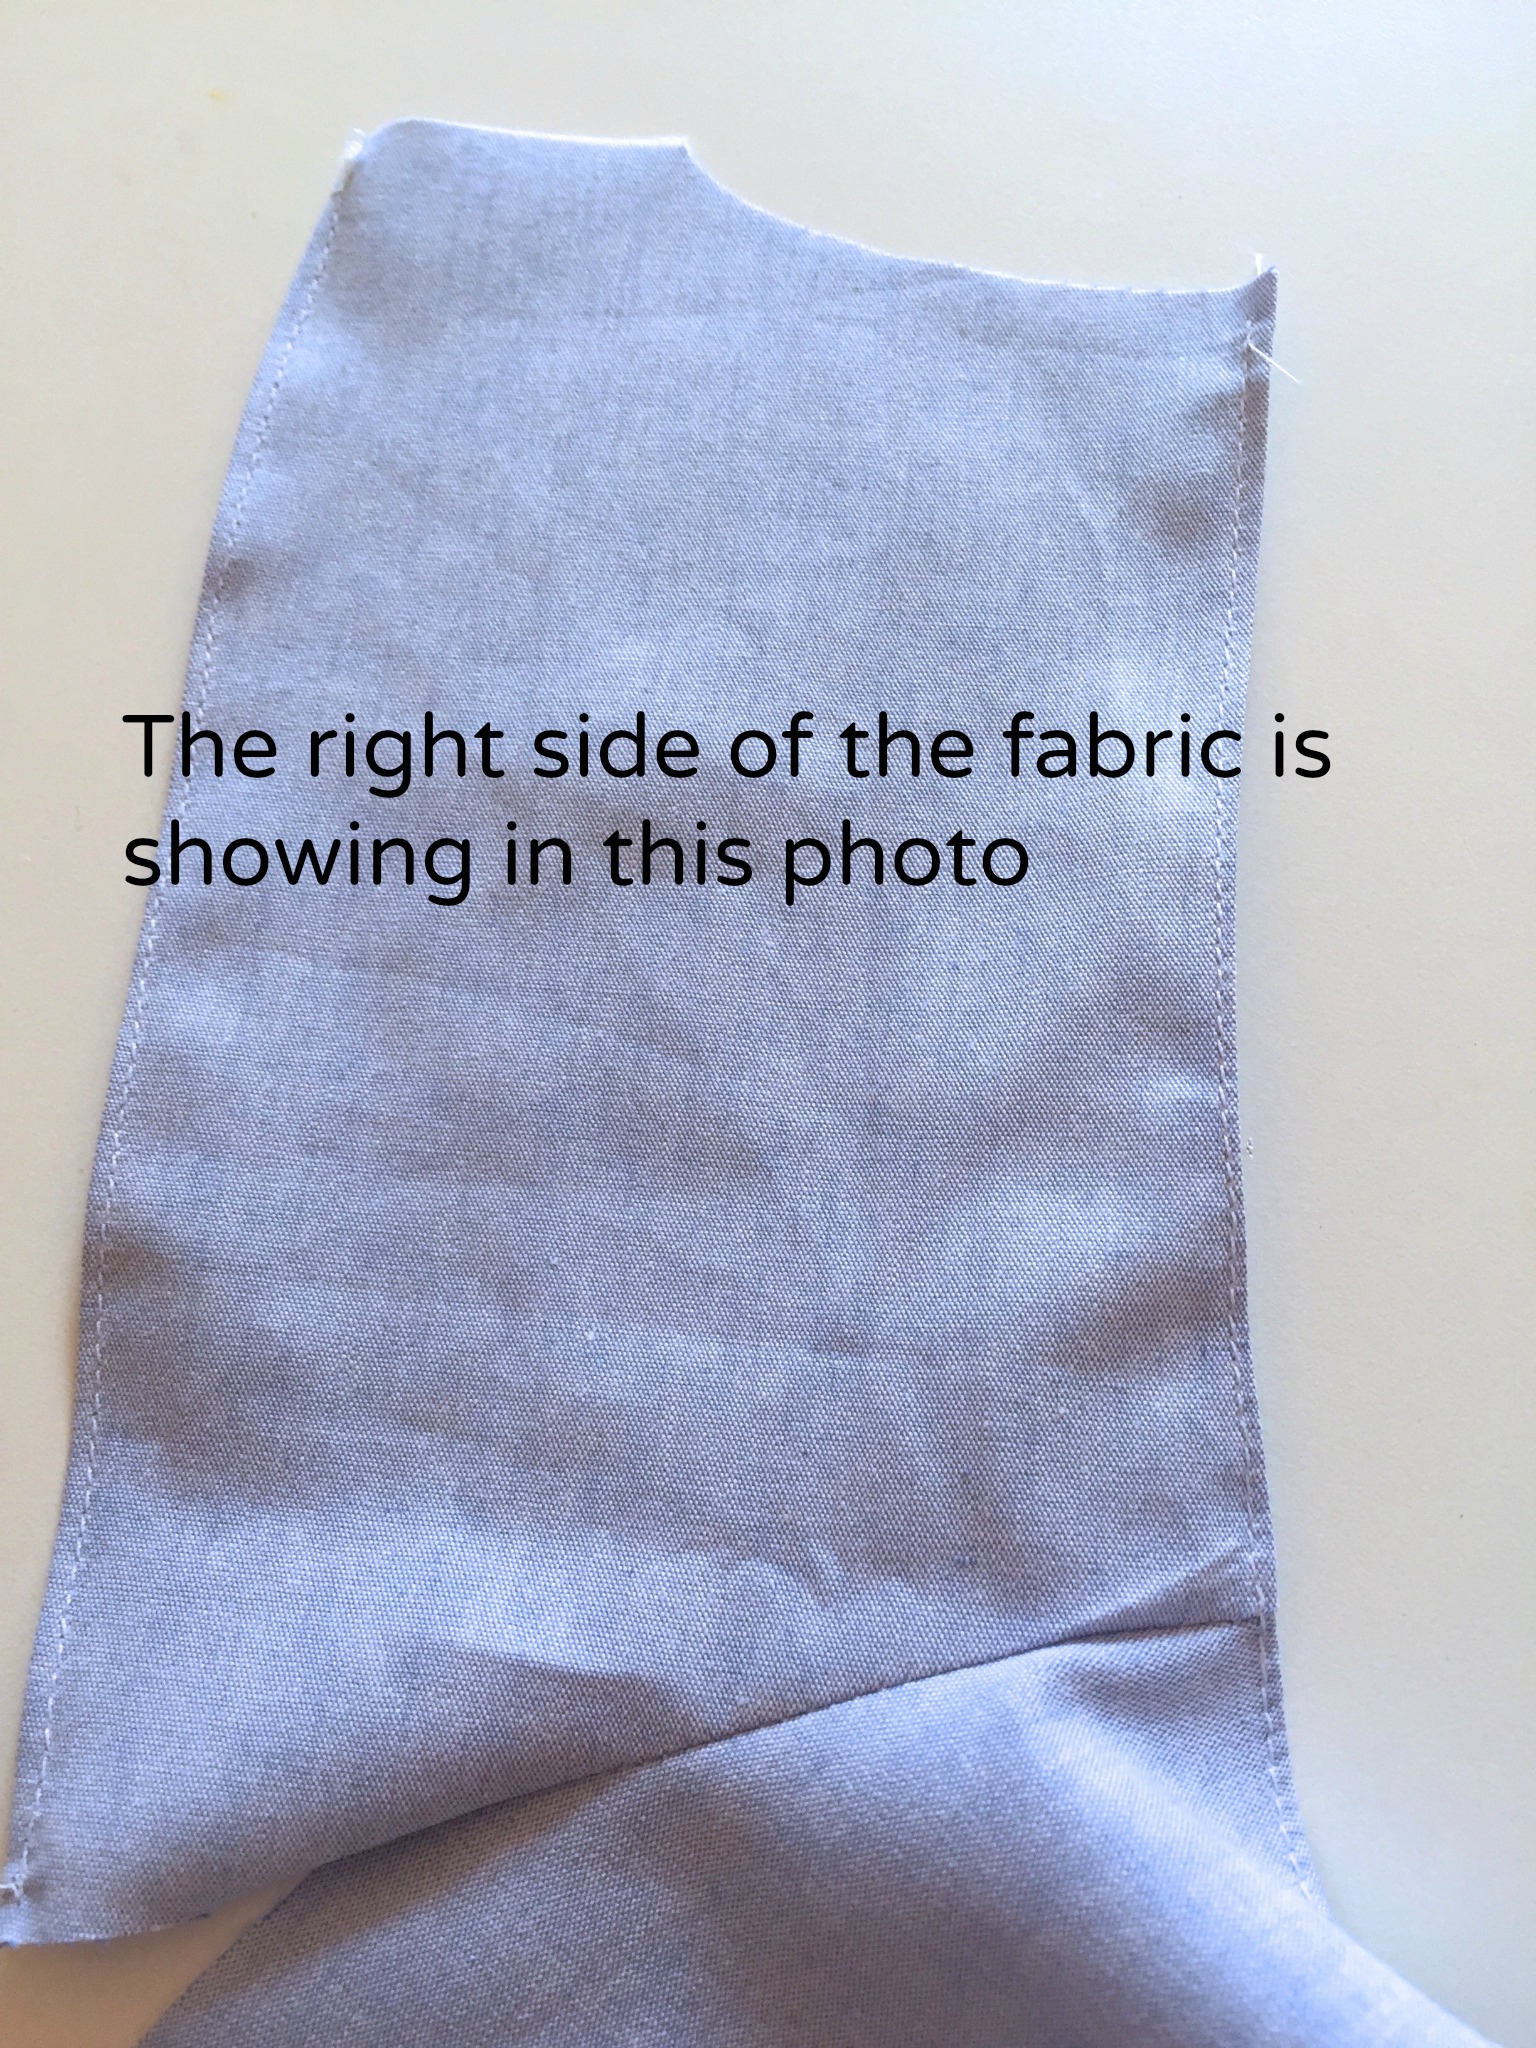
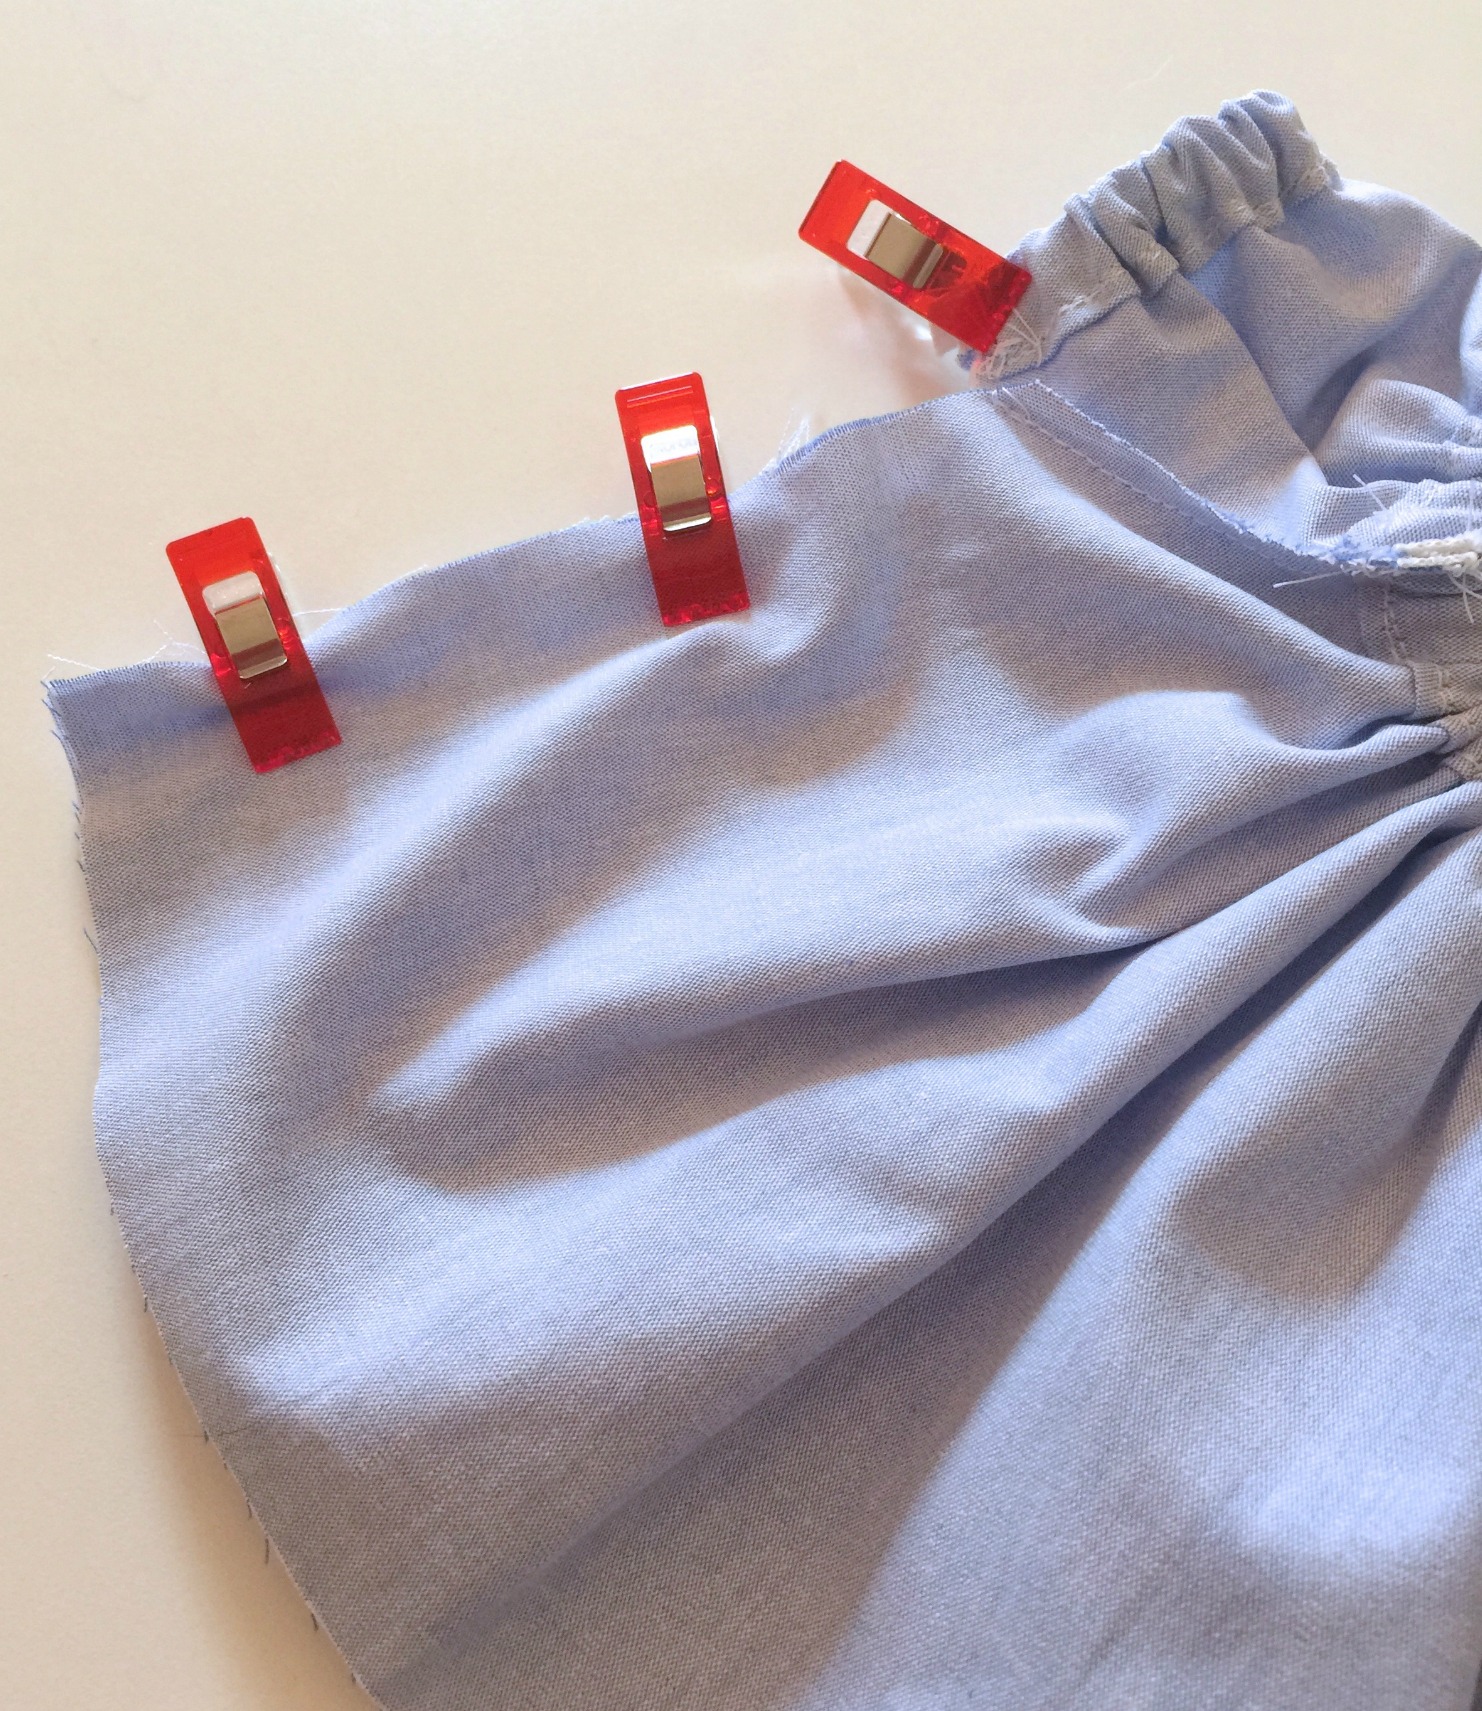
Next sew up one side seam.

side seam

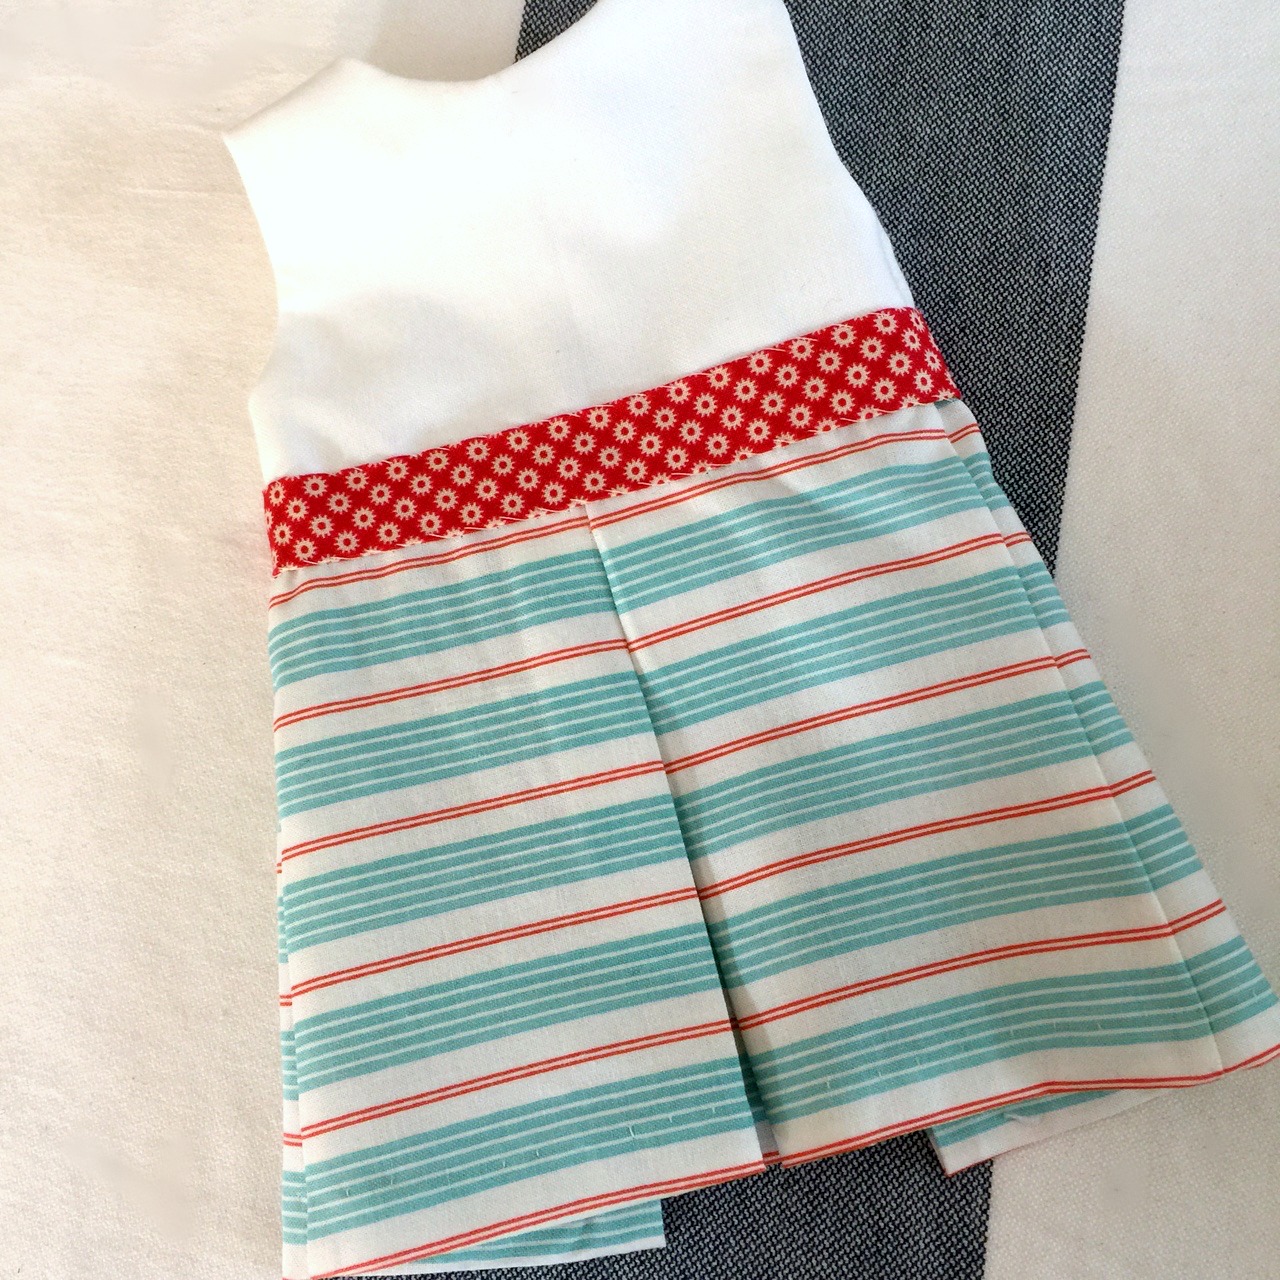
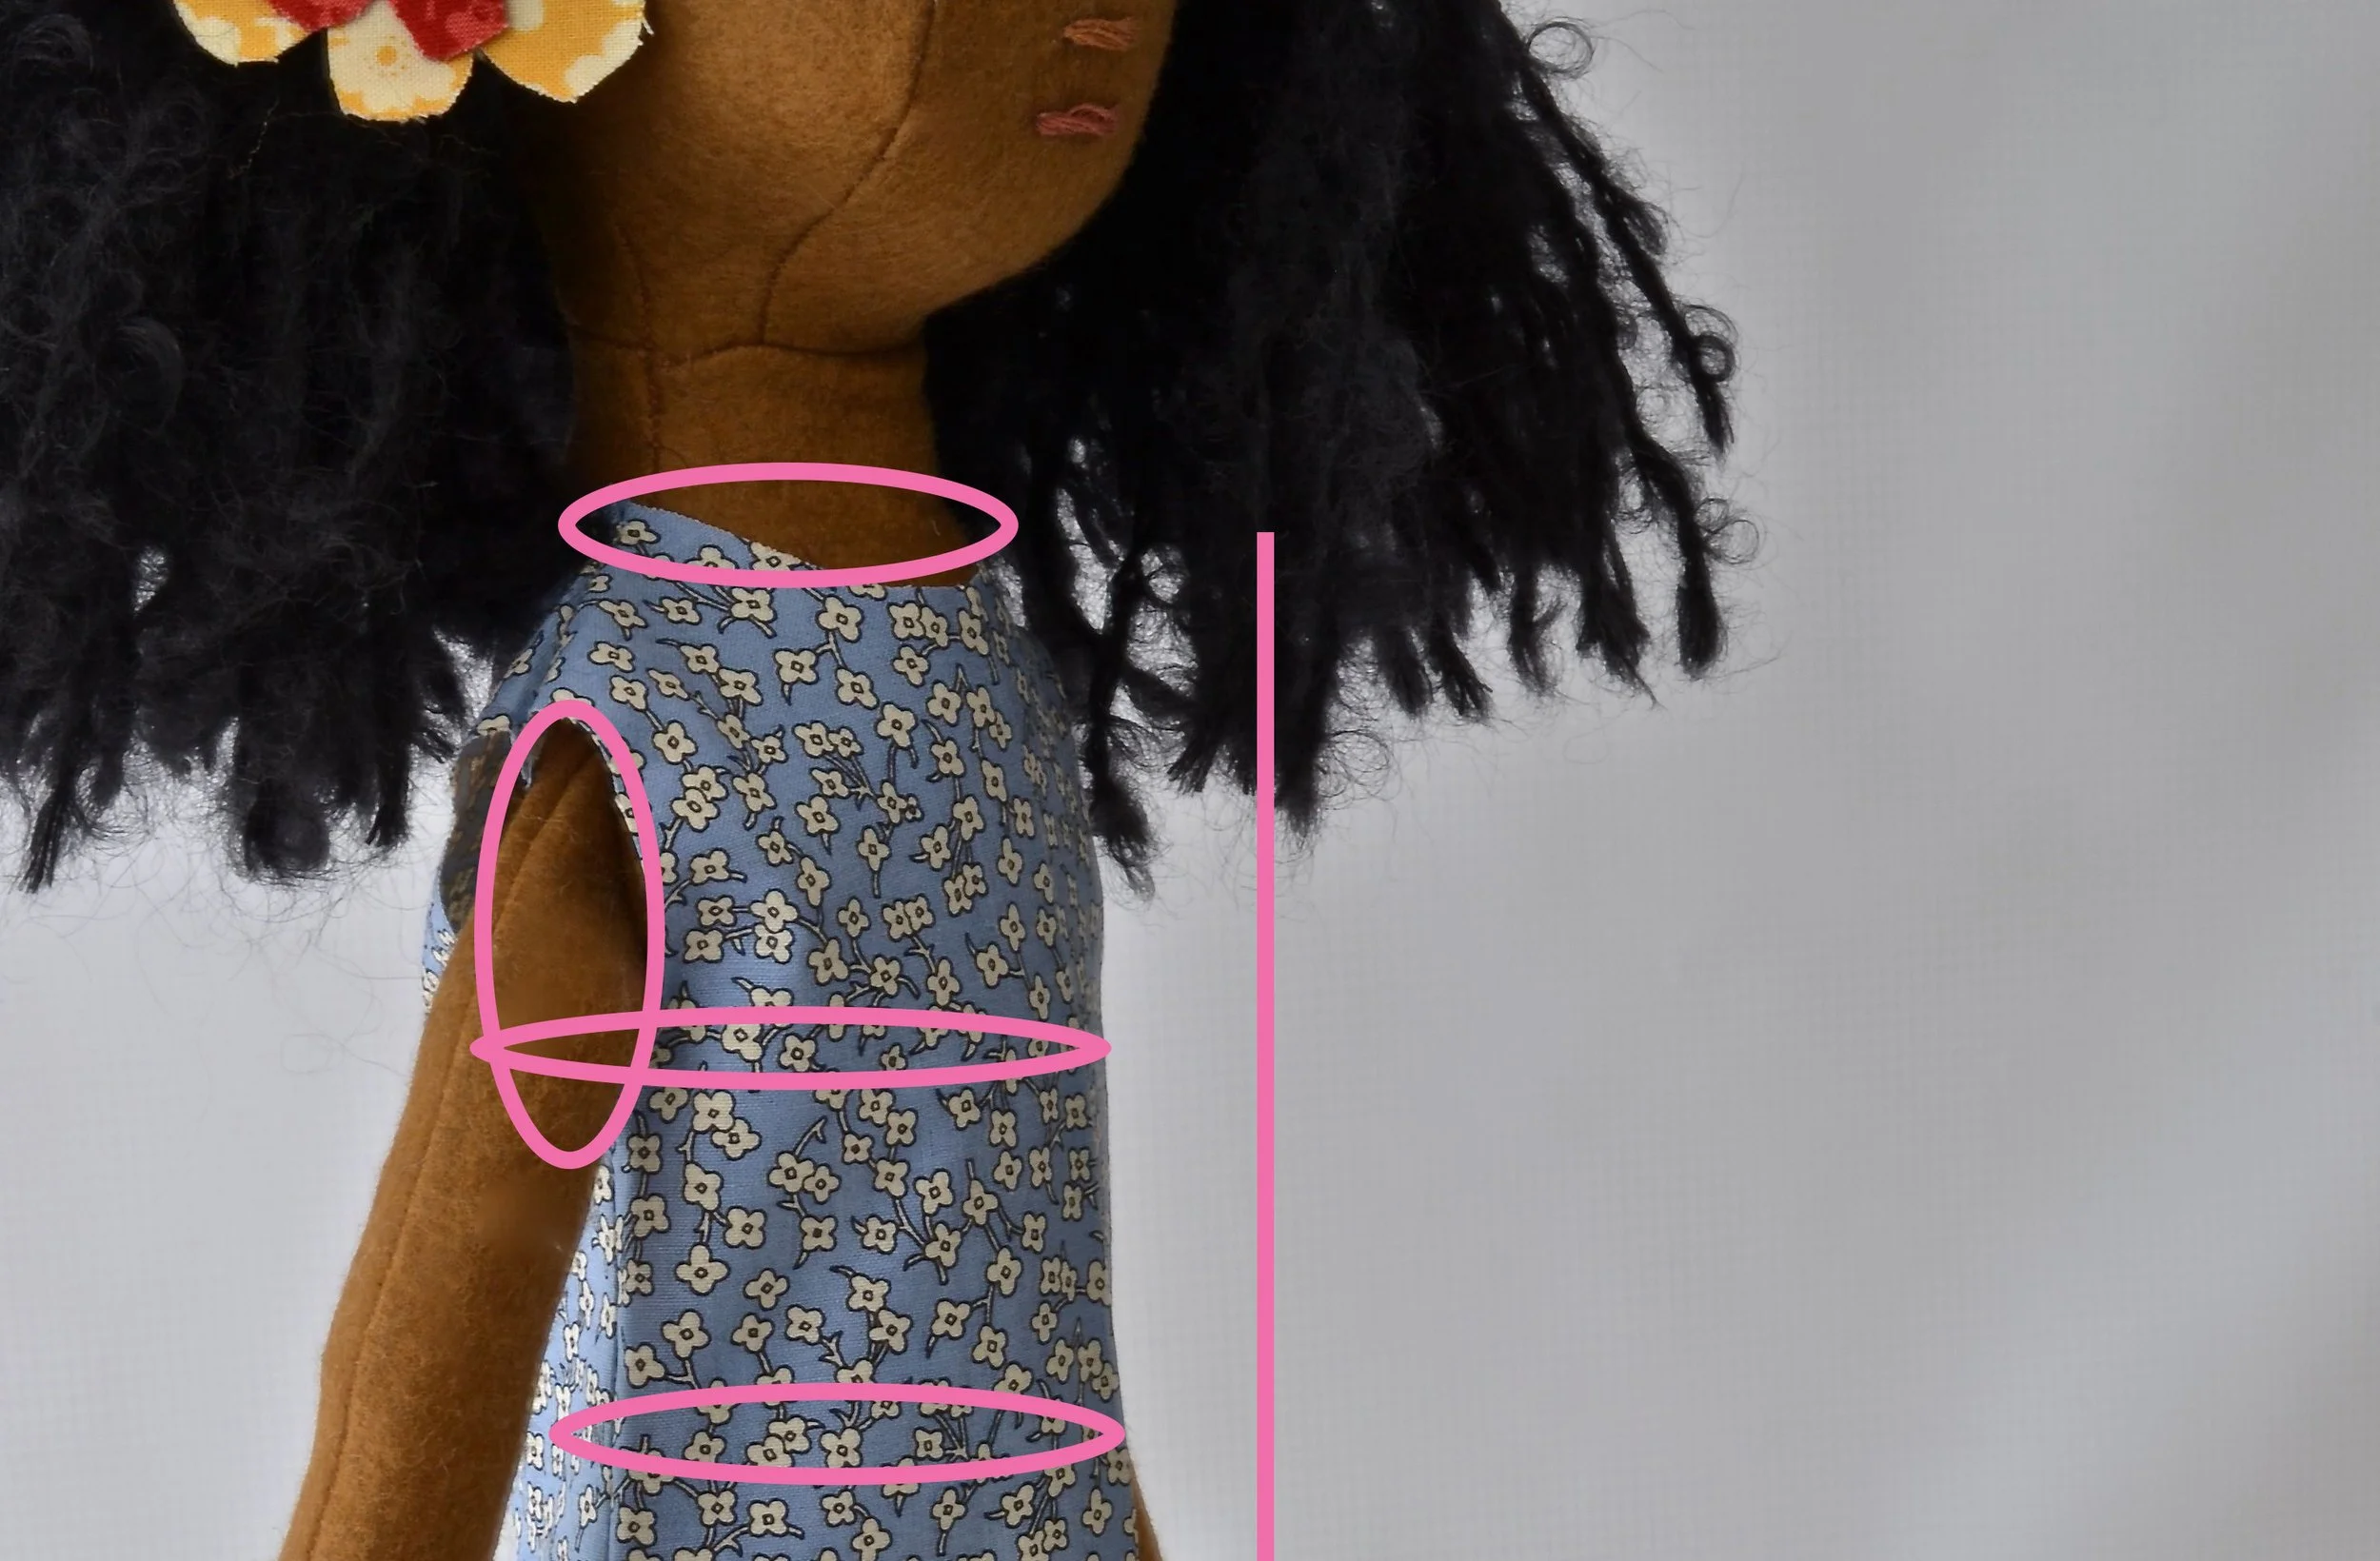
The next few steps involve creating and attaching the casing for the bodice elastic.

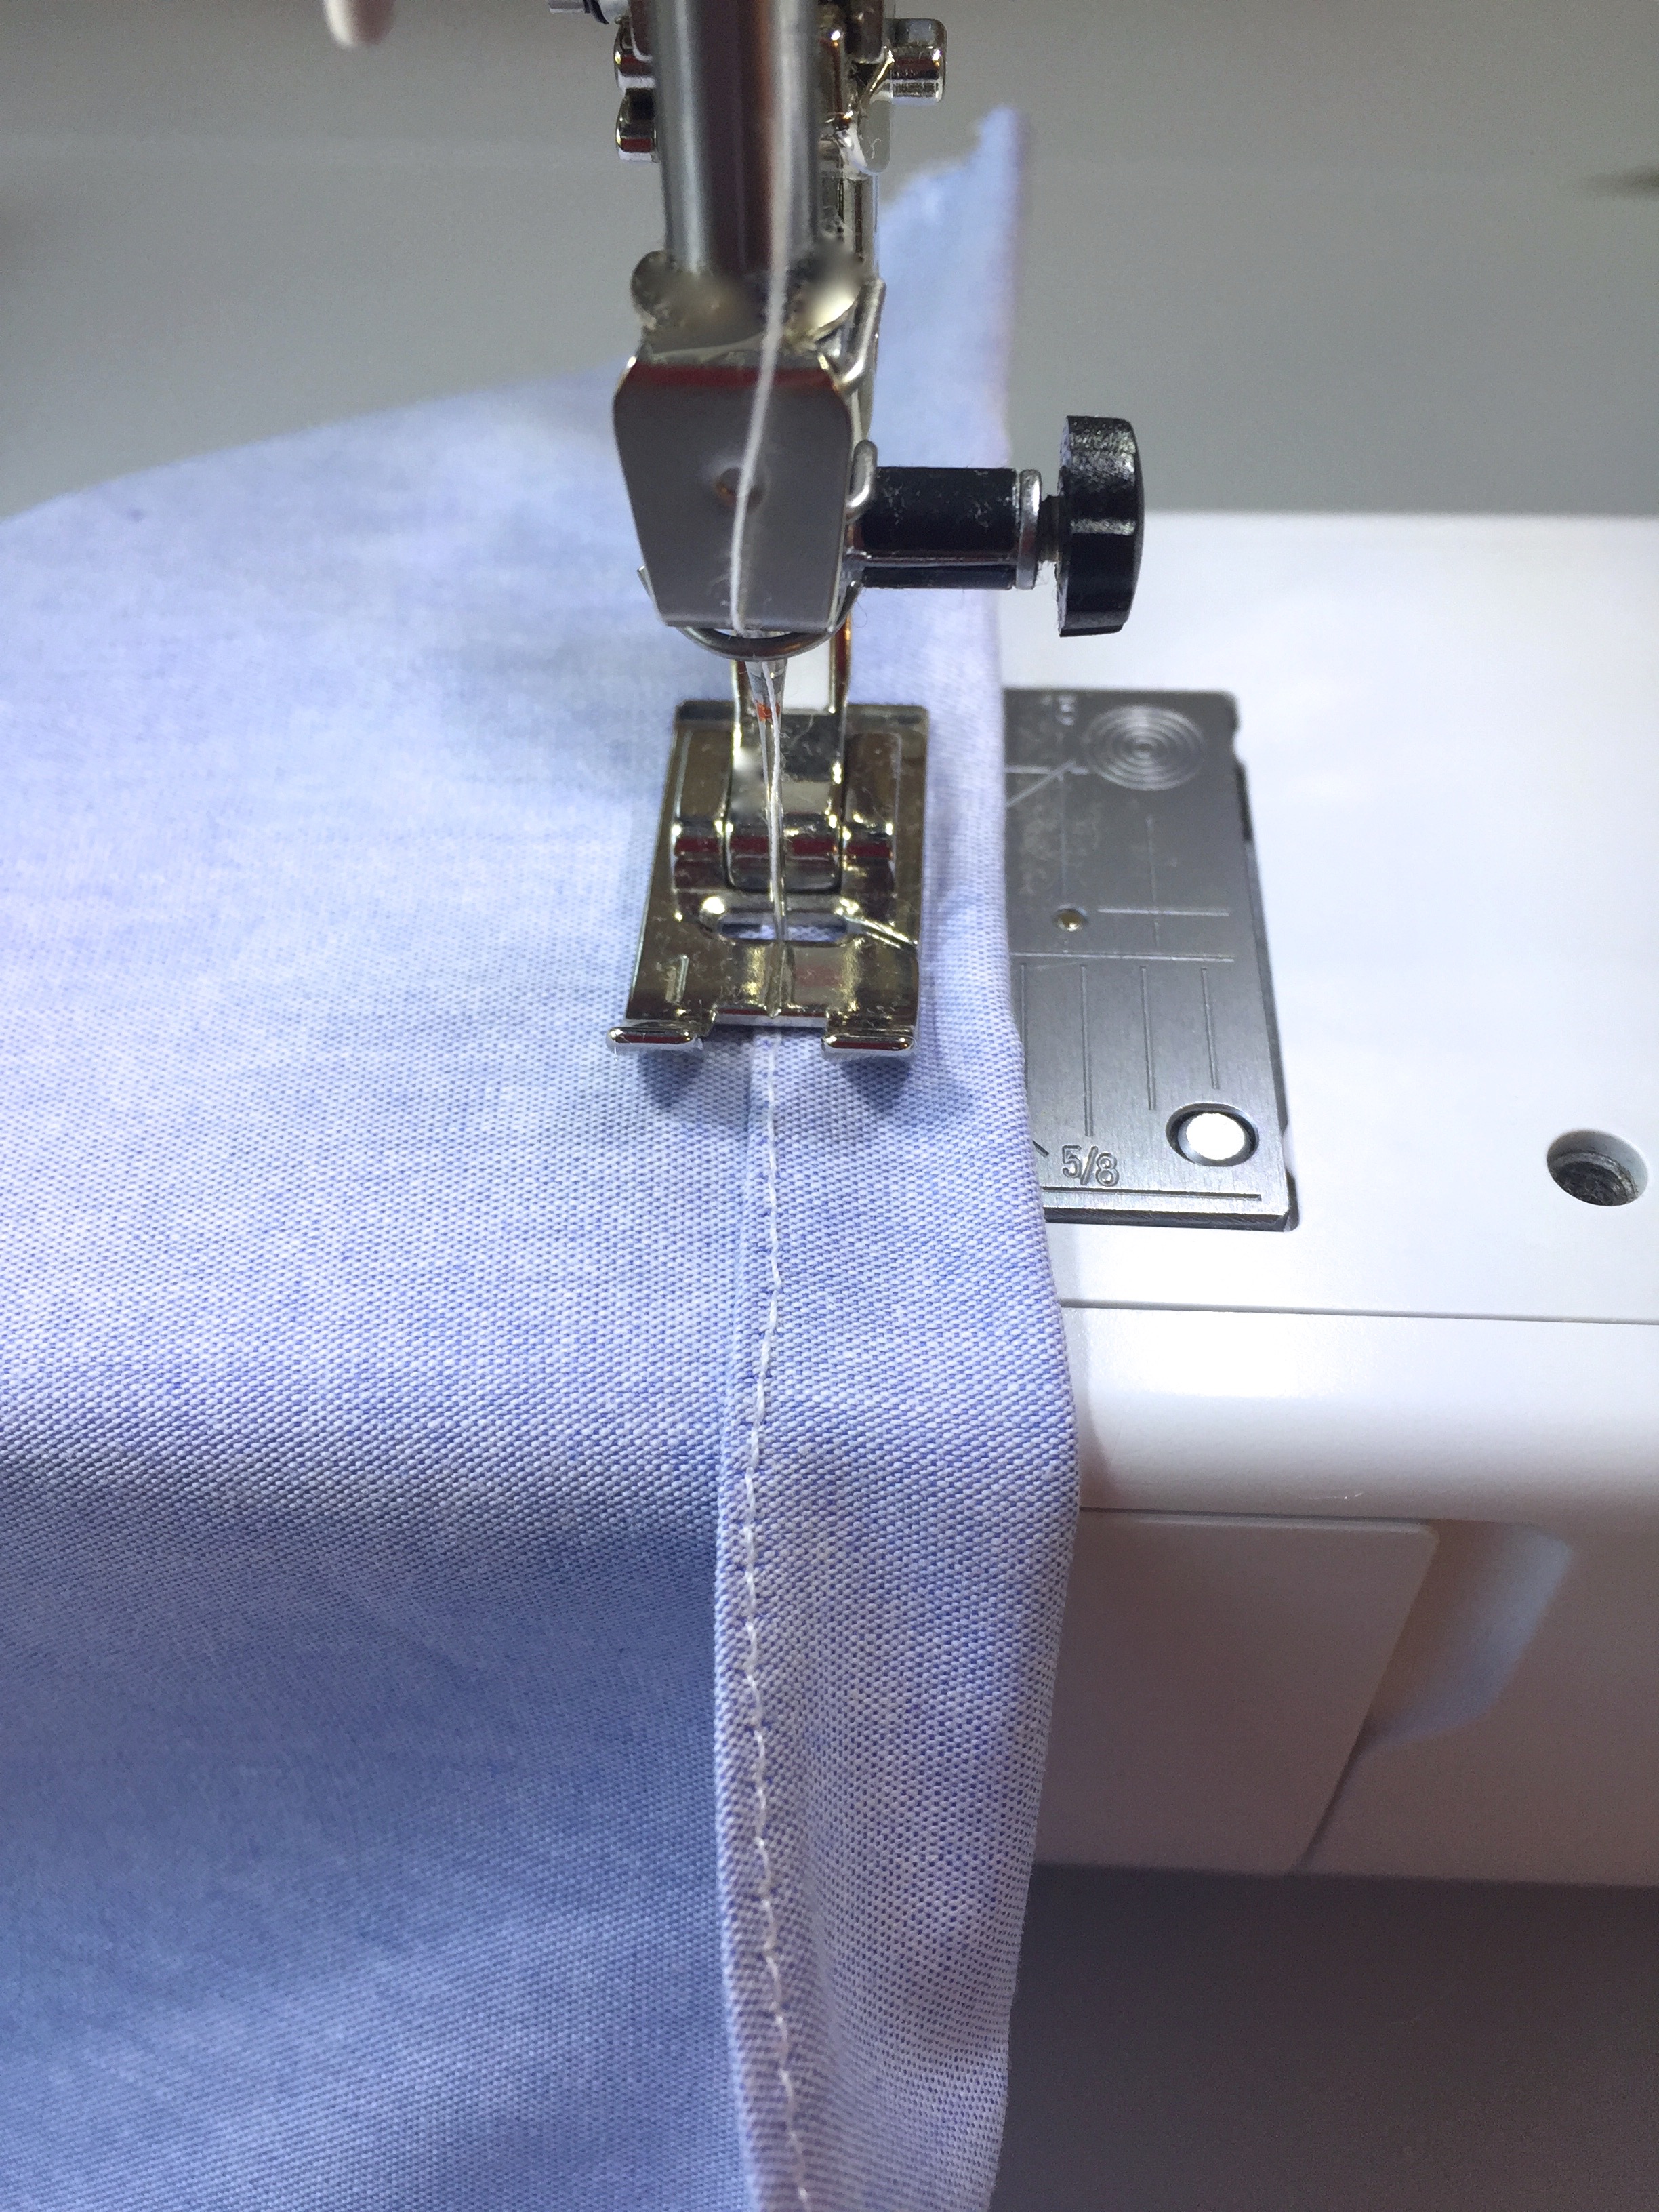
1. Cut a strip of fabric 1.25 inches wide and at least the length of the dress.

2. Make narrow machine hems along the long edges of this strip.

3. Pin strip to bodice using your markings.

4. Sew the casing down by stitching along the top and the bottom.

Creating the bodice casing. Click to enlarge

Next insert elastic and pull to desired length and secure end with machine stitching. For final length I recommend 1 inch longer than your dolls chest measurement. However, your initial piece of elastic can be several inches longer than that.

Inserting elastic in the bodice casing. Click to enlarge.

Next insert elastic in the neck casing and follow the remaining raglan blouse instructions to complete.

Raglan bodice dress
In Tips, Doll Dressmaking 2 Tags doll clothes, doll dressmaking series
Comment

Doll Dressmaking Series: Long Sleeves

February 10, 2016 Lisa Press
Doll Dressmaking long sleeves

Sleeves are an easy way to switch up a dress and completely change the look.

So far in this series we have covered basic shorts sleeves, short puffed sleeves and a ruffle sleeve.  But there are quite a few more sleeve options that are easy to make on a small scale.

This tutorial will focus on the basic doll long sleeve. Most long sleeves on doll clothes have elastic at the wrist 9this pattern does). That is because dolls hands are big and that makes it hard to get them through a long sleeve with a narrow end. Plastic dolls hands cant's squeeze in. The hands and arms of cloth dolls are hard to push through the tunnel of a long straight sleeve. So the elastic at the end solves both of these problems. It allows the wrist to stretch out and the sleeve itself to be a bit wider.

The pattern for this dress and all of the others in the series is available through my newsletter. Sign up form is at the end of this post.

Sewing long sleeves

I used the basic dress pattern and the retro collar, all have been part of past tutorials and are available through my newsletter. The dress is lined. 

Retro collar

1. Until the sleeves I am basically following the directions of the retro collar tutorial. This starts with sewing the shoulder seams together and then the collar pieces  together and sewing them onto the dress neckline.

2. Sew the lining should seams together.

3. Place the dress with the collar on top of the lining with right sides together. Pin or wonderclip up one back edge around the neck and down the other back edge. Sew the lining to the dress making sure you sew deeper than the collar attachment seam so it does not show. Tirn right side out.

Click to enlarge

Sew the sleeve edge of the dress to the sleeve edge of the lining. This is to keep them in place and together when you sew the sleeve on.

Seleve edges

Hemming the sleeves and making a casing:

1. Turn the ends of the sleeves up 1/4 inch and stitch.

2. Turn the bottoms up 1/2 inch and stitch again. this is the casing for your elastic for the "cuff" at the wrist.

Making the sleeve casings

Making the sleeve casings

Easing for the Sleeve Cap

The next few steps are similar to the gathering of the sleeve cap done on the puffed sleeve dress. Except this is called easing.  Easing is step down from gathering. it is done to get the sleeve to curve slightly better at the shoulder of the armhole, which makes more of a shoulder shape. it is also done to obtain a better fit in the armhole.

1. Stitch about two inches of long stitches at the cap of each sleeve. As in gathering, leave one end without reverse stitching and leave the threads long, so you can pull one.

2. Pull one of the threads slightly to puff the cap of the sleeve slightly.

3. measure the sleeve cap to the armhole, when it seems the right length, secure the thread by wrapping around a pin.

4. Fit and pin into the armhole, adjusting the ease if needed.


easing the sleeve cap

Sew sleeves in. make sure you've put your stitch length back to regular.

Sleeves

You are almost done. Next is the sleeve casing for the wrist.

1. Cut two pieces of elastic, each approximately the width of the bottom of the sleeve.

2. You will need to use something to thread the elastic. I use this tool, but a safety pin works fine.

3. Thread the elastic through the casing, securing it at the starting end with a few machine stitches.

4. Pull to desired length. I pull to 4 inches for Phoebe. For Sasha, 3.5 should do. For AG and Waldorf, 4.5-5 inches. stitch done the other end of the elastic to secure.

Click to enlarge

Sew up the side seams, hem and you are done!

side seams
Gingham dress

The pattern pieces for this dress and all other dresses are available through my newsletter. When you sign up, you will receive a second email asking you to confirm, after you do that you will receive another email with the base pattern downloads and a link to pattern pieces that came through previous newsletters.

Please check your spam first before emailing me if you do not receive this.

The long sleeve pattern piece will be available in this Friday's newsletter.

Sign up for the Phoebe&Egg Newsletter

* indicates required
In Tips, Doll Dressmaking 2 Tags doll dressmaking series
4 Comments

Doll Dressmaking Series: Pintucked Bodice

December 3, 2015 Lisa Press

Click to enlarge

There are several fun (and simple) things you can do with the drop waist dress pattern. One is to embellish the front. Pintucks, small stitched down pleats, on the bodice, are one way to change the pattern up.

Since doll dresses, especially their bodices, are small, it is easier to sew the tucks in the fabric before cutting out the bodice.

Cut a rectangle of fabric slightly taller than your bodice and at least three inches wider.

Fold it in half vertically to mark the middle. You will want to keep your pintucks centered.

I use a ruled piece of paper to mark where the pintuck folds will be (I will provide this in the newsletter patterns). It's kind of a pintuck cheat. Place the ruled piece of paper on your fabric. Center it.

Cut small snips at the end of each line on your cheat sheet. This is for marking where to fold and iron. Fold and iron along each line making sure all of your folds are on the same side of your fabric.

Snipping and folding

After pressing the folds, you will stitch each one with a contrasting thread a tiny bit in from the fold. I used the interior edge of my presser foot as my guide for keeping the pintucks straight and even. See arrow. 

Using your presser foot to keep the pintucks straight and even.

Using your presser foot to keep the pintucks straight and even.

Repeat this for all six of the pleats, paying attention to making sure they are coming out all on the same side of the fabric.

Sewing your tucks

When you are done, press the pleats so they are all facing out from the center and then staystitch across the top of the fabric so they stay pressed in the correct direction while you cut out your bodice. 

Pressing your tucks

Now that your bodice fabric with tucks is made, you are ready to cut out the bodice. Since I use freezer paper, I ironed mine on and cut. Pins also will work. Make sure your pleats are centered underneath before cutting.

Placing and cutting the bodice
All of the pieces

Next sew your dress together following the dropwaist instructions. I did this one without the ruffle sleeves and I machine hemmed it with contrasting thread to match the pintucks.

For this pattern, the drop waist pattern and all of the other patterns in the series, subscribe to the Phoebe and Egg newsletter. Sign up is below.

Pintuck dress

Sign up for the newsletter and receive a set of the base patterns and receive patterns as they come out, plus useful links and more.

Sign up for the newsletter

* indicates required
In Tips, Doll Dressmaking 2
1 Comment

Book Review: I Can Make Dolls' Clothes

November 3, 2015 Lisa Press
I can Make Dolls Clothes

I love Instagram. Through Instagram I have stumbled upon a lot of cool makers, including the authors: Georgia Vaux and Louise Scott-Smith.  Their book, aptly named, "I CAN MAKE DOLLS" CLOTHES" is adorable.

The pair have worked on other projects togther in the past and said this book was the perfect combination of all of their interests: fashion, design, craft, and a shared aesthetic and love of the handmade.

I have always thought of sewing for a Barbie sized doll challenging, but this book makes it easy...for even a six year old. The graphics are so fun and simple, if your child can read, they can follow the instructions. But the book isn't just designed for kinds, adults can use it too.

The clothes are better than the bought Barbie clothes. The book helps a child make simple patterns that they can alter, enhance and easily sew. 

And two doll clothing sewing tips from the authors:

  1. Don't worry about wobbly stitches, that's part of the charm.
  2. If you can't hem the cut edges, or get a grown up to do it, nail varnishing will keep them from fraying.

Tommorrw's post I will be giving away one copy of this book and fabric, trim and velcro to make five dresses.

Book Page.jpg
Sewing Barbie Clothes
In Teaching a Child to Sew, Tips Tags doll clothing, sewing doll clothes
5 Comments

Doll Dressmaking Series: Bib Front Dress

October 2, 2015 Lisa Press
Tutorial Bib Front Dress

My last tutorial was for a Retro pointy Collared Dress. So I thought I'd stick with the retro theme and add a bib front dress tutorial. The bib front can easily be added to a number of dress styles. I added it to a puff sleeved dress.

In this tutorial, I will show you how to add the bib to a dress pattern. To make the complete dress shown you might also need to reference:

The puffed sleeve drss instructions

The Peter pan collar instructions

The short sleeve dress instructions

Cut out dress, collar, sleeves, lining. I have been using cotton lawn for my linings. It is a lighter weight cotton whic reduces bulk in the lining seams. This especially helps in the neckline collar area.

Click to enlarge

There are several ways to treat the edges of a bib collar. In this first tutorial I am using one layer of fabric for the bib and trimming it with rick rack. So choose a trim. Medium sized rick rack or lace both will work well. Small ricj rack is tricky and big may not bend around the corners so easily.

Bib collar trim

Sew Rick rack to the bib front. This is a two step process. Step one is sewing it about 1/4 inc in around the edge.

Click to enlarge

After Step 1 the bib should look like this.

Bib Front with Rick rack

Next fold over the edge so the outer half of your rick rack is underneath and stitch. Try to stitch on top of your first set of stitches.

Folding Over Rick rack

Pin collar to the dress matching up neckline edges. Stitch down, stitching over your first set of stitches. Press.

Add collar and sleeves. See links above if you need to revisit those tutorials. Or visit the doll dressmaking page with all of them. 

Bib Collar Dress Tutorial

Add buttons. The pattern pieces for this dress and all others are available through the Phoebe&Egg newsletter. When you sign up you will automatically receive the base pattern set in 4 sizes.

Subscribe to our newlsetter

* indicates required
In Tips, Doll Dressmaking 2 Tags doll dressmaking series
4 Comments

Doll Dressmaking Series: Peasant Dress Pattern

August 10, 2015 Lisa Press
Peasant Dress Pattern

Remember the raglan peasant blouse tutorial a few weeks ago?  A very easy pattern. Now this pattern can easily be made into a dress.

Same instructions, it's just a matter of lengthening one pattern  piece. I've done it for you and will include a download in my upcoming newsletter. Sign up form is down below.

Peasant Dress Pattern
Raglan Peasant Dress Pattern

To make sure you receive all pattern pieces and tips, sign up for my newsletter.  When you sign up you automatically receive all of the pattern pieces to date. 

Subscribe to our mailing list

* indicates required
In Tips, Doll Dressmaking 2
17 Comments

The Doll Dressmaking Series: Tips for adjusting a pattern's size

July 23, 2015 Lisa Press
Two beautiful Waldorf dolls made by Andrea Schrage-Möller. Photo courtesy of ASM

Two beautiful Waldorf dolls made by Andrea Schrage-Möller. Photo courtesy of ASM

I love Waldorf dolls, but I do not own any.

Yet.

So when I started the Doll Dressmaking Series, I designed the 16 inch Waldorf Doll patterns from the measurements of a local dollmaker who makes lovely Waldorfs. But doll sizes vary, even in mass produced plastic dolls, but especially in Waldorfs.

The good news is with a soft doll, arms, heads and waists can be squeezed in a bit to make things work. But if things are too big they drape or worse still, fall off.

So I asked for feedback from those sewing for Waldorf dolls and I was grateful to here from Andrea, all of the way over in Germany.

She had been using my patterns to sew dresses for her beautiful Waldorf dolls and yes, she had made a few adjustments.

Here's what she said she did:

1. Overall she made the bodice/dress more narrow at the side seams of both the front and back.

2. She also moved the front center foldline in a bit to make the front narrower.

3. She added a bit to the back center edge to make more of an overlap where the dress snaps closed.

4. She made the neckline a bit larger.

Tweaking a bodice pattern

Andrea's Adjustments

Above I have drawn on the original pattern to show you approximately what Andrea did. These type of adjustments can be done to any bodice/dress pattern to make it fit a specific doll better. Some times it takes a few tries on how far to take in before you get the exact right fit. When you find it, be sure to draw on your pattern or a copy of your pattern, so you can repeat what you did.

Thank you Andrea!

I will include a link to the PDF pattern for Andrea's adjustment in next week's newsletter.

You can sign up here, and receive all future pattern pieces, plus tips, tutorials, finds and inspiration.

Subscribe to our newsletter

* indicates required


In Tips Tags Handmade doll clothes, sewing doll clothes
3 Comments

Doll Dressmaking Series: Raglan Peasant Top

July 2, 2015 Lisa Press
Raglan Peasant Top Tutorial

Raglan peasant tops are classic. They are also simple to make. The main skill involved is knowing how to thread elastic through a casing.

And I explained that in an earlier post here.

Cut out two sleeve pieces and two body pieces. 

Raglan Peasant Top Tutorial

Sew the two sleeves to either side of one of the body pieces.

Raglan Peasant Top Tutorial

Sew the remaining body piece to one of the raw sleeve edges.

Raglan Peasant Top Tutorial

Sew a narrow machine hem along the neckline and bottoms of the two sleeves. By narrow turn over no more than a 1/4 inch.

Make elastic casings for threading your elastic. These should be about 3/8 inch if your elastic is 1/4 inch. The casing are made by folding your fabric towards the wrong side (sorry i used fabric that does not have two distinct sides for this tutorial).

Sewing the casing.

Sewing the casing.

Completed elastic casings.

Cut elastic for neckline and sleeves.

For Phoebe: Sleeves two 5" pieces and for the neckline one 12" piece

For American Girl dolls and Waldorf: Two 6 inch pieces for sleeves and one 14 inch piece for neckline..

Thread elastic through casings, as described in my puffy sleeve tutorial. 

Elastic threaded through neck.

Elastic threaded through neck.

I suggest draping the shirt on your doll to determine how "gathered" you want the neck. Remember it stretches, but you also don't want it too tight. Too tight looks awkward and is hard to get over the dolls feet or her head.

Sew remaining "shoulder" seam.

Raglan Peasant Top Tutorial

Sew side seam from bottom of top to the bottom of the sleeve, on each side.

Raglan Peasant Top Tutorial

Hem or trim bottom of the blouse. I think this style is perfect for all sorts of trim. Form for the pattern below. Phoebe's is ready. AG and Waldorf should be ready by Saturday.

Phoebe in her new peasant top
Trim on Phoebe's New Peasant Top
Phoebe in her new top

If you want the pattern:

Subscribe to our mailing list

* indicates required
In Tips, Doll Dressmaking 2 Tags doll clothing, learning to sew
56 Comments

Doll Dressmaking Series: Adding a Pleat

April 10, 2015 Lisa Press
Doll Dressmaking: Making a Pleat

Pleats are classic. And used in a doll dress they can be classic cute.

They are also simple. There are also variations on the pleat theme. One pleat in the center, two pleats on the side, pleats in the front and back, lots of pleats...

This first tutorial is for a simple center pleat.

At the end of the email, I have included a form for requesting the pattern for this, which includes the bodice and skirt with a center pleat.

Start with making the bodice, which is made like the beginning of the reversible dress or dress with a bodice.

But do not sew up the side seams!

Sewing the bodice

Next cut out the skirt. Mark the top and bottom of the skirt pleat basting line with a tiny cut (less than 1/8 of an inch)

Do not cut the pleat line, just make small snips at either end to mark it, or mark the ends with pencil.

Do not cut the pleat line, just make small snips at either end to mark it, or mark the ends with pencil.

Next you will make the center front pleat.

1. Fold the front skirt piece in half, with the right side in the fold, or wrong side out. Lightly iron.

2 and 3. Use very large basting stitches to stitch from the nick and the top of the skirt to the nick at the bottom.

4. Your skirt should look like this.

Click to enlarge

Next you want to iron the pleat and "set" it. or get it to stay. Use steam and the cotton setting. Press pleat from the back side as shown. Flip over, press some more.

When you feel like your pleat is stable, you can take out the basting stitches. Leave a few at the top to hold the pleat together while you stitch it to the bodice.

Setting the pleat

The last few steps will seem familiar.

1. Finish center edges of the skirt back pieces.

2. Sew skirt front and backs to their appropriate bodice pieces.

3. Press

4. Sew side seams and hem.

Click to enlarge.

I added some bias trim along the waist seam.

I have finished drawing the Phoebe pattern in Illustrator. I hope to have the other two done by the end of the weekend. Form for requesting the patterns is below.

Subscribe to our newsletter to receive all of the patterns.

Subscribe to our mailing list

* indicates required
In Tips, Doll Dressmaking 1
9 Comments

Doll Dressmaking Series: A Simple Trick

March 31, 2015 Lisa Press
Doll Dressmaking a simple trick

There are a lot of easy ways to change up a doll dress. This trick can be used in a number of sewing situations, but I'll start with showing you how on the reversible dress. After you see how easy it is, you may want to try it with sleeves or a collar.

You will see this is an excellent way to use scraps of fabric.

Start with two pieces of fabric that you like together.

two fabrics together

Sew the two pieces length wise. Your goal is to create a piece of fabric large enough to cut the outside of the reversible dress pattern from.

sew fabrics together

Once you've sen them together, you may want to add trim, but you don't have to.

adding ric rac to simple doll dress

Sew trim along the seam you just created.

sewing on ric rac

Then lay your pattern out on your piece of fabric and cut.

simple doll dress trick

Next cut a lining and proceed to make the reversible dress. As I mentioned earlier this can be done with sleeves or a collar too. 

Reversible doll dress trick
Finished doll dress
Featured
Doll Dressmaking Series: 10 Dresses
Apr 23, 2015
Doll Dressmaking Series: 10 Dresses
Apr 23, 2015
Apr 23, 2015
Doll Dressmaking Series: Adding a Pleat
Apr 10, 2015
Doll Dressmaking Series: Adding a Pleat
Apr 10, 2015
Apr 10, 2015
Doll Dressmaking Series: A Simple Trick
Mar 31, 2015
Doll Dressmaking Series: A Simple Trick
Mar 31, 2015
Mar 31, 2015
Doll Dressmaking Series: Playing with Fabric
Mar 17, 2015
Doll Dressmaking Series: Playing with Fabric
Mar 17, 2015
Mar 17, 2015
How to Use a Ruffler for sewing pleats or gathers
Mar 10, 2015
How to Use a Ruffler for sewing pleats or gathers
Mar 10, 2015
Mar 10, 2015
making a ruffle
Feb 2, 2015
Doll Dressmaking Series: Making a Ruffle with Perle Cotton
Feb 2, 2015
Feb 2, 2015
Four Ways to Make Ruffled Trim: Part 1
Jan 29, 2015
Four Ways to Make Ruffled Trim: Part 1
Jan 29, 2015
Jan 29, 2015
Doll Dressmaking Series: Ruffle Sleeves
Jan 8, 2015
Doll Dressmaking Series: Ruffle Sleeves
Jan 8, 2015
Jan 8, 2015
Doll Dressmaking Series: Beginners Sleeves
Jan 4, 2015
Doll Dressmaking Series: Beginners Sleeves
Jan 4, 2015
Jan 4, 2015
Doll Dressmaking Series: A trick for pockets
Nov 13, 2014
Doll Dressmaking Series: A trick for pockets
Nov 13, 2014
Nov 13, 2014
Doll Dressmaking Series: Sewing on Trim
Oct 24, 2014
Doll Dressmaking Series: Sewing on Trim
Oct 24, 2014
Oct 24, 2014
Doll Dressmaking Series: Making your own fabric trim
Oct 20, 2014
Doll Dressmaking Series: Making your own fabric trim
Oct 20, 2014
Oct 20, 2014
Doll Dressmaking Series: The Peter Pan Collar
Sep 24, 2014
Doll Dressmaking Series: The Peter Pan Collar
Sep 24, 2014
Sep 24, 2014
Doll Dressmaking Series: Yes, Another Tool
Sep 19, 2014
Doll Dressmaking Series: Yes, Another Tool
Sep 19, 2014
Sep 19, 2014
Doll Dressmaking Series:Dress with a bodice and gathered skirt
Sep 16, 2014
Doll Dressmaking Series:Dress with a bodice and gathered skirt
Sep 16, 2014
Sep 16, 2014
Doll Dressmaking Series: The Reversible Dress
Sep 4, 2014
Doll Dressmaking Series: The Reversible Dress
Sep 4, 2014
Sep 4, 2014
Doll Dressmaking Series: Facings 101
Sep 2, 2014
Doll Dressmaking Series: Facings 101
Sep 2, 2014
Sep 2, 2014
Doll Dressmaking Series: Resizing the pattern
Aug 19, 2014
Doll Dressmaking Series: Resizing the pattern
Aug 19, 2014
Aug 19, 2014
Doll Dressmaking Series: Base Patterns are ready
Aug 14, 2014
Doll Dressmaking Series: Base Patterns are ready
Aug 14, 2014
Aug 14, 2014
Doll Dressmaking: Useful Tools
Aug 6, 2014
Doll Dressmaking: Useful Tools
Aug 6, 2014
Aug 6, 2014
In Tips, Doll Dressmaking 1 Tags doll dressmaking series, doll clothing, sewing
11 Comments
Older Posts →
Instagram
ExtraSmall pajamas in the works. 😴
By Friday, I’m hoping to list 4 medium Phoebes and 3 ExtraSmall. This little redhead is one of the ExtraSmalls.
Still photography, sewing and getting ready to reopen. #etsysellersofinstagram
This Phoebe flew off to the west coast last week ✈️💕
Another shot of two adorables getting acquainted in London. 💕💕
Phoebe happily made it to London in her matching school uniform. 🇬🇧
Thanks @lanelaurenlane for letting people know about Phoebe&Egg ❤️ We have 6 skin colors of dolls.
The black squares will be gone in a few days. Let’s try to do something more long term. #blackouttuesday
Did I mention how happy I am to be doll making? Soooo happy 😊
On her way to a birthday girl🎂😘

Keep up with the patterns

Sign up with your email address to receive news and updates and the patterns.

We respect your privacy.

Thank you!
Blog
Help me find a Home for this Special Phoebe
about 6 years ago
Explaining Phoebe Doll Sizes
about 6 years ago
Kiki, the delivery doll
about 7 years ago
A Few Words About Ruby Bridges
about 7 years ago
Historical Heroines: Pure Inspiration for Young Girls
about 7 years ago
Doll Dressmaking Series: Puffy Sleeves
about 7 years ago
Doll Dressmaking: Fancy Sleeves Tutorial
about 7 years ago
Phoebe is now a new size: 16.5 inches
about 7 years ago
One Small Customer Spreads Creativity and Good
about 7 years ago
Grace O'Malley Crosses the Atlantic
about 7 years ago
  • Studio (2)
  • The Historic Collection (2)
  • Supplies for Making (4)
  • The Doll Friend Project (5)
  • Interviews (7)
  • My Personal Journey (7)
  • Handmade Stories (9)
  • Inspiration (9)
  • The Value of Handmade (11)
  • Materials (14)
  • Teaching a Child to Sew (14)
  • Things I Love (15)
  • Doll Dressmaking 2 (17)
  • Doll Dressmaking 1 (20)
  • Tips (27)


Dolls and Clothing are available in both Etsy Shop.

Powered by Squarespace