• Home
  • Blog
  • Featured on Etsy
  • About the Dollmaker
  • About the Handmade Dolls
  • About the Doll Clothes
  • Scrappy Phoebe's Page
  • Reviews
  • Shop
  • My Etsy Shop
  • Doll Dressmaking Series
  • Teaching A Child to Sew
  • Dress Patterns for your Phoebe Doll
  • Scrappy Phoebe's Page (Copy)
  • Contact
  • Shop
Menu

Phoebe&Egg

Street Address
City, State, Zip
Phone Number
handmade dolls and doll clothing

Your Custom Text Here

Phoebe&Egg

  • Home
  • Blog
  • About
    • Featured on Etsy
    • About the Dollmaker
    • About the Handmade Dolls
    • About the Doll Clothes
  • Scrappy Phoebe's Page
  • Shop and Reviews
    • Reviews
    • Shop
    • My Etsy Shop
  • Doll Dressmaking
    • Doll Dressmaking Series
    • Teaching A Child to Sew
    • Dress Patterns for your Phoebe Doll
    • Scrappy Phoebe's Page (Copy)
  • Contact
  • Shop

Doll Dressmaking Series: Adding a Pleat

April 10, 2015 Lisa Press
Doll Dressmaking: Making a Pleat

Pleats are classic. And used in a doll dress they can be classic cute.

They are also simple. There are also variations on the pleat theme. One pleat in the center, two pleats on the side, pleats in the front and back, lots of pleats...

This first tutorial is for a simple center pleat.

At the end of the email, I have included a form for requesting the pattern for this, which includes the bodice and skirt with a center pleat.

Start with making the bodice, which is made like the beginning of the reversible dress or dress with a bodice.

But do not sew up the side seams!

Sewing the bodice

Next cut out the skirt. Mark the top and bottom of the skirt pleat basting line with a tiny cut (less than 1/8 of an inch)

Do not cut the pleat line, just make small snips at either end to mark it, or mark the ends with pencil.

Do not cut the pleat line, just make small snips at either end to mark it, or mark the ends with pencil.

Next you will make the center front pleat.

1. Fold the front skirt piece in half, with the right side in the fold, or wrong side out. Lightly iron.

2 and 3. Use very large basting stitches to stitch from the nick and the top of the skirt to the nick at the bottom.

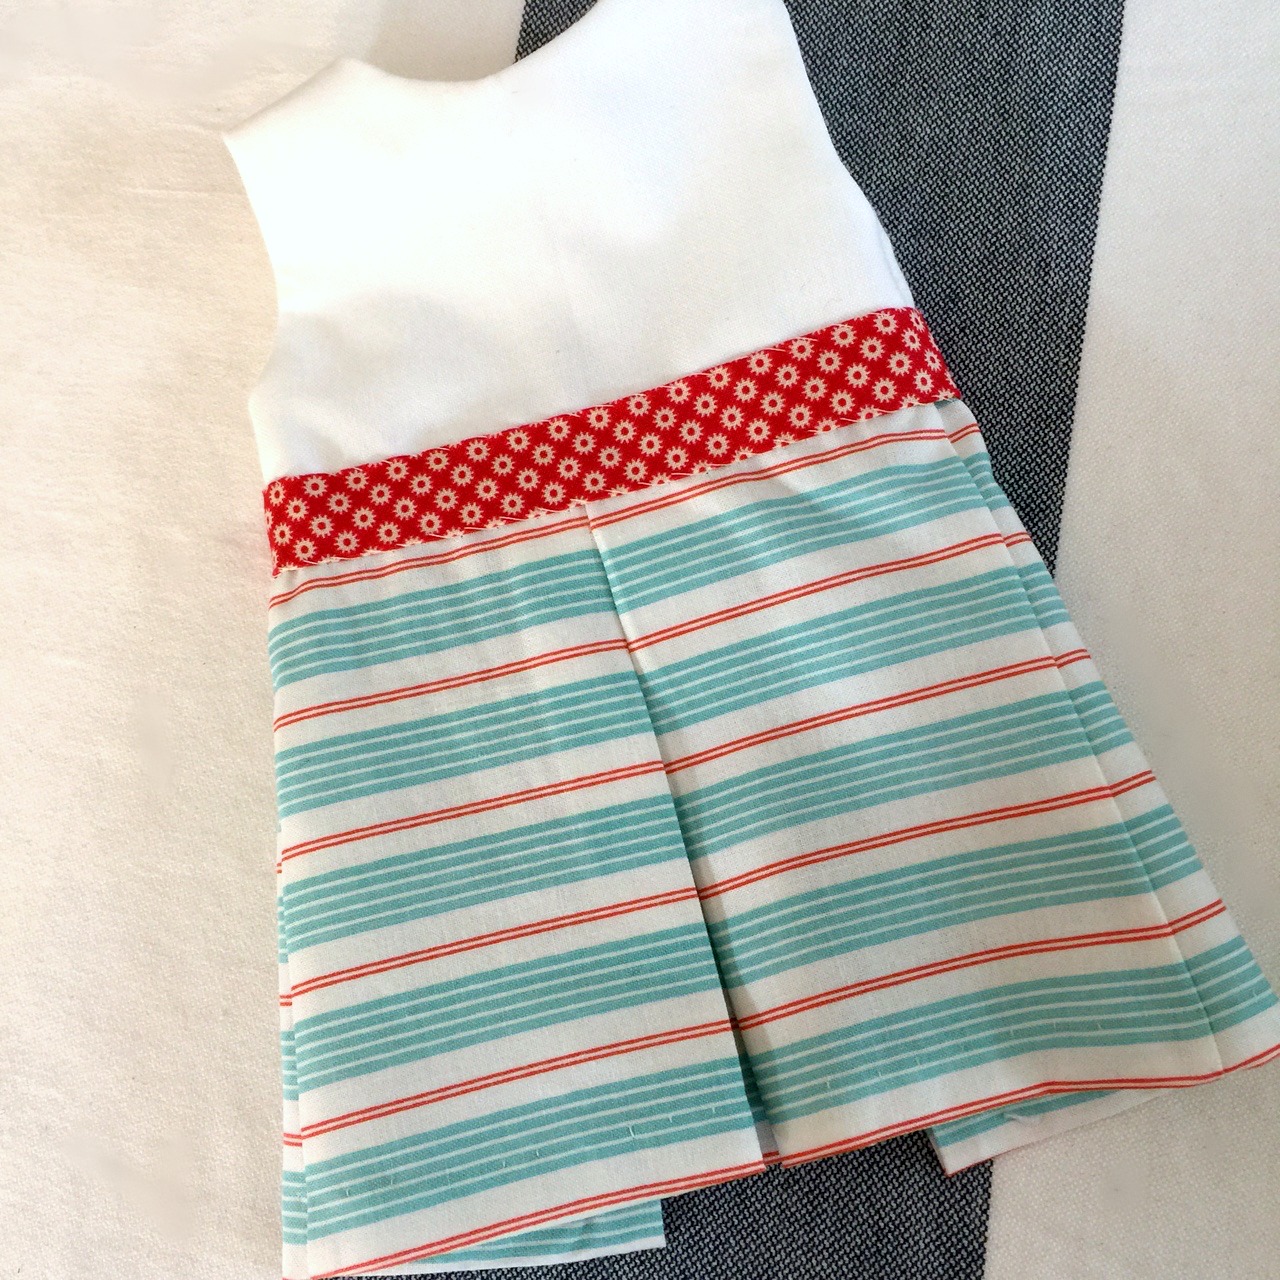
4. Your skirt should look like this.

Click to enlarge

Next you want to iron the pleat and "set" it. or get it to stay. Use steam and the cotton setting. Press pleat from the back side as shown. Flip over, press some more.

When you feel like your pleat is stable, you can take out the basting stitches. Leave a few at the top to hold the pleat together while you stitch it to the bodice.

Setting the pleat

The last few steps will seem familiar.

1. Finish center edges of the skirt back pieces.

2. Sew skirt front and backs to their appropriate bodice pieces.

3. Press

4. Sew side seams and hem.

Click to enlarge.

I added some bias trim along the waist seam.

I have finished drawing the Phoebe pattern in Illustrator. I hope to have the other two done by the end of the weekend. Form for requesting the patterns is below.

Subscribe to our newsletter to receive all of the patterns.

Subscribe to our mailing list

* indicates required
In Tips, Doll Dressmaking 1
← Reviving a childhood memory with a dollWe have a winner, again! →
Instagram
ExtraSmall pajamas in the works. 😴
By Friday, I’m hoping to list 4 medium Phoebes and 3 ExtraSmall. This little redhead is one of the ExtraSmalls.
Still photography, sewing and getting ready to reopen. #etsysellersofinstagram
This Phoebe flew off to the west coast last week ✈️💕
Another shot of two adorables getting acquainted in London. 💕💕
Phoebe happily made it to London in her matching school uniform. 🇬🇧
Thanks @lanelaurenlane for letting people know about Phoebe&Egg ❤️ We have 6 skin colors of dolls.
The black squares will be gone in a few days. Let’s try to do something more long term. #blackouttuesday
Did I mention how happy I am to be doll making? Soooo happy 😊
On her way to a birthday girl🎂😘

Keep up with the patterns

Sign up with your email address to receive news and updates and the patterns.

We respect your privacy.

Thank you!
Blog
Help me find a Home for this Special Phoebe
about 6 years ago
Explaining Phoebe Doll Sizes
about 6 years ago
Kiki, the delivery doll
about 7 years ago
A Few Words About Ruby Bridges
about 7 years ago
Historical Heroines: Pure Inspiration for Young Girls
about 7 years ago
Doll Dressmaking Series: Puffy Sleeves
about 7 years ago
Doll Dressmaking: Fancy Sleeves Tutorial
about 7 years ago
Phoebe is now a new size: 16.5 inches
about 7 years ago
One Small Customer Spreads Creativity and Good
about 7 years ago
Grace O'Malley Crosses the Atlantic
about 7 years ago
  • Studio (2)
  • The Historic Collection (2)
  • Supplies for Making (4)
  • The Doll Friend Project (5)
  • Interviews (7)
  • My Personal Journey (7)
  • Handmade Stories (9)
  • Inspiration (9)
  • The Value of Handmade (11)
  • Materials (14)
  • Teaching a Child to Sew (14)
  • Things I Love (15)
  • Doll Dressmaking 2 (17)
  • Doll Dressmaking 1 (20)
  • Tips (27)


Dolls and Clothing are available in both Etsy Shop.

Powered by Squarespace