• Home
  • Blog
  • Featured on Etsy
  • About the Dollmaker
  • About the Handmade Dolls
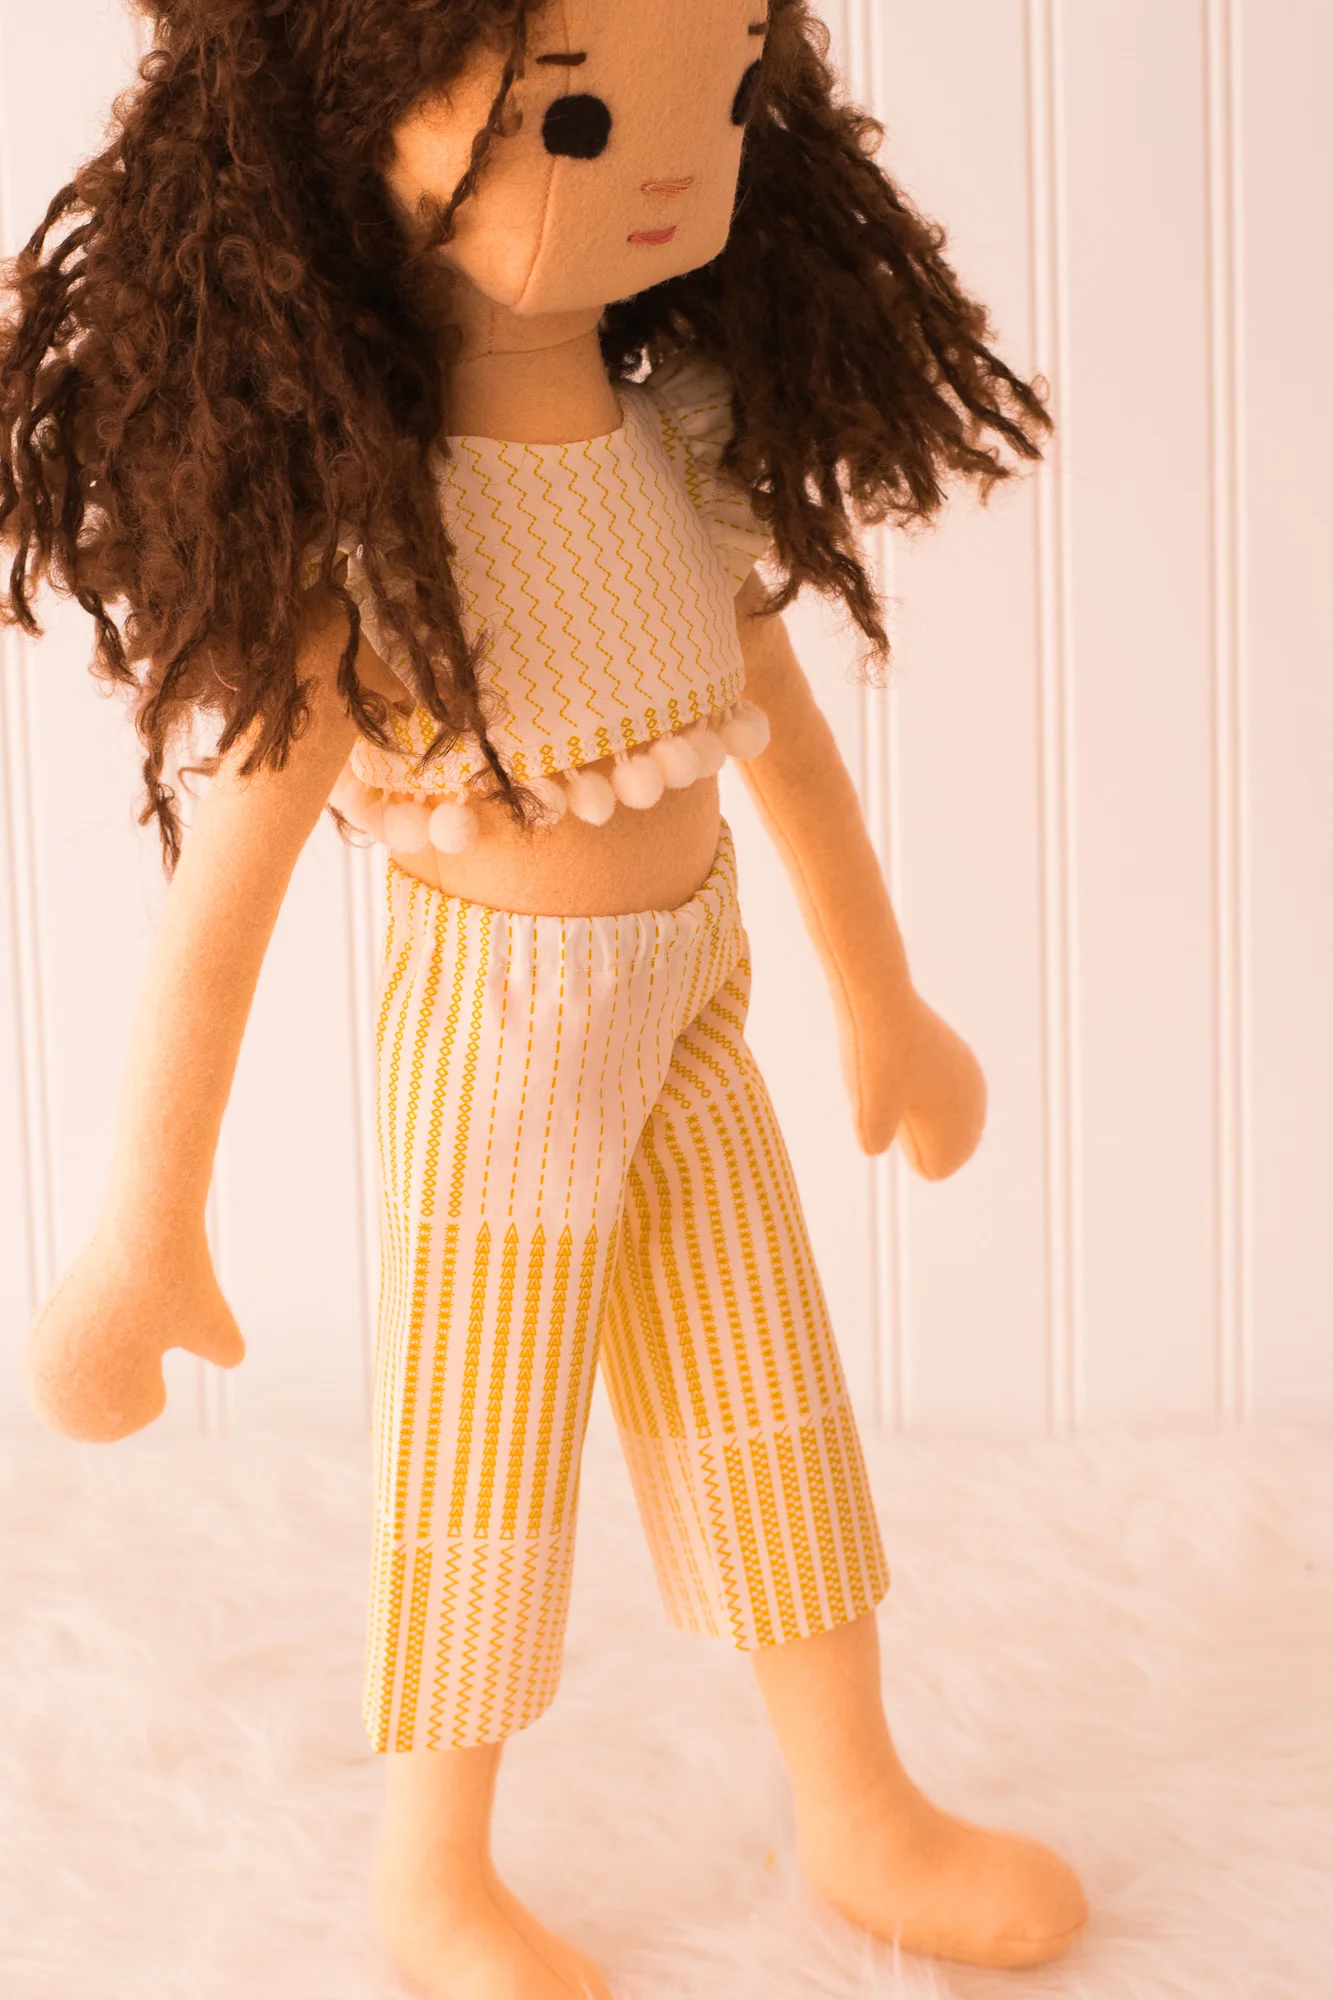
  • About the Doll Clothes
  • Scrappy Phoebe's Page
  • Reviews
  • Shop
  • My Etsy Shop
  • Doll Dressmaking Series
  • Teaching A Child to Sew
  • Dress Patterns for your Phoebe Doll
  • Scrappy Phoebe's Page (Copy)
  • Contact
  • Shop
Menu

Phoebe&Egg

Street Address
City, State, Zip
Phone Number
handmade dolls and doll clothing

Your Custom Text Here

Phoebe&Egg

  • Home
  • Blog
  • About
    • Featured on Etsy
    • About the Dollmaker
    • About the Handmade Dolls
    • About the Doll Clothes
  • Scrappy Phoebe's Page
  • Shop and Reviews
    • Reviews
    • Shop
    • My Etsy Shop
  • Doll Dressmaking
    • Doll Dressmaking Series
    • Teaching A Child to Sew
    • Dress Patterns for your Phoebe Doll
    • Scrappy Phoebe's Page (Copy)
  • Contact
  • Shop

Doll Dressmaking Series: Puffy Sleeves

January 6, 2018 Lisa Press
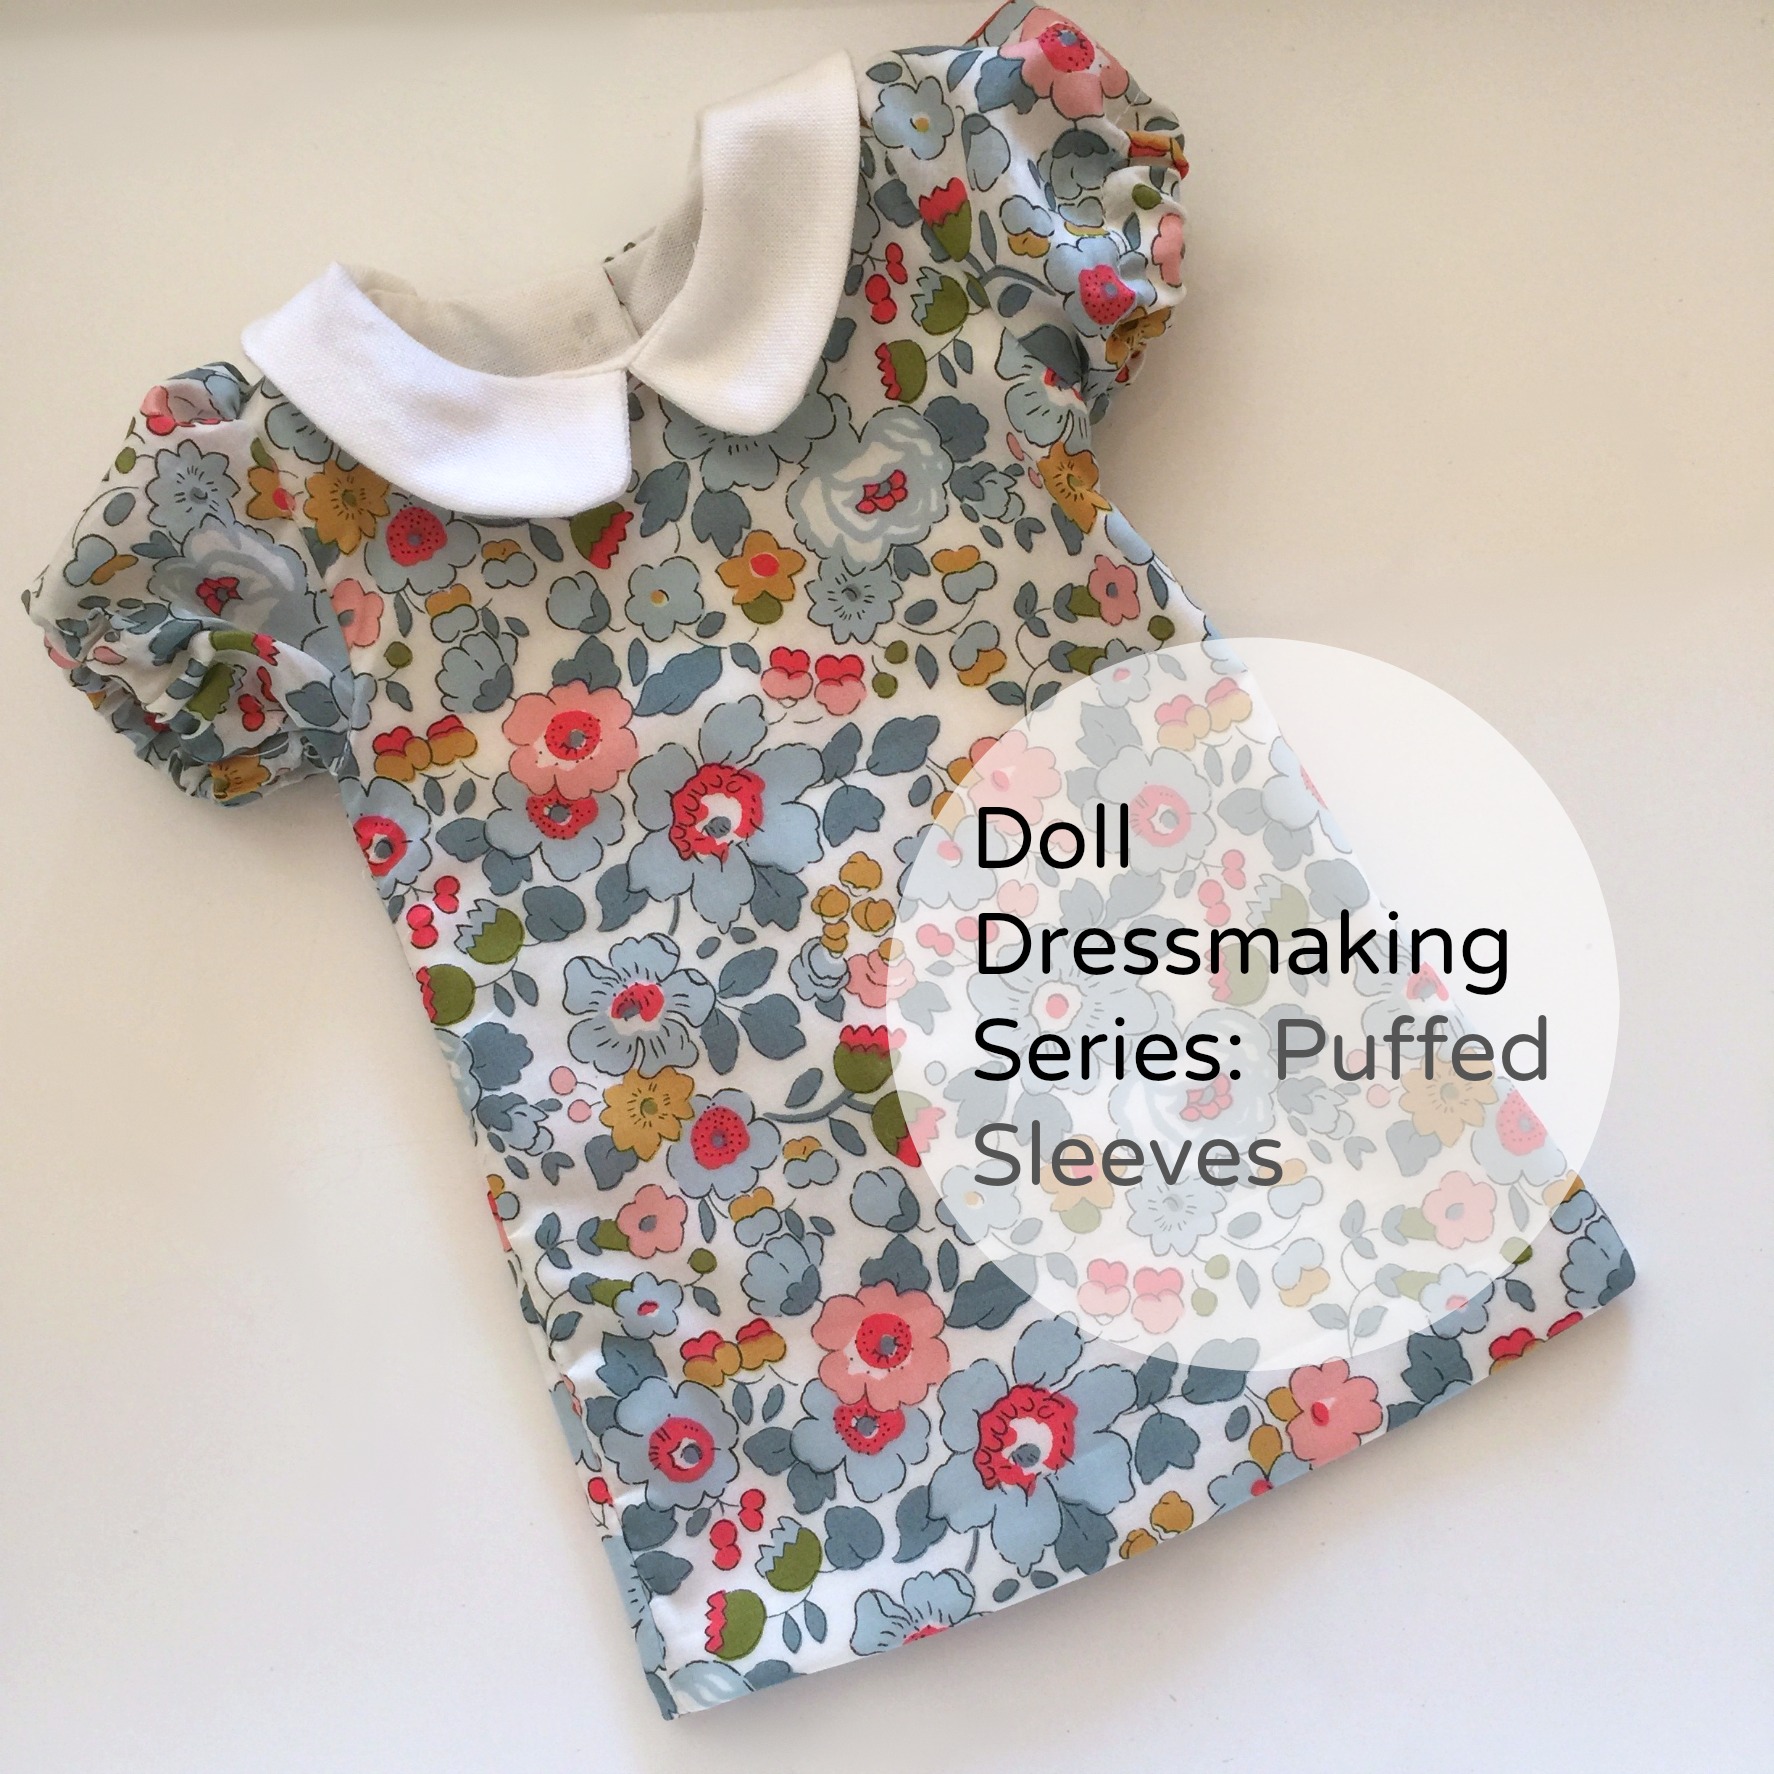
Puffed sleeve tutorial

Finally, a new tutorial. And I cut into my cherished Liberty fabric to make it. A double bonus... I hope.

A few months back I showed you how to make a doll dress with a basic sleeve. And a dress with a ruffled sleeve. Puffed sleeves takes those two skills one easy step further. 

Form for the puffed sleeve is at the end of this post.

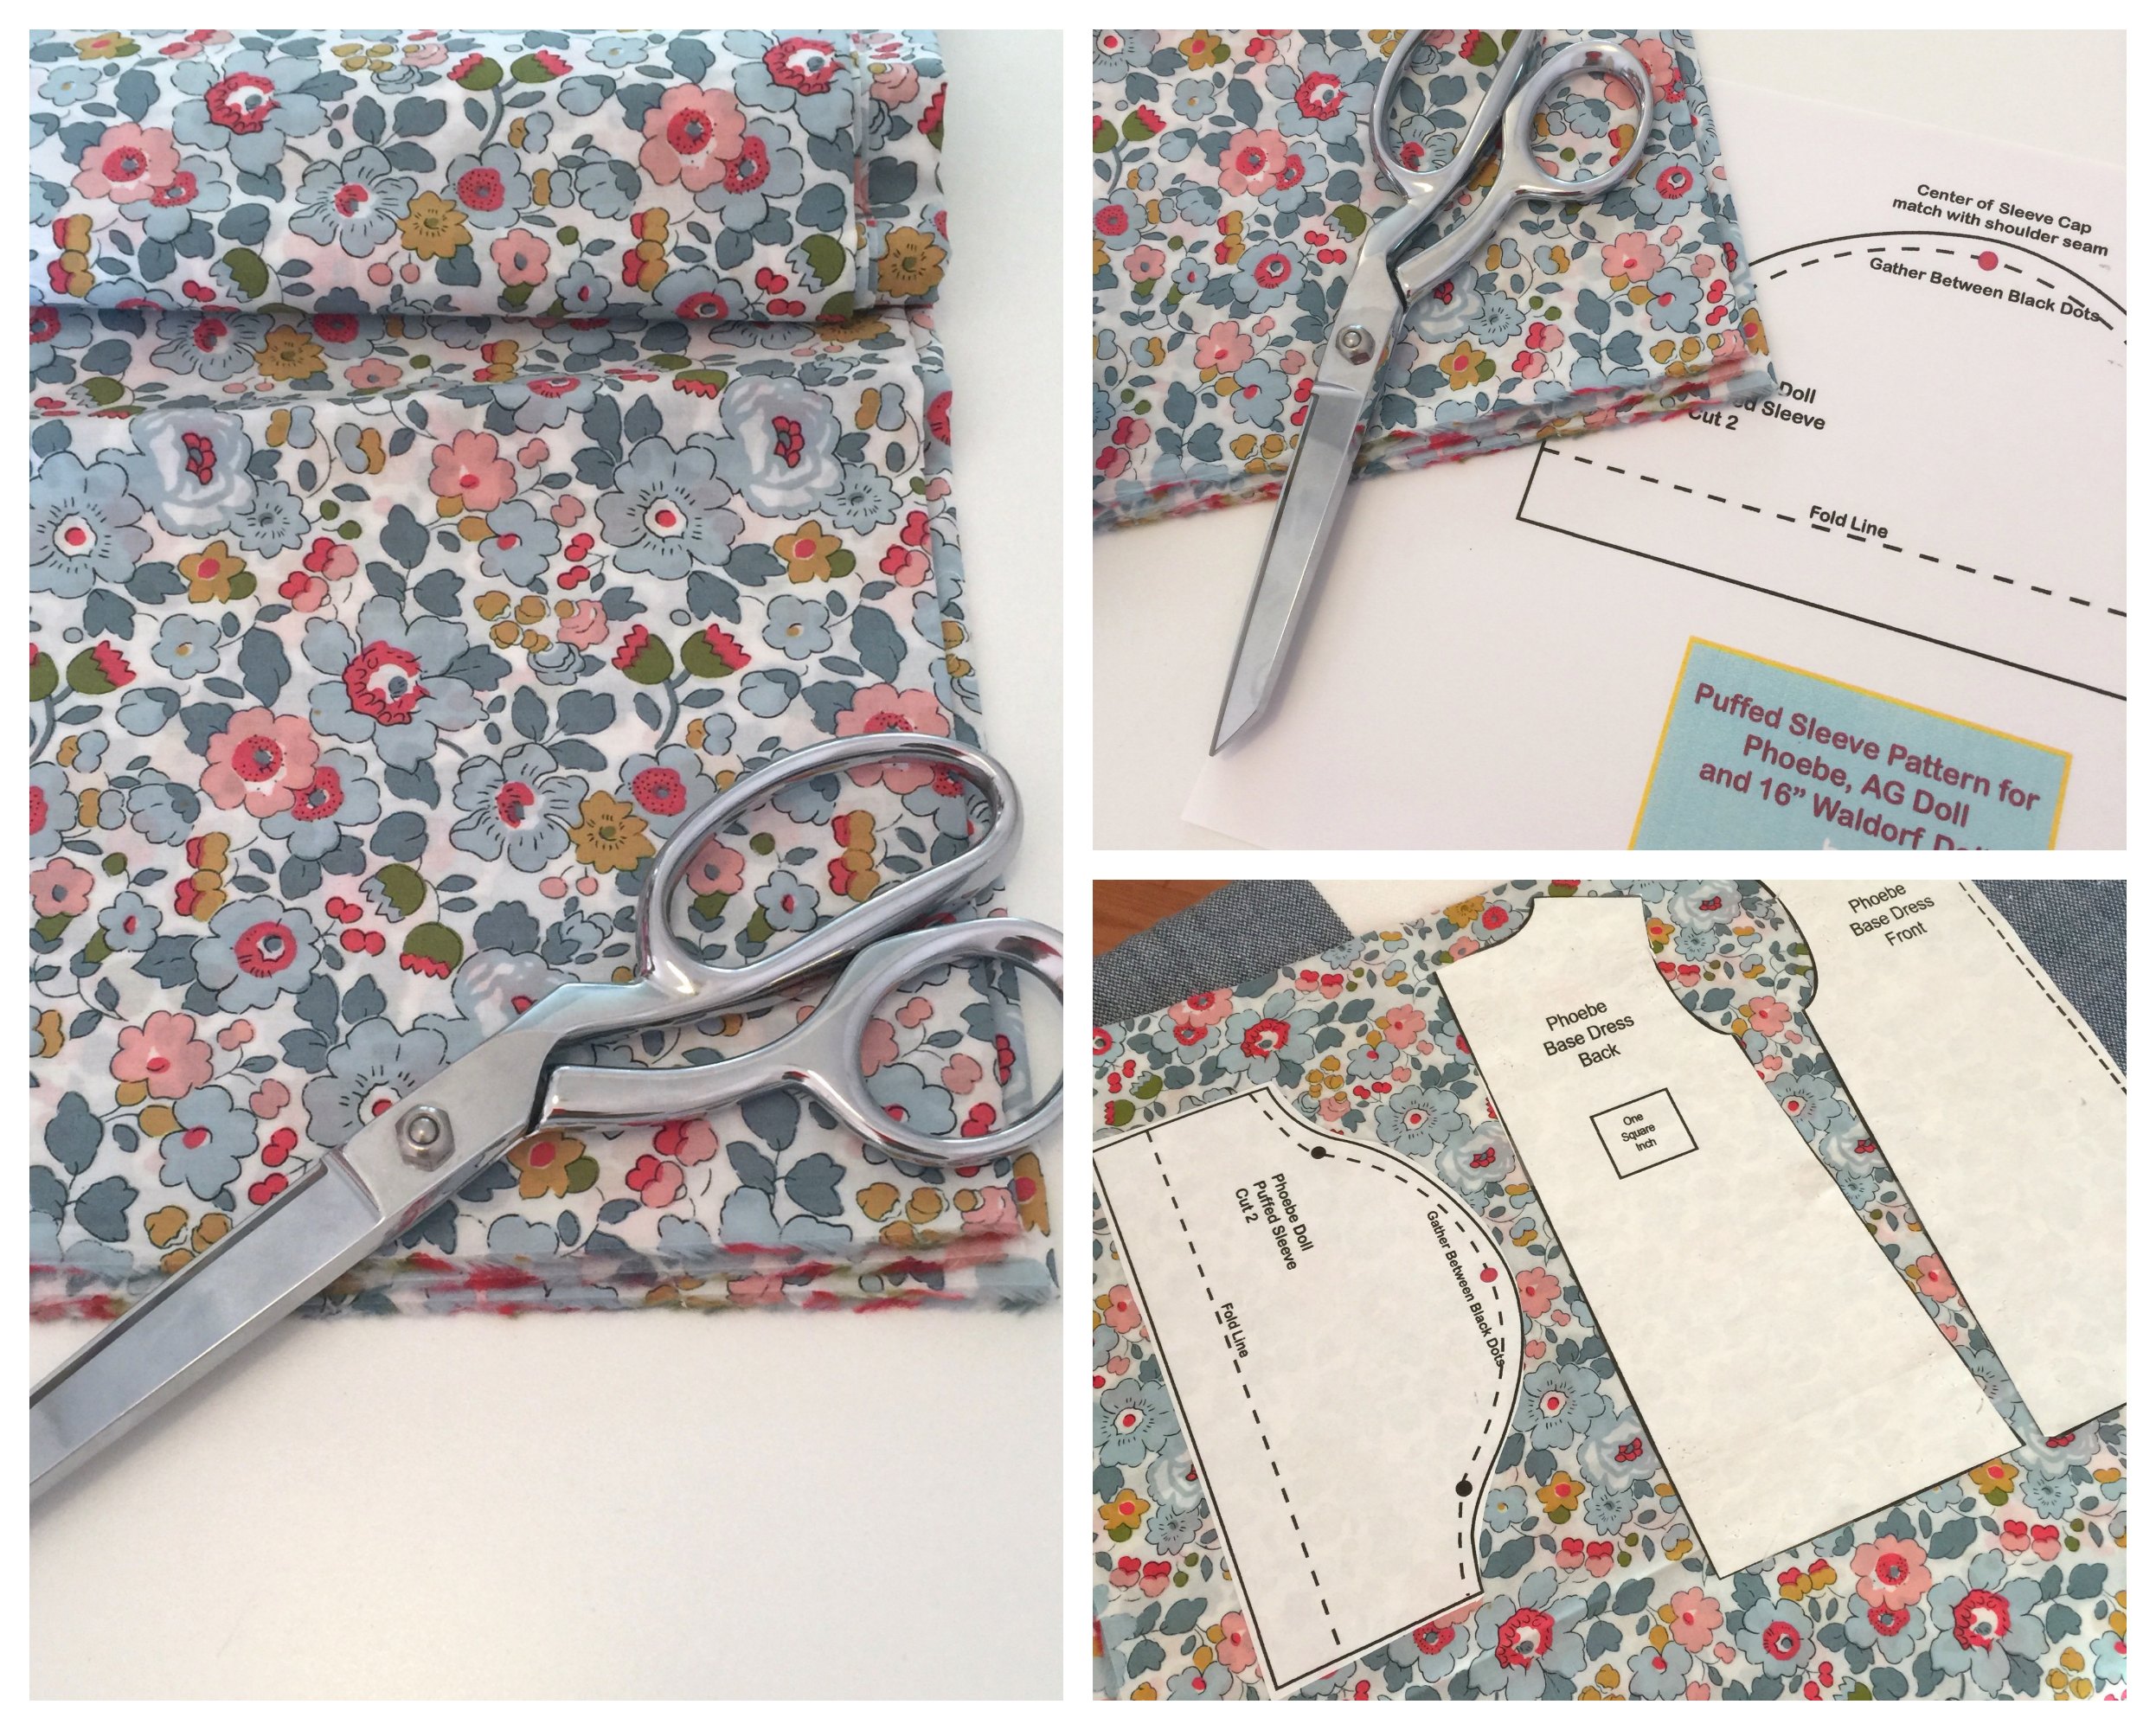
Cutting out pattern

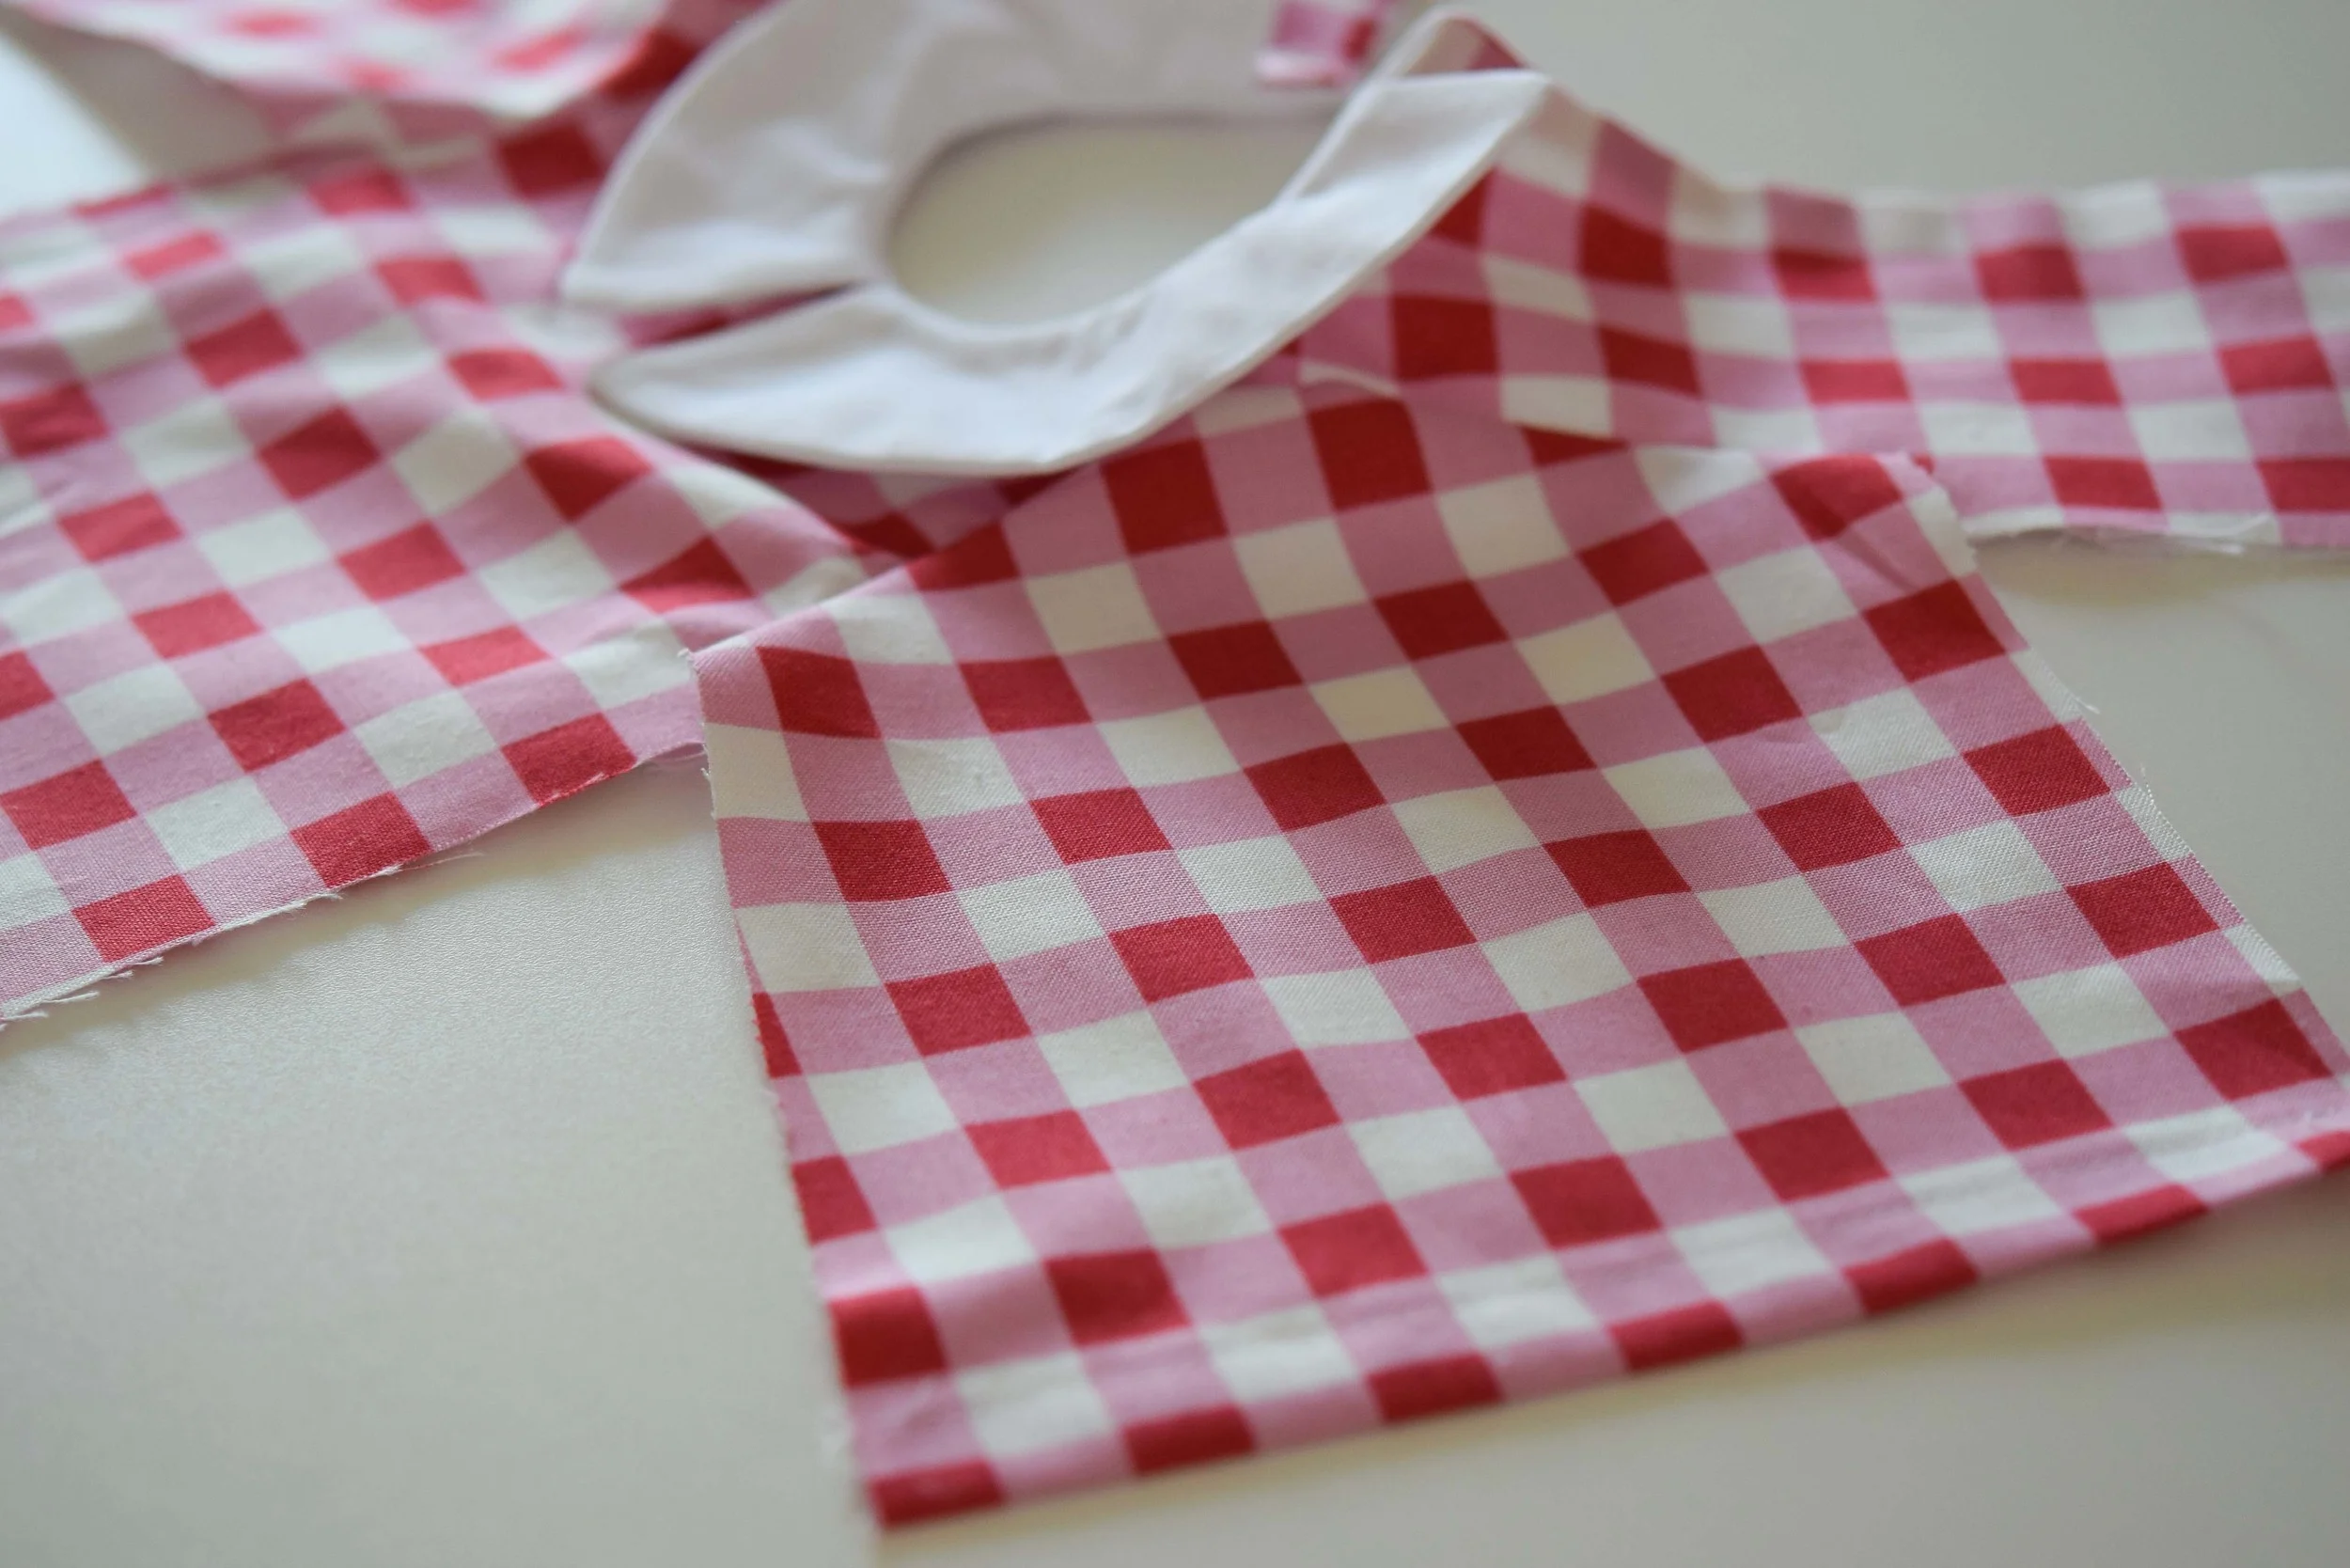
I'm attaching the puff sleeve pattern to the basic dress with a Peter Pan collar pattern. The dress is lined as described in the original tutorial, which can be found here.

So follow the instructions for the basic dress until it is time to make and attach the sleeves.

For puffed sleeves, you have a wider sleeve so the top will be gathered before you attach it to the armhole and the bottom will be puffed by making an elastic casing.

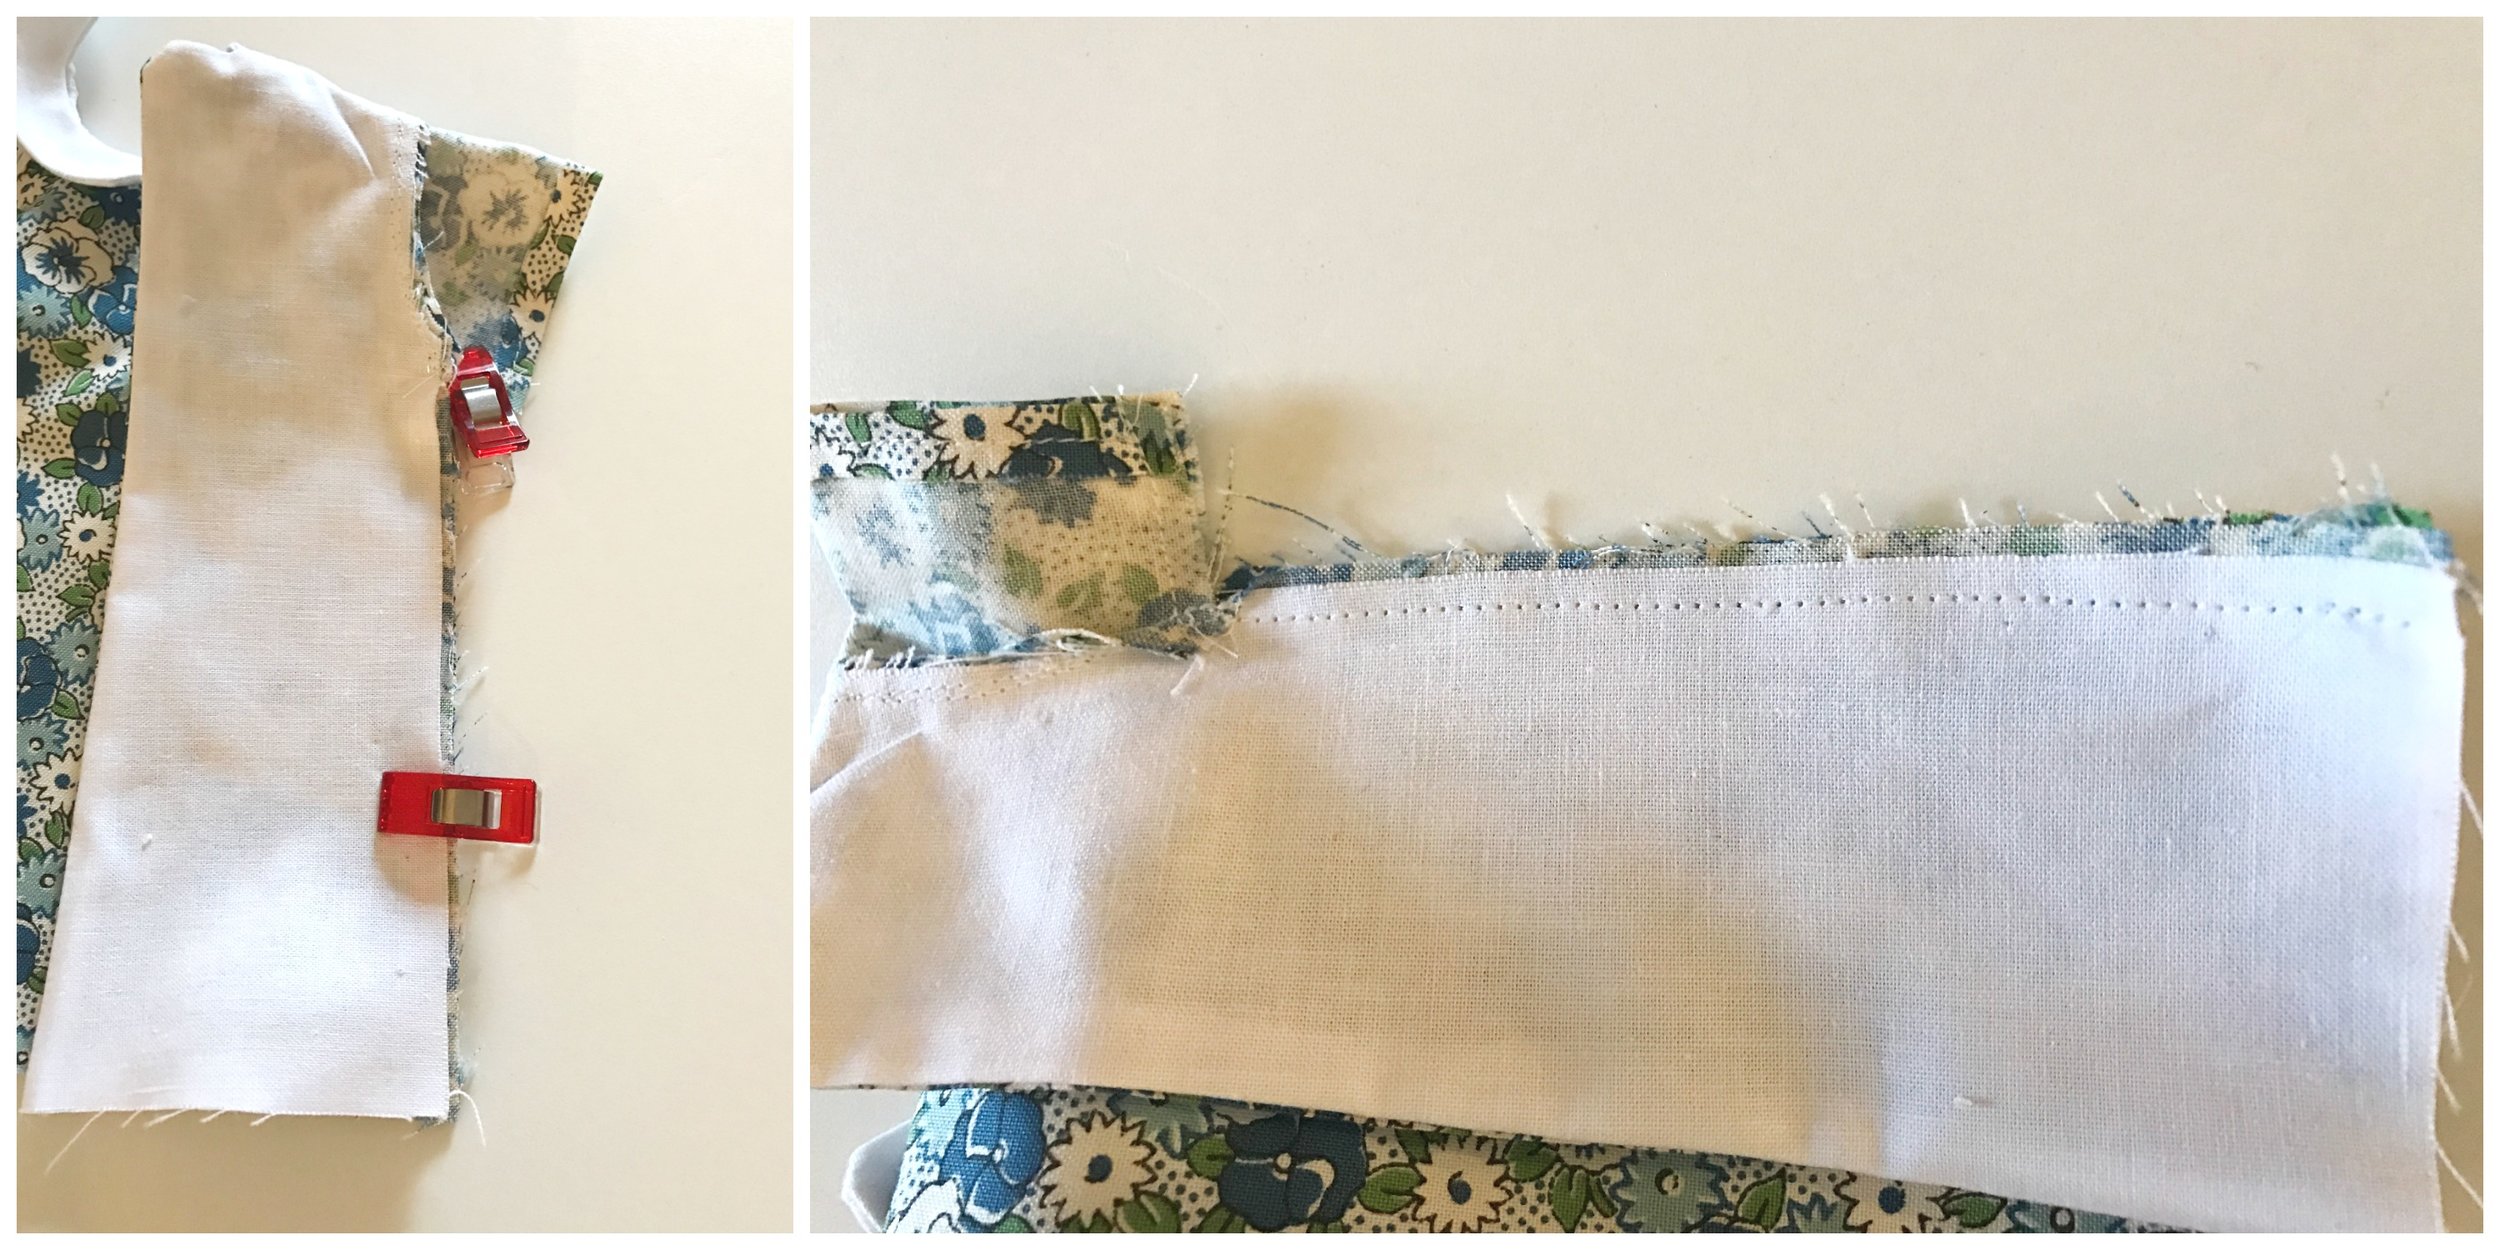
Hemming and making a casing for the elastic.

Hemming and making a casing for the elastic.

1. Press the bottom of each sleeve up 1/4 inch.

2. Machine stitch down.

3. Fold up again, about 3/8" and press. Stitch this down. This will form your elastic casing. Later, after you've attached the sleeves you will thread the elastic through this.

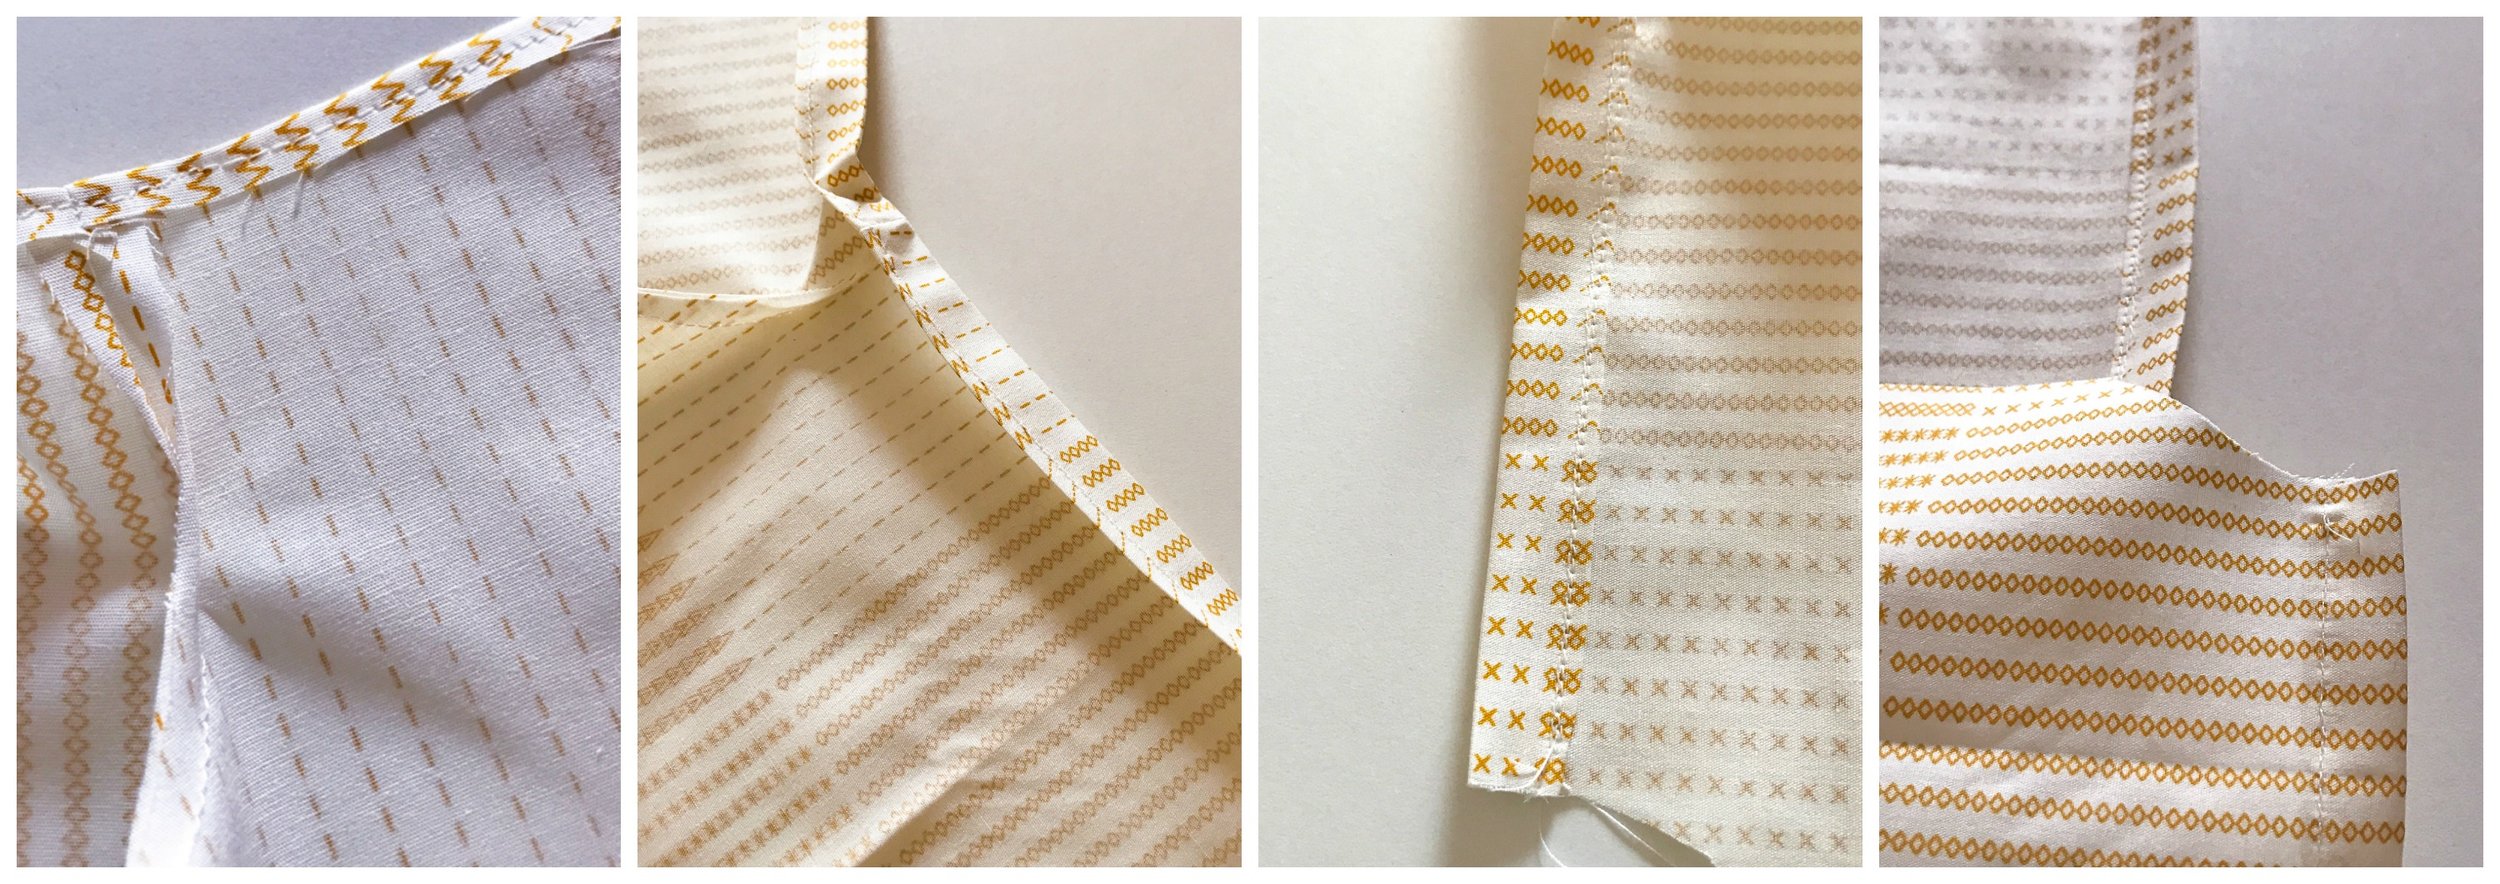
Basting the armhole edges

Basting the armhole edges

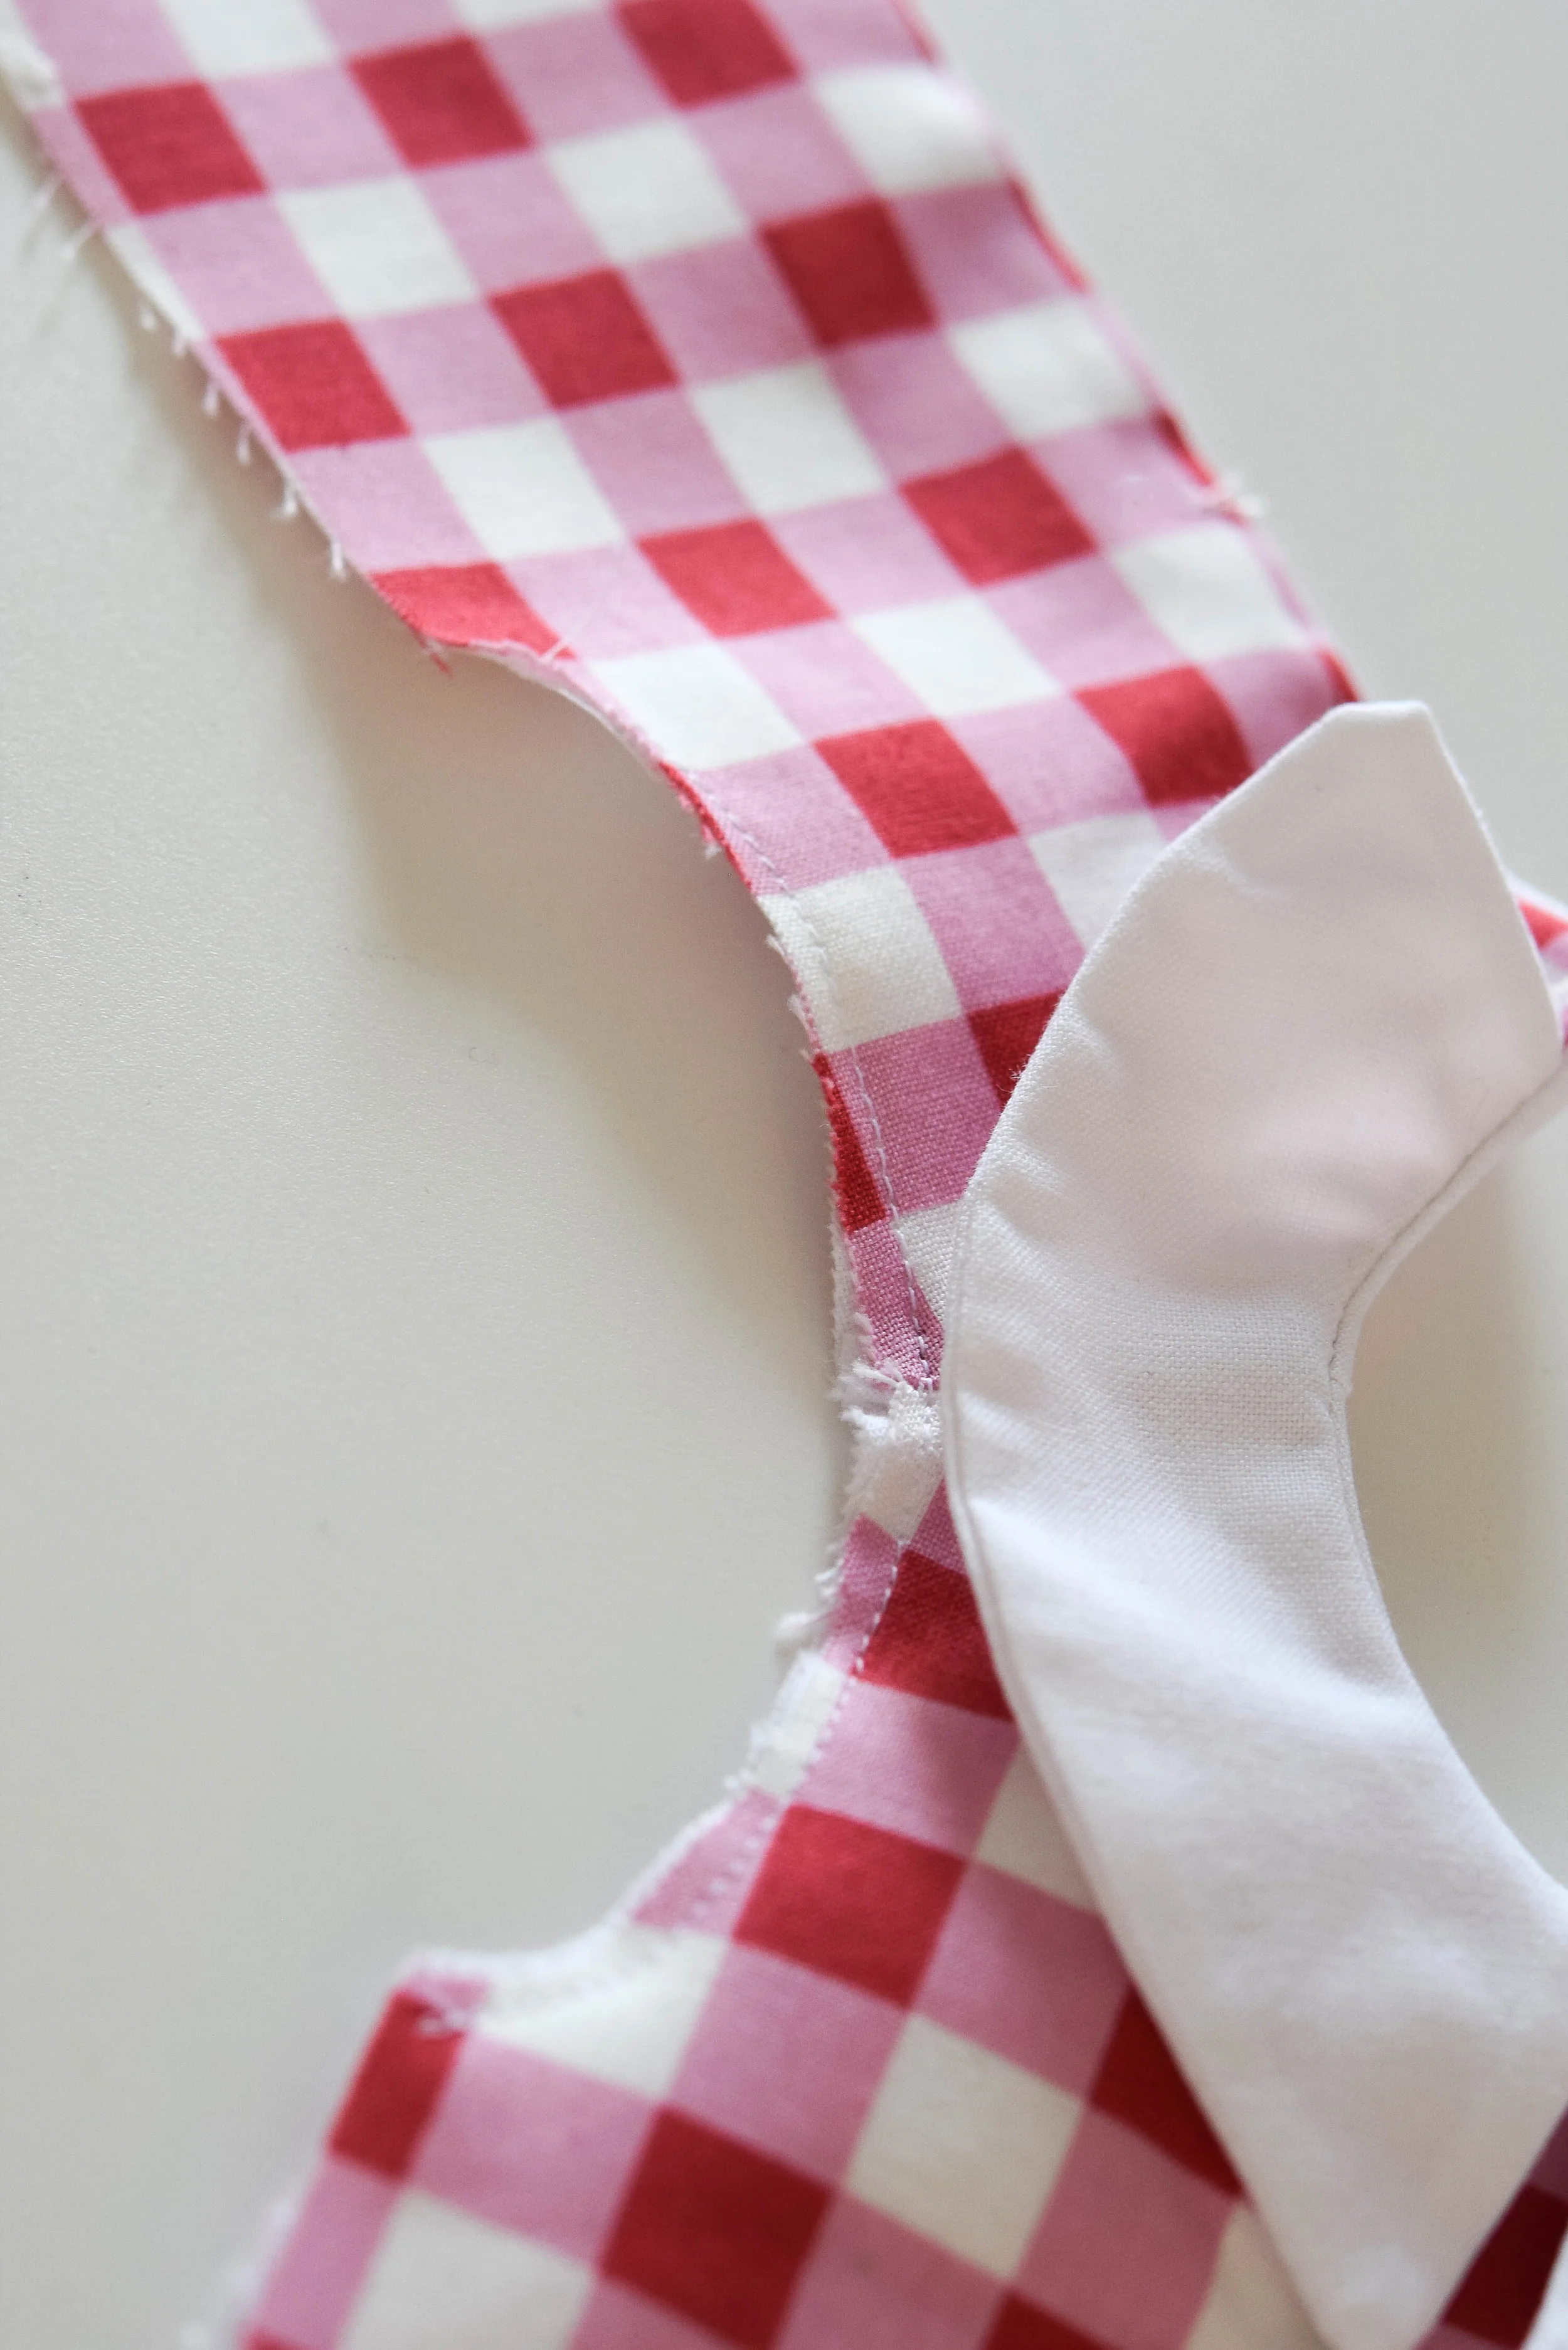
Baste both of the armhole edges. I do this to make sure the dress fabric and lining stay lined up.

1. Set your stitch length to the longest stitch length and sew two rows of stitches. Do not secure the ends of either of these rows. You will need to pull threads to gather, so leave a long thread at the end of each of these two rows of stitches. For more on gathering, look here. Scroll halfway down the tutorial for the gathering info.

2. After making the gathering rows for both sleeves, remember to clear your stitch length. You want to resume sewing with a regular stitch length, not super long stitches.

3. Pull your long threads to gather the top of the sleeve. It should be gathered until it is the length of the armhole.

Fitting the gathered sleeve to armhole

Fitting the gathered sleeve to armhole

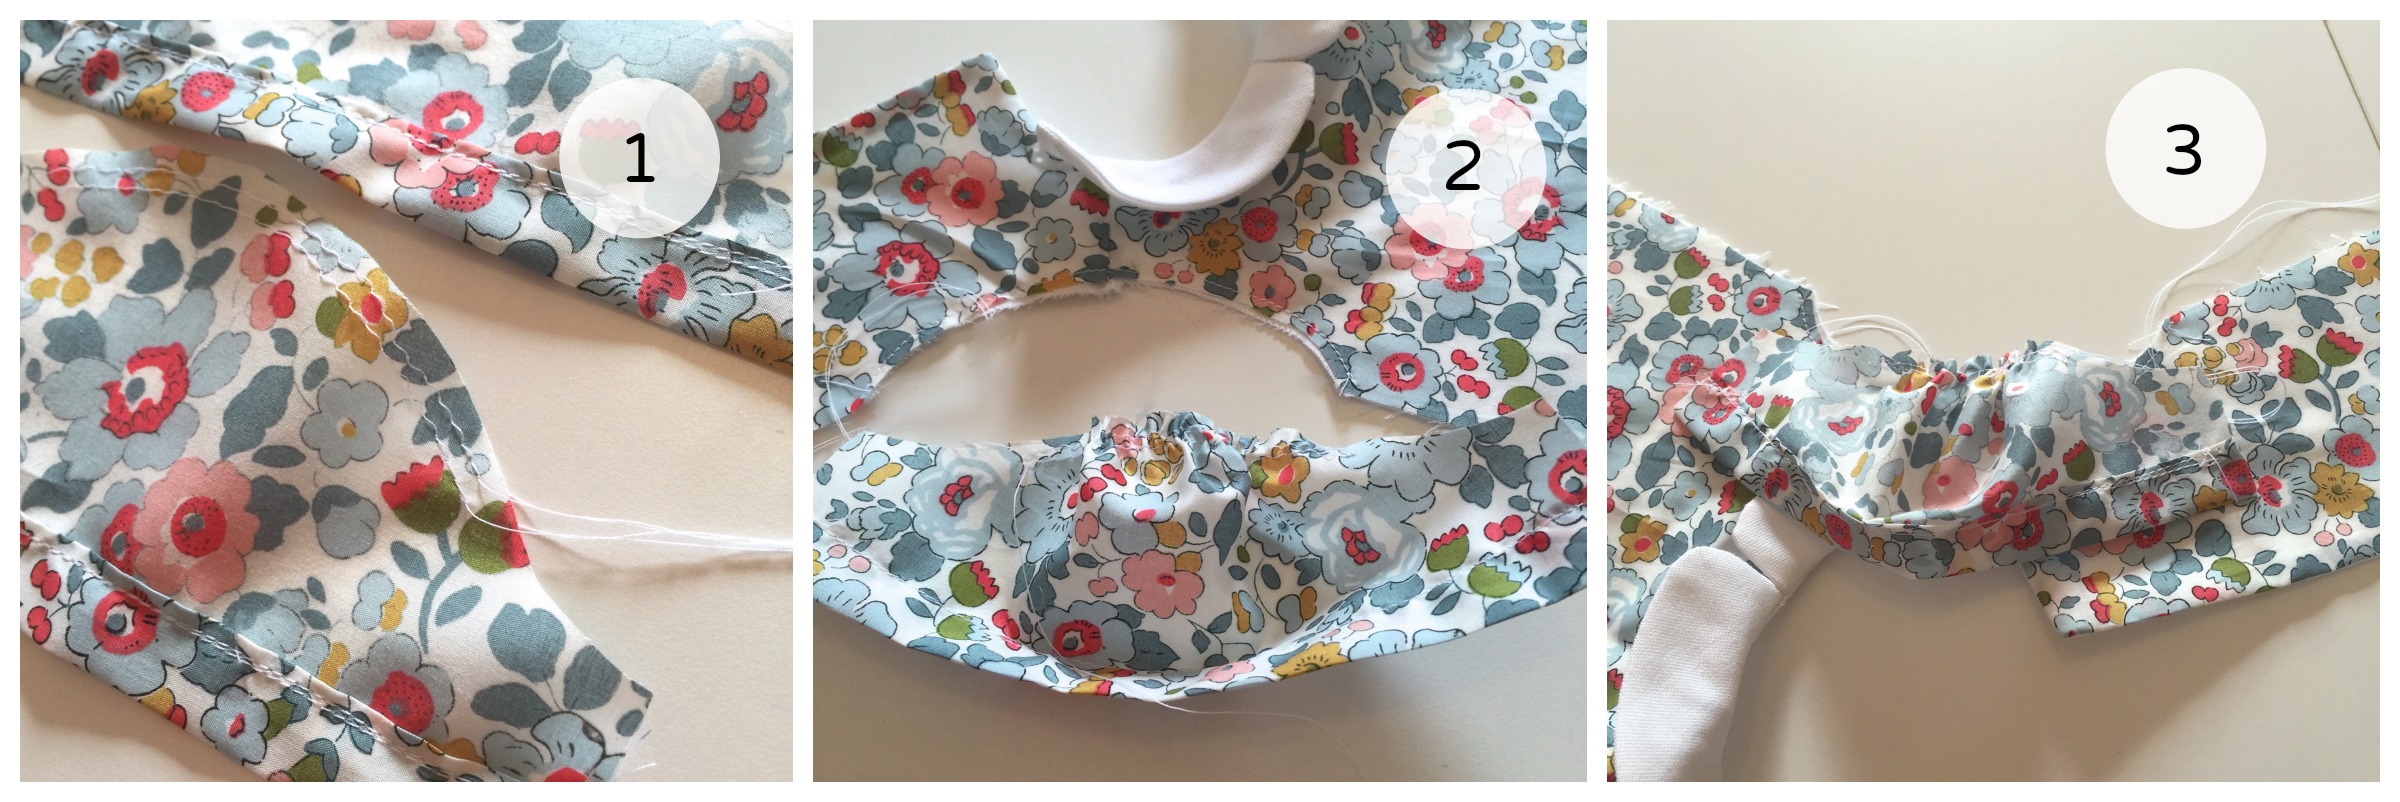
1. I think this is the trickiest part of sewing a puffed sleeve—gathering until the sleeve cap fits the armhole edge.

2. It's often hard to tall if you hold it this way.

3. I find, putting right sides together and bending it along the curve like this works best.

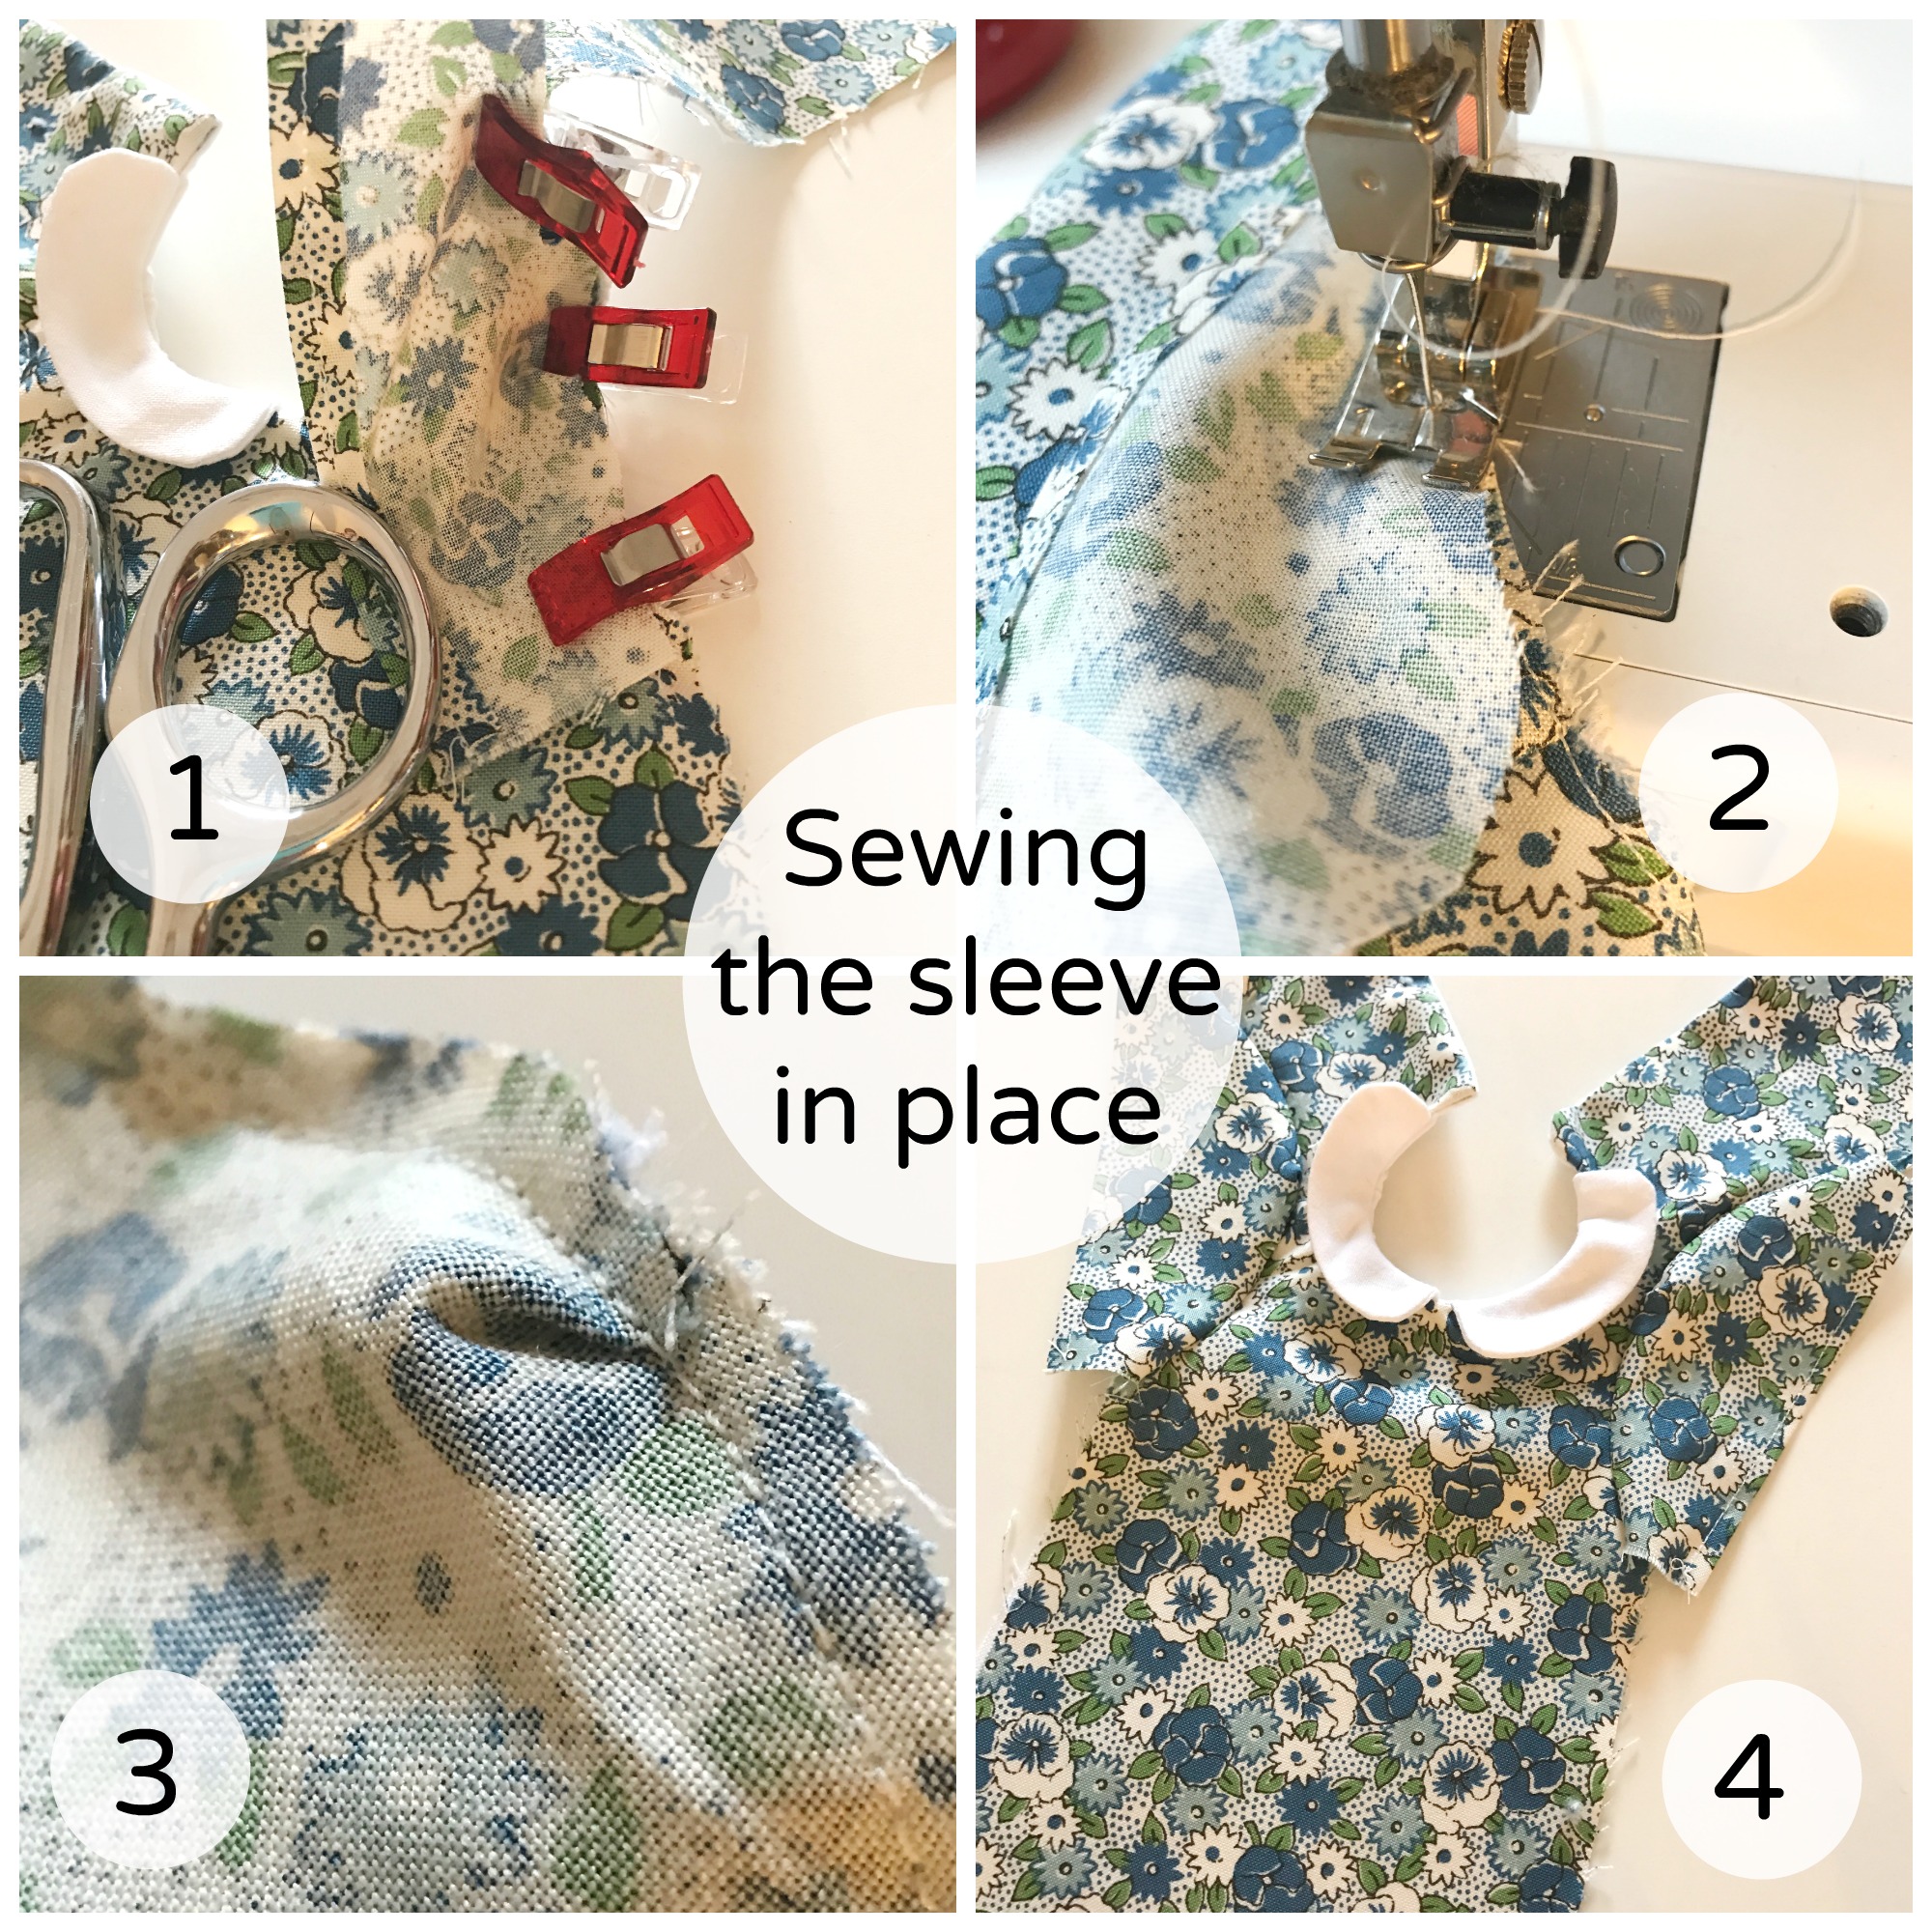
Attaching the puffed sleeves.

Attaching the puffed sleeves.

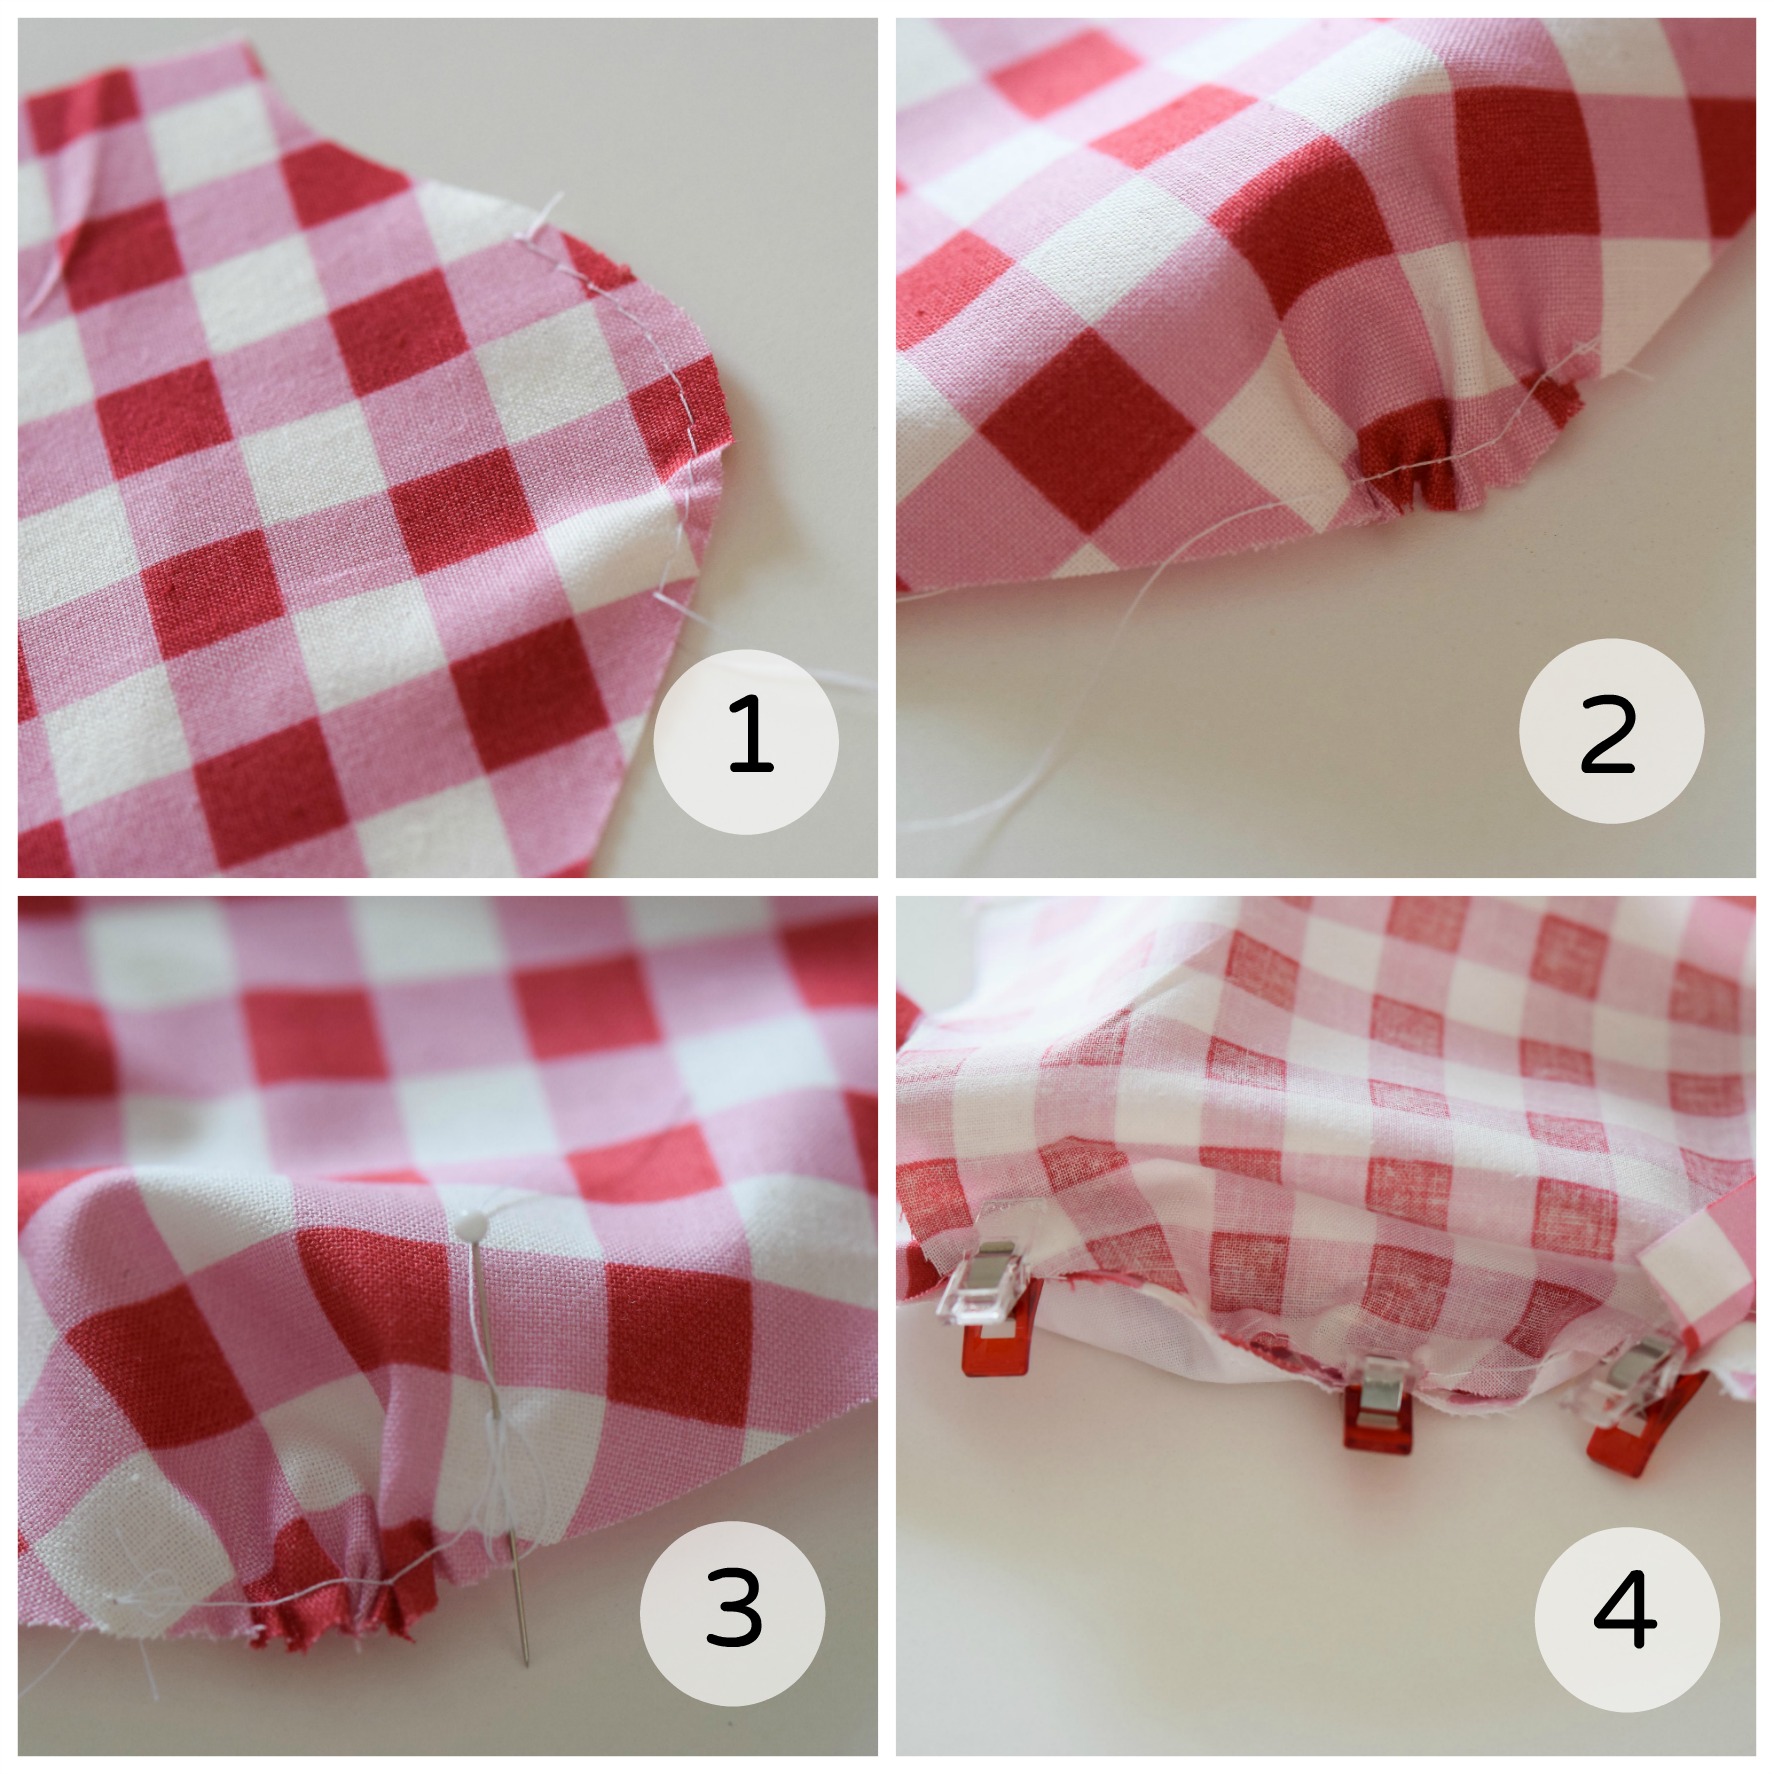
1. Secure threads and gathering (so it doesn't loosen while you are sewing) by winding around a pin, like this.

2. Pin sleeve (or wonderclip).

3. Sew making sure you sew on or below the second row of gathering so it does not show. You can also sew between the two rows and pull out the row that shows.

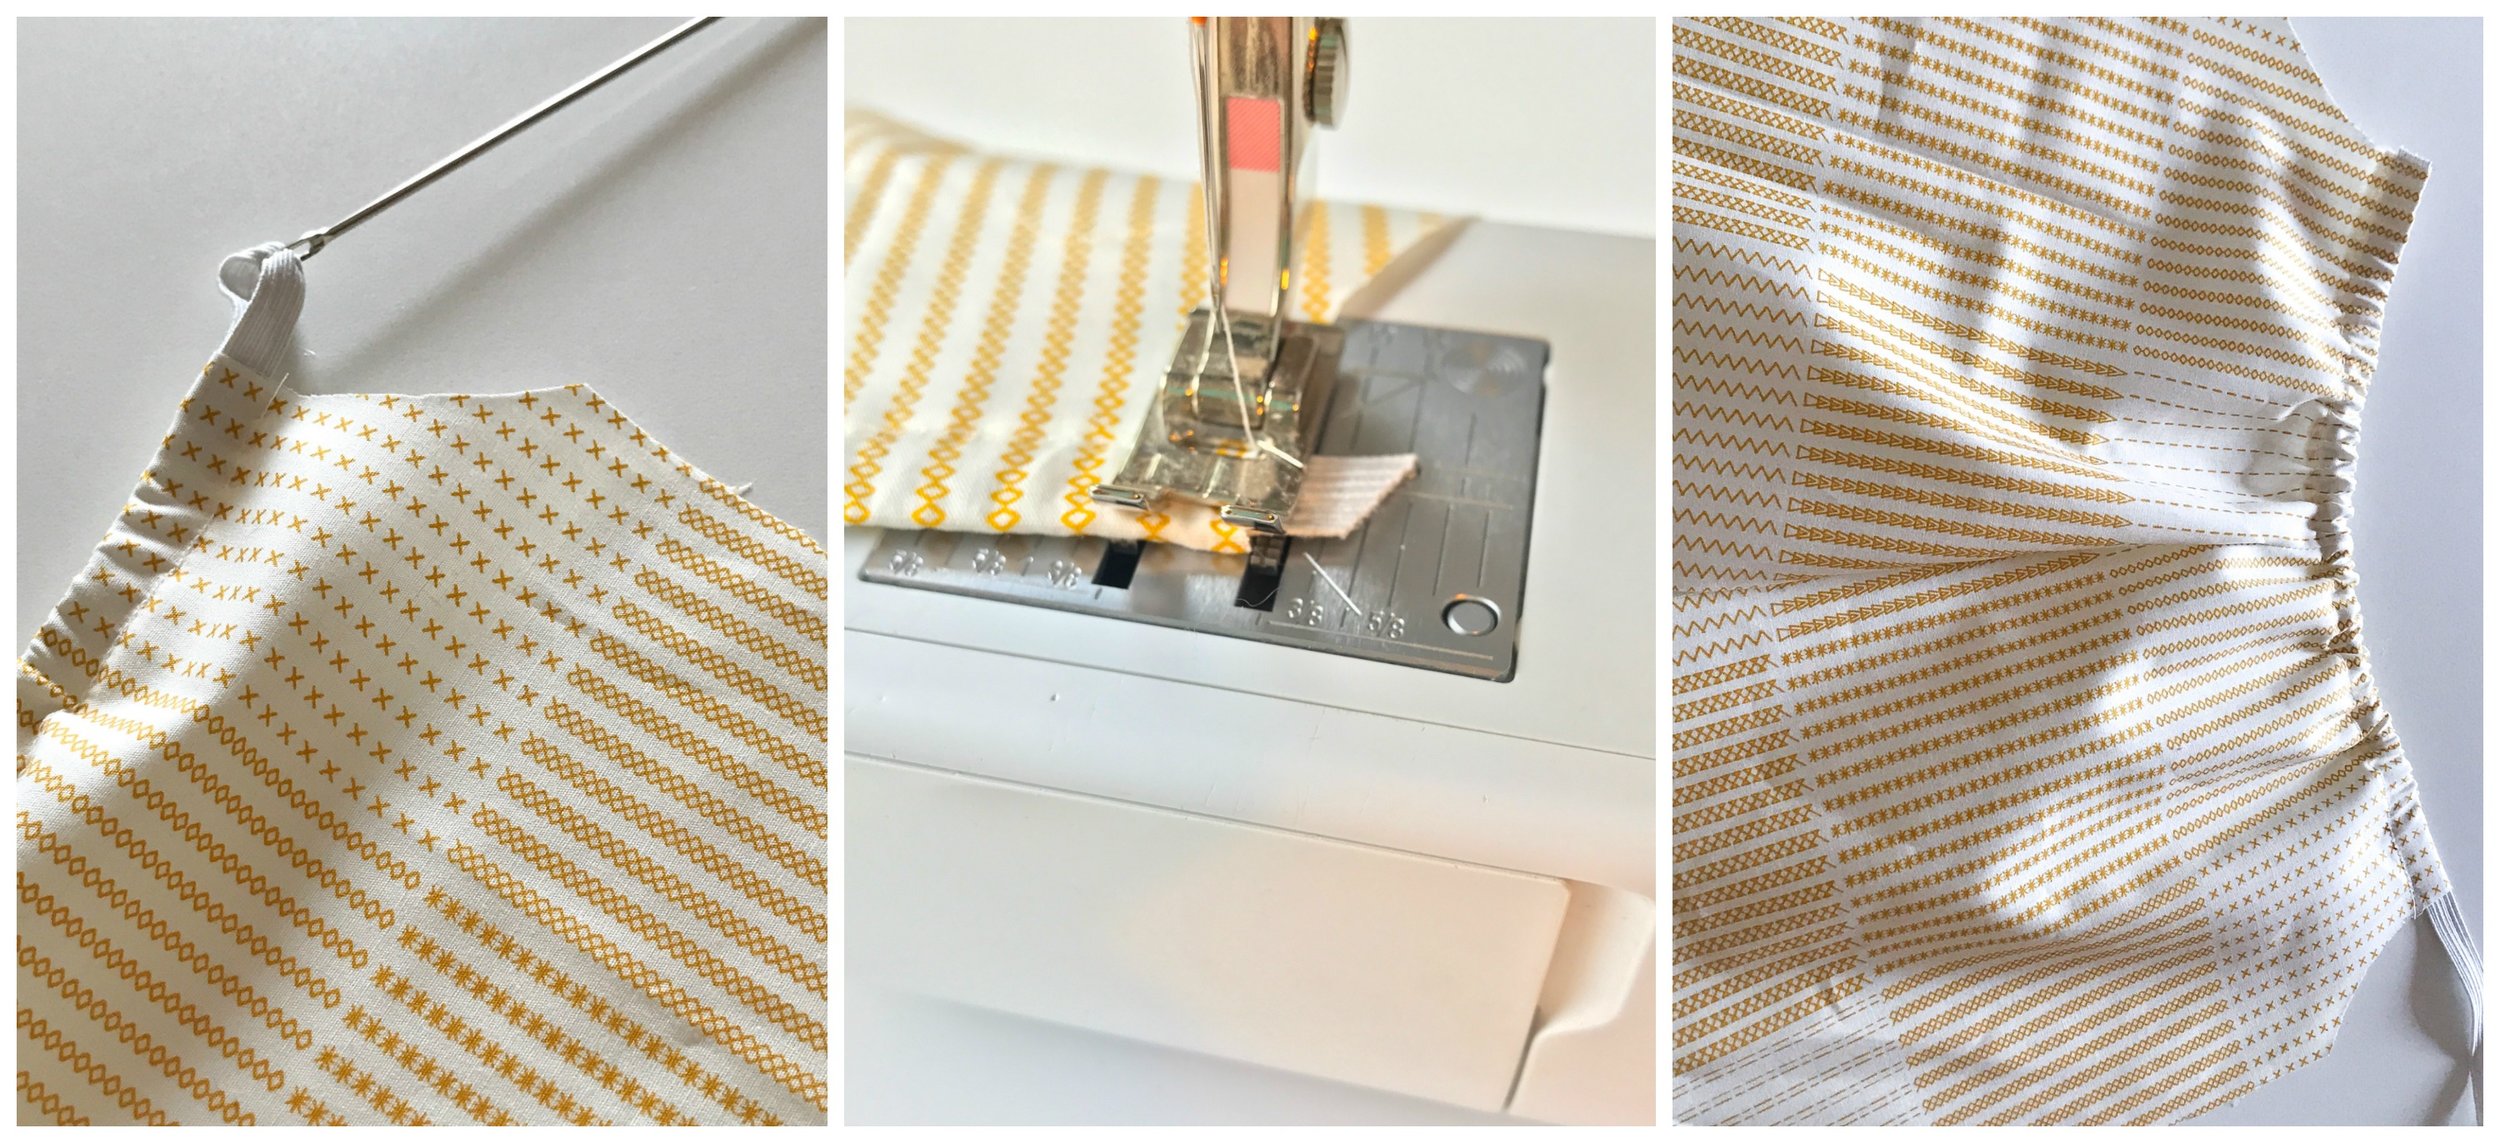
Threading the elastic

Threading the elastic

1. Cut two pieces of elastic. For Phoebe they should be at least 5 inches. For AG and Waldorf dolls at least 6 inches. I use 1/4 inch elastic.. The elastic has to be thin enough to slide through the casing you made.

2. You can thread the elastic through the casing with a number of things. Pictured here— a bodkin, a safety pin or an elastic threader. 

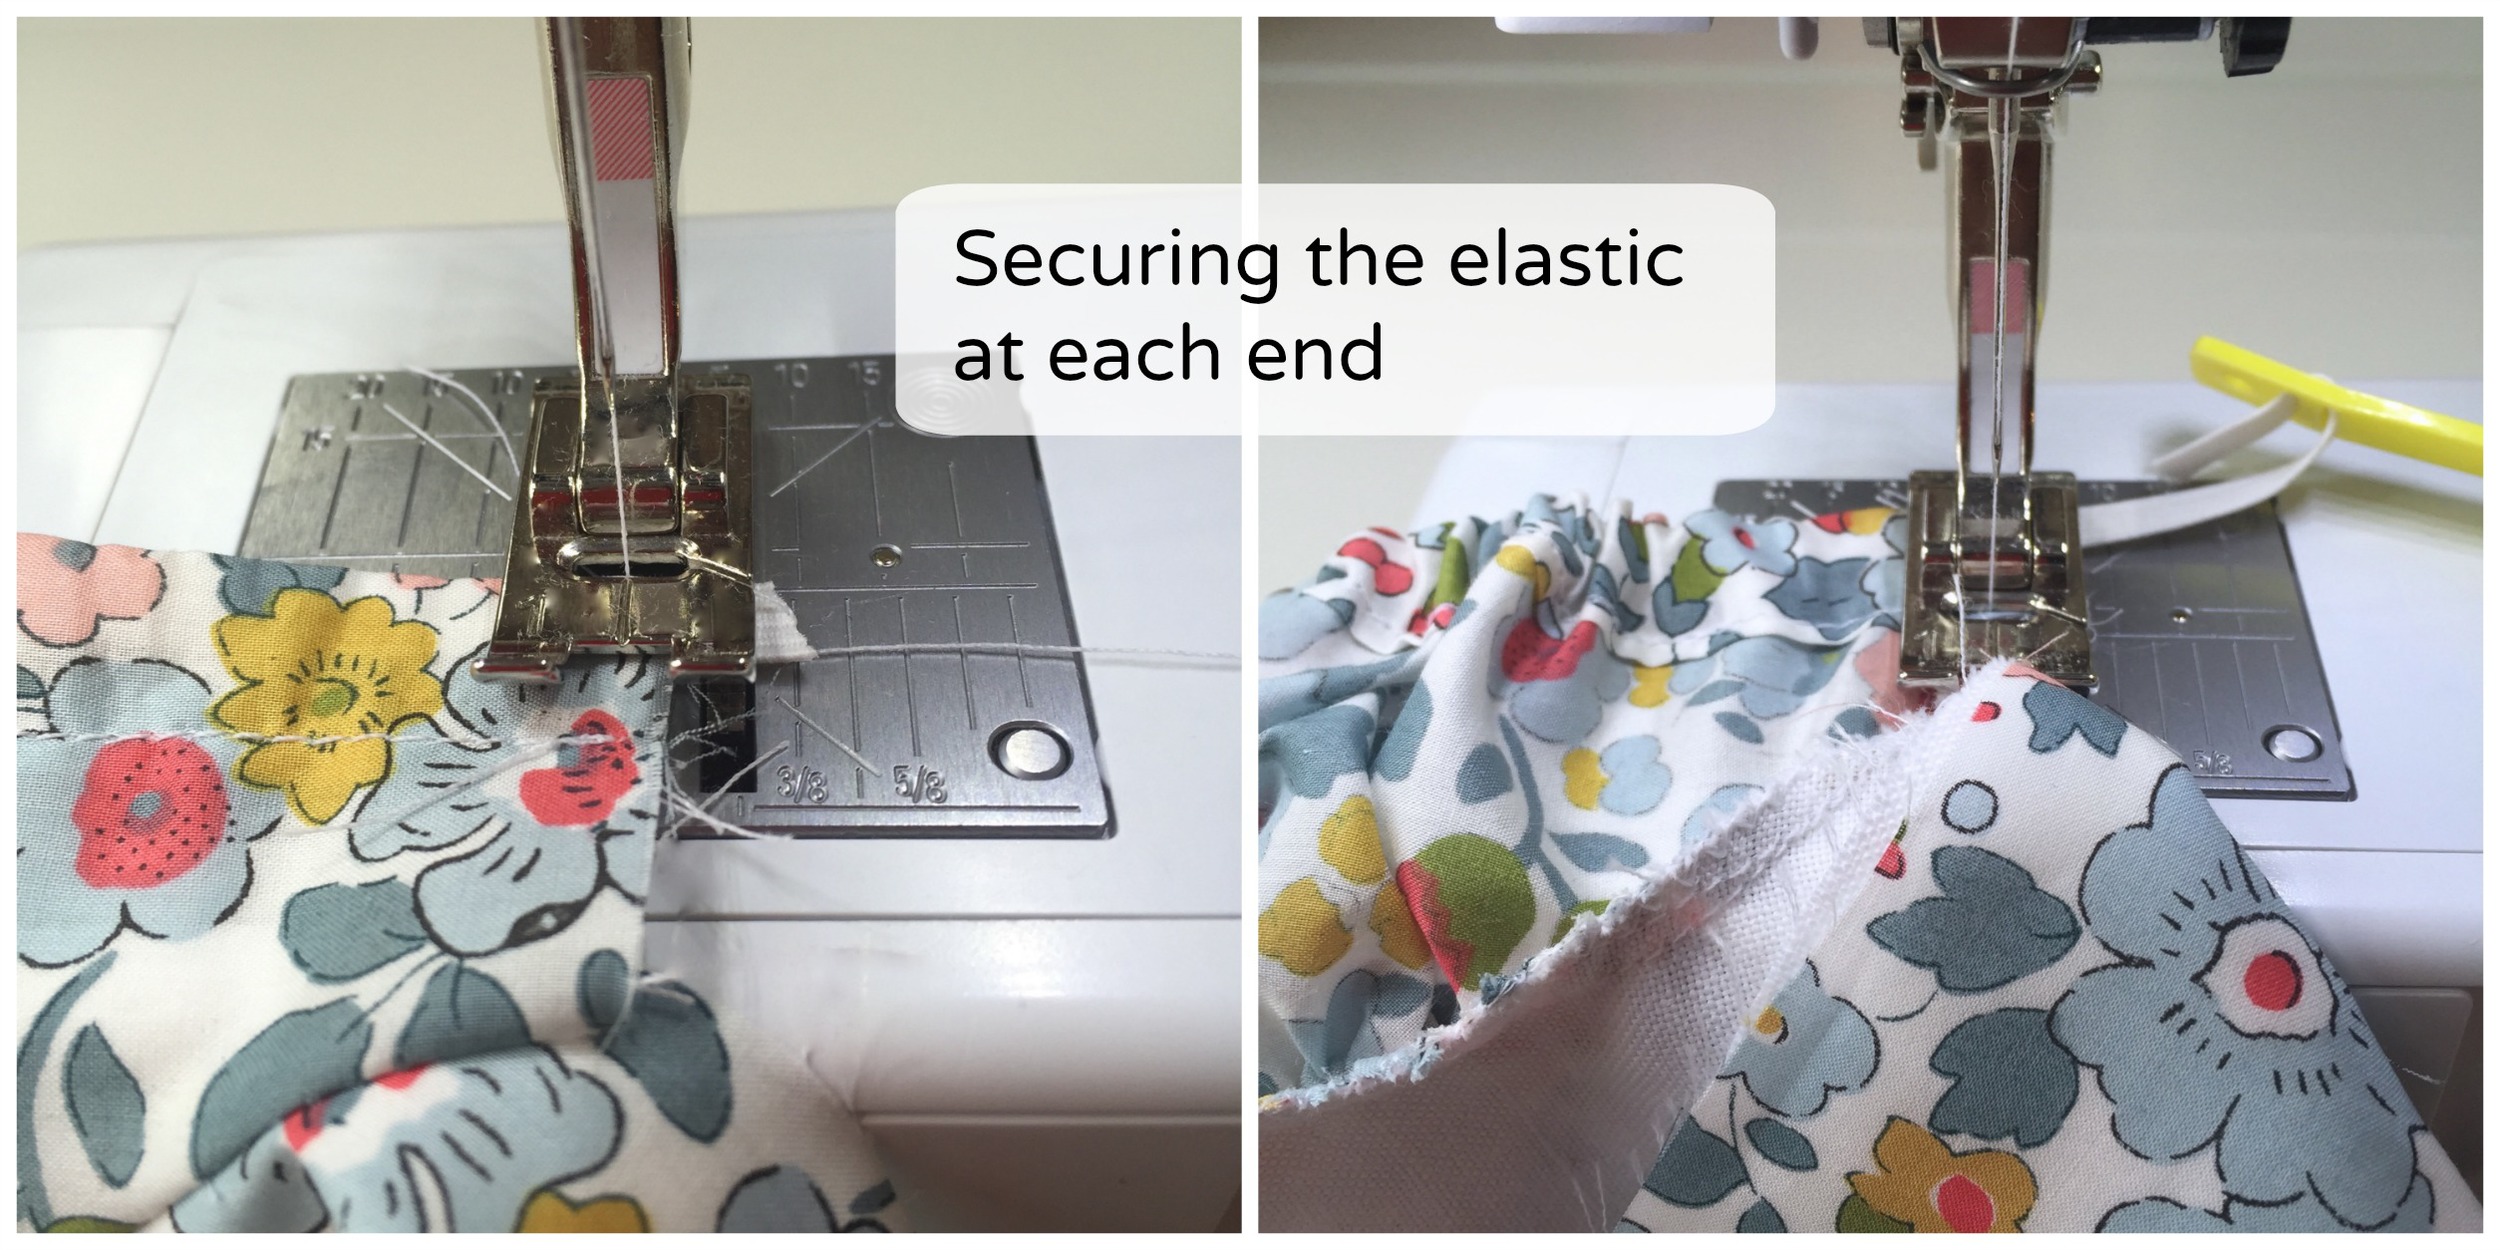
3 and 4. Thread the elastic through. You will need to secure the elastic on each end as shown below.

securing elastic.

For Phoebe the bottom of the sleeve should end up approximately 4 inches. For AG dolls and Waldorf, probably a little under 5 inches.

Measuring the elastic

Once the elastic is secured, you can sew up your side seams and finish your dress. 

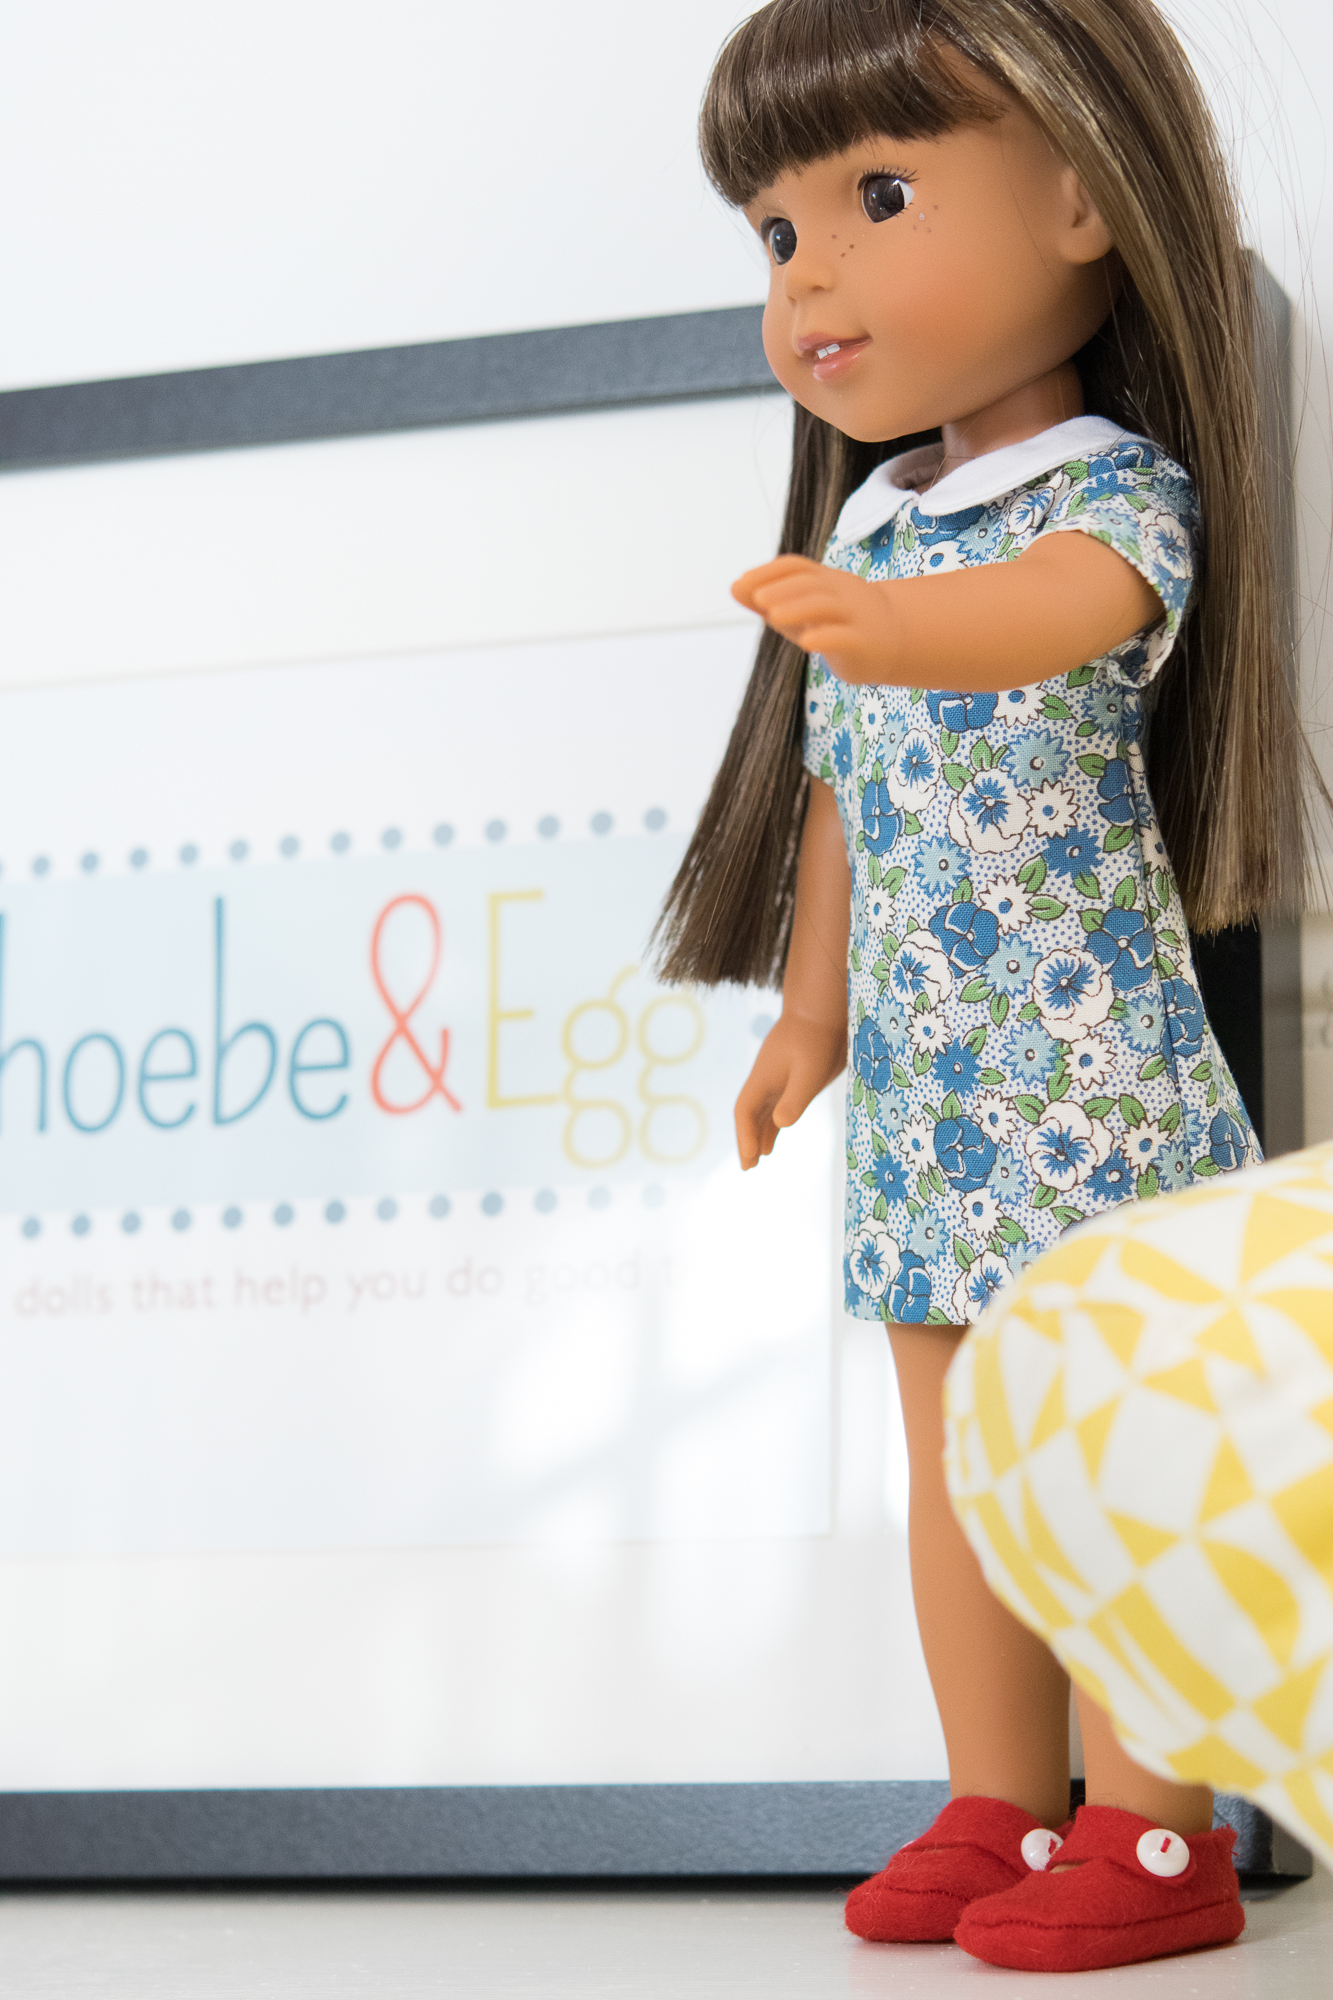
Puffed sleeve
Puff sleeve dress

Subscribe to our newsletter to get this pattern and all future pattern pieces automatically.

Subscribe to our mailing list

* indicates required
Featured
Doll Dressmaking Series: 10 Dresses
Apr 23, 2015
Doll Dressmaking Series: 10 Dresses
Apr 23, 2015
Apr 23, 2015
Doll Dressmaking Series: Adding a Pleat
Apr 10, 2015
Doll Dressmaking Series: Adding a Pleat
Apr 10, 2015
Apr 10, 2015
Doll Dressmaking Series: A Simple Trick
Mar 31, 2015
Doll Dressmaking Series: A Simple Trick
Mar 31, 2015
Mar 31, 2015
Doll Dressmaking Series: Playing with Fabric
Mar 17, 2015
Doll Dressmaking Series: Playing with Fabric
Mar 17, 2015
Mar 17, 2015
How to Use a Ruffler for sewing pleats or gathers
Mar 10, 2015
How to Use a Ruffler for sewing pleats or gathers
Mar 10, 2015
Mar 10, 2015
making a ruffle
Feb 2, 2015
Doll Dressmaking Series: Making a Ruffle with Perle Cotton
Feb 2, 2015
Feb 2, 2015
Four Ways to Make Ruffled Trim: Part 1
Jan 29, 2015
Four Ways to Make Ruffled Trim: Part 1
Jan 29, 2015
Jan 29, 2015
Doll Dressmaking Series: Ruffle Sleeves
Jan 8, 2015
Doll Dressmaking Series: Ruffle Sleeves
Jan 8, 2015
Jan 8, 2015
Doll Dressmaking Series: Beginners Sleeves
Jan 4, 2015
Doll Dressmaking Series: Beginners Sleeves
Jan 4, 2015
Jan 4, 2015
Doll Dressmaking Series: A trick for pockets
Nov 13, 2014
Doll Dressmaking Series: A trick for pockets
Nov 13, 2014
Nov 13, 2014


In Doll Dressmaking 2
5 Comments

Doll Dressmaking: Fancy Sleeves Tutorial

January 5, 2018 Lisa Press
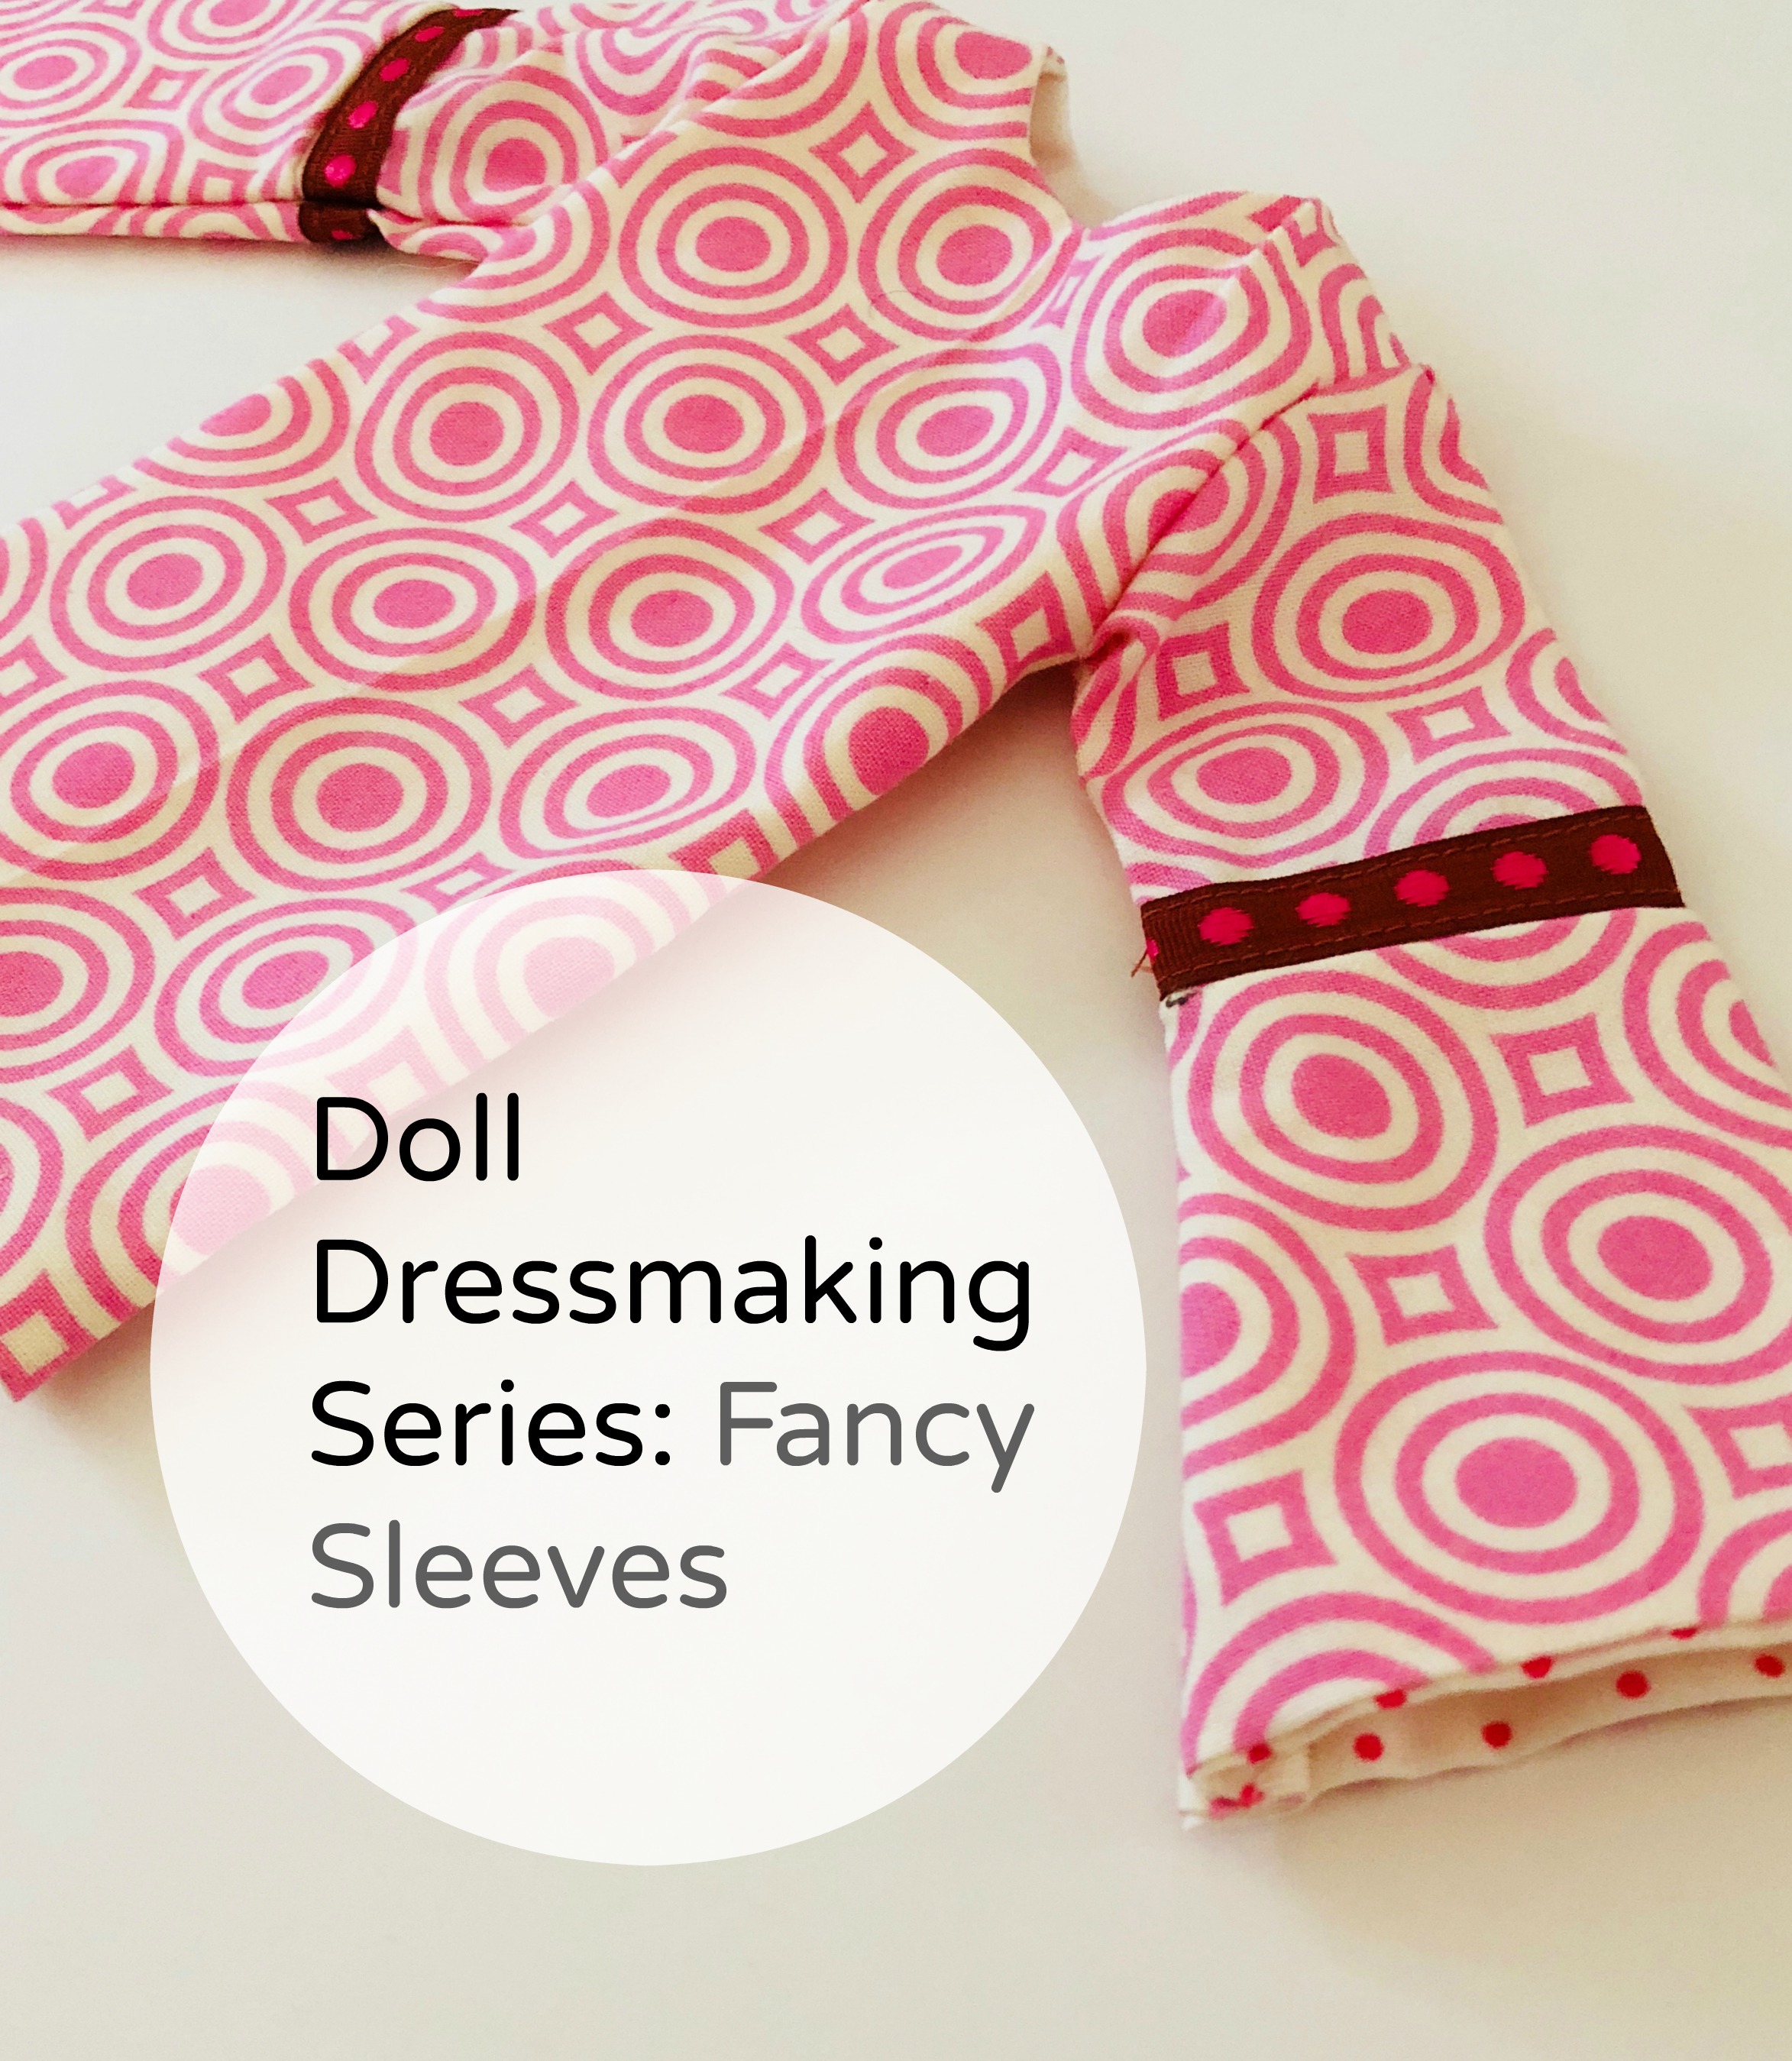
Fancy sleeves

"Fancy" sleeves can give a doll dress 70s retro look, or even a medieval look. You can make the bottom of the sleeves wider for a more extreme look. I lined my sleeves, but the bottom can be unlined or edged in trim. Have fun

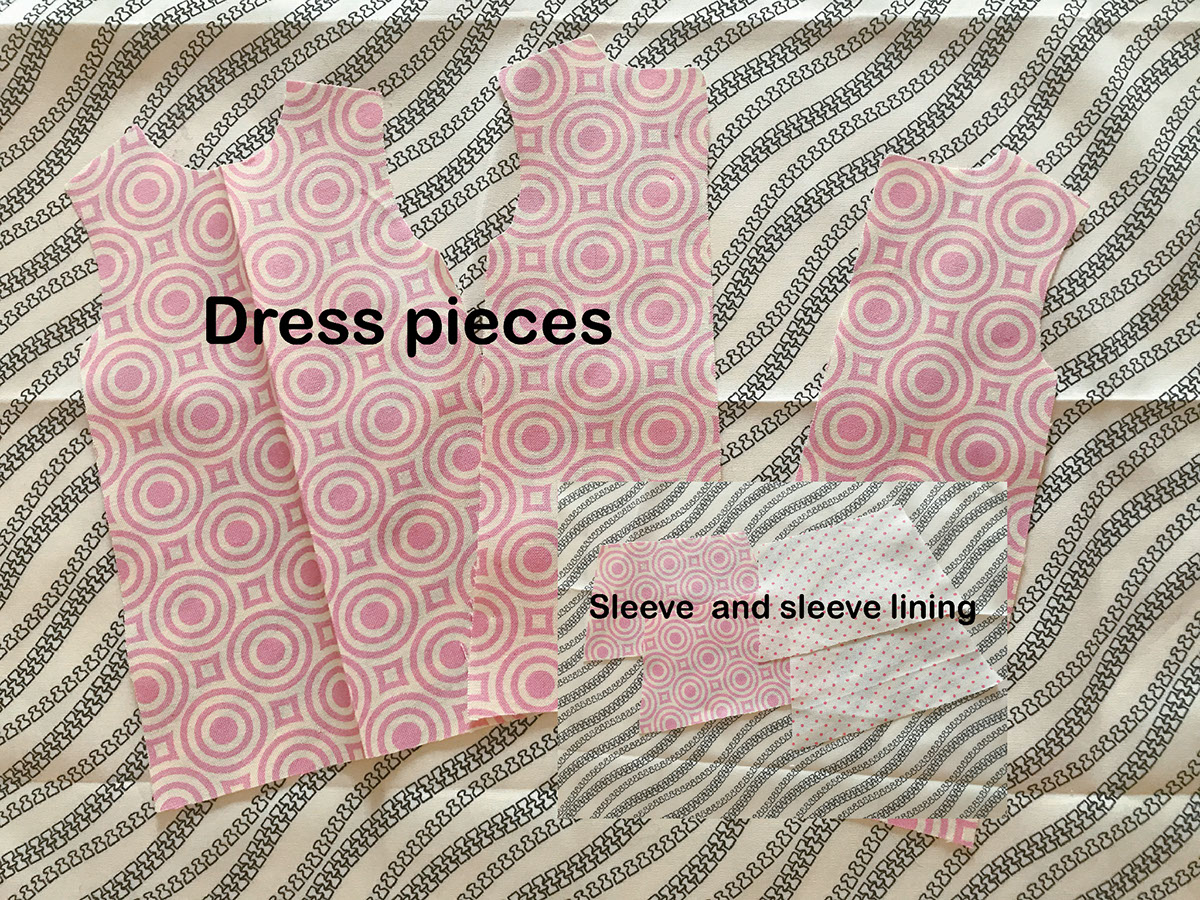
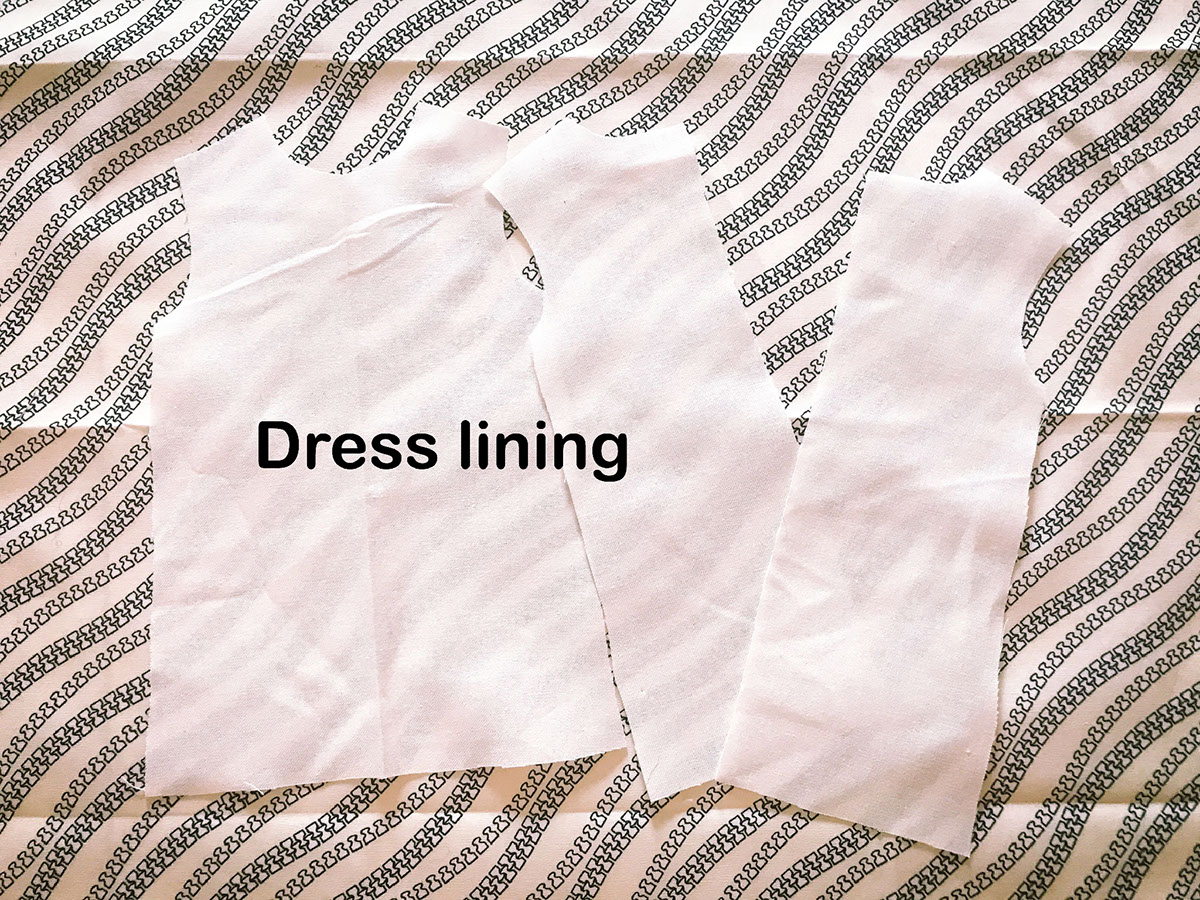
Cut out pieces for the dress, sleeve, lining, and dress lining.

Cut out dress pieces, should be 7 excluding lining

Cut out dress pieces, should be 7 excluding lining

And lining pieces, should be 3

And lining pieces, should be 3

Sew together shoulder seams of dress and lining as shown below.

Shoulder seams

Place lining and dress together with right sides together, pin or wonder clip. Sew one long seam beginning at the bottom of the center back`around neck and back down the other side of the center back.

Neck seam

Turn right sides out and press.

Neck right side out.jpg

Stitch along each armhole making sure you are stitching through both the dress fabric and the lining fabric. This is to baste the two fabrics together so they stay together when sewing the sleeves in.

Armhole

Place the sleeve bottom and the corresponding lining pieces together (right sides together) and stitch. Then turm right sides out and press.

Sleeve Bottom
Sew sleeves together

Stitch sleeve bottom to sleeve top as shown below and press. If you are using trim stitch it on at this stage just above the seam.

Sew sleeves together
Sew trim on sleeve

Pin sleeves to armholes. You could do a slight gather with one row of stitching. This is called an ease. Or you can just make a tiny tuck at the top as you are sewing (see my tuck above the arrow). Sew side seams, hem, add snaps or velcro and you are done.

Sew sleeve to dress
Sew side seam.jpg

Below is an example of "fancy Sleeves" used for a medieval look. The pattern pieces for this sleeve will be available in my newsletter which may even be done tonight.

Medieval Fancy Sleeves
In Doll Dressmaking 2
1 Comment

Doll Dressmaking Series: Capris

June 4, 2017 Lisa Press
Doll Capris pattern

You've been asking for awhile and I'm happy to say, finally, I have patterns and a tutorial for capris. And if you can make capris, pants and shorts or an easy tweak.

Cut out two of the pattern piece. For the 18 inch dolls the pattern piece will need to go on the fold and you will still need two.

Doll Capris pattern

Next sew the front center seam. The front and the back center seams are the same so either side will work. 

Sewing Capris

Next, you will need to make a tunnel/casing for the elastic along the waist edge. fold 1/4 inch or less over and hem. Then fold down a little more than 1/2 inch. if you are using elastic wider than 1/2 inch, fold over a little more.

Creating a tunnel or casing for the elastic.

Creating a tunnel or casing for the elastic.

Cut a piece of elastic approximately as long as the top edge of the pants. You will need something to thread the elastic through the casing. Below are three tools I like. More about threading elastic, including more about these tools here in my puffy sleeves tutorial.

Tools for threading elastic.

Tools for threading elastic.

Once secured on one end, the elastic will need to be pulled to be approximately the width of your dolls waist.

Threading elastic.

Threading elastic.

Thread and secure the elastic as described in the puffy sleeve tutorial.

Center back seam.

Center back seam.

Sew the center back seam. This seam should add security to catching the elastic on each end.

Hemming the leg bottom edge

Hemming the leg bottom edge

Hem the bottom edge of each leg. 

Leg inseam

Leg inseam

Next sew the leg inseam. Start at the bottom of one leg, go straight up to the center seams, pivot around with your sewing machine needle down and sew down the other leg.

Your capris are done. However, I always add a tag to cover up the back seam with the elastic poking out.

Covering the seam

The capris pattern will be available shortly through my newsletter. If you are not already signed up for my newsletter, you can right here.

Capris
In Doll Dressmaking 2
1 Comment

Doll Dressmaking Series: Snaps and Velcro

February 6, 2017 Lisa Press
Snaps and velcro

I have heard from lots of you about your adventures in doll dressmaking. I am so amazed at the dresses people have made, thank you for sharing.

One question I am frequently asked is what type of fastening do I recommend for the backs of the dresses. My answer is multi-faceted. Both closures have pros and cons.

For Regular Phoebe and ExtraSmall Phoebe I use snaps. I love the aesthetics of snaps, but also velcro will grab and damage yarn and Phoebe has yarn hair. 

For My First Phoebe, which is a linen doll, with linen hair, I use velcro. Velcro won't damage linen hair and it is easier for little hands to manipulate. I also don't like to use little things like buttons or snaps on a doll designed for a toddler.

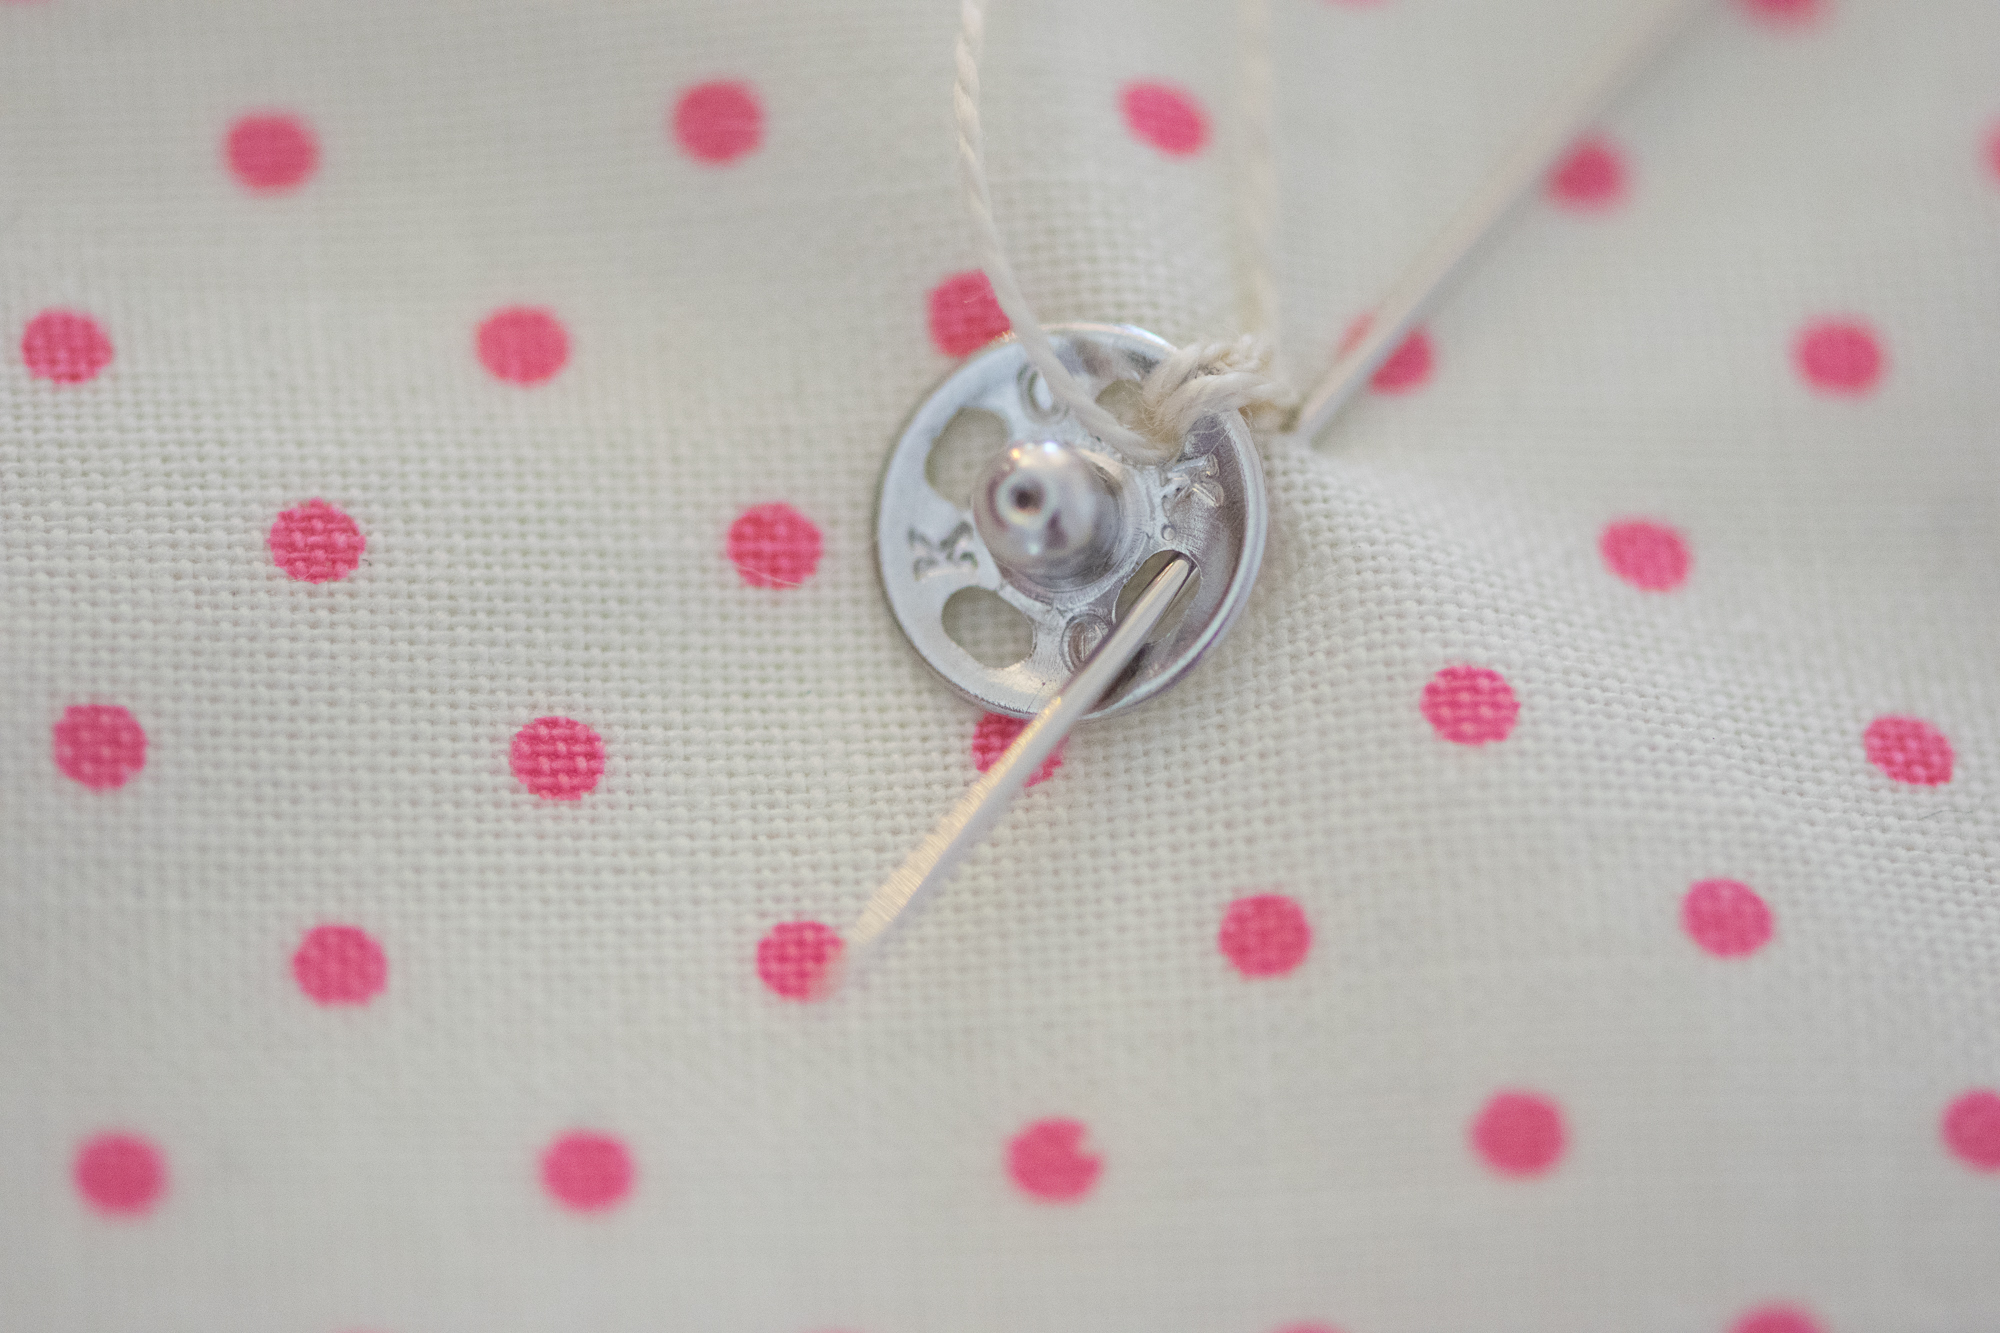
Snaps take more time to sew on. Here's how I do it. 

The snap has two parts, so first make sure the smaller side, the male side has the prong facing up. It usually is the top of the snap. The other side, which is larger, is the female side and has the hole facing up. The smaller prong should always be the exposed side and so should the larger hole. This way they can snap together. If you have it the other way around, they won't snap.

Two parts of snap

I use perle cotton thread size 8 to sew my snaps on. I find that it is neater, stronger and looks a bit prettier. It might be easier too. Tie a knot and do not double the thread.

Perle cotton
Snap knot

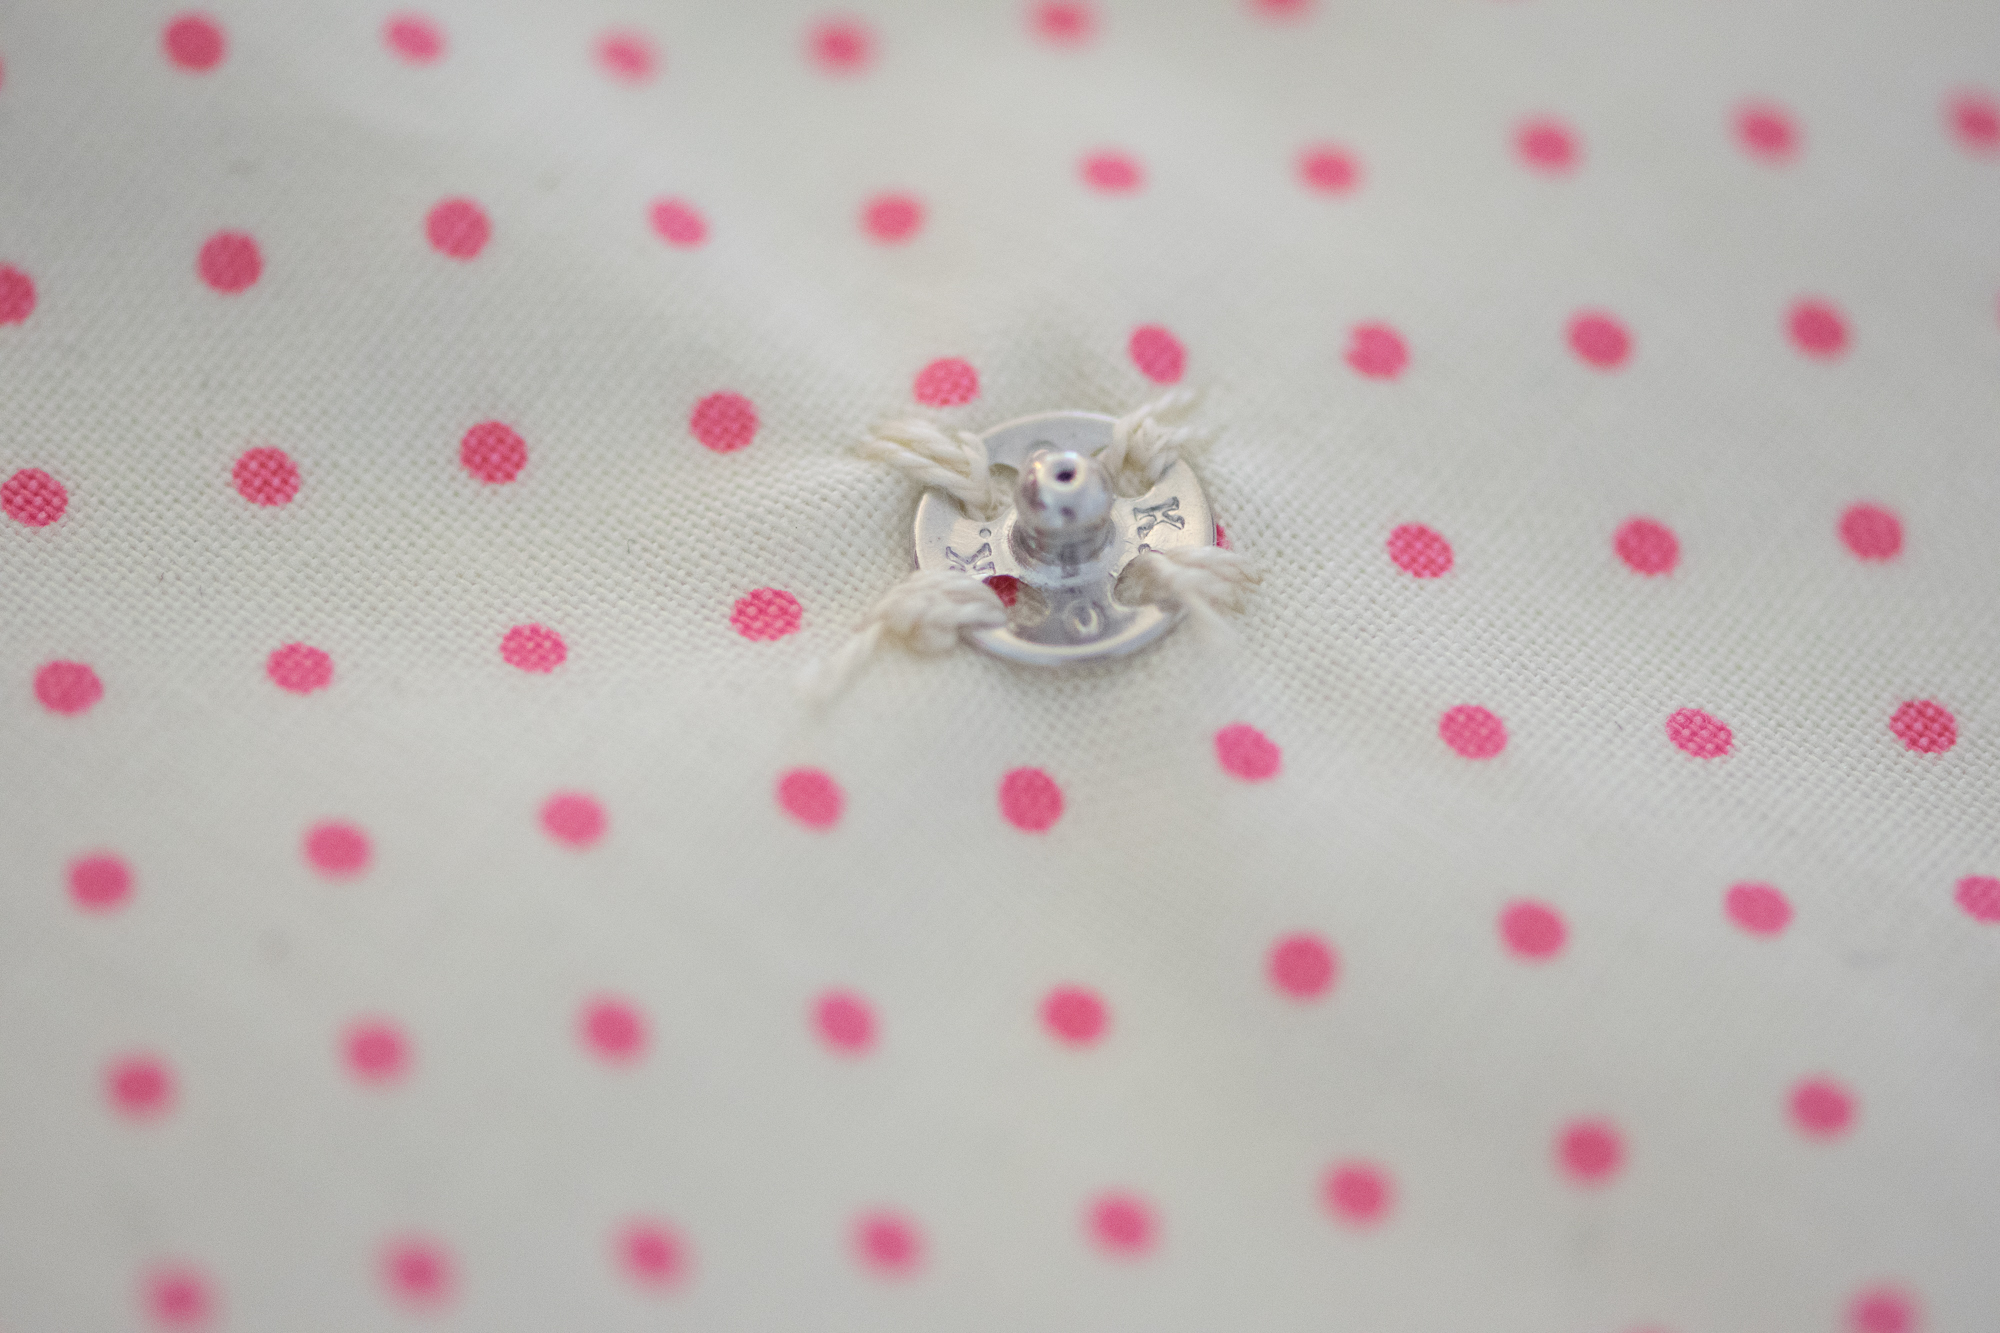
I then do two or three loops through each of the four holes of the snap. Knot your thread on the last loop.

Snap loops
Completed snap

At first snaps take patience, but after you've done a few they should take a lot less time.

Velcro does not take patience. It is quick. I usually cut strips of velcro in half, so that the velcro strips are only 1/2 inch wide. Velcro has a lot of stick so you do not necessarily need wide swaths of velcro.

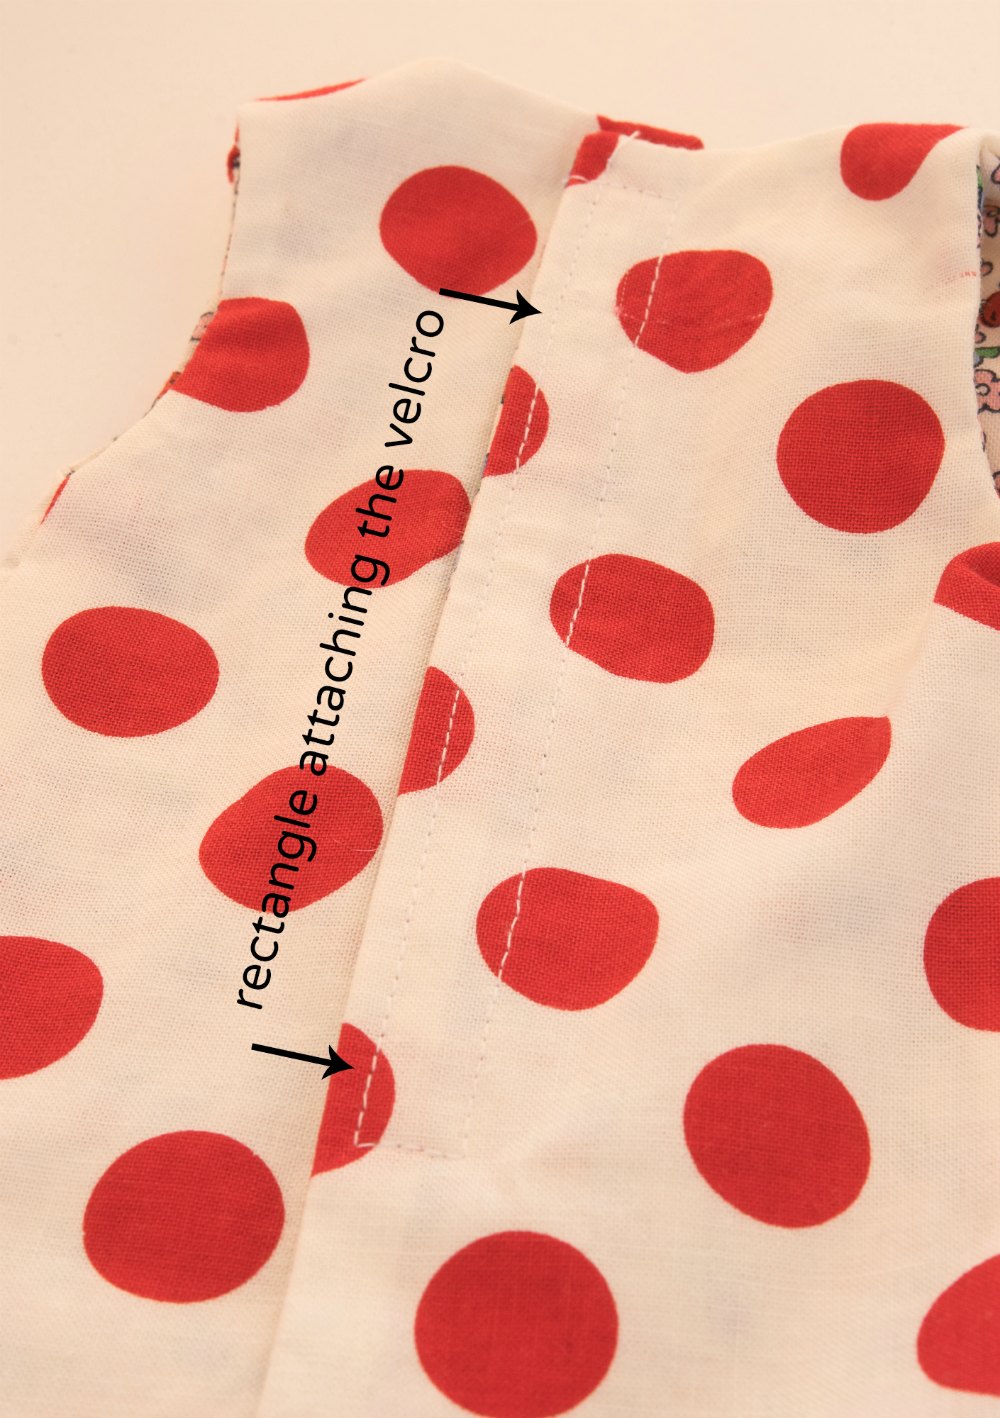
Velcro is best if you sew it on by making a rectangle, sewing around all four of the edges of velcro. This gives a sturdy attachment that can withstand lots of pulling.

Velcro attachment

A number of people have asked how do you handle velcro or snaps on the reversible dress. Just attach as you normally would and flip the dress inside out. You'll see your snaps and velcro still work even when it is flipped.

reversible dress

Hope this has helped!

Featured
Doll Dressmaking Series: Puffy Sleeves
Doll Dressmaking 2
Doll Dressmaking Series: Puffy Sleeves
Doll Dressmaking 2
Doll Dressmaking 2
Fancy sleeves
Doll Dressmaking 2
Doll Dressmaking: Fancy Sleeves Tutorial
Doll Dressmaking 2
Doll Dressmaking 2
Doll Dressmaking Series: Capris
Doll Dressmaking 2
Doll Dressmaking Series: Capris
Doll Dressmaking 2
Doll Dressmaking 2
Snaps and velcro
Doll Dressmaking 2
Doll Dressmaking Series: Snaps and Velcro
Doll Dressmaking 2
Doll Dressmaking 2
Doll Dressmaking Series: Sewing for Smaller Dolls
Doll Dressmaking 2
Doll Dressmaking Series: Sewing for Smaller Dolls
Doll Dressmaking 2
Doll Dressmaking 2
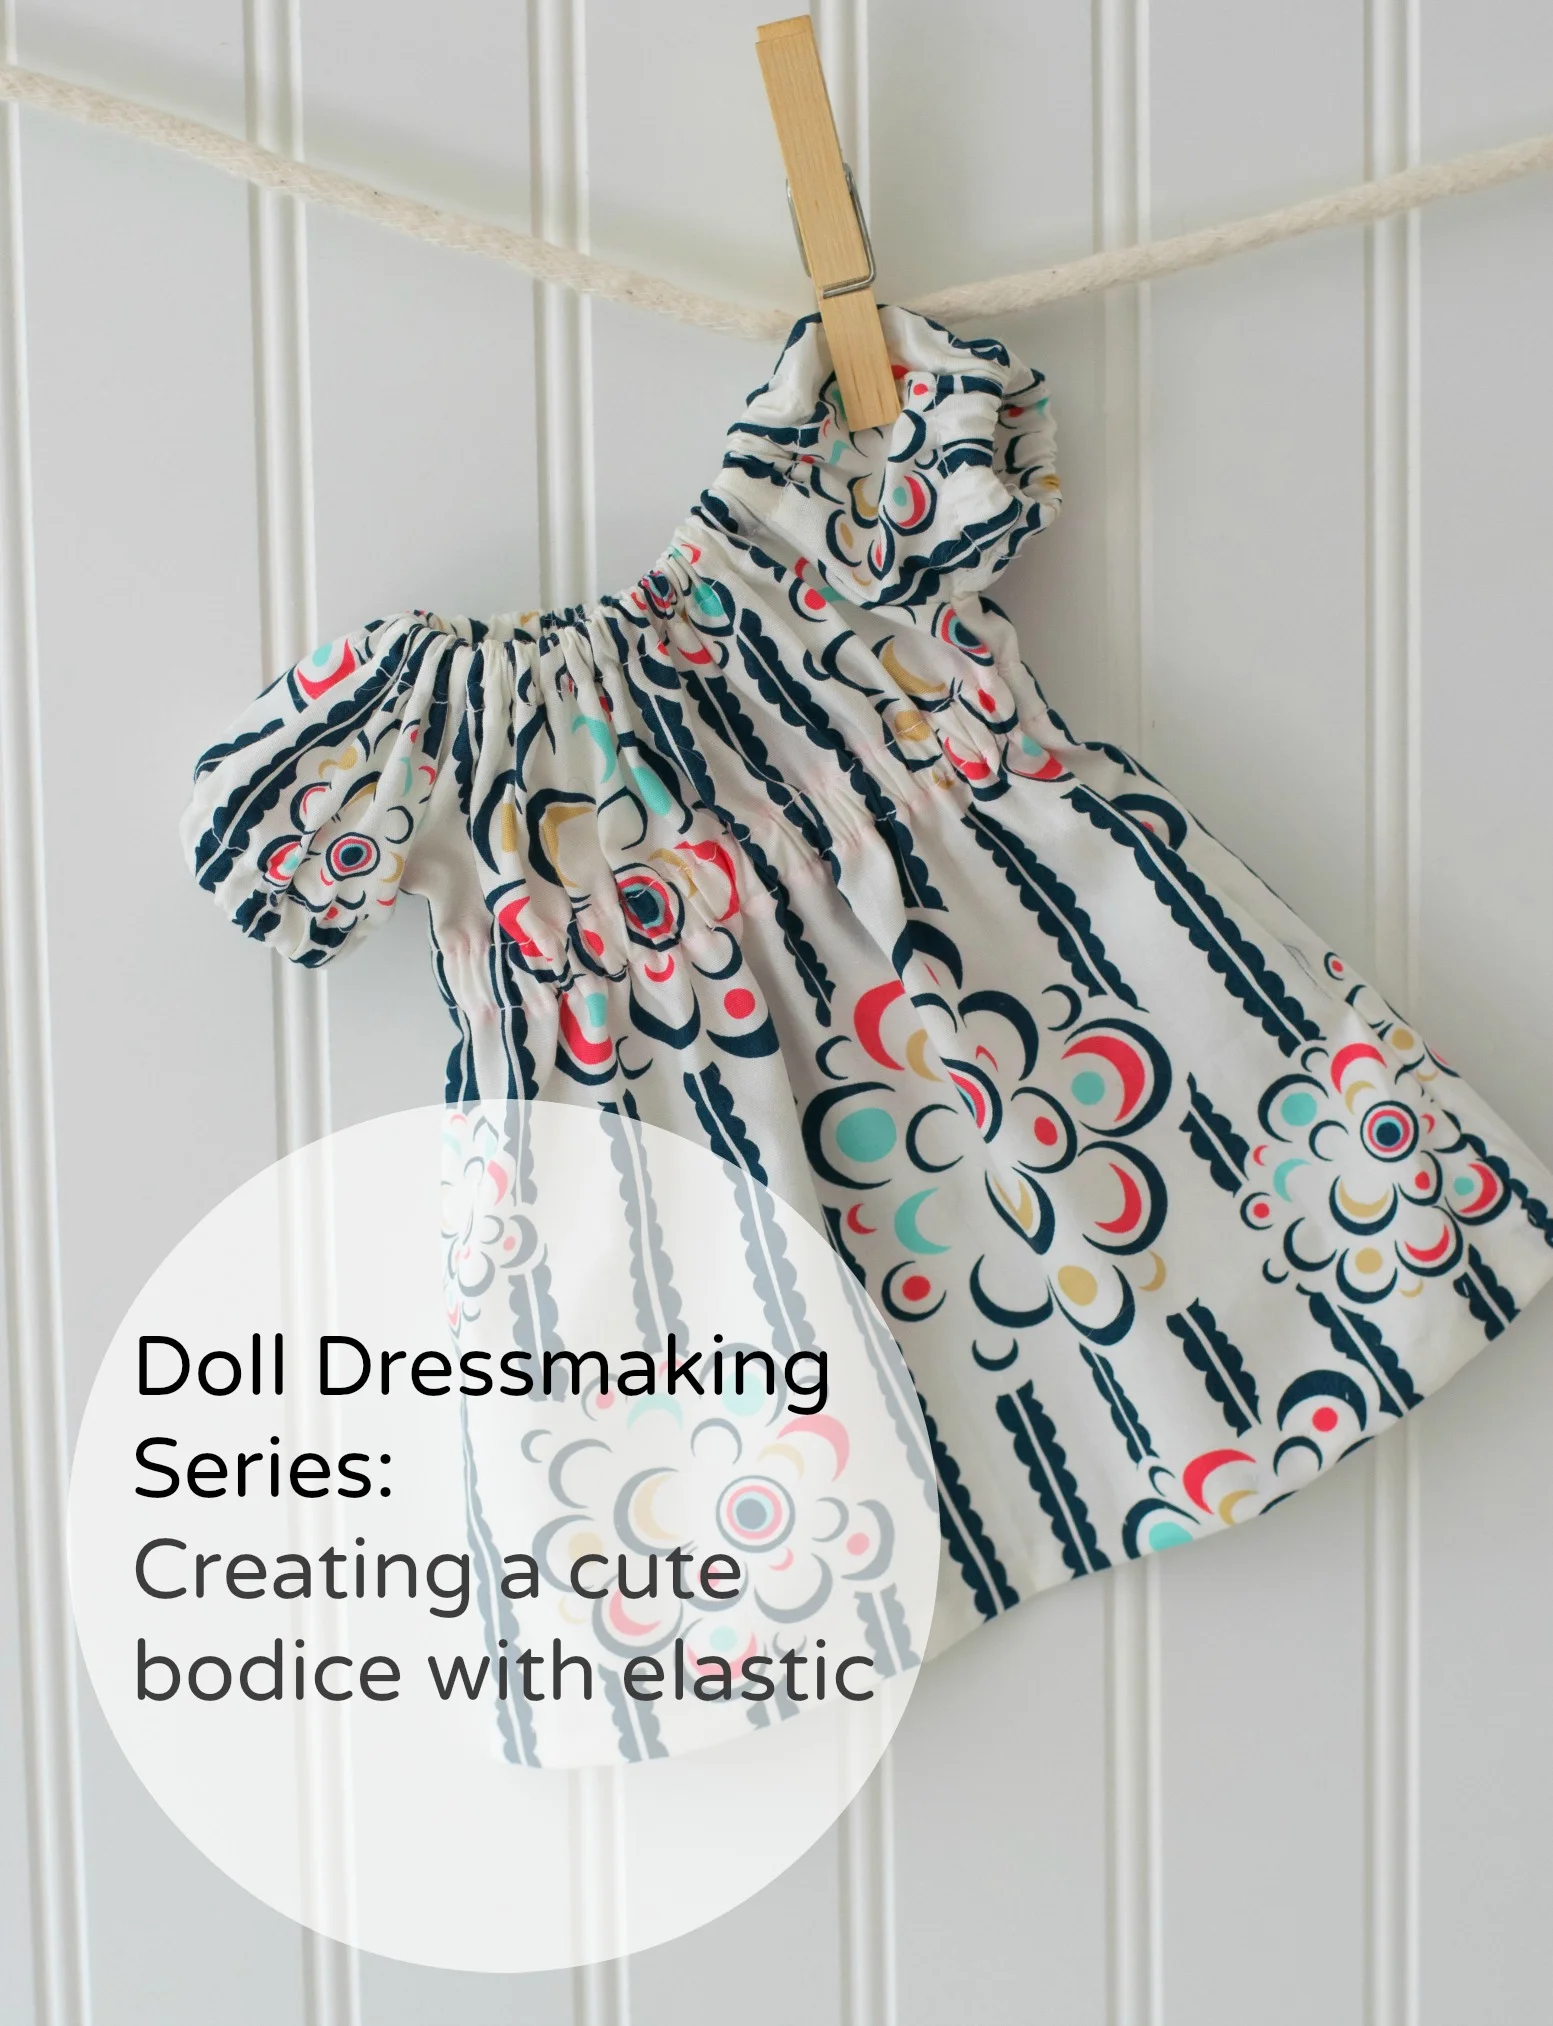
Doll Dressmaking Tutorial: Creating a Cute Bodice with Elastic
Tips, Doll Dressmaking 2
Doll Dressmaking Tutorial: Creating a Cute Bodice with Elastic
Tips, Doll Dressmaking 2
Doll Dressmaking Series: Long Sleeves for the Peasant Blouse
Doll Dressmaking 2
Doll Dressmaking Series: Long Sleeves for the Peasant Blouse
Doll Dressmaking 2
Doll Dressmaking 2
Doll Dressmaking Series: Long Sleeves
Tips, Doll Dressmaking 2
Doll Dressmaking Series: Long Sleeves
Tips, Doll Dressmaking 2
Don't Be Afraid of Buttonholes
Doll Dressmaking 2
Don't Be Afraid of Buttonholes
Doll Dressmaking 2
Doll Dressmaking 2
How to resize doll patterns
Doll Dressmaking 2
Resizing Doll Dress Patterns
Doll Dressmaking 2
Doll Dressmaking 2
In Doll Dressmaking 2
4 Comments

Doll Dressmaking Series: Sewing for Smaller Dolls

October 27, 2016 Lisa Press
Sewing for Small Dolls

Sewing for small dolls is a bit more difficult than sewing for regular sized dolls. 

What is considered a small doll? Height is not the primary consideration.  Leg and head height can make the size of a doll deceiving. Your doll's width (waist, chest, neck and hips) is the determining factor. Thinner dolls and dolls with smaller torsos can be small even if they have long limbs or large heads. 

ExtraSmall Phoebe is small. Wellie Wishers by American Girl are small. Blythe is very small.

Sewing doll clothes for smaller dolls uses many of the same techniques as sewing for larger dolls. But you also need to know a few extra tricks. It's harder to get fussy. It's harder to pin things since pins are made for a human scale, I use wonder clips, often just one. Small quilters pins are good too.

In this tutorial, for a basic Wellie Wisher dress I cover a few of those tricks. The Wellie Wishers Dressmaking Pattern set is now available in my shop.

Well Wishers patterns are available in my shop.

Well Wishers patterns are available in my shop.

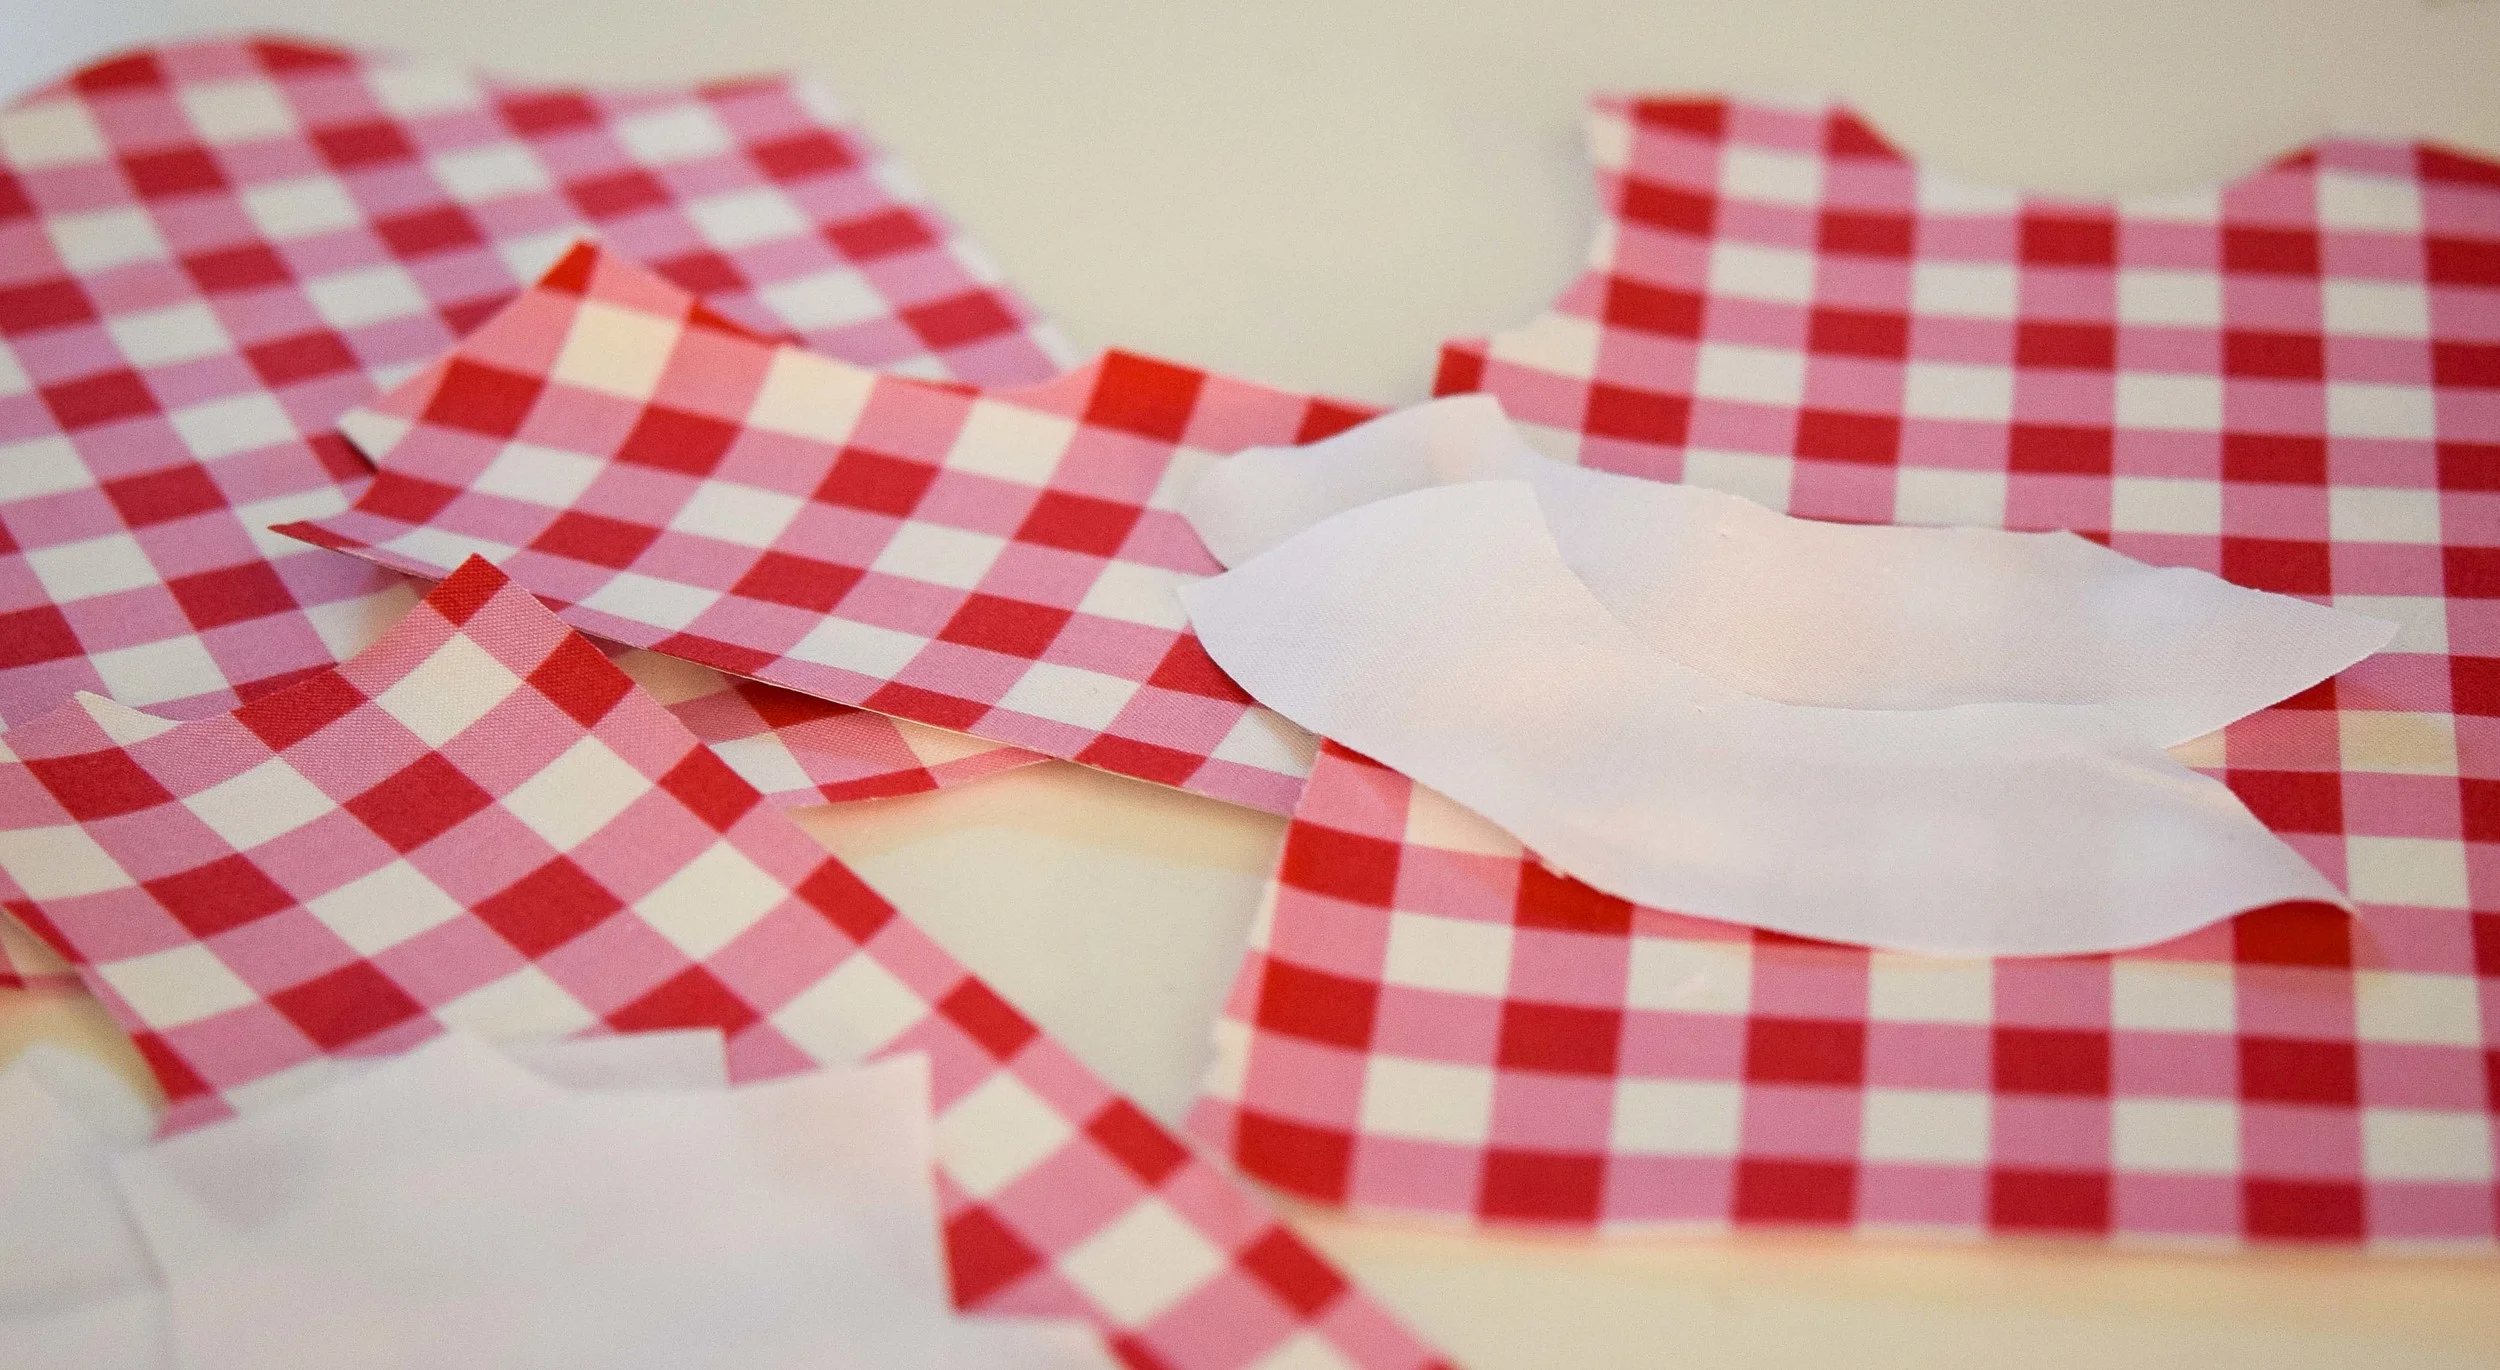
Cut out dress pieces including lining, basic sleeve and Peter Pan collar.

  1. Clip two identical pieces of Peter Pan collar together.
  2. Sew Peter Pan collar pieces together. Seams are just slightly under 1/4 inch. Do not sew top closed, because you will be turning this inside out.
  3. Turn Collar inside out, I use a point turner to push the curves smooth.
  4. Press.

Sew shoulder seams for the dress. Do the same for the lining. Press

Shoulder seams.

Shoulder seams.

Next sew the collar to the dress.

  1. Because the collar is one piece, you will not need to fuss with the placement and pinning of two little pieces. I use one wonder clip to center the collar on the dress. match center to center.
  2. Carefully stitch, making sure your needle is going through all four layers, two layers of collar and two layers of dress.
  3. Sew over the space in the middle.
  4. Continue until the other edge of the collar.
Sewing collar to the dress
Sew lining to the dress.jpg

Next sew the lining to the dress.

  1. Place right sides together.
  2. Clip together up the center back edges and around neckline.
  3. Sew up center backs, around neck edge, making sure to sew below the line of stitches for tacking the collar in place, and then sew down the center back on the pther side.
  4. Carefully clip away excess fabric along the neck line, where there are 4 layers and this can create bulk.

Pin dress fabric and lining fabric together along the armhole edges and sew together. This will keep the fabrics together when you attach the sleeve.

dress armholes

Hem the bottoms of each sleeve.

Hem sleeves

Hem sleeves

Puff sleeve which require gathering and elastic are harder at this scale, so I recommend starting with a basic set in sleeve. 

  1. clip sleeve into armhole space.
  2. Sew, taking clips out as you go.
  3. I take a tuck at the top of the sleeve. Helps it fit better.
  4. Repeat.
Sewing the sleeves in place
Sew side seams

Sew side seams. Hem and add back closures. I use snaps. The Wellie Wishers Doll dressmaking pattern is available here.

Well Wisher Pattern
In Doll Dressmaking 2
7 Comments

Doll Dressmaking Tutorial: Creating a Cute Bodice with Elastic

June 20, 2016 Lisa Press
Doll Dressmaking Series

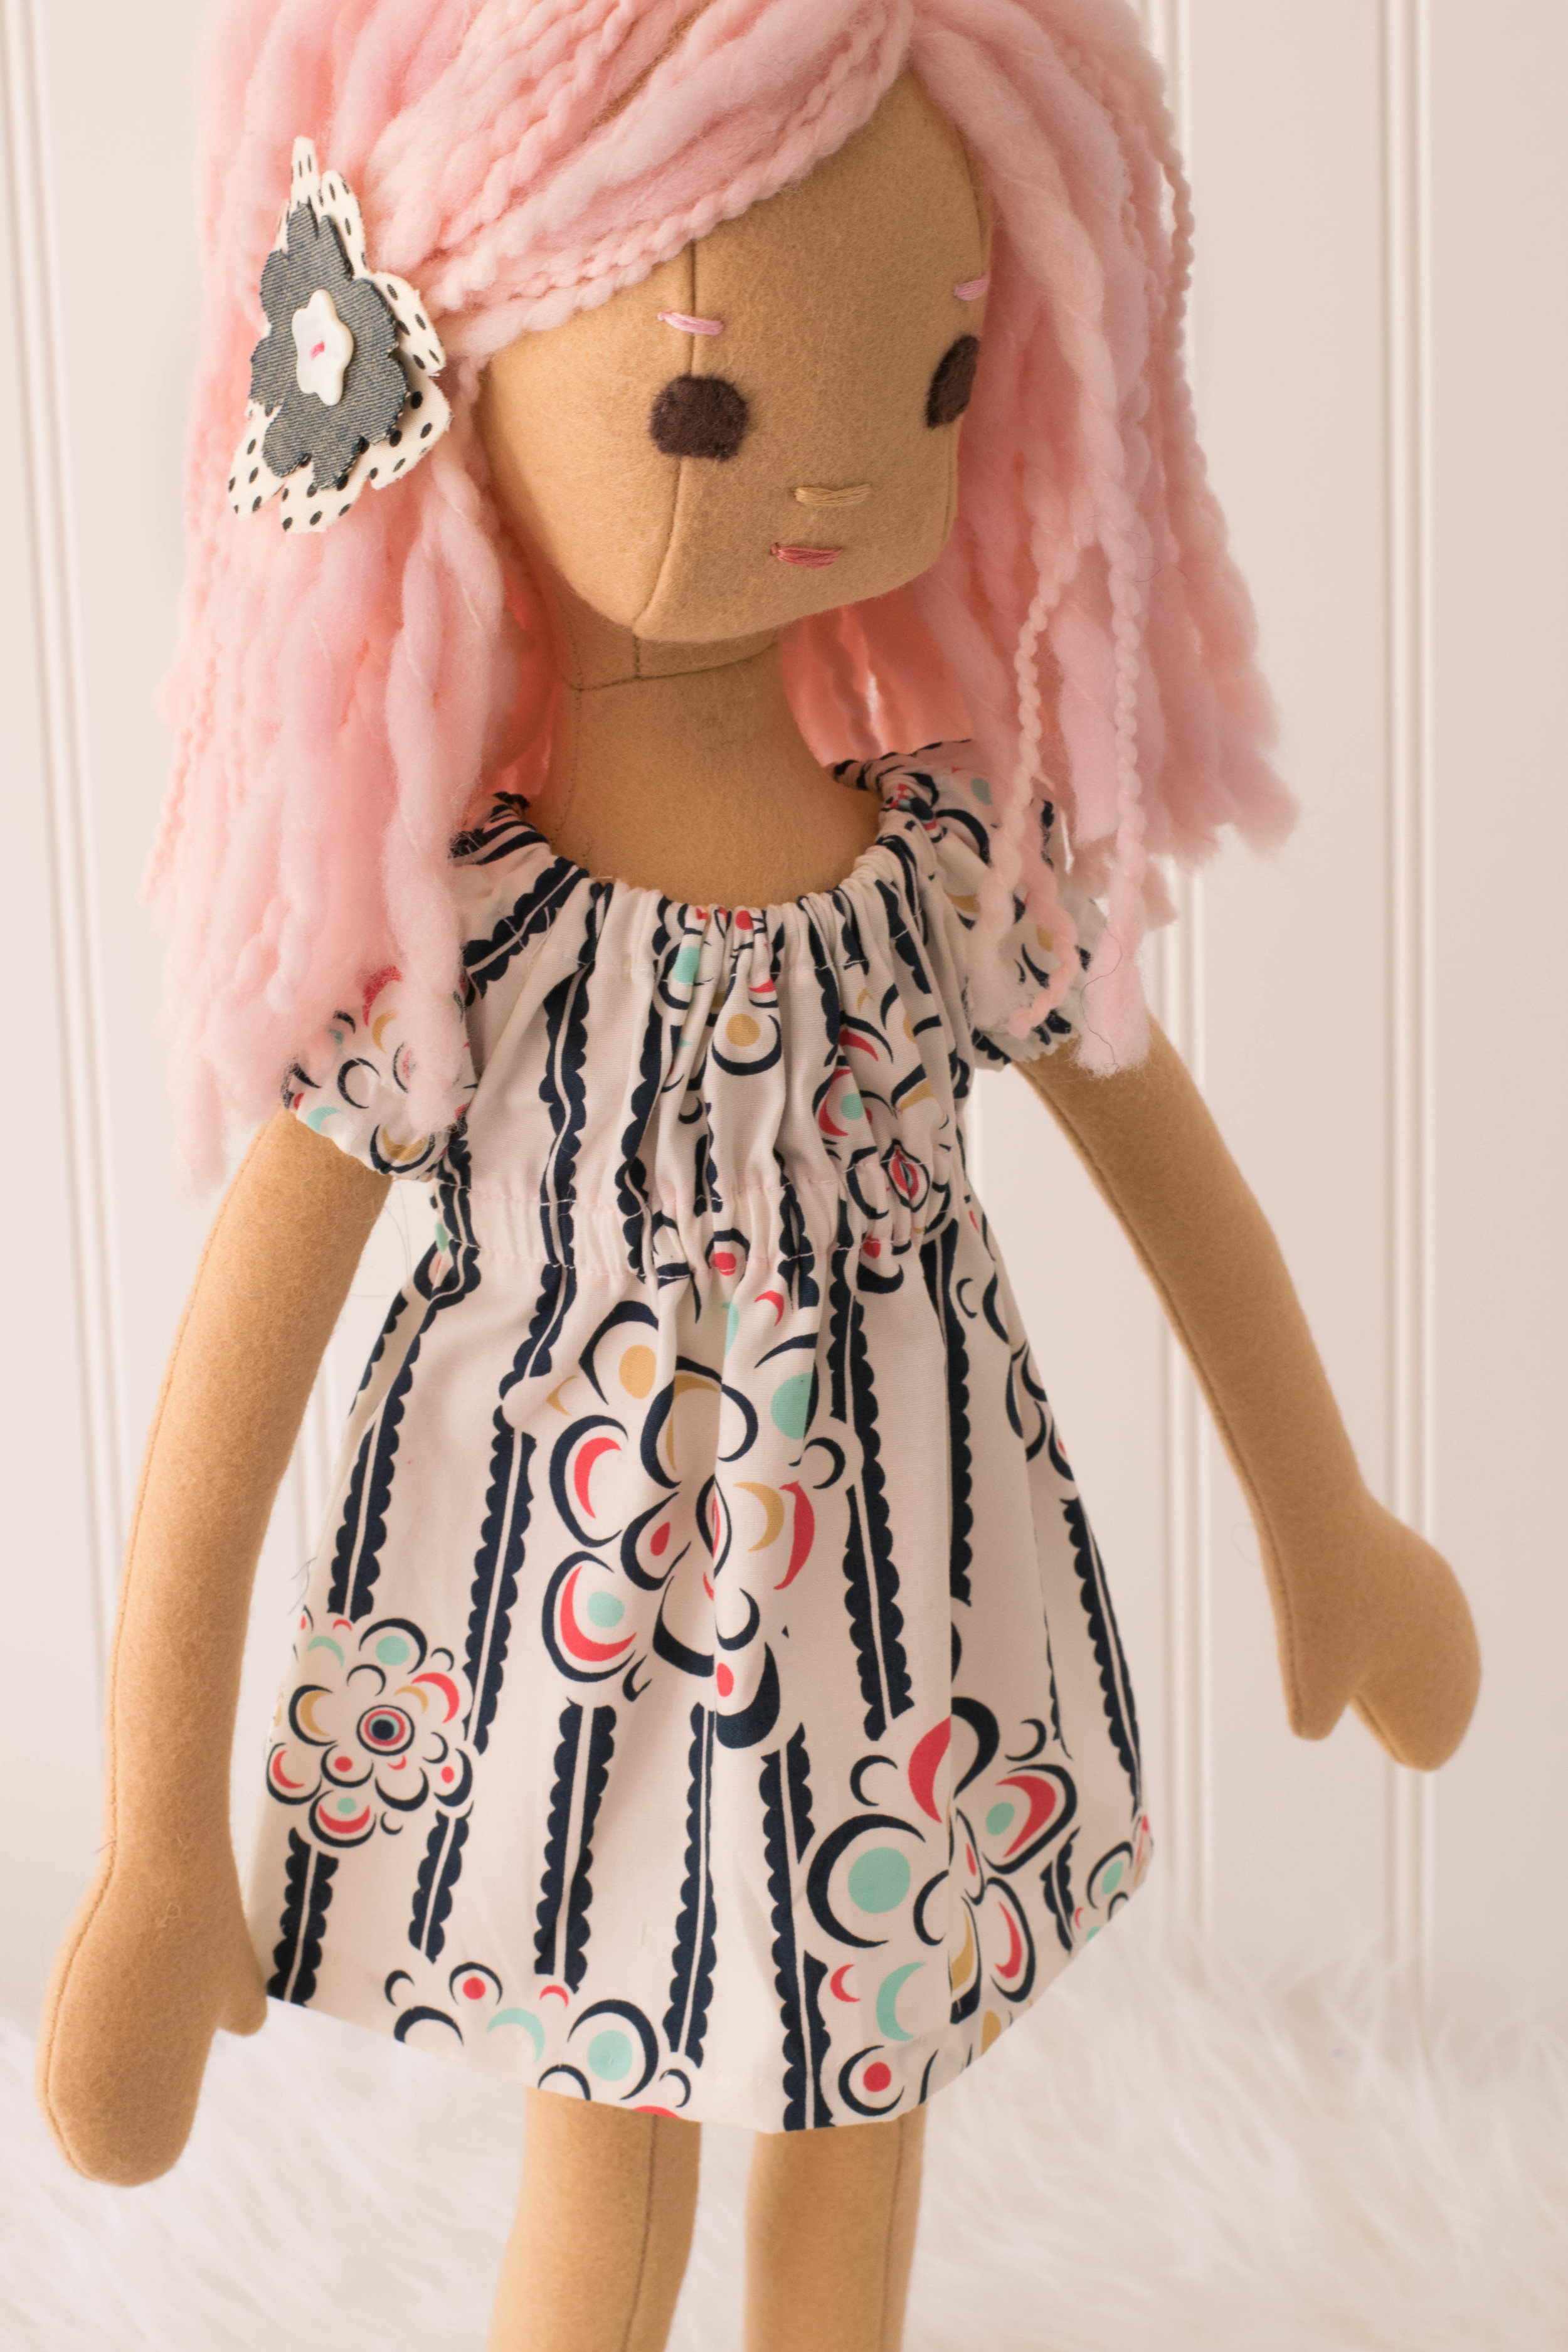
There a number of ways to alter the basic peasant/raglan dress pattern to give it a different look. One is by adding an elastic cinching to the bodice. It makes the dress more fitted and can be used for both creating a modern or a retro look (this was big in the early 70s).

To make this dress you will need to use both the instructions here and some of the instructions in the original raglan blouse tutorial, which is here. 

When you cut out the pieces, you will want to somehow mark where you will place the casing for the bodice elastic. I make small snips where the elastic will hit on the side seams. Pencil makrks within the seam allowance will also work.

cut and mark bodice casing placement. click to enlarge

Next follow the instructions in the peasant/raglan blouse tutorial: sew the sleeves to the bodice pieces and make the sleeve and neck casings. 

next add the elastic to the sleeve bottoms. DO NOT add elastic to the neck yet. 

Click to enlarge

Next sew up one side seam.

side seam

The next few steps involve creating and attaching the casing for the bodice elastic.

1. Cut a strip of fabric 1.25 inches wide and at least the length of the dress.

2. Make narrow machine hems along the long edges of this strip.

3. Pin strip to bodice using your markings.

4. Sew the casing down by stitching along the top and the bottom.

Creating the bodice casing. Click to enlarge

Next insert elastic and pull to desired length and secure end with machine stitching. For final length I recommend 1 inch longer than your dolls chest measurement. However, your initial piece of elastic can be several inches longer than that.

Inserting elastic in the bodice casing. Click to enlarge.

Next insert elastic in the neck casing and follow the remaining raglan blouse instructions to complete.

Raglan bodice dress
In Tips, Doll Dressmaking 2 Tags doll clothes, doll dressmaking series
Comment

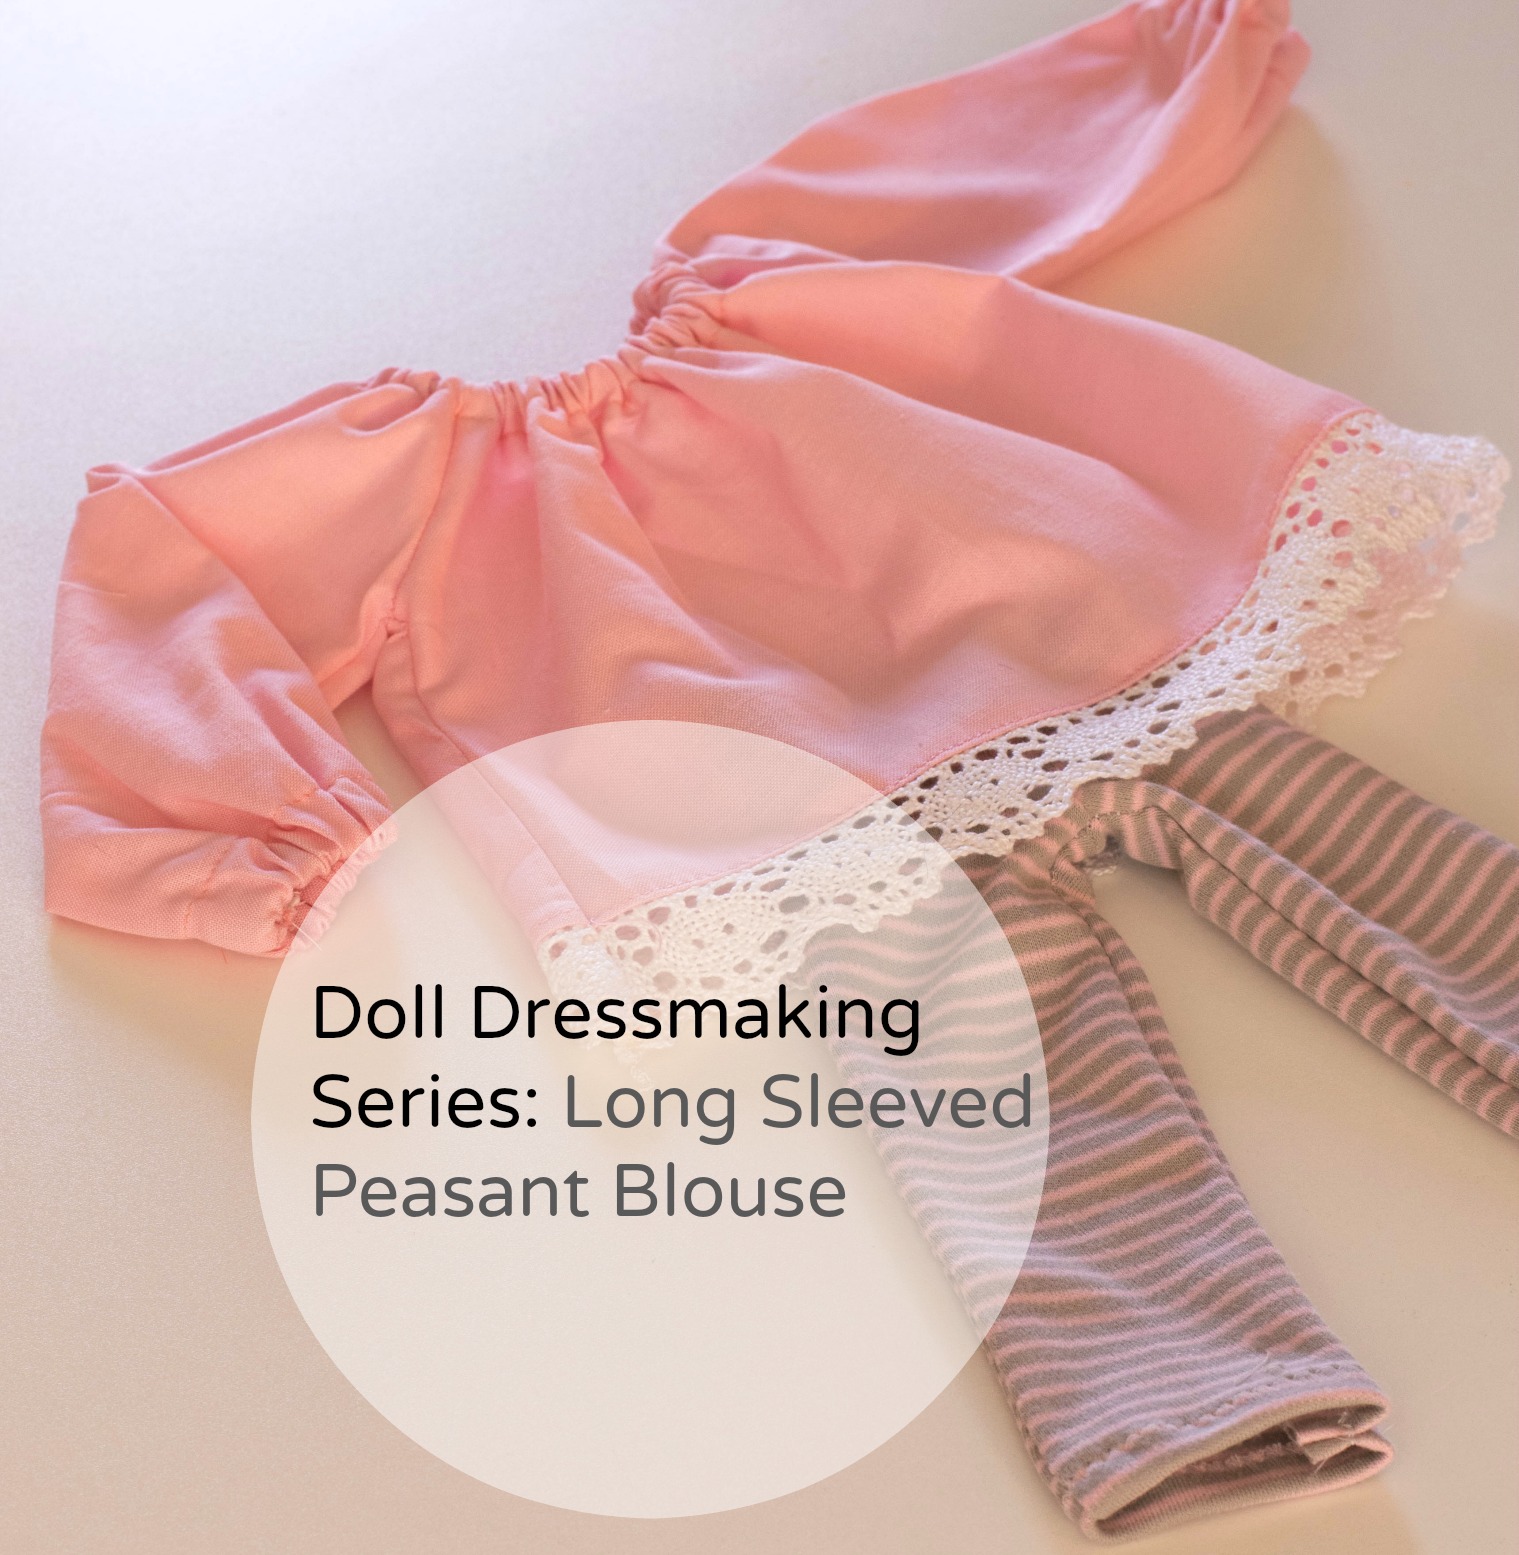
Doll Dressmaking Series: Long Sleeves for the Peasant Blouse

April 26, 2016 Lisa Press
Long sleeves for the peasant blouse

First apologies for the scant amount of blogging these last two months. I've been focusing on the ExtraSmalls and a number of custom orders and kind of neglected the blog and doll dressmaking. But I'm back. And I'm getting back to sleeves, which is where I left off.

My last tutorial was for long sleeves for the dresses. This tutorial is for long sleeves for the raglan peasant blouse (or dress). The short sleeve tutorial for the blouse is here. And the dress is here.

I am not going to repeat all of the instructions. Just skim over the making of the peasant blouse as discussed in the original tutorial, but with long sleeves. 

And of course the long sleeve pattern will be in the upcoming newsletter.

Pattern pieces

Cut out your pattern pieces, front and back (both the same) and the two sleeves.

Click to enlarge

Sew three of the four "shoulder" seams. Make sure you are attaching a sleeve to a body and a body edge to a sleeve.

click to enlarge

On the bottom of each sleeve, fold under (to the wrong side of the fabric) 5/8 of an inch, press and stitch. This is the sleeve casing, meaning you will guide elastic through here.

click to enlrge

Do the same along the neck edge for the neck casing and elastic.

Click to enlarge

Run elastic through the neck casing and then each of the sleeve casings. Directions for elastic and casings are here in the original tutorial. Finished wrist lengths (with the elastic) should measure as follows:

Phoebe: 3.5 inches, Sasha Dolls, 3 inches, American Girl and Waldorf: 4 inches. Neck length for Phoebe: 8.5 inches, Sasha 8 inches and AG and Waldorf 9-9.5 inches. Neck length is a bit of personal preference depending on how you like the neckline.

Shoulder seam

Stitch up the remaining "shoulder seam. 

Side seam

Stitch up only one of the two side seams. Leaving one open makes it easier to add a trim on the bottom if one side is still open.

Click to enlarge

Stitch trim onto bottom edge right sides together. Fold under and stitch down.

Stitch the other side seam and you are down.  Make the body a few inches longer and you have a dress.

Phoebe is a bit camera shy in this photo, but you can see the sleeve at least : )

Long sleeve peasant blouse

Subscribe to our newsletter to keep up to date on pattern pieces

* indicates required
In Doll Dressmaking 2 Tags doll dressmaking series
1 Comment

Doll Dressmaking Series: Long Sleeves

February 10, 2016 Lisa Press
Doll Dressmaking long sleeves

Sleeves are an easy way to switch up a dress and completely change the look.

So far in this series we have covered basic shorts sleeves, short puffed sleeves and a ruffle sleeve.  But there are quite a few more sleeve options that are easy to make on a small scale.

This tutorial will focus on the basic doll long sleeve. Most long sleeves on doll clothes have elastic at the wrist 9this pattern does). That is because dolls hands are big and that makes it hard to get them through a long sleeve with a narrow end. Plastic dolls hands cant's squeeze in. The hands and arms of cloth dolls are hard to push through the tunnel of a long straight sleeve. So the elastic at the end solves both of these problems. It allows the wrist to stretch out and the sleeve itself to be a bit wider.

The pattern for this dress and all of the others in the series is available through my newsletter. Sign up form is at the end of this post.

Sewing long sleeves

I used the basic dress pattern and the retro collar, all have been part of past tutorials and are available through my newsletter. The dress is lined. 

Retro collar

1. Until the sleeves I am basically following the directions of the retro collar tutorial. This starts with sewing the shoulder seams together and then the collar pieces  together and sewing them onto the dress neckline.

2. Sew the lining should seams together.

3. Place the dress with the collar on top of the lining with right sides together. Pin or wonderclip up one back edge around the neck and down the other back edge. Sew the lining to the dress making sure you sew deeper than the collar attachment seam so it does not show. Tirn right side out.

Click to enlarge

Sew the sleeve edge of the dress to the sleeve edge of the lining. This is to keep them in place and together when you sew the sleeve on.

Seleve edges

Hemming the sleeves and making a casing:

1. Turn the ends of the sleeves up 1/4 inch and stitch.

2. Turn the bottoms up 1/2 inch and stitch again. this is the casing for your elastic for the "cuff" at the wrist.

Making the sleeve casings

Making the sleeve casings

Easing for the Sleeve Cap

The next few steps are similar to the gathering of the sleeve cap done on the puffed sleeve dress. Except this is called easing.  Easing is step down from gathering. it is done to get the sleeve to curve slightly better at the shoulder of the armhole, which makes more of a shoulder shape. it is also done to obtain a better fit in the armhole.

1. Stitch about two inches of long stitches at the cap of each sleeve. As in gathering, leave one end without reverse stitching and leave the threads long, so you can pull one.

2. Pull one of the threads slightly to puff the cap of the sleeve slightly.

3. measure the sleeve cap to the armhole, when it seems the right length, secure the thread by wrapping around a pin.

4. Fit and pin into the armhole, adjusting the ease if needed.


easing the sleeve cap

Sew sleeves in. make sure you've put your stitch length back to regular.

Sleeves

You are almost done. Next is the sleeve casing for the wrist.

1. Cut two pieces of elastic, each approximately the width of the bottom of the sleeve.

2. You will need to use something to thread the elastic. I use this tool, but a safety pin works fine.

3. Thread the elastic through the casing, securing it at the starting end with a few machine stitches.

4. Pull to desired length. I pull to 4 inches for Phoebe. For Sasha, 3.5 should do. For AG and Waldorf, 4.5-5 inches. stitch done the other end of the elastic to secure.

Click to enlarge

Sew up the side seams, hem and you are done!

side seams
Gingham dress

The pattern pieces for this dress and all other dresses are available through my newsletter. When you sign up, you will receive a second email asking you to confirm, after you do that you will receive another email with the base pattern downloads and a link to pattern pieces that came through previous newsletters.

Please check your spam first before emailing me if you do not receive this.

The long sleeve pattern piece will be available in this Friday's newsletter.

Sign up for the Phoebe&Egg Newsletter

* indicates required
In Tips, Doll Dressmaking 2 Tags doll dressmaking series
4 Comments

Don't Be Afraid of Buttonholes

January 29, 2016 Lisa Press
Buttonhole tutorial

For years I was afraid of making buttonholes.  They made me nervous. A bad buttonhole can ruin a good coat.

 When you are making doll clothing you can deftly avoid them. You can use snaps with decorative buttons on things that open in the front. Faux is fine for dolls.

But if you master buttonholes, they can become easier than the substitutions. And real buttoning buttons are just charming on doll clothing. Practical with a retro charm.

Over the last year each time I've done a series of buttonholes I've discovered or made up a new trick. They are close to mistake proof. Now I love doing them.

And don't be daunted by the number of steps. they are all very quick and designed to eliminate mistakes.

First gather a few supplies: 

Pieces of tissue paper or stabilizer

A pen

A ruler, quilting ruler or a Simflex expanding gauge (pictured below)

Your buttons

Buttonhole thread

A bright contrasting thread

An Xacto knife and pad to cut on

Scrap fabric

A Simflex expanding gauge, if you don't have one of these a ruler will do just fine.

A Simflex expanding gauge, if you don't have one of these a ruler will do just fine.

Step one, I use a machine long basting stitch to baste a piece of stabilizer (or tissue paper) to the garment along the edge where the buttonholes will go with bright contrasting thread. I go about 1/4 inch in from the edge as shown below. I am basting on the outside of the coat edge. 

Buttonhole tutorial

Basting the paper to the coat edge accomplished several things.

1. You have stabilizer or tissue on the bottom side of your fabric. This helps a button hole foot glide more smoothly and not jam.

2. The line of basting can serve as a guide.

3. You can make measured marks on the paper to tell you where to start each buttonhole.

Click to enlarge

The Simflex expanding gauge can be pulled to figure out how to best evenly distribute your buttonholes.  A ruler will also work. I then mark the paper where the top of each button will start.

However, full disclosure here, I have an automatic butttonhole foot. So once I determine the correct size, I can set it to make that exact size over and over. If you cannot repeat the size, you will also need to mark the paper for the when to stop, ie the bottom of each button hole. The nice part about the marks on the side of the paper is that you can easily see them whilke you are sewing with a great big buttonhole foot.

A buttonhole foot allows you to measure your button.

A buttonhole foot allows you to measure your button.

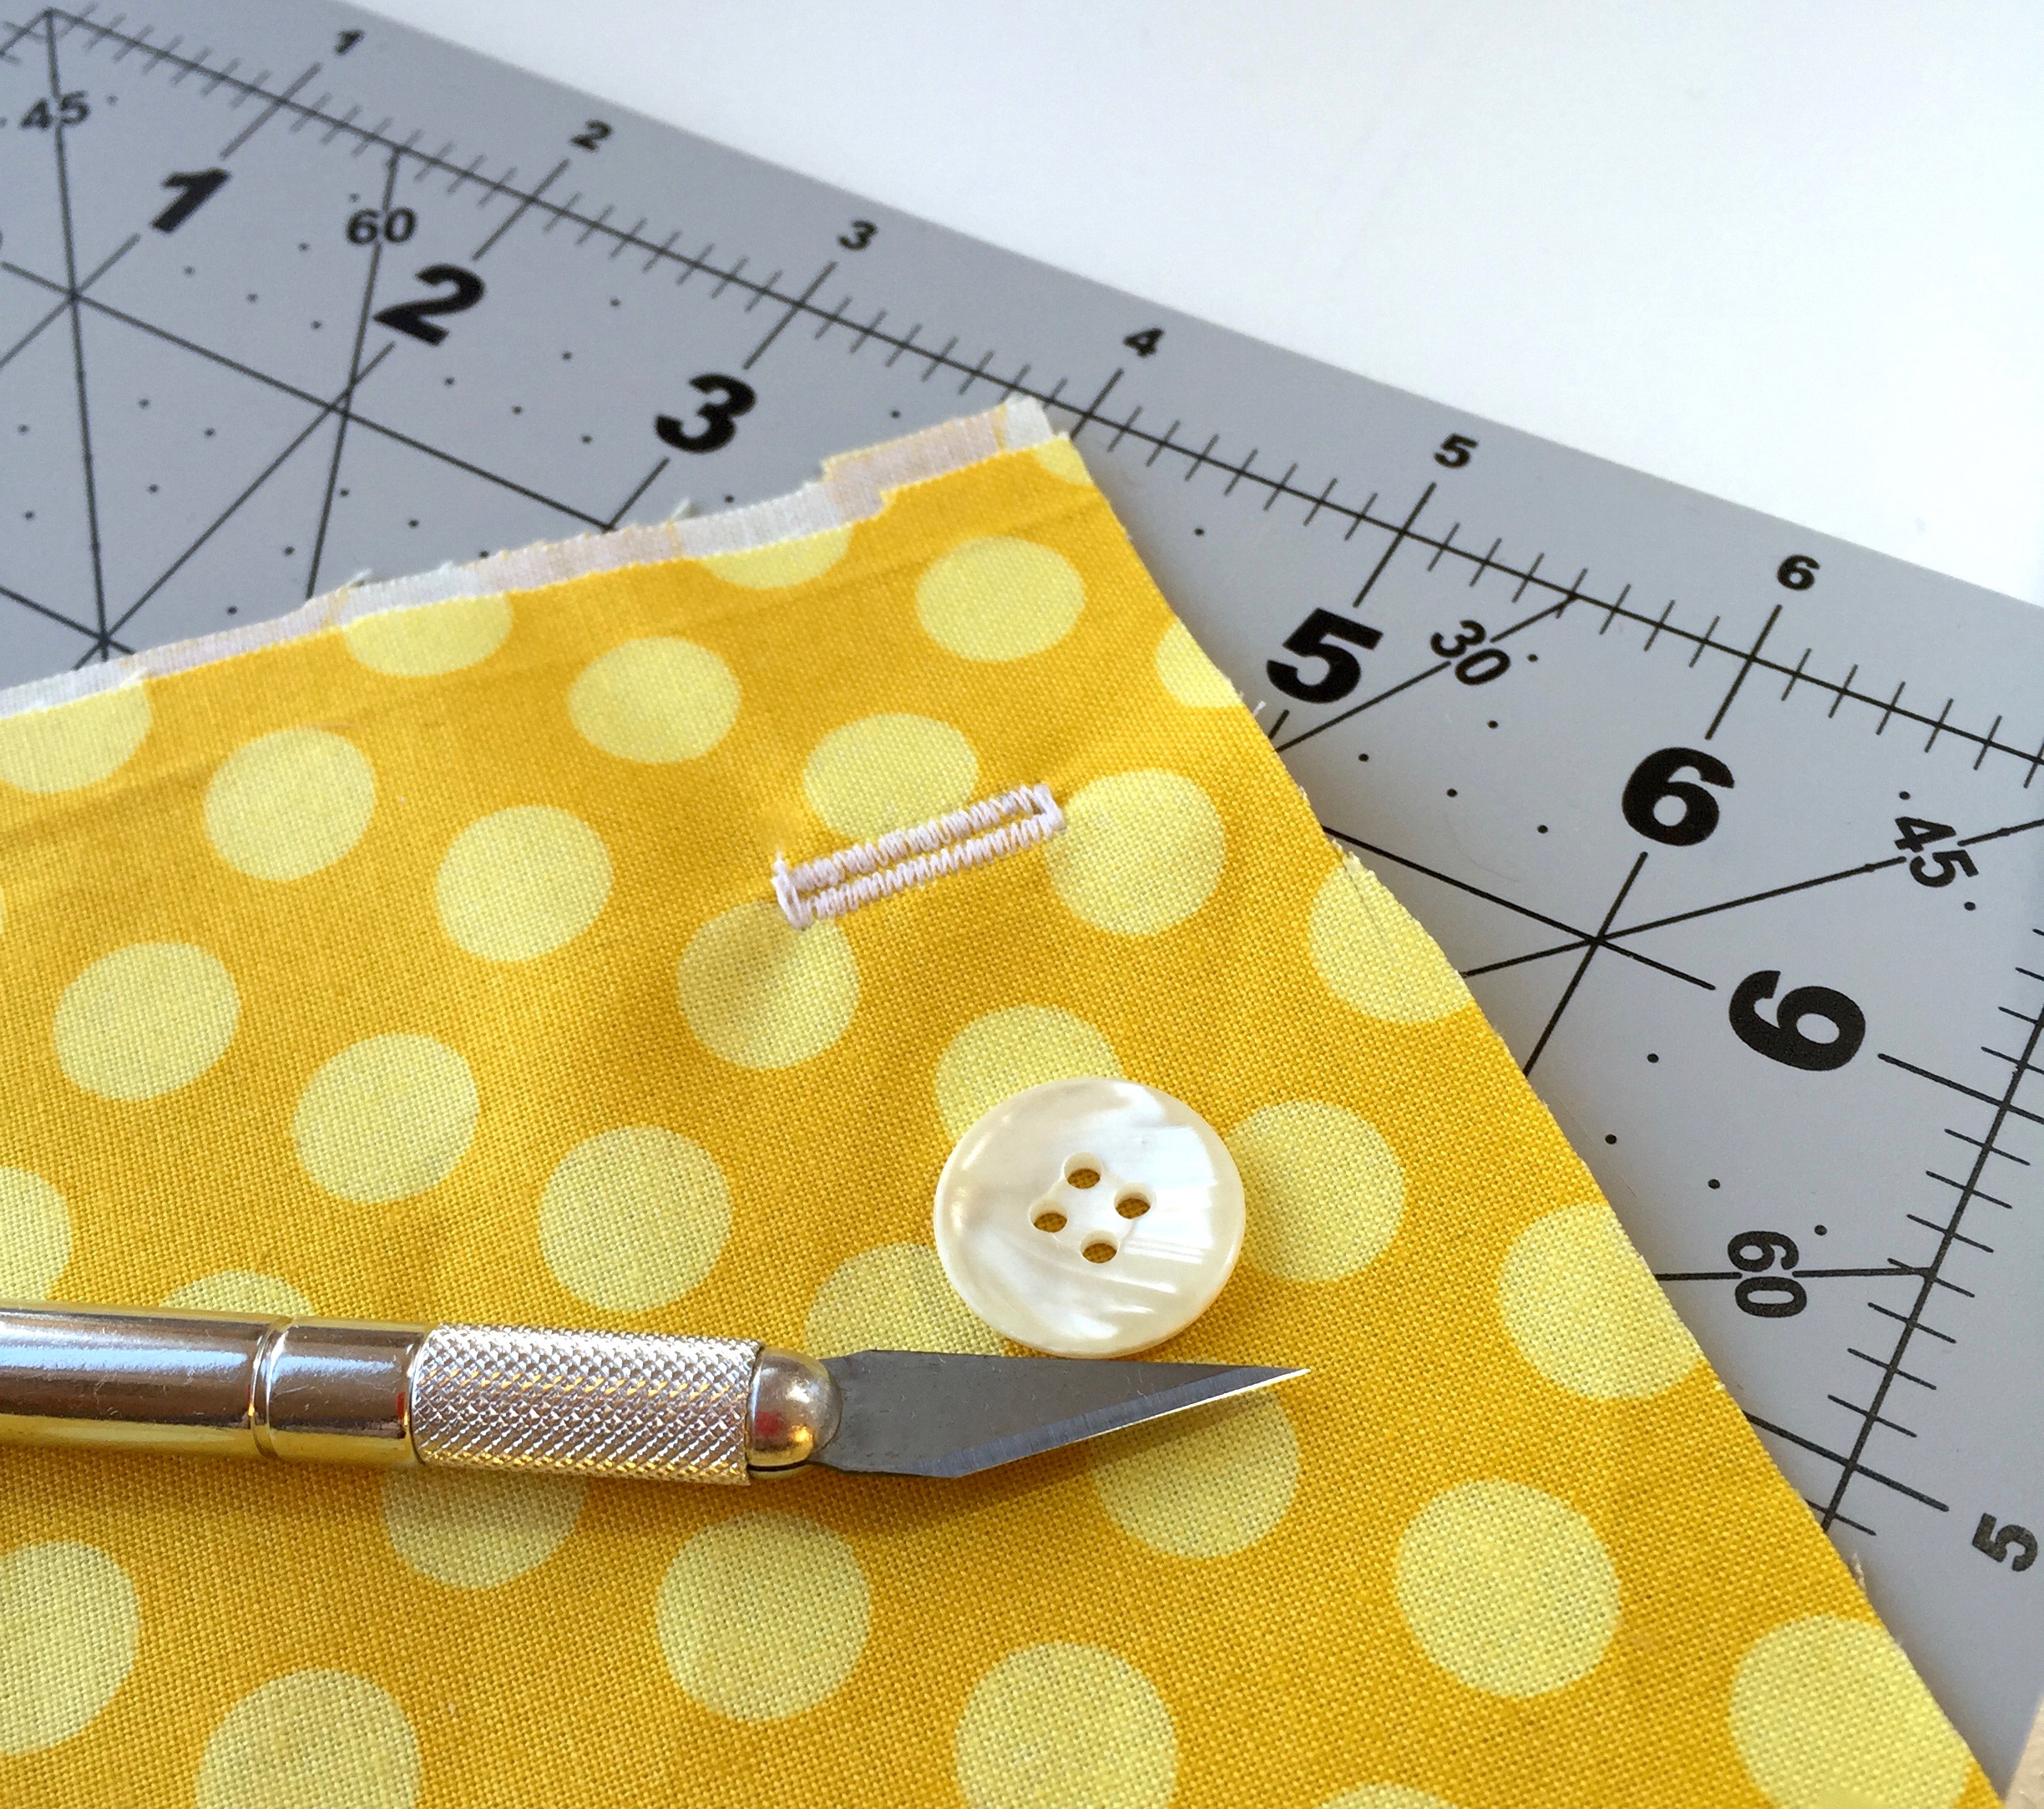
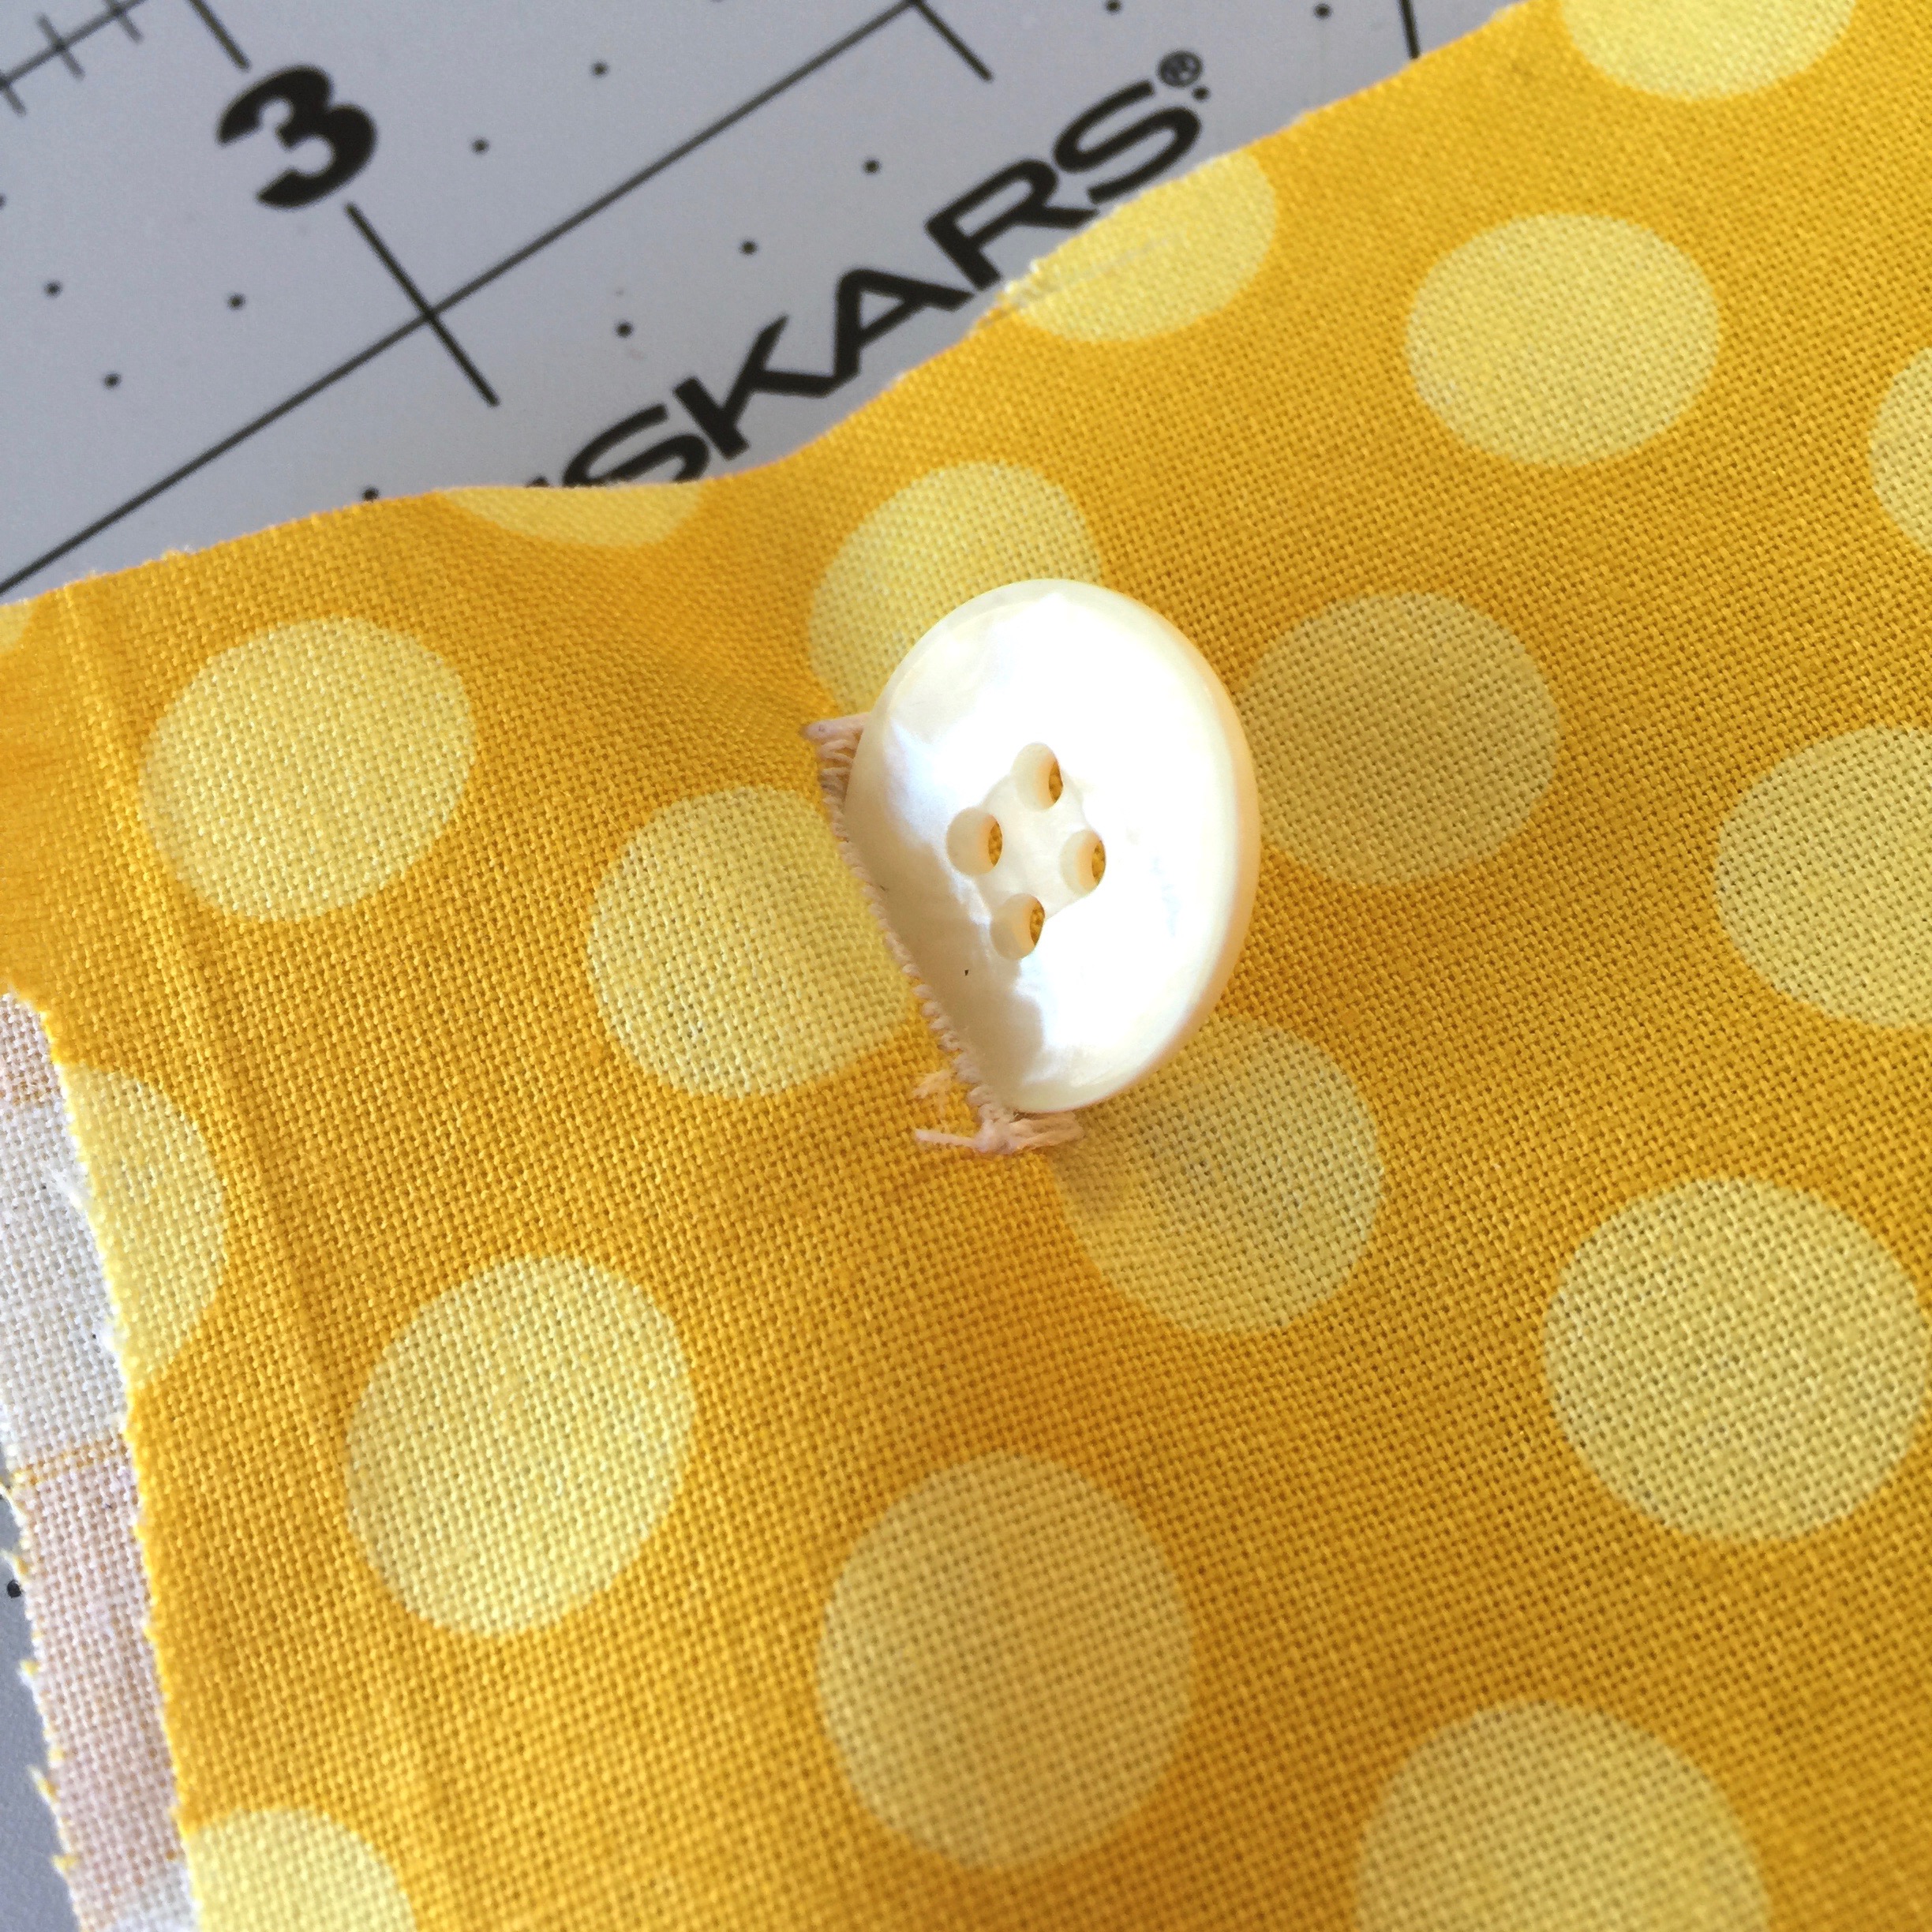
Attach your buttonhole foot and measure your buttonhole with the red marker on your foot. After you have an approximate idea of buttonhole size. Sew one on some scrap fabric. Yoiu will want to try this with your button to see if it fits. I use an Xacto knife and a mat to cut the slit in the hole. There is such a thing as a buttonhole cutter. However, it may be too big for some buttonholes.

Sizing buttonholes

If the buttonhole is too small or too big tweak your size.

Too small

Too small

Once you get the correct size, sew several before starting on the real garment. This helps make sure your machine is behaving consistently and you are confident.

buttonhole sewing

Now you are ready for the real thing. 

Line the top of the buttonhole up with your first mark. Line the basting to be just underneath the right inside edge of the foot. 

Buttonhole placemenbt

If you have an automatic buttonholer it will stop and turn and you can just move onto the next buttonhole and repeat. if it is not automatic you will need to pay attention to your end mark.

When you are done:

Take out the basting

Tear off the paper or stabilizer

Cut the holes

Sew on your buttons.

Try it, it is probably quicker than reading this tutorial.

Buttonholes for doll clothes
Buttonholes
Featured
Doll Dressmaking Series: Puffy Sleeves
Jan 6, 2018
Doll Dressmaking Series: Puffy Sleeves
Jan 6, 2018
Jan 6, 2018
Fancy sleeves
Jan 5, 2018
Doll Dressmaking: Fancy Sleeves Tutorial
Jan 5, 2018
Jan 5, 2018
Doll Dressmaking Series: Capris
Jun 4, 2017
Doll Dressmaking Series: Capris
Jun 4, 2017
Jun 4, 2017
Snaps and velcro
Feb 6, 2017
Doll Dressmaking Series: Snaps and Velcro
Feb 6, 2017
Feb 6, 2017
Doll Dressmaking Series: Sewing for Smaller Dolls
Oct 27, 2016
Doll Dressmaking Series: Sewing for Smaller Dolls
Oct 27, 2016
Oct 27, 2016
Doll Dressmaking Tutorial: Creating a Cute Bodice with Elastic
Jun 20, 2016
Doll Dressmaking Tutorial: Creating a Cute Bodice with Elastic
Jun 20, 2016
Jun 20, 2016
Doll Dressmaking Series: Long Sleeves for the Peasant Blouse
Apr 26, 2016
Doll Dressmaking Series: Long Sleeves for the Peasant Blouse
Apr 26, 2016
Apr 26, 2016
Doll Dressmaking Series: Long Sleeves
Feb 10, 2016
Doll Dressmaking Series: Long Sleeves
Feb 10, 2016
Feb 10, 2016
Don't Be Afraid of Buttonholes
Jan 29, 2016
Don't Be Afraid of Buttonholes
Jan 29, 2016
Jan 29, 2016
How to resize doll patterns
Jan 12, 2016
Resizing Doll Dress Patterns
Jan 12, 2016
Jan 12, 2016


In Doll Dressmaking 2
2 Comments

Resizing Doll Dress Patterns

January 12, 2016 Lisa Press
How to resize doll patterns

A number of you have contacted me asking for me if I had patterns for certain dolls. In addition, although I sized the pattern sets for Phoebe, AG doll, 16 inch Waldorf dolls and Sasha, each of those dolls' sizes vary.
In other words inevitably it is useful to know how to resize a pattern to fit your doll.

There are number of easy steps to resizing a pattern.

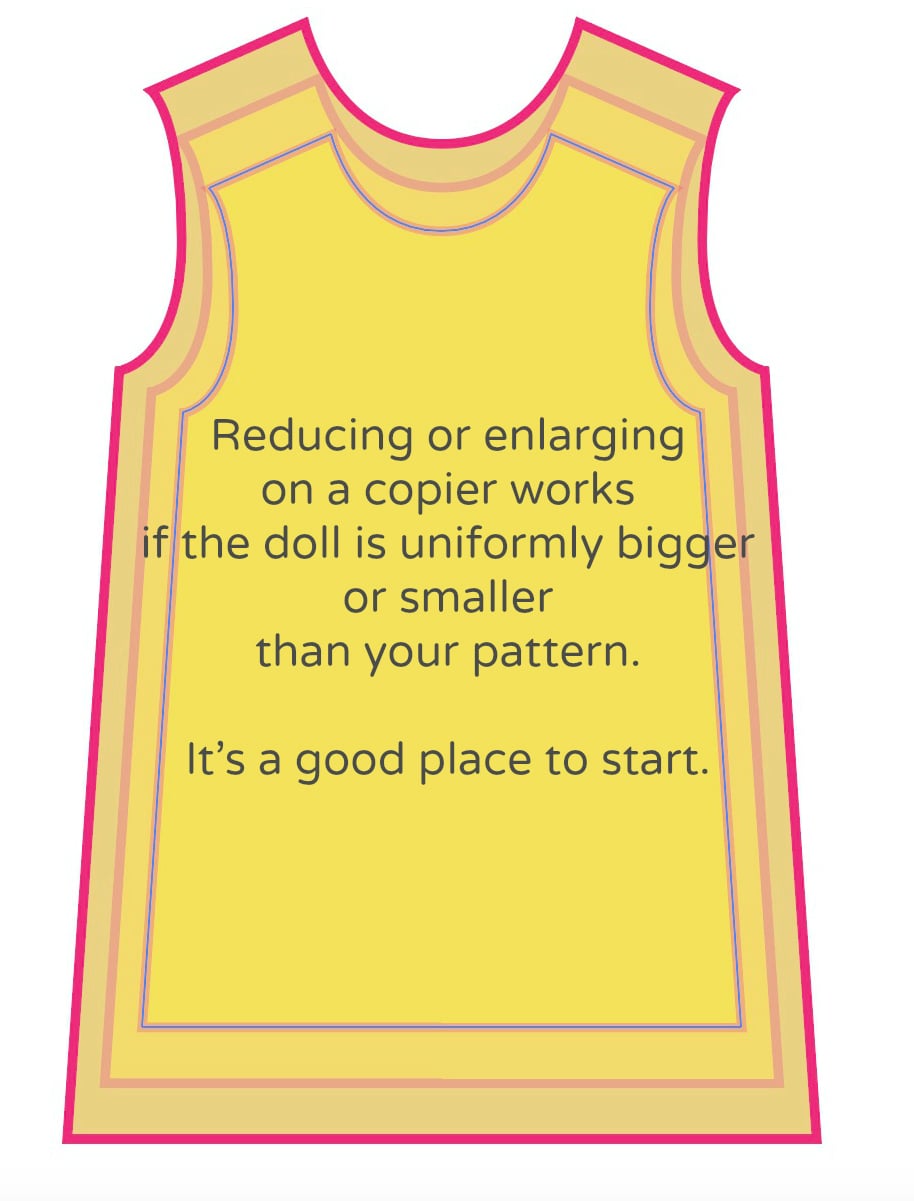
If the dolls is overall bigger or smaller, start with copying or printing the pattern at a larger or smaller percentage.

enlarging a pattern

If the doll has the same proportions this step may get you there. You can start by taking a chest measurement of your doll and searching online for the chest measurement of the doll the pattern was created for. If your doll is 8" and the doll the pattern was created for is 12", then 8/12 or 75% is what you should print at.

If that gets you closer, but the pattern size still needs to be tweaked. Here are some next steps.

Dress is the right size but the neck if tight.

widening the nack

If it is more than the neck that is narrow, you may want to widen the dress without making it over all bigger, ie the armholes and shoulders and length stay the same. this can be done by splitting the pattern down the middle and separating the two sides by the amount you need to make it wider.

widening the back

Once you've done this, take tracing paper and trace over to make a new pattern piece.

Be sure to also add some onto each back piece. I usually add half of the front increase to each side of the back.

altering the back

If the dress is torso is too short, especially in the armhole area, you can cut the pattern horizontally and divide and make a new pattern piece.

Lengthening the armholes.jpg

If a dress is the correct length but overall too wide, the pattern can be narrowed by cutting down the middle and pushing the two pieces together.

narrowing a doll dress

Be sure to also trim a bit off the center back edges too. If the neck is too narrow you may need to redraw the neck.

Although any one of these steps may get you straight to the a doll dress that perfectly fits your doll, it make take a combination of these steps. If you don't feel like using lots of fabric to sew the size trials, use paper towel.

Hope this helps! Happy sewing (and resizing)!

Featured
Doll Dressmaking Series: Puffy Sleeves
Jan 6, 2018
Doll Dressmaking Series: Puffy Sleeves
Jan 6, 2018
Jan 6, 2018
Fancy sleeves
Jan 5, 2018
Doll Dressmaking: Fancy Sleeves Tutorial
Jan 5, 2018
Jan 5, 2018
Doll Dressmaking Series: Capris
Jun 4, 2017
Doll Dressmaking Series: Capris
Jun 4, 2017
Jun 4, 2017
Snaps and velcro
Feb 6, 2017
Doll Dressmaking Series: Snaps and Velcro
Feb 6, 2017
Feb 6, 2017
Doll Dressmaking Series: Sewing for Smaller Dolls
Oct 27, 2016
Doll Dressmaking Series: Sewing for Smaller Dolls
Oct 27, 2016
Oct 27, 2016
Doll Dressmaking Tutorial: Creating a Cute Bodice with Elastic
Jun 20, 2016
Doll Dressmaking Tutorial: Creating a Cute Bodice with Elastic
Jun 20, 2016
Jun 20, 2016
Doll Dressmaking Series: Long Sleeves for the Peasant Blouse
Apr 26, 2016
Doll Dressmaking Series: Long Sleeves for the Peasant Blouse
Apr 26, 2016
Apr 26, 2016
Doll Dressmaking Series: Long Sleeves
Feb 10, 2016
Doll Dressmaking Series: Long Sleeves
Feb 10, 2016
Feb 10, 2016
Don't Be Afraid of Buttonholes
Jan 29, 2016
Don't Be Afraid of Buttonholes
Jan 29, 2016
Jan 29, 2016
How to resize doll patterns
Jan 12, 2016
Resizing Doll Dress Patterns
Jan 12, 2016
Jan 12, 2016
In Doll Dressmaking 2
17 Comments
Older Posts →
Instagram
ExtraSmall pajamas in the works. 😴
By Friday, I’m hoping to list 4 medium Phoebes and 3 ExtraSmall. This little redhead is one of the ExtraSmalls.
Still photography, sewing and getting ready to reopen. #etsysellersofinstagram
This Phoebe flew off to the west coast last week ✈️💕
Another shot of two adorables getting acquainted in London. 💕💕
Phoebe happily made it to London in her matching school uniform. 🇬🇧
Thanks @lanelaurenlane for letting people know about Phoebe&Egg ❤️ We have 6 skin colors of dolls.
The black squares will be gone in a few days. Let’s try to do something more long term. #blackouttuesday
Did I mention how happy I am to be doll making? Soooo happy 😊
On her way to a birthday girl🎂😘

Keep up with the patterns

Sign up with your email address to receive news and updates and the patterns.

We respect your privacy.

Thank you!
Blog
Help me find a Home for this Special Phoebe
about 6 years ago
Explaining Phoebe Doll Sizes
about 6 years ago
Kiki, the delivery doll
about 7 years ago
A Few Words About Ruby Bridges
about 7 years ago
Historical Heroines: Pure Inspiration for Young Girls
about 7 years ago
Doll Dressmaking Series: Puffy Sleeves
about 7 years ago
Doll Dressmaking: Fancy Sleeves Tutorial
about 7 years ago
Phoebe is now a new size: 16.5 inches
about 7 years ago
One Small Customer Spreads Creativity and Good
about 7 years ago
Grace O'Malley Crosses the Atlantic
about 7 years ago
  • Studio (2)
  • The Historic Collection (2)
  • Supplies for Making (4)
  • The Doll Friend Project (5)
  • Interviews (7)
  • My Personal Journey (7)
  • Handmade Stories (9)
  • Inspiration (9)
  • The Value of Handmade (11)
  • Materials (14)
  • Teaching a Child to Sew (14)
  • Things I Love (15)
  • Doll Dressmaking 2 (17)
  • Doll Dressmaking 1 (20)
  • Tips (27)


Dolls and Clothing are available in both Etsy Shop.

Powered by Squarespace