• Home
  • Blog
  • Featured on Etsy
  • About the Dollmaker
  • About the Handmade Dolls
  • About the Doll Clothes
  • Scrappy Phoebe's Page
  • Reviews
  • Shop
  • My Etsy Shop
  • Doll Dressmaking Series
  • Teaching A Child to Sew
  • Dress Patterns for your Phoebe Doll
  • Scrappy Phoebe's Page (Copy)
  • Contact
  • Shop
Menu

Phoebe&Egg

Street Address
City, State, Zip
Phone Number
handmade dolls and doll clothing

Your Custom Text Here

Phoebe&Egg

  • Home
  • Blog
  • About
    • Featured on Etsy
    • About the Dollmaker
    • About the Handmade Dolls
    • About the Doll Clothes
  • Scrappy Phoebe's Page
  • Shop and Reviews
    • Reviews
    • Shop
    • My Etsy Shop
  • Doll Dressmaking
    • Doll Dressmaking Series
    • Teaching A Child to Sew
    • Dress Patterns for your Phoebe Doll
    • Scrappy Phoebe's Page (Copy)
  • Contact
  • Shop

Spoonflower Doll Giveaway

March 3, 2016 Lisa Press
Spoonflower Doll Giveaway

For those of you unfamiliar with Spoonflower, you really should check it out. In a nutshell they print on fabric.

They can print your designs on fabric. Or you can buy others designs on fabric. and there are now so many types of fabric that they print on. Cottons, knits, linens, canvas, satin, faux suede.

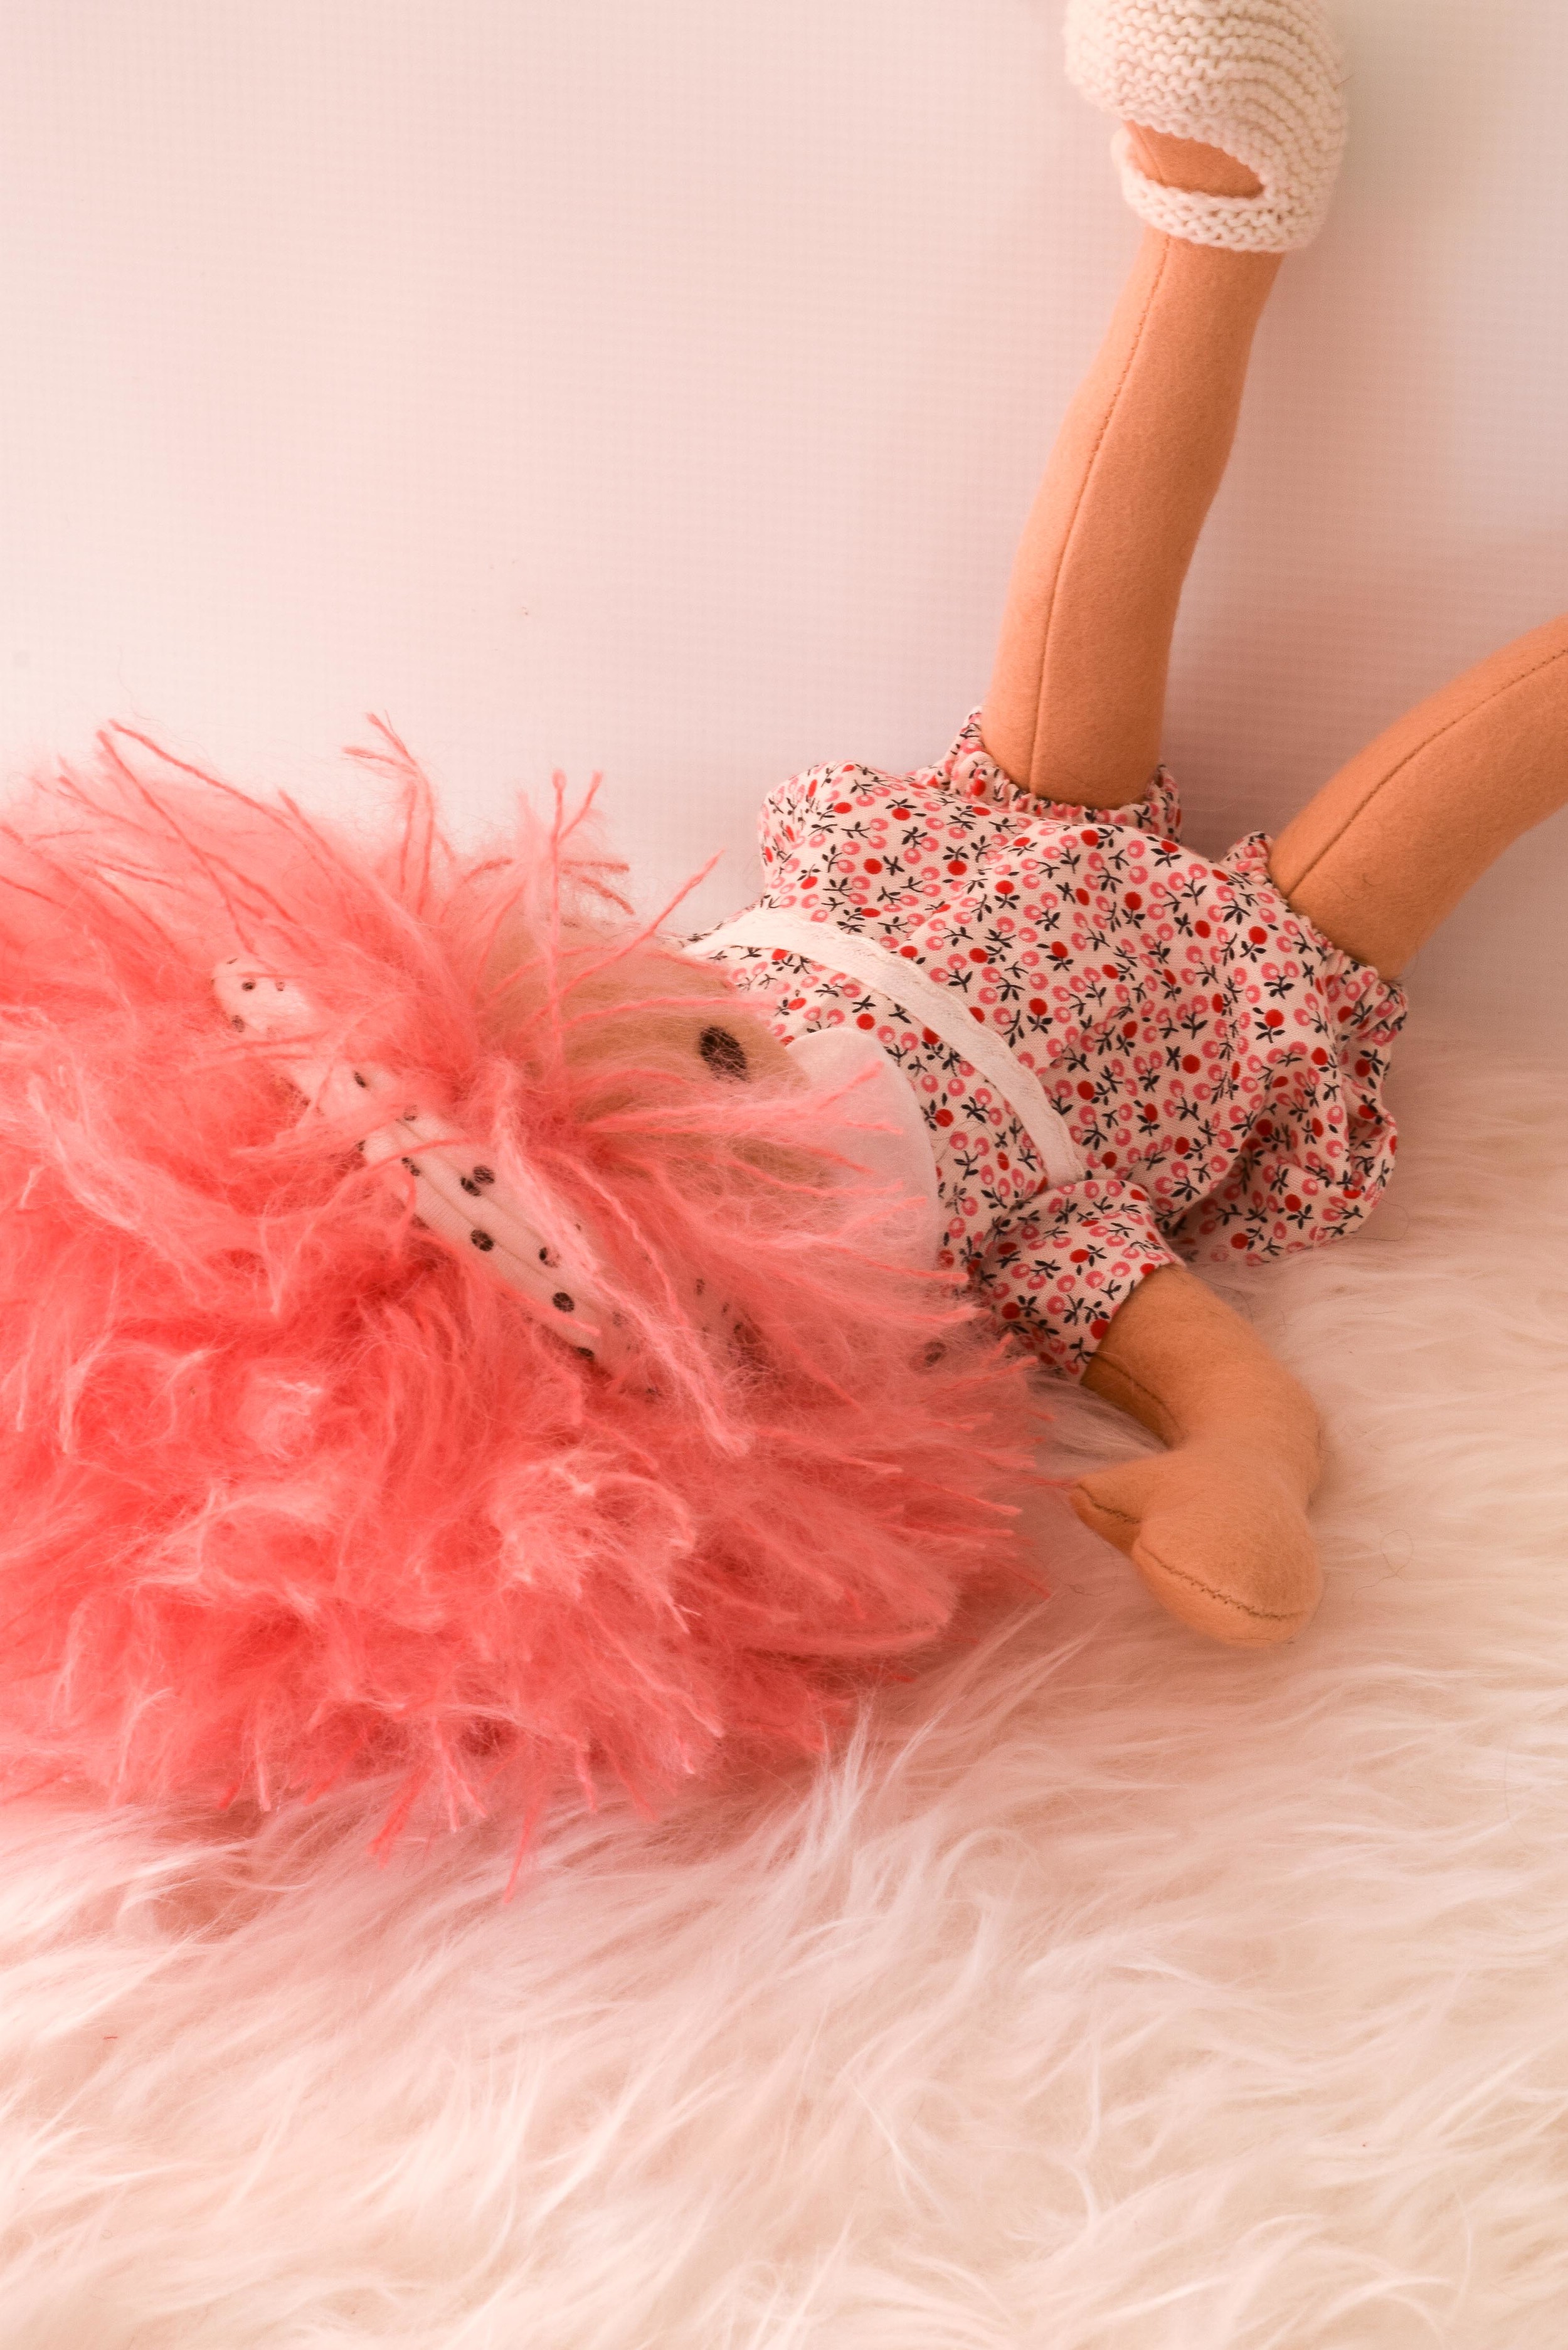
I've had a number of things printed there, including Scrappy Phoebe. But I've also been eyeing other people's dolls on Spoonflower. 

I especially love the dolls of Stacy Iest Hsu, a San Francisco based textile designer, whose work includes dolls and textiles on Spoonflower and at Moda fabrics. She also designs for Janie and Jack, GapKids, Target, and Tiny Prints. She recently did this Little Red Riding Hood line for Moda, which includes a doll, clothes and a wolf.

Spoonflower doll

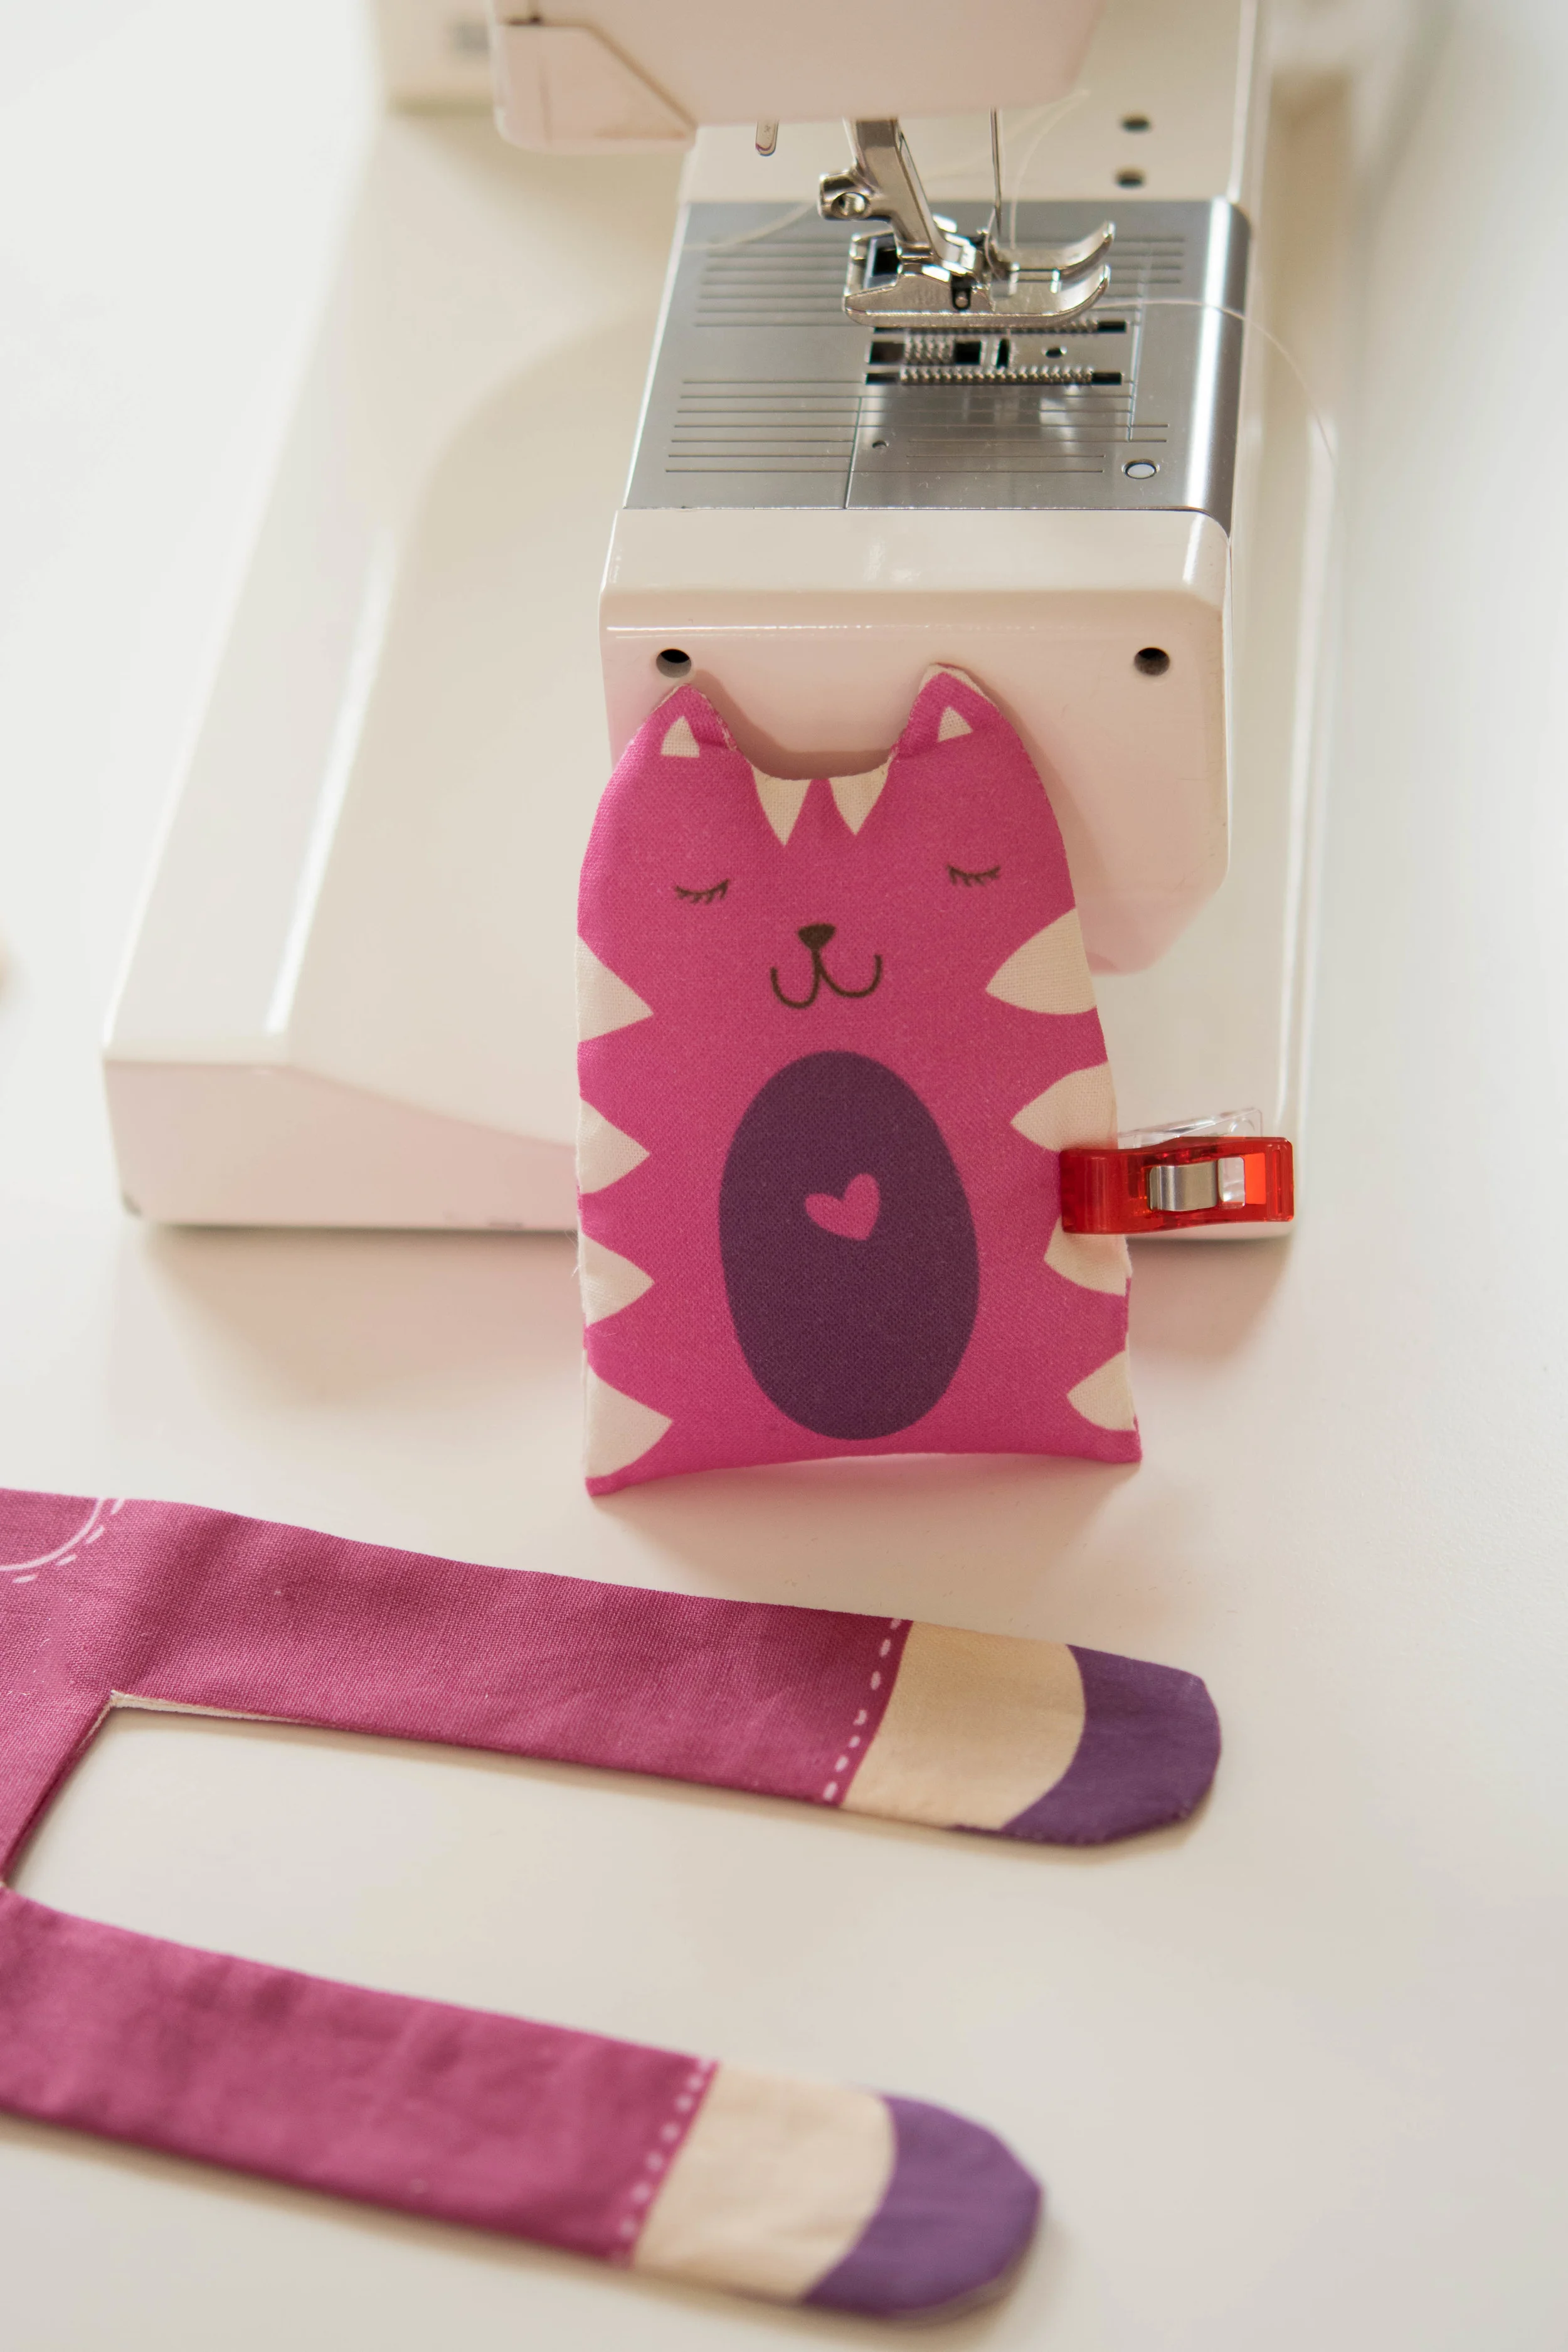
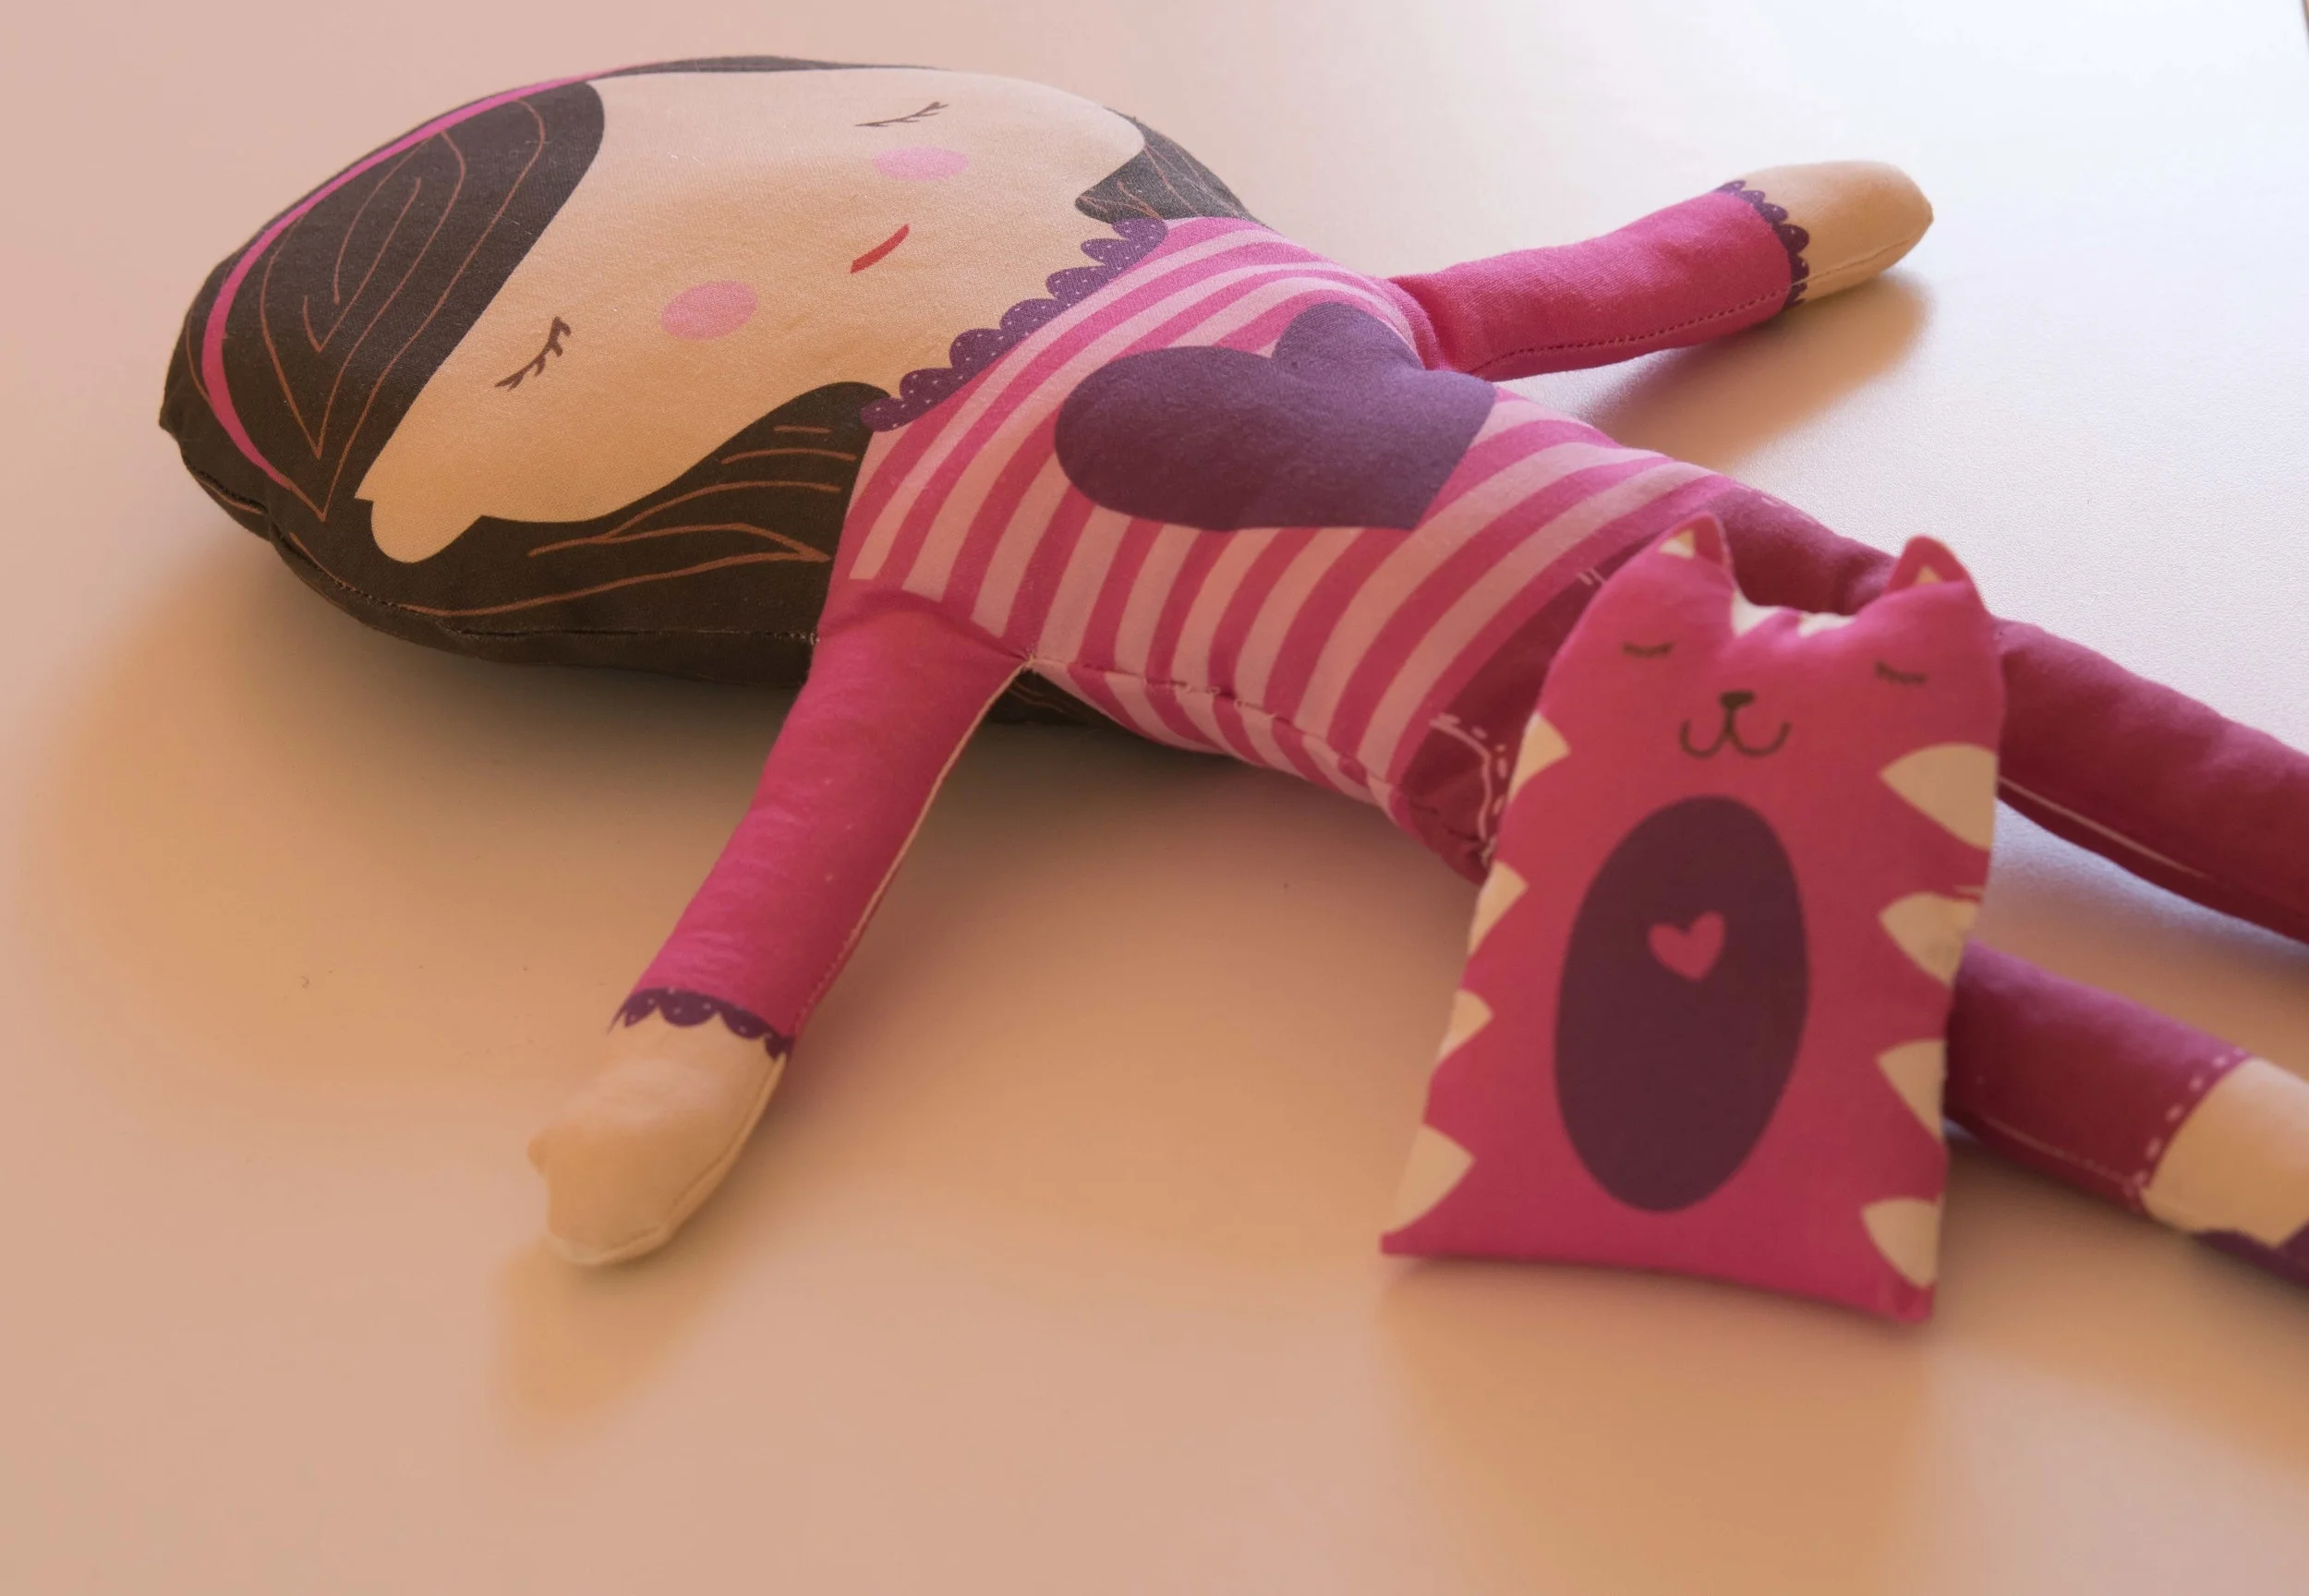
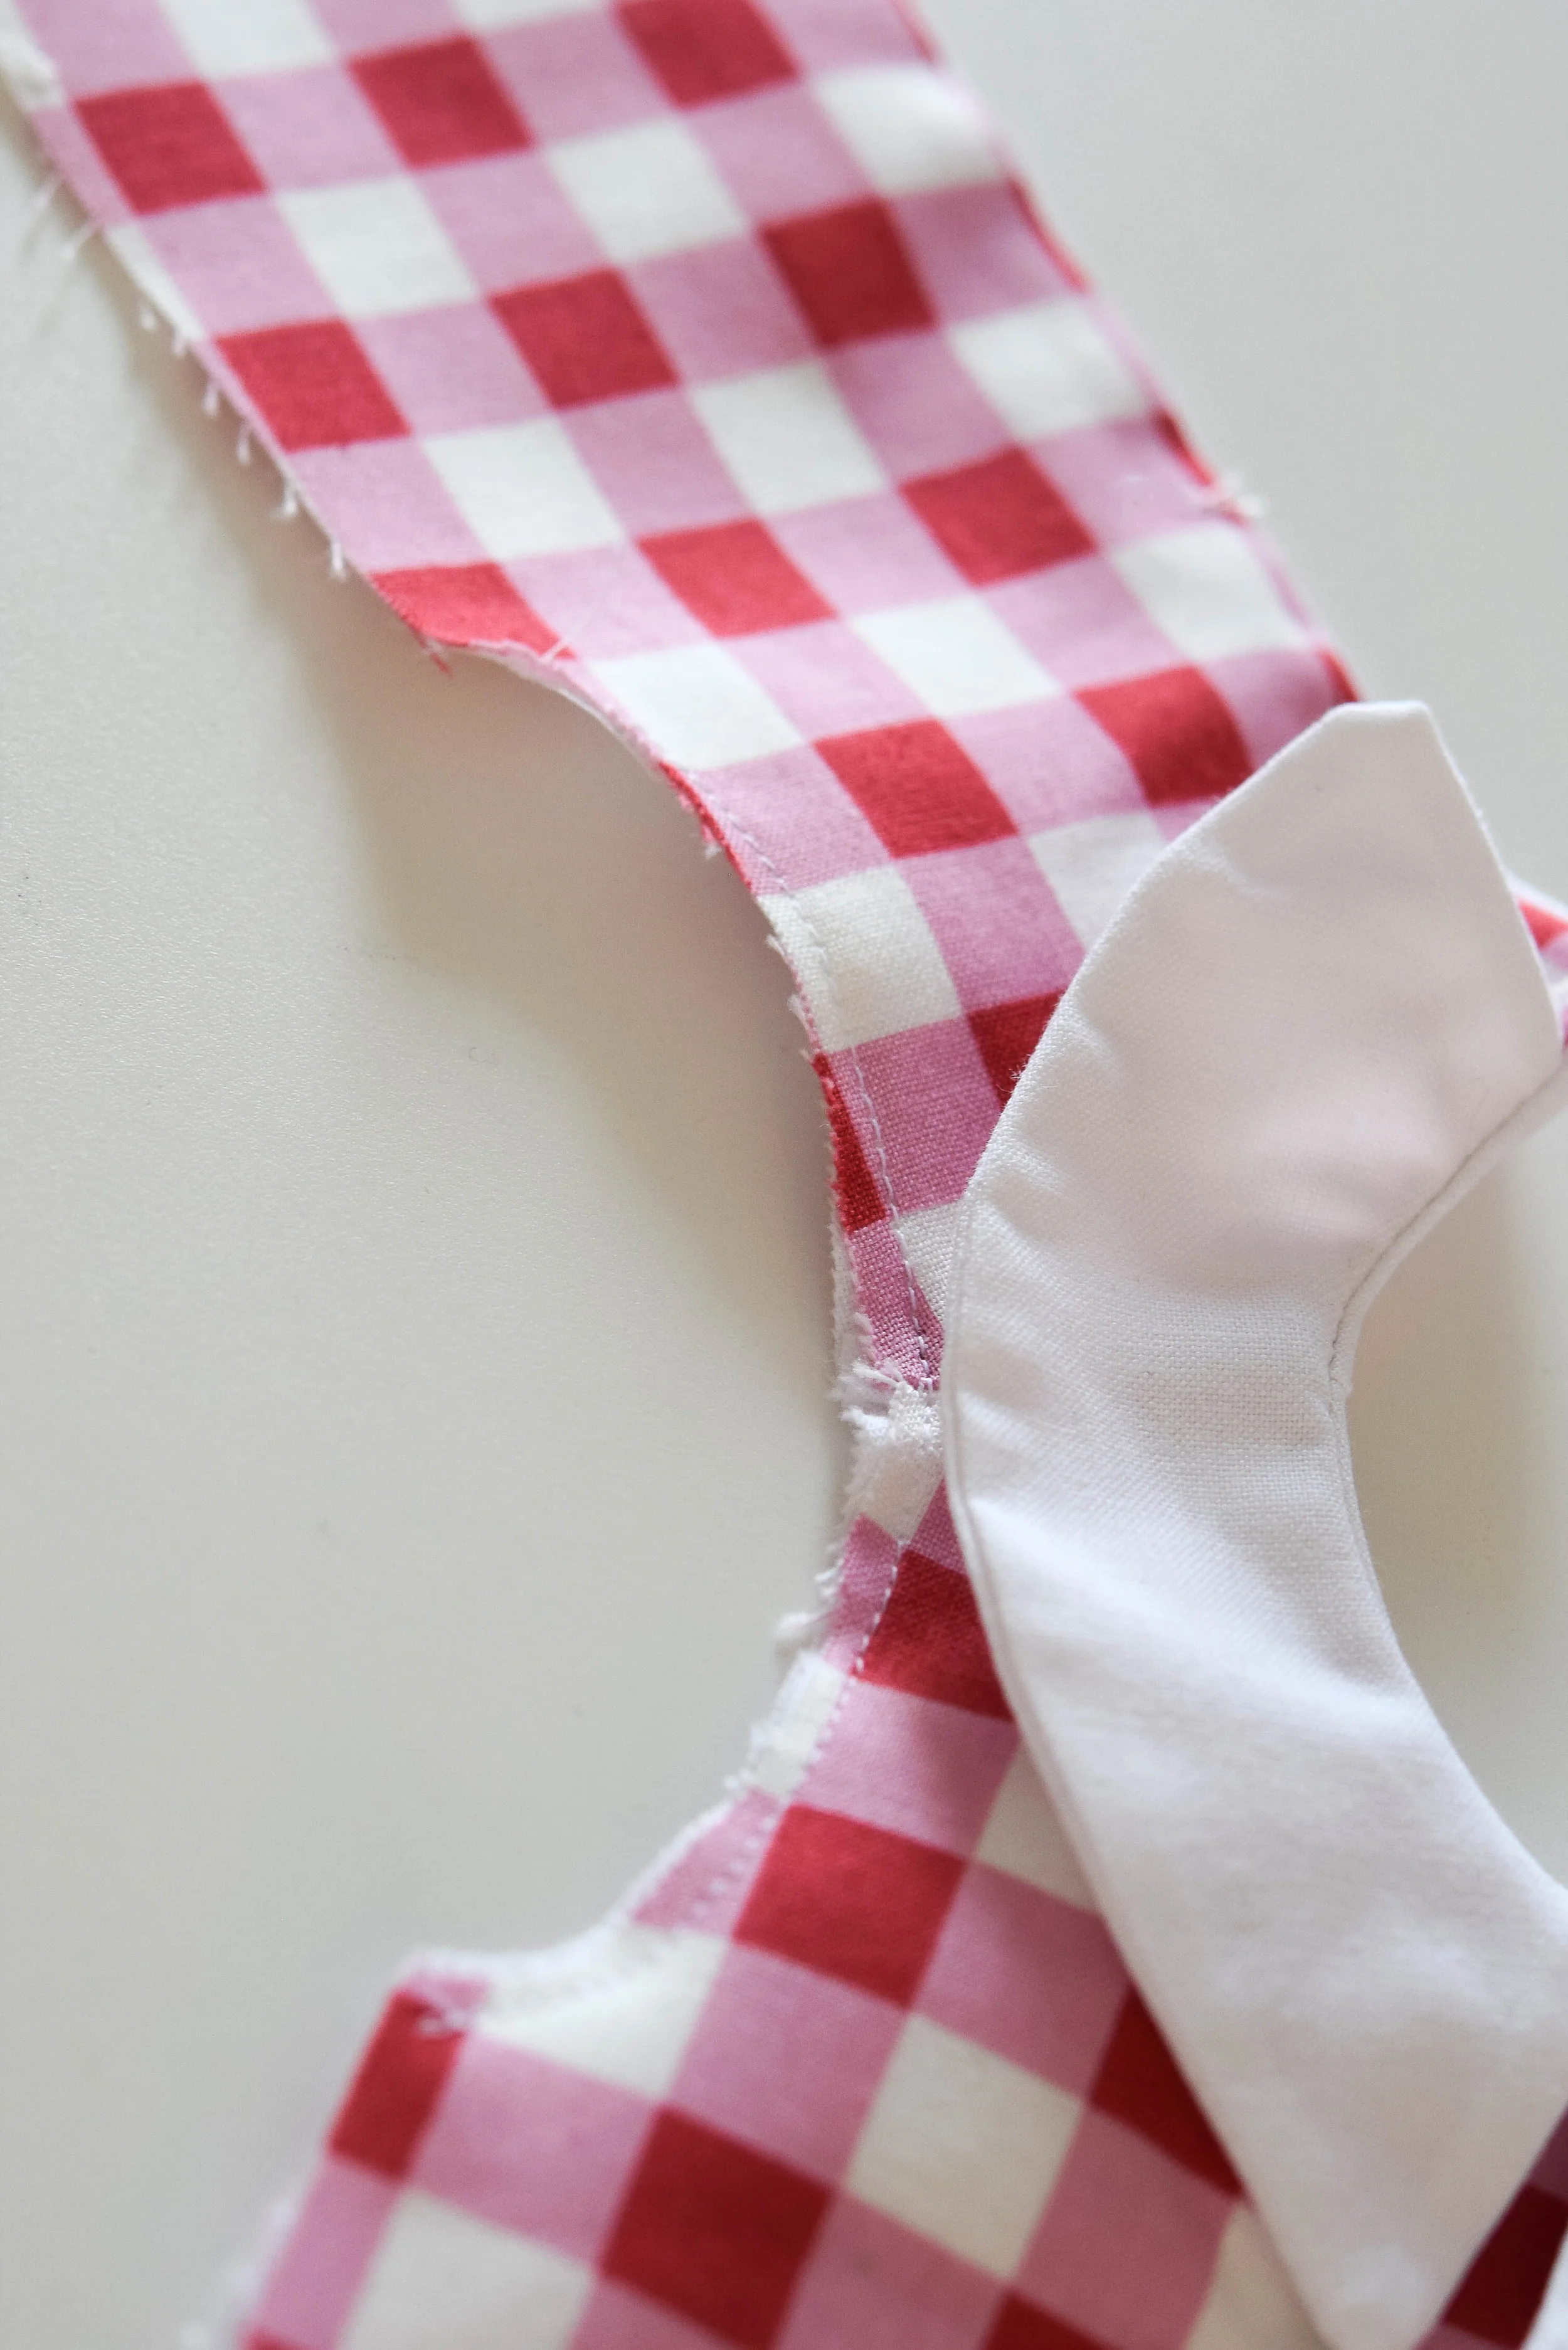
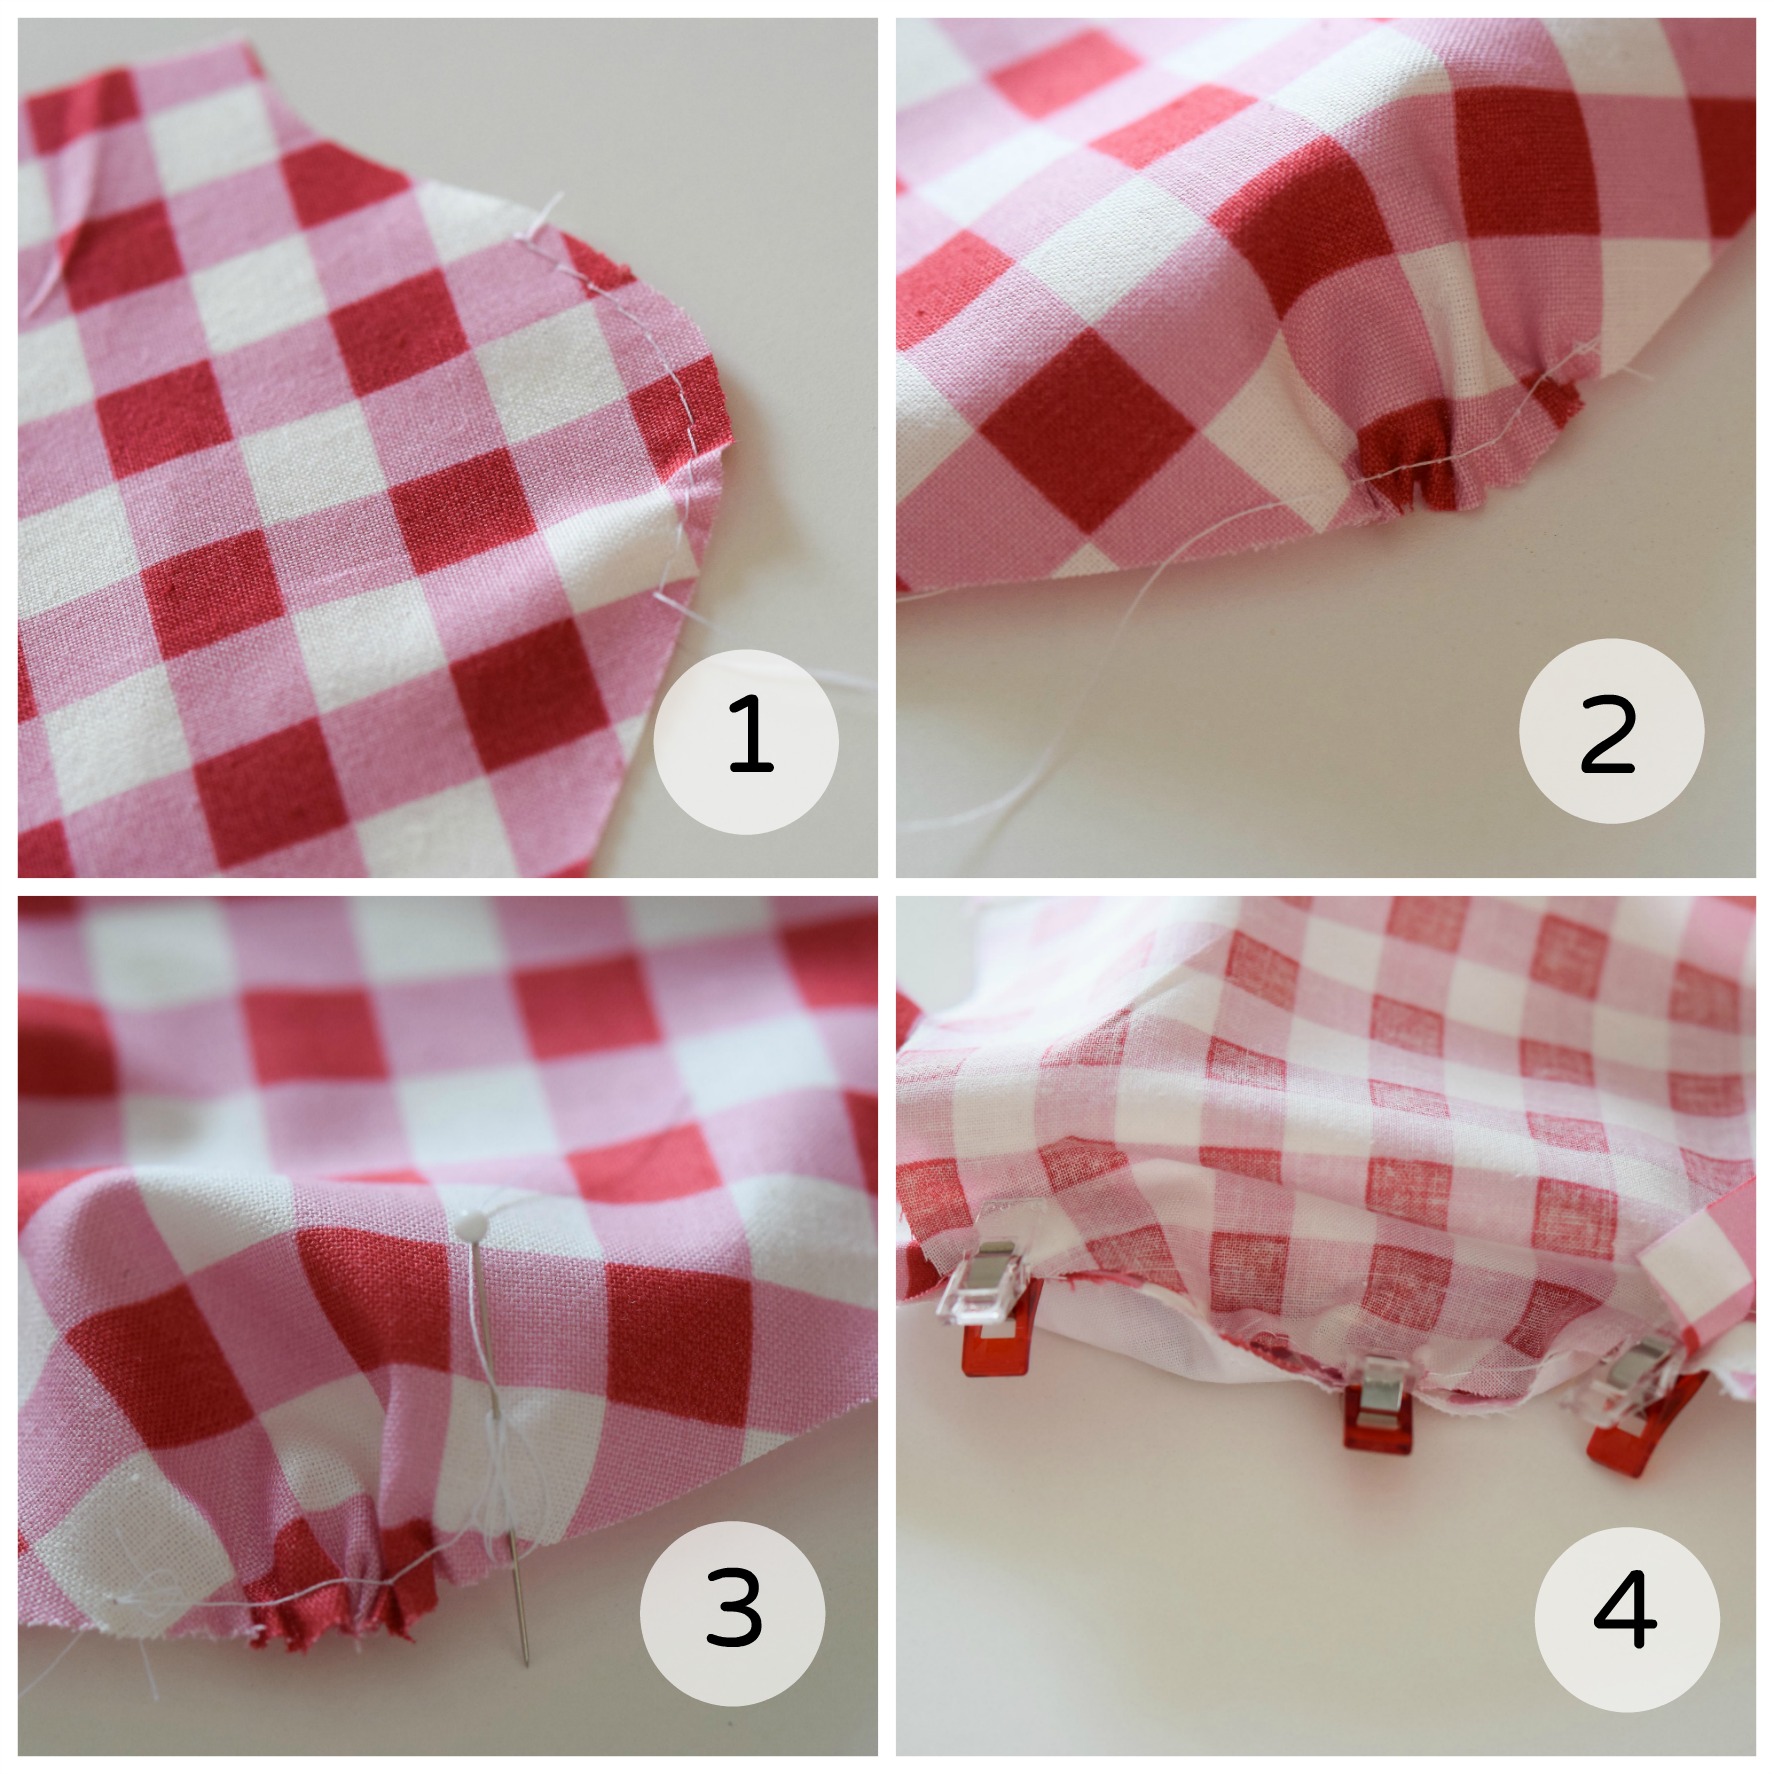
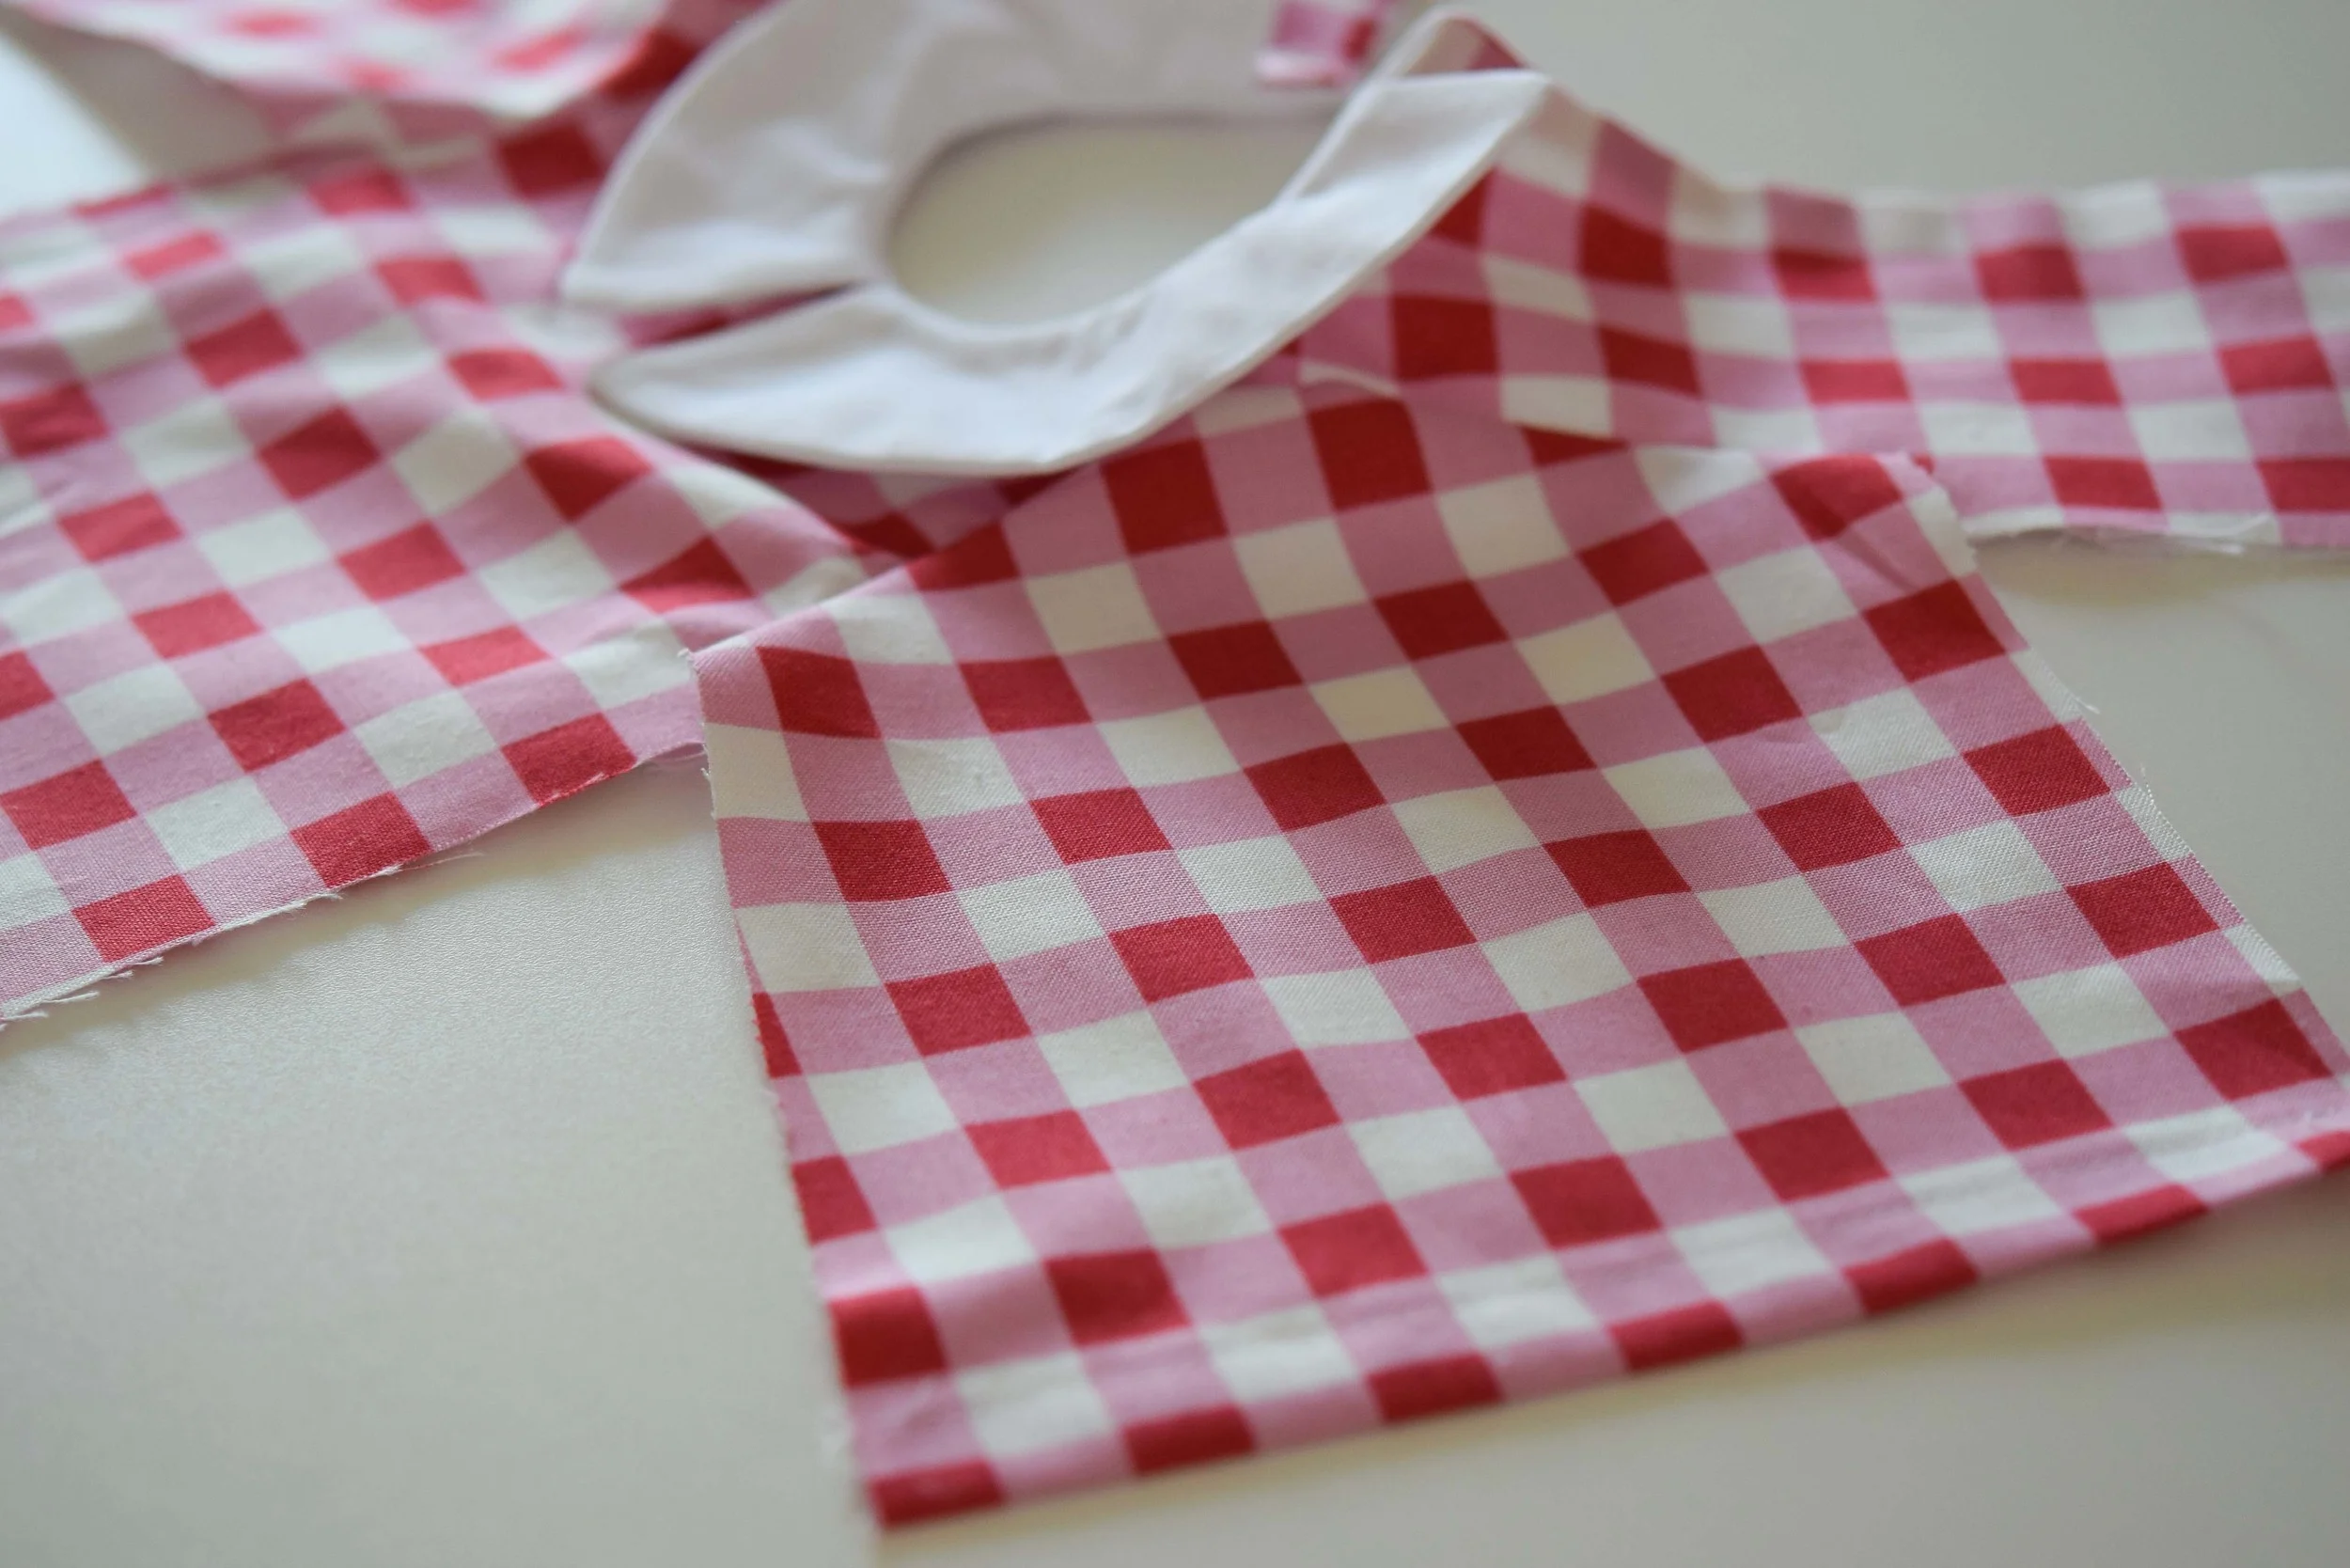
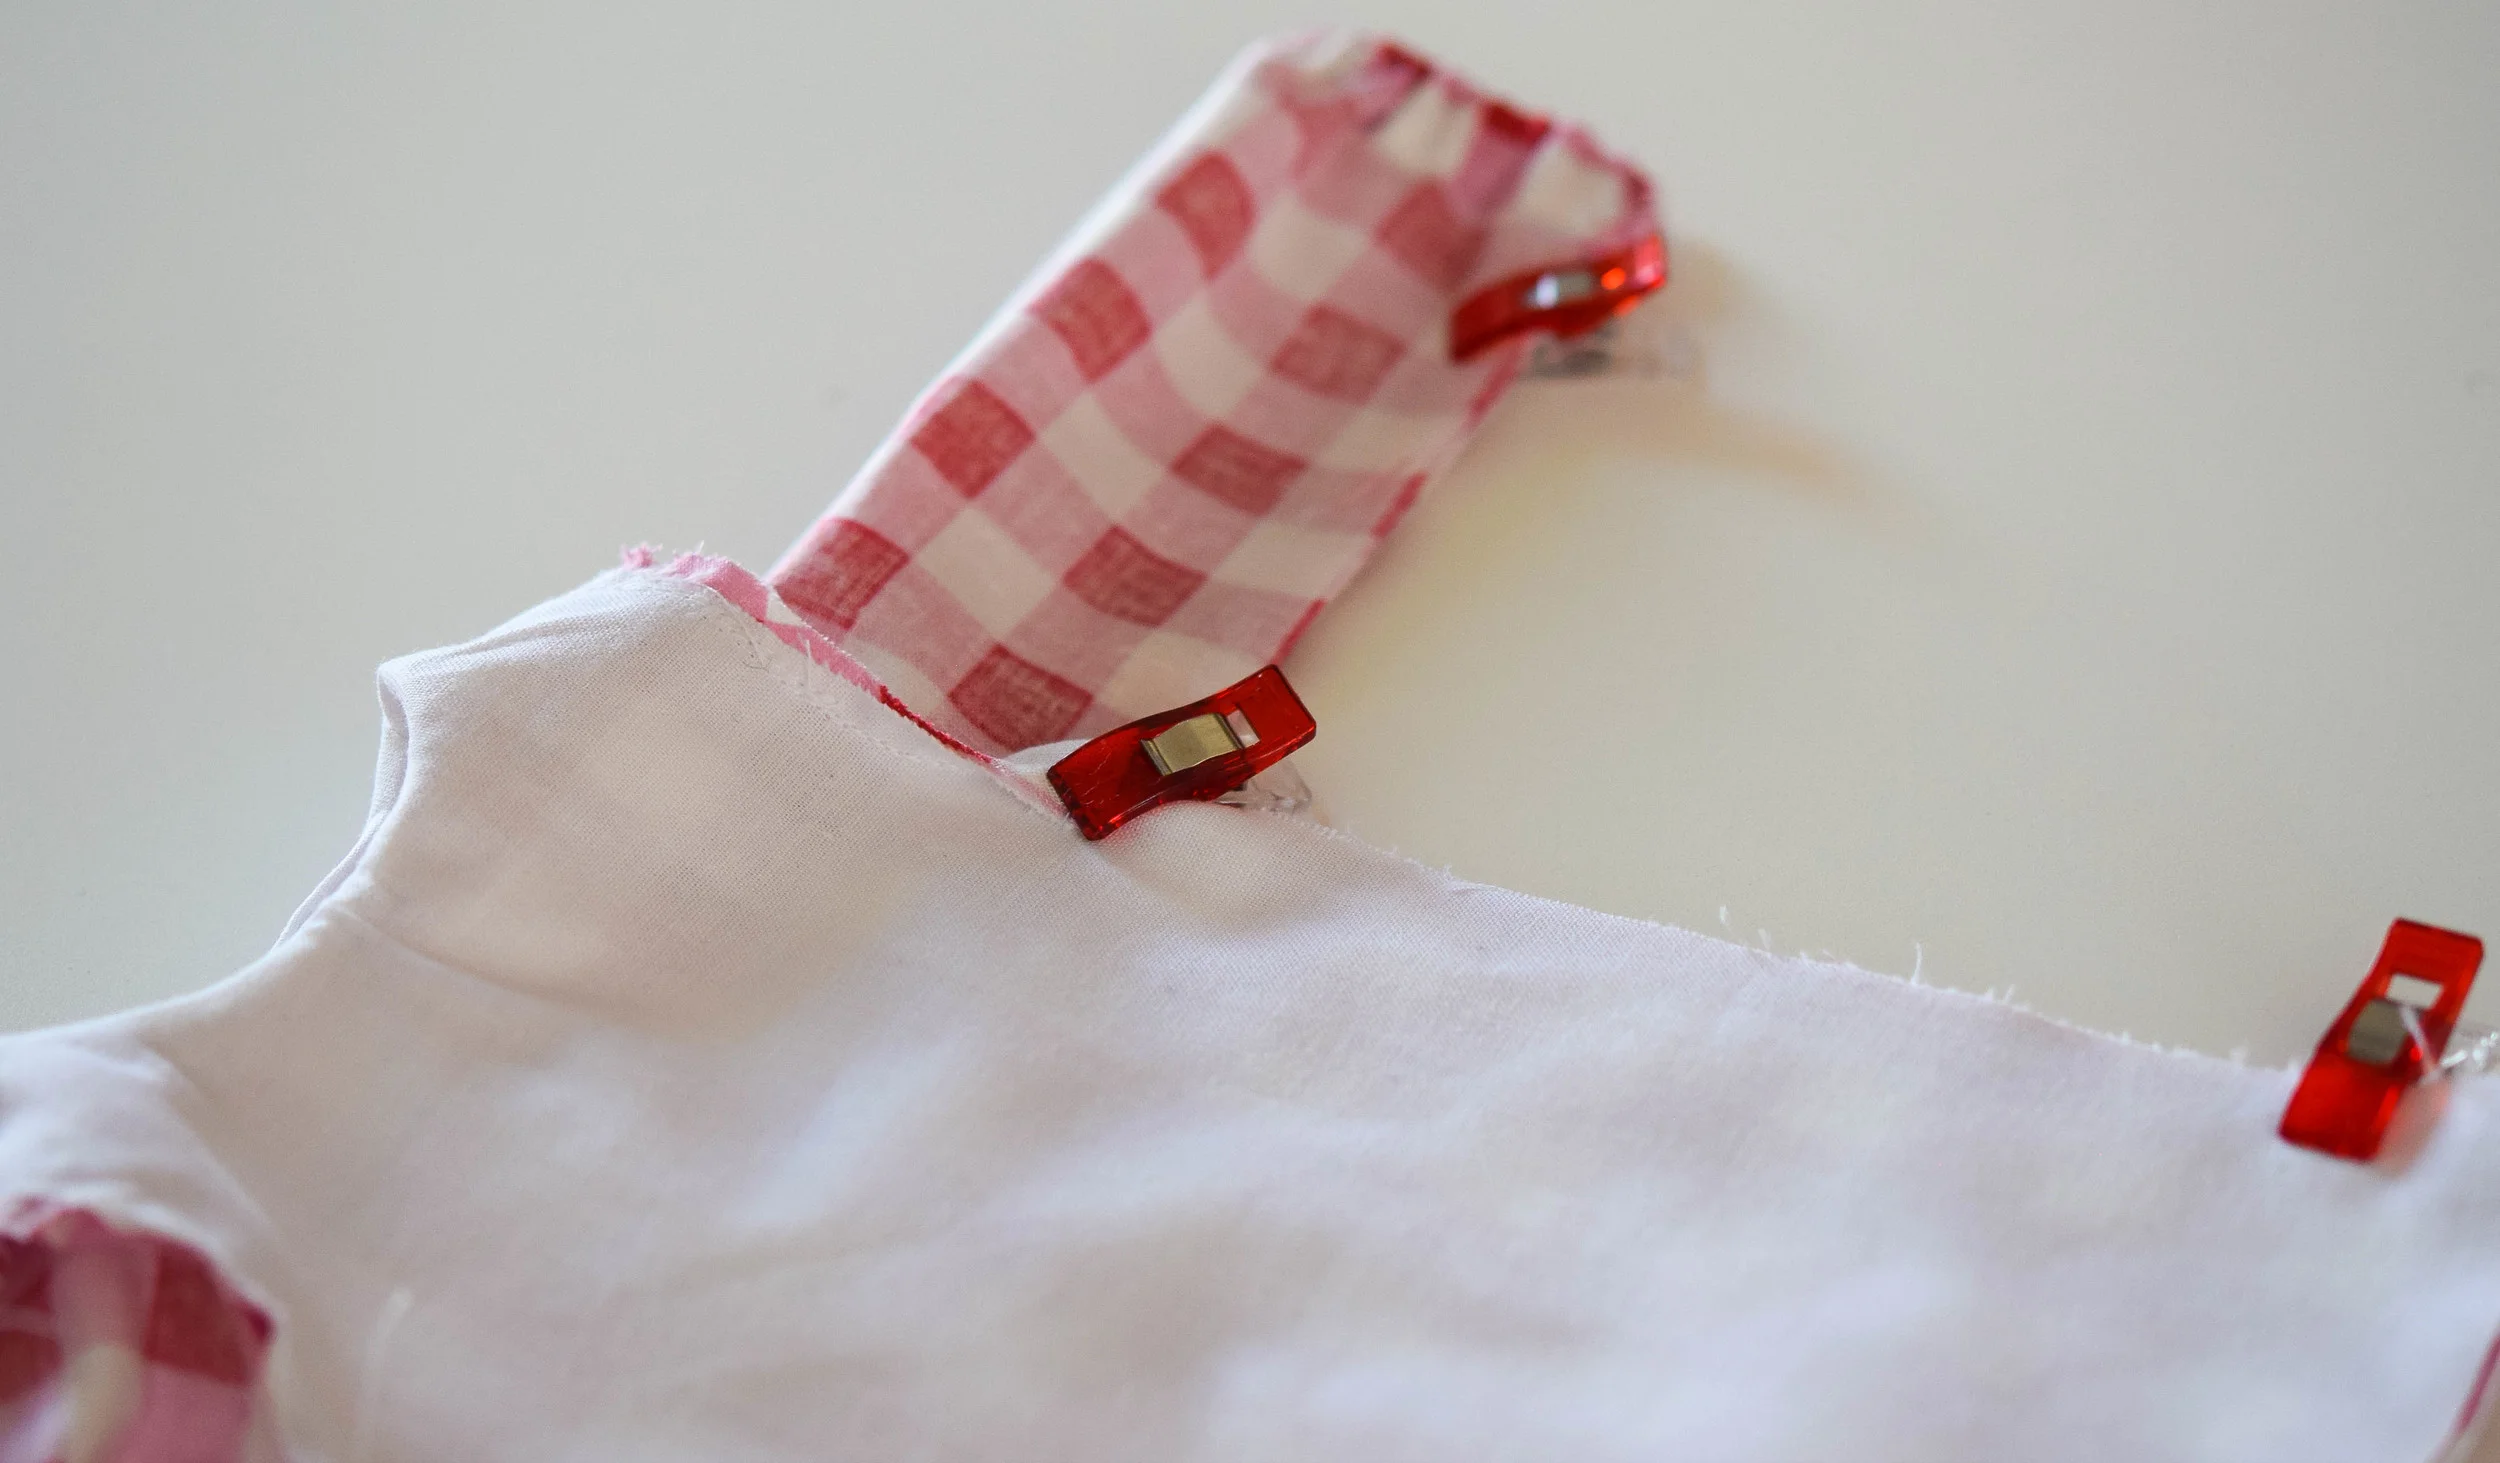
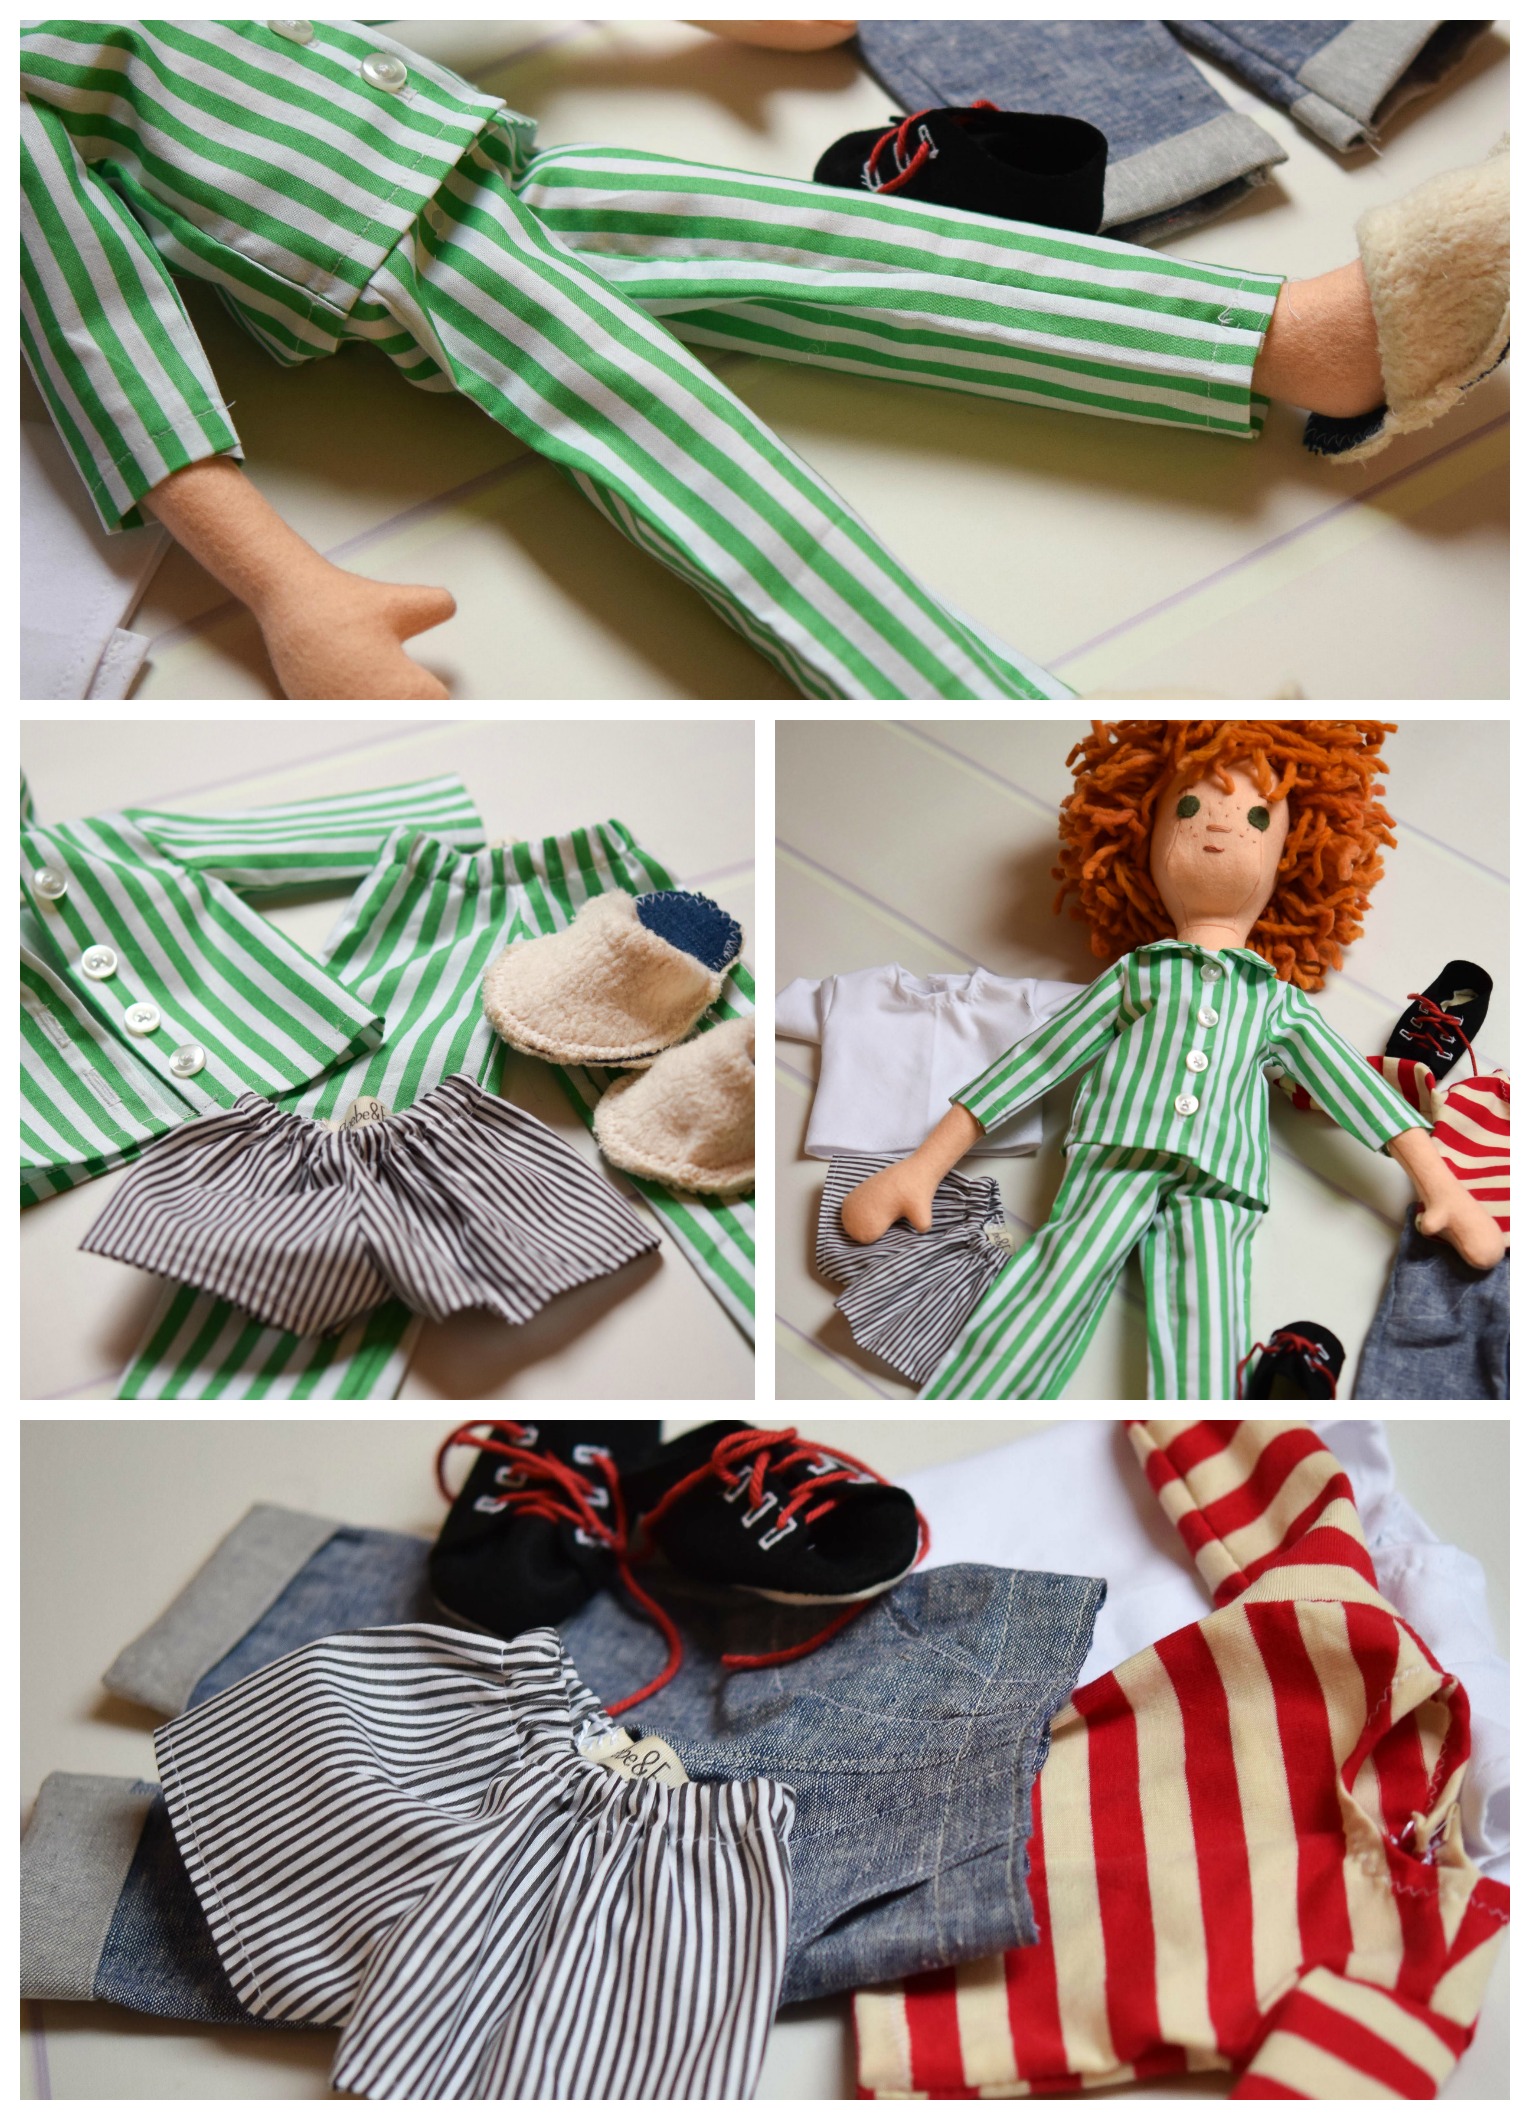
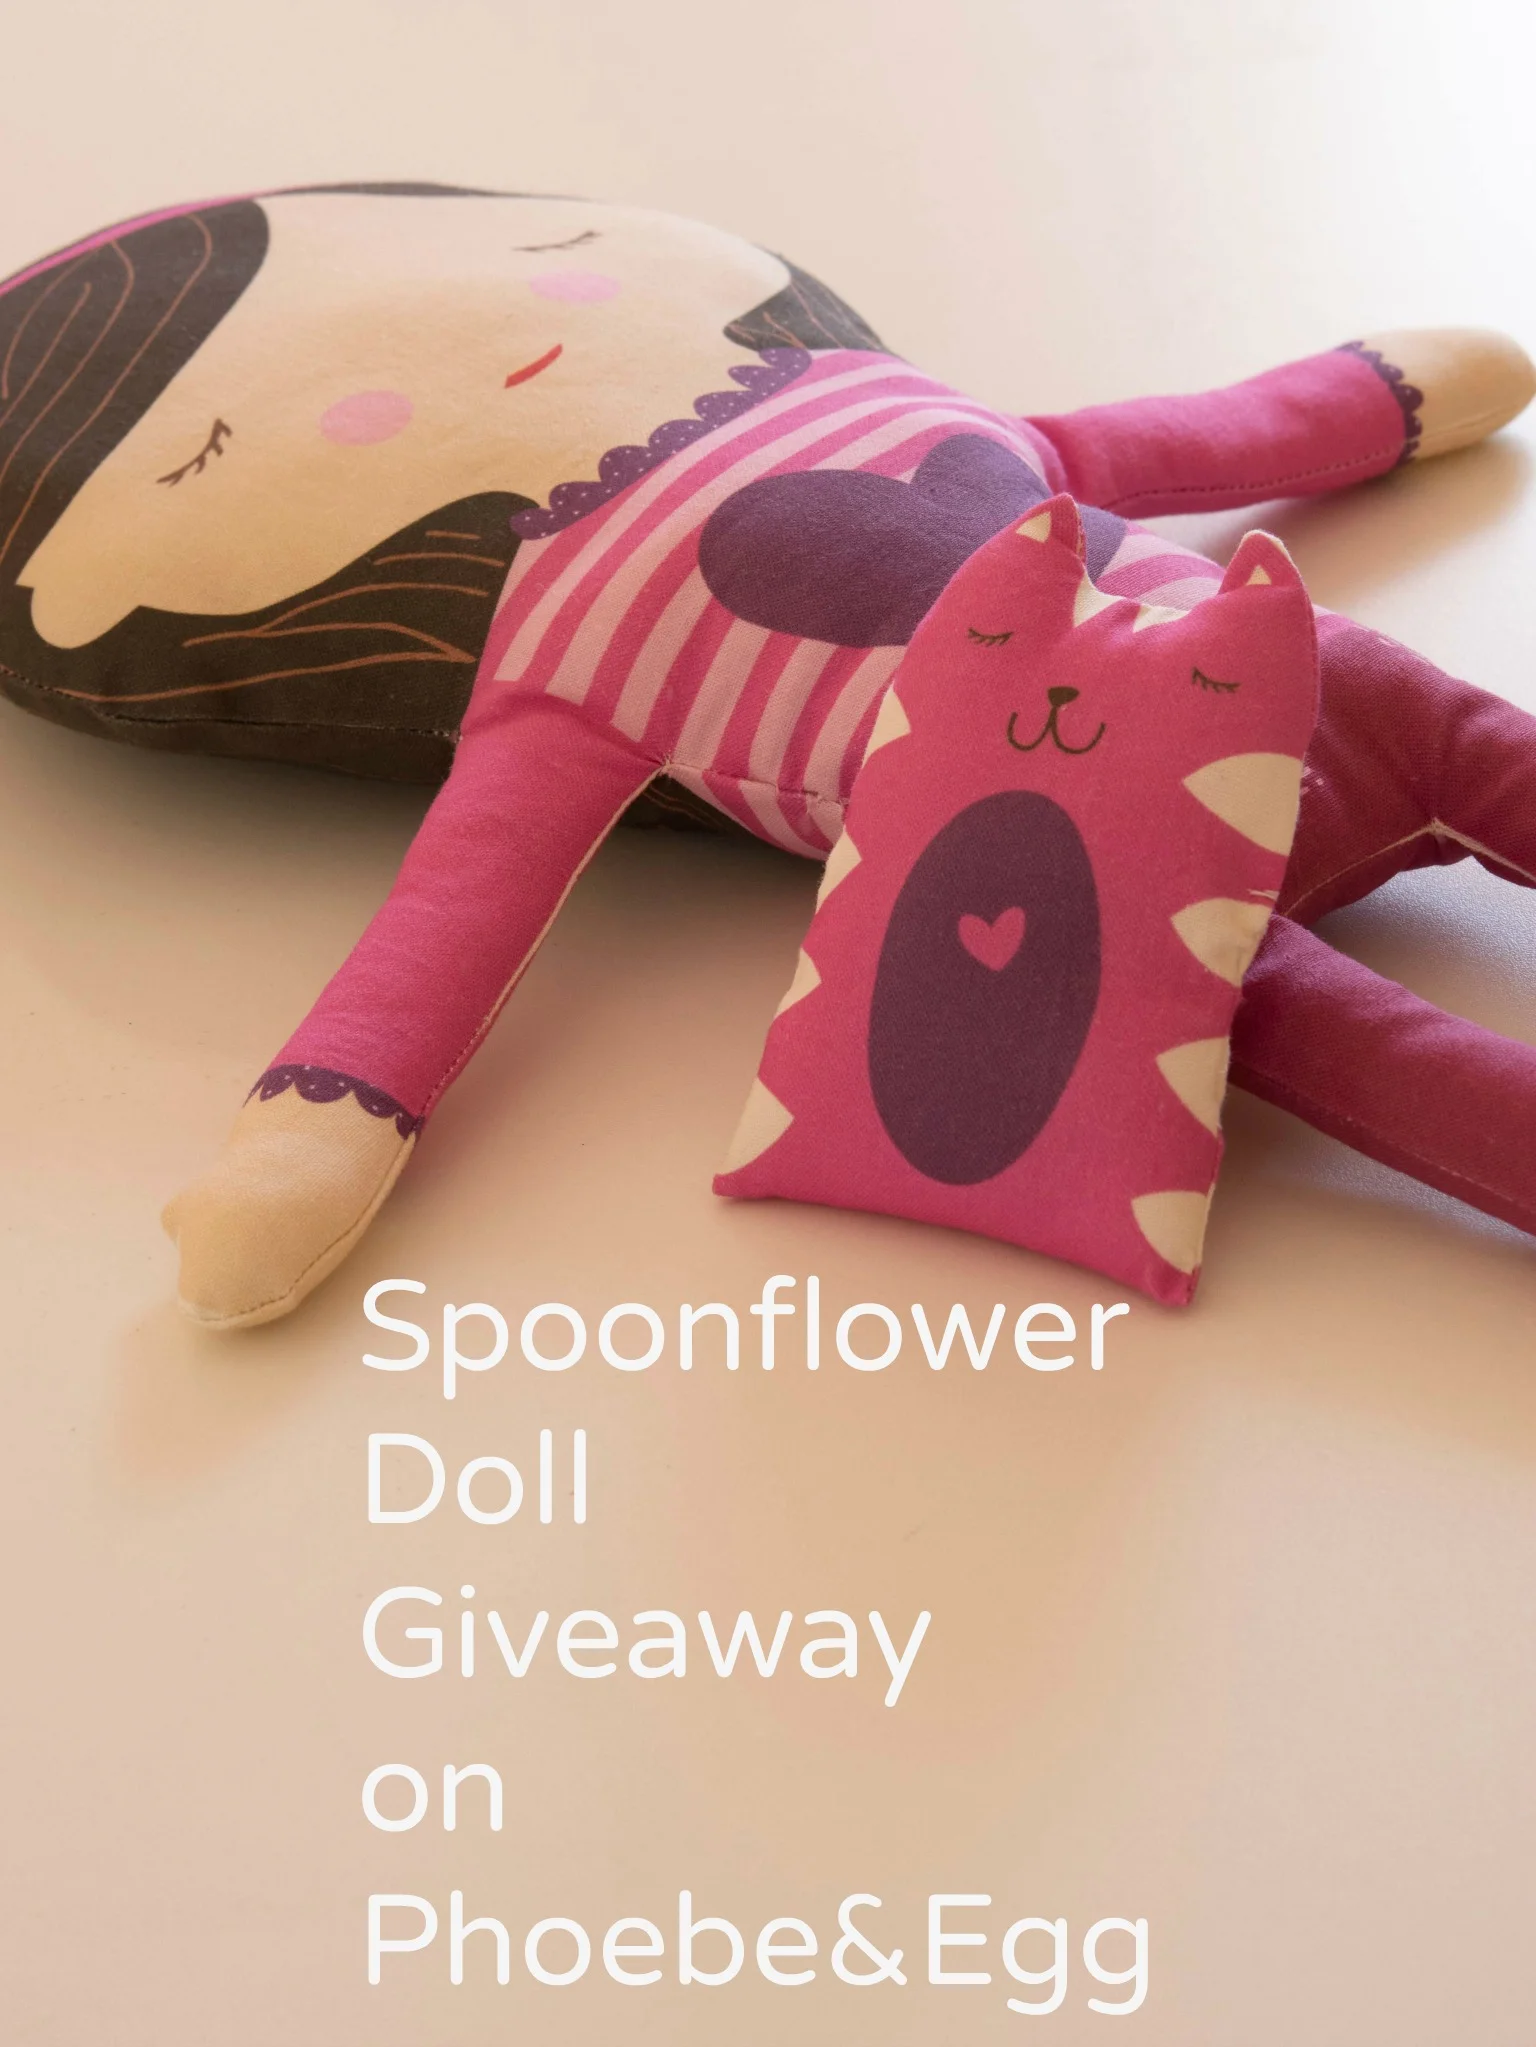
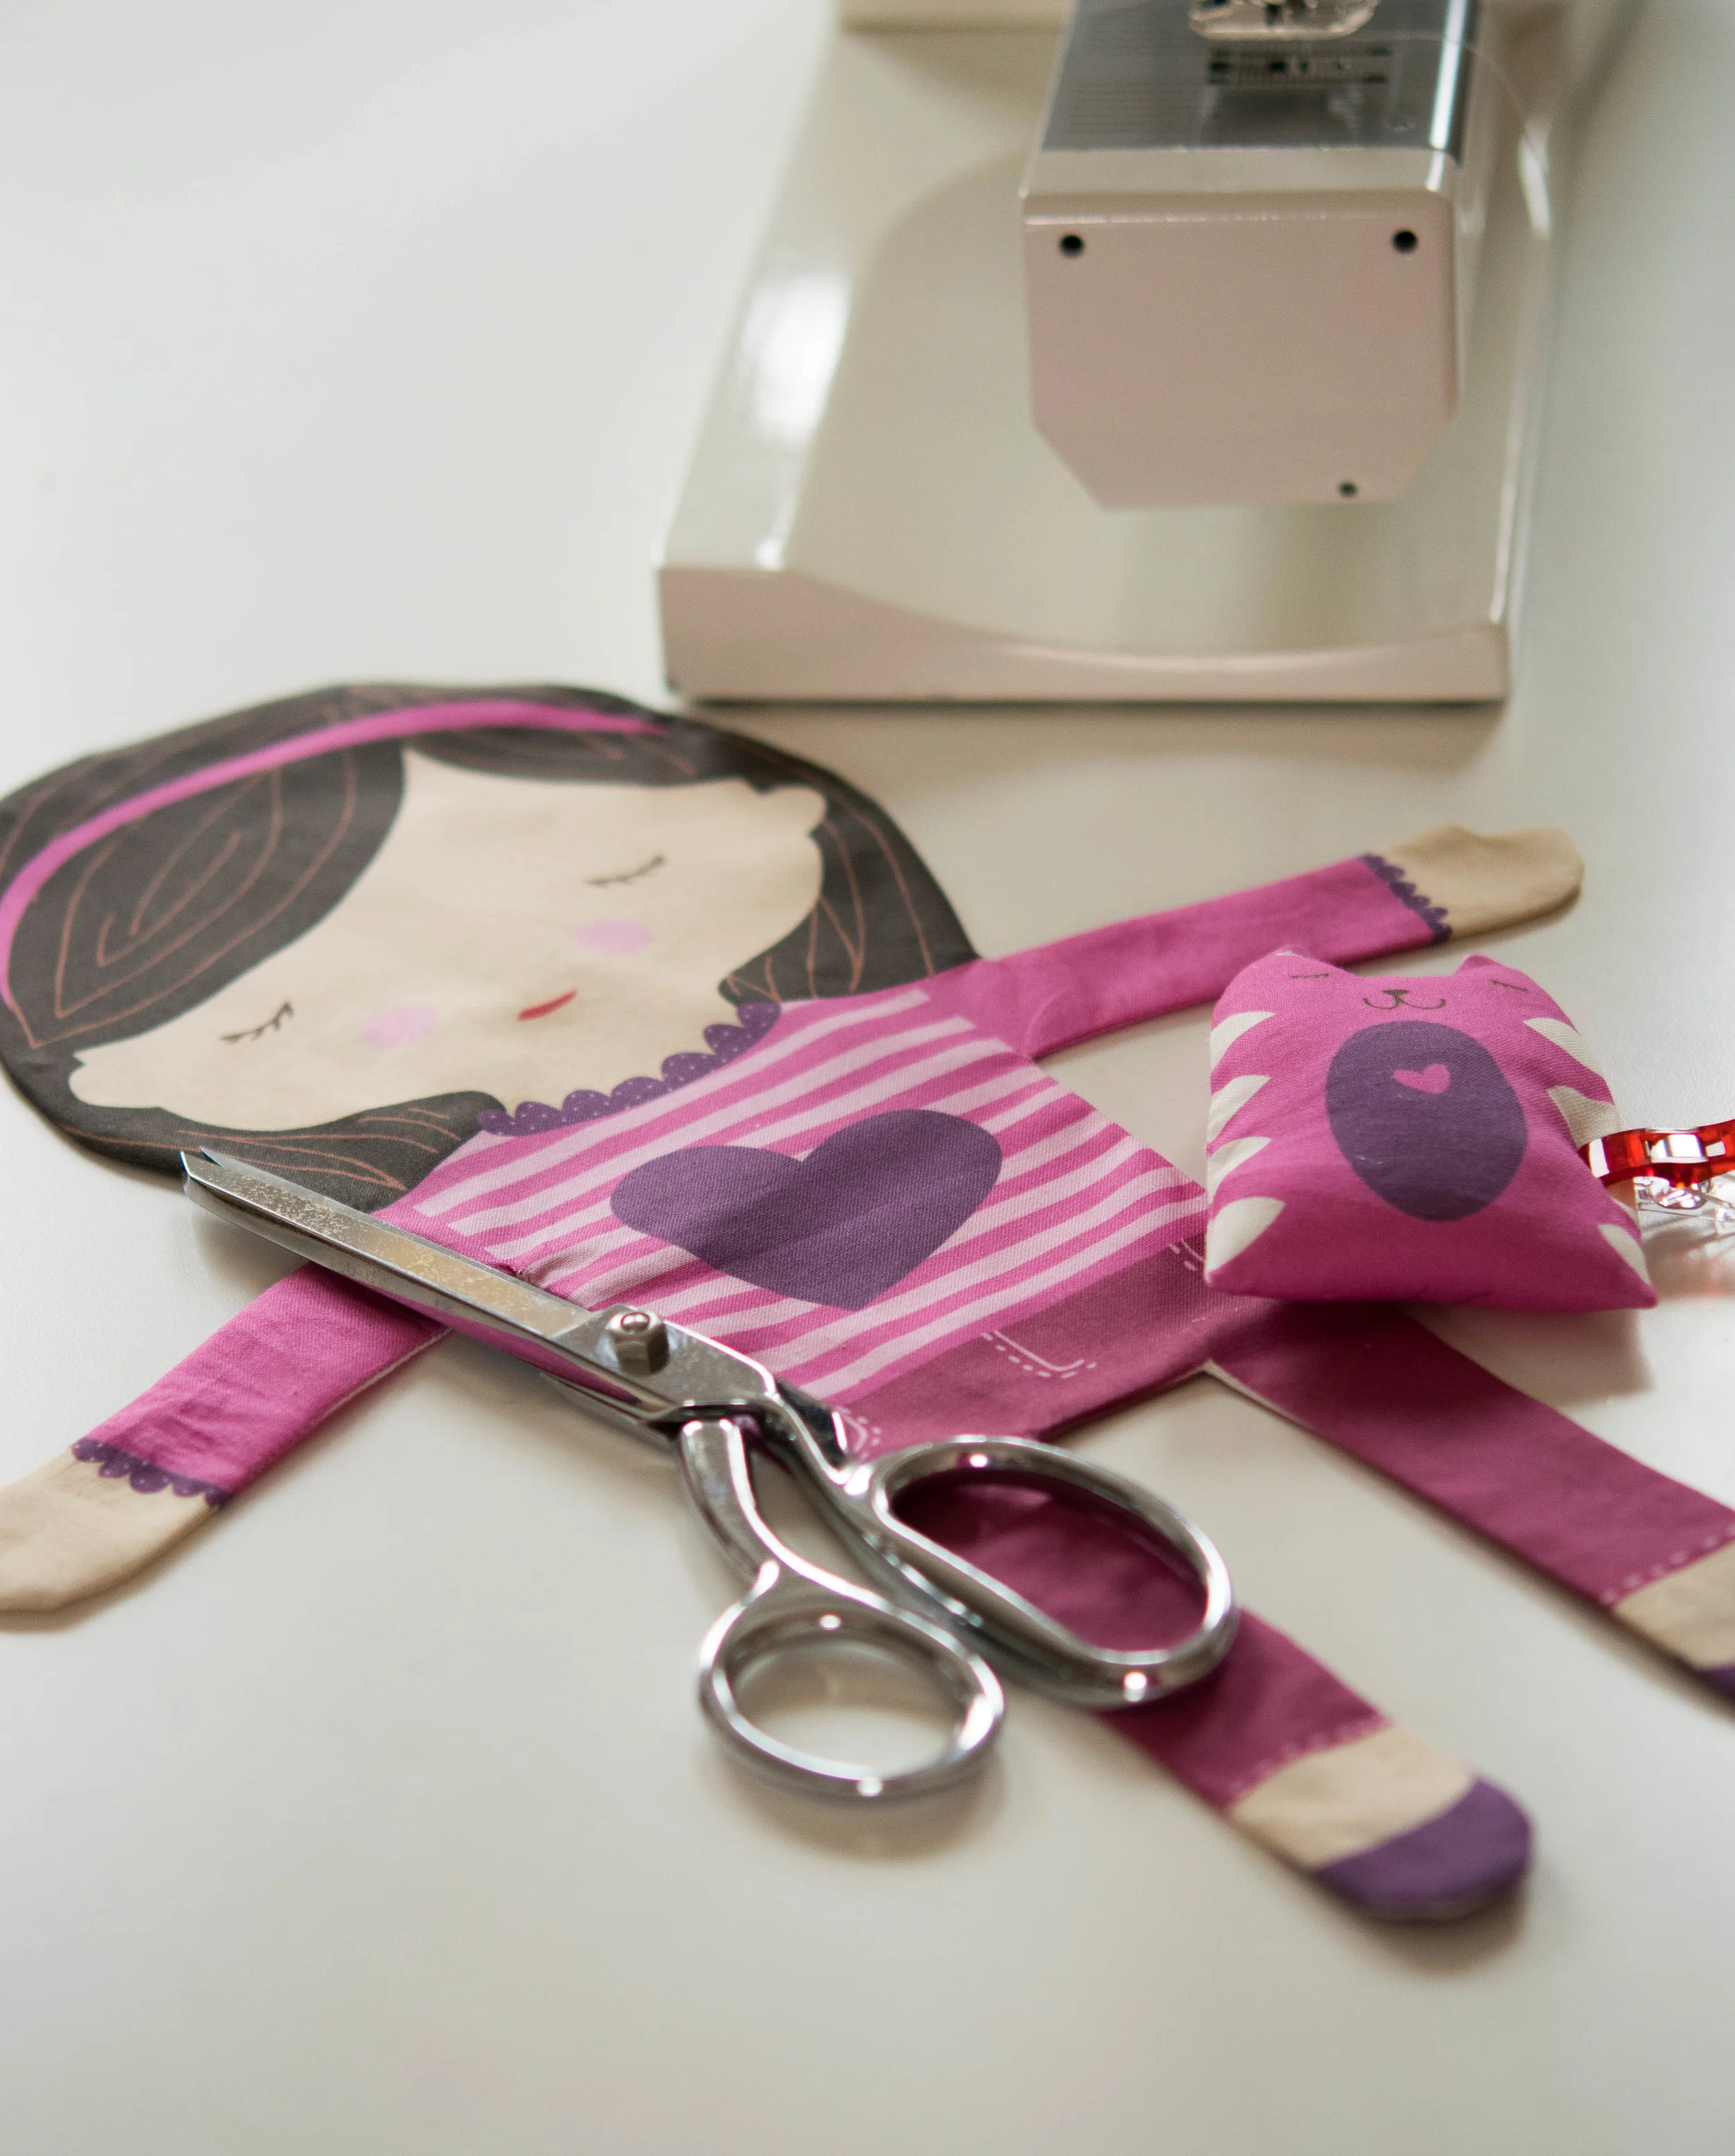
I fell in love with a set of dolls she designed on Spoonflower that are perfect for teaching a child to sew. They are just two pieces, many with a simple pet that is even easier to sew. 

All of them are adorable.

The Spoonflower Doll Giveaway

I will be giving away three fat quarters, each with the unmade doll and kitten on them, ready to be sewn and stuffed. 

Spoonflower Doll Giveaway

How to enter?

Comment on this blog post, but be sure I have your email. The comment form has a place for you to fill out your email, but if you want to be sure include your email in the actual comment. I have set comments to be moderated/approved due to recent spam, so if you don't see your comment up there, it is for one of two reasons. either it didn't have an email, or it is awaiting approval. If it isn't up there after a few days, you can contact  me with the contact form.

Giveaway ends March 17, 2016. I will pick the three with a random number generator

Spoonflower doll giveway
In Teaching a Child to Sew Tags Doll Making, learning to sew, sewing
26 Comments

A Collection of Liberty Doll Dress Sets

February 29, 2016 Lisa Press
A peek at the new Phoebe&Egg Liberty Collection

A peek at the new Phoebe&Egg Liberty Collection

After the holidays I was in NYC and of course also in Purl Soho. And lets just say I bought a few pieces of Liberty Fabric.

Flash forward a month or two and in between other things, i started sewing these little Liberty dress sets. It went from an experiment, to smitten, to well..a collection is what I will call it.

Introducing the Phoebe&Egg Liberty Collection. Four or five of the sets are already in my Etsy shop and more are coming. 

Matching bloomers

Matching bloomers

The Phoebe&Egg Liberty Collection
The Liberty Collection

Dress sets come with leggings, sweaters, shoes, peasant blouses and of course the Liberty Dress and bloomers. All right here.

2 Comments

I'm the featured shop on Etsy!

February 22, 2016 Lisa Press
Lisa Press, me, owner of Phoebe&Egg, photo by Cynthia August

Lisa Press, me, owner of Phoebe&Egg, photo by Cynthia August

I'm not a selfie taker. I don't like being in pictures, I'm more about taking pictures of my kids and my work. But I could not pass up the opportunity when Etsy asked me last November to be their Featured Shop.

The preparation, photoshoot with Cynthia August, who is fabulous, and I mean fabulous, and the interview were all fun and helped me see my business in new ways.

Here's my story on the Esty site:

Featured Shop: Phoebe&Egg

The Phoebe&Egg Studio, photo by Cynthia August

The Phoebe&Egg Studio, photo by Cynthia August

Behind the scenes at Phoebe&Egg, photo by Cynthia August

Behind the scenes at Phoebe&Egg, photo by Cynthia August

The Phoebe&Egg Studio, photo by Cynthia August

The Phoebe&Egg Studio, photo by Cynthia August

In Handmade Stories, My Personal Journey Tags storage, studio, Doll Making, Doll-maker, Handmade, Inspiration, sewing
Comment

Doll Dressmaking Series: Long Sleeves

February 10, 2016 Lisa Press
Doll Dressmaking long sleeves

Sleeves are an easy way to switch up a dress and completely change the look.

So far in this series we have covered basic shorts sleeves, short puffed sleeves and a ruffle sleeve.  But there are quite a few more sleeve options that are easy to make on a small scale.

This tutorial will focus on the basic doll long sleeve. Most long sleeves on doll clothes have elastic at the wrist 9this pattern does). That is because dolls hands are big and that makes it hard to get them through a long sleeve with a narrow end. Plastic dolls hands cant's squeeze in. The hands and arms of cloth dolls are hard to push through the tunnel of a long straight sleeve. So the elastic at the end solves both of these problems. It allows the wrist to stretch out and the sleeve itself to be a bit wider.

The pattern for this dress and all of the others in the series is available through my newsletter. Sign up form is at the end of this post.

Sewing long sleeves

I used the basic dress pattern and the retro collar, all have been part of past tutorials and are available through my newsletter. The dress is lined. 

Retro collar

1. Until the sleeves I am basically following the directions of the retro collar tutorial. This starts with sewing the shoulder seams together and then the collar pieces  together and sewing them onto the dress neckline.

2. Sew the lining should seams together.

3. Place the dress with the collar on top of the lining with right sides together. Pin or wonderclip up one back edge around the neck and down the other back edge. Sew the lining to the dress making sure you sew deeper than the collar attachment seam so it does not show. Tirn right side out.

Click to enlarge

Sew the sleeve edge of the dress to the sleeve edge of the lining. This is to keep them in place and together when you sew the sleeve on.

Seleve edges

Hemming the sleeves and making a casing:

1. Turn the ends of the sleeves up 1/4 inch and stitch.

2. Turn the bottoms up 1/2 inch and stitch again. this is the casing for your elastic for the "cuff" at the wrist.

Making the sleeve casings

Making the sleeve casings

Easing for the Sleeve Cap

The next few steps are similar to the gathering of the sleeve cap done on the puffed sleeve dress. Except this is called easing.  Easing is step down from gathering. it is done to get the sleeve to curve slightly better at the shoulder of the armhole, which makes more of a shoulder shape. it is also done to obtain a better fit in the armhole.

1. Stitch about two inches of long stitches at the cap of each sleeve. As in gathering, leave one end without reverse stitching and leave the threads long, so you can pull one.

2. Pull one of the threads slightly to puff the cap of the sleeve slightly.

3. measure the sleeve cap to the armhole, when it seems the right length, secure the thread by wrapping around a pin.

4. Fit and pin into the armhole, adjusting the ease if needed.


easing the sleeve cap

Sew sleeves in. make sure you've put your stitch length back to regular.

Sleeves

You are almost done. Next is the sleeve casing for the wrist.

1. Cut two pieces of elastic, each approximately the width of the bottom of the sleeve.

2. You will need to use something to thread the elastic. I use this tool, but a safety pin works fine.

3. Thread the elastic through the casing, securing it at the starting end with a few machine stitches.

4. Pull to desired length. I pull to 4 inches for Phoebe. For Sasha, 3.5 should do. For AG and Waldorf, 4.5-5 inches. stitch done the other end of the elastic to secure.

Click to enlarge

Sew up the side seams, hem and you are done!

side seams
Gingham dress

The pattern pieces for this dress and all other dresses are available through my newsletter. When you sign up, you will receive a second email asking you to confirm, after you do that you will receive another email with the base pattern downloads and a link to pattern pieces that came through previous newsletters.

Please check your spam first before emailing me if you do not receive this.

The long sleeve pattern piece will be available in this Friday's newsletter.

Sign up for the Phoebe&Egg Newsletter

* indicates required
In Tips, Doll Dressmaking 2 Tags doll dressmaking series
4 Comments

A Cute Little Boy for A Cute Little Boy

February 9, 2016 Lisa Press
Friends
Henry waits for a face and a haircut

Henry waits for a face and a haircut

Three things I really enjoy are Instagram, making boy dolls and making custom dolls.  So you can image how happy I was when all three of these things came together. 

A customer from Instagram asked me to make a custom boy doll for her little boy. How lucky am I?

Her little boy Liam loves the Henry and Mudge books. henry is a little redheaded boy and Mudge is his not so little dog.

Henry's hair, look and clothing were just my style. 

The best part, the photos of Henry's new life with Liam in Alaska. Both Henry and I couldn't be happier.

Henry and Mudge
Henry's clothes

Henry's clothes

IMG_2984.JPG

As you can see Henry is enjoying his new life with Liam which includes bedtime stories, snuggles and a birthday card with a cake and Henry's name written perfectly .

Click to enlarge.

Good night Henry and Liam, sleep tight!

2 Comments

A fox comes to the rescue

February 1, 2016 Lisa Press
Fox face

Since I started making the dolls for the children in need, I have been making puppies for the boys. They looked like this:

Stuffed puppies

They were very cute, but tiny and too many little pieces for something I need to make lots of. I had been searching for a pattern that would have the same appeal for a boy, but be more fun to sew up.

I think I found it.

Enter the fox. From this pattern that I found a while back on Etsy.

Fox pattern

The fox so far seems to meet all of the requirements: sturdy, fun to make, materials are easy to find, appealing to little boys and not scary. He's cute, but not too cute.

This past weekend, with the help of an assistant,  a skulk of foxes got made. Soon they will go out with a bunch of other dolls, some to Family Promise in central Massachusetts and some to foster children in Connecticut.

Fox friends
Fox friends
Fox friends
Fox friends
In The Value of Handmade, The Doll Friend Project Tags family promise, doll friend project
Comment

Don't Be Afraid of Buttonholes

January 29, 2016 Lisa Press
Buttonhole tutorial

For years I was afraid of making buttonholes.  They made me nervous. A bad buttonhole can ruin a good coat.

 When you are making doll clothing you can deftly avoid them. You can use snaps with decorative buttons on things that open in the front. Faux is fine for dolls.

But if you master buttonholes, they can become easier than the substitutions. And real buttoning buttons are just charming on doll clothing. Practical with a retro charm.

Over the last year each time I've done a series of buttonholes I've discovered or made up a new trick. They are close to mistake proof. Now I love doing them.

And don't be daunted by the number of steps. they are all very quick and designed to eliminate mistakes.

First gather a few supplies: 

Pieces of tissue paper or stabilizer

A pen

A ruler, quilting ruler or a Simflex expanding gauge (pictured below)

Your buttons

Buttonhole thread

A bright contrasting thread

An Xacto knife and pad to cut on

Scrap fabric

A Simflex expanding gauge, if you don't have one of these a ruler will do just fine.

A Simflex expanding gauge, if you don't have one of these a ruler will do just fine.

Step one, I use a machine long basting stitch to baste a piece of stabilizer (or tissue paper) to the garment along the edge where the buttonholes will go with bright contrasting thread. I go about 1/4 inch in from the edge as shown below. I am basting on the outside of the coat edge. 

Buttonhole tutorial

Basting the paper to the coat edge accomplished several things.

1. You have stabilizer or tissue on the bottom side of your fabric. This helps a button hole foot glide more smoothly and not jam.

2. The line of basting can serve as a guide.

3. You can make measured marks on the paper to tell you where to start each buttonhole.

Click to enlarge

The Simflex expanding gauge can be pulled to figure out how to best evenly distribute your buttonholes.  A ruler will also work. I then mark the paper where the top of each button will start.

However, full disclosure here, I have an automatic butttonhole foot. So once I determine the correct size, I can set it to make that exact size over and over. If you cannot repeat the size, you will also need to mark the paper for the when to stop, ie the bottom of each button hole. The nice part about the marks on the side of the paper is that you can easily see them whilke you are sewing with a great big buttonhole foot.

A buttonhole foot allows you to measure your button.

A buttonhole foot allows you to measure your button.

Attach your buttonhole foot and measure your buttonhole with the red marker on your foot. After you have an approximate idea of buttonhole size. Sew one on some scrap fabric. Yoiu will want to try this with your button to see if it fits. I use an Xacto knife and a mat to cut the slit in the hole. There is such a thing as a buttonhole cutter. However, it may be too big for some buttonholes.

Sizing buttonholes

If the buttonhole is too small or too big tweak your size.

Too small

Too small

Once you get the correct size, sew several before starting on the real garment. This helps make sure your machine is behaving consistently and you are confident.

buttonhole sewing

Now you are ready for the real thing. 

Line the top of the buttonhole up with your first mark. Line the basting to be just underneath the right inside edge of the foot. 

Buttonhole placemenbt

If you have an automatic buttonholer it will stop and turn and you can just move onto the next buttonhole and repeat. if it is not automatic you will need to pay attention to your end mark.

When you are done:

Take out the basting

Tear off the paper or stabilizer

Cut the holes

Sew on your buttons.

Try it, it is probably quicker than reading this tutorial.

Buttonholes for doll clothes
Buttonholes
Featured
Doll Dressmaking Series: Puffy Sleeves
Jan 6, 2018
Doll Dressmaking Series: Puffy Sleeves
Jan 6, 2018
Jan 6, 2018
Fancy sleeves
Jan 5, 2018
Doll Dressmaking: Fancy Sleeves Tutorial
Jan 5, 2018
Jan 5, 2018
Doll Dressmaking Series: Capris
Jun 4, 2017
Doll Dressmaking Series: Capris
Jun 4, 2017
Jun 4, 2017
Snaps and velcro
Feb 6, 2017
Doll Dressmaking Series: Snaps and Velcro
Feb 6, 2017
Feb 6, 2017
Doll Dressmaking Series: Sewing for Smaller Dolls
Oct 27, 2016
Doll Dressmaking Series: Sewing for Smaller Dolls
Oct 27, 2016
Oct 27, 2016
Doll Dressmaking Tutorial: Creating a Cute Bodice with Elastic
Jun 20, 2016
Doll Dressmaking Tutorial: Creating a Cute Bodice with Elastic
Jun 20, 2016
Jun 20, 2016
Doll Dressmaking Series: Long Sleeves for the Peasant Blouse
Apr 26, 2016
Doll Dressmaking Series: Long Sleeves for the Peasant Blouse
Apr 26, 2016
Apr 26, 2016
Doll Dressmaking Series: Long Sleeves
Feb 10, 2016
Doll Dressmaking Series: Long Sleeves
Feb 10, 2016
Feb 10, 2016
Don't Be Afraid of Buttonholes
Jan 29, 2016
Don't Be Afraid of Buttonholes
Jan 29, 2016
Jan 29, 2016
How to resize doll patterns
Jan 12, 2016
Resizing Doll Dress Patterns
Jan 12, 2016
Jan 12, 2016


In Doll Dressmaking 2
2 Comments

Playing with Babies

January 20, 2016 Lisa Press
Pink Haired Baby Egg Doll

One of my goals for 2016 is to give Baby Egg a little more attention. And as luck would have it, my first few orders this year were for Eggs. One escaped photography, but the rest did not.

Although they are a lot more work, I've been focusing on fluffy haired Baby Eggs (those of you who have ever threaded hair in a crocheted wig cap know what I'm talking about). But the fluffy hair is just so...Eggy ...so cute and cuddly.

Here's a sneak peek at what will soon be listed. If you've been dreaming of Baby Egg, let me know and I can help you design your own.

Baby Egg Doll
Baby Egg Rag doll
Baby Egg Clothes
Baby Egg in PJs
Baby Egg Clothes
Tags Doll Making, New Doll
Comment

Resizing Doll Dress Patterns

January 12, 2016 Lisa Press
How to resize doll patterns

A number of you have contacted me asking for me if I had patterns for certain dolls. In addition, although I sized the pattern sets for Phoebe, AG doll, 16 inch Waldorf dolls and Sasha, each of those dolls' sizes vary.

In other words inevitably it is useful to know how to resize a pattern to fit your doll.

There are number of easy steps to resizing a pattern.

If the dolls is overall bigger or smaller, start with copying or printing the pattern at a larger or smaller percentage.

enlarging a pattern

If the doll has the same proportions this step may get you there. You can start by taking a chest measurement of your doll and searching online for the chest measurement of the doll the pattern was created for. If your doll is 8" and the doll the pattern was created for is 12", then 8/12 or 75% is what you should print at.

If that gets you closer, but the pattern size still needs to be tweaked. Here are some next steps.

Dress is the right size but the neck if tight.

widening the nack

If it is more than the neck that is narrow, you may want to widen the dress without making it over all bigger, ie the armholes and shoulders and length stay the same. this can be done by splitting the pattern down the middle and separating the two sides by the amount you need to make it wider.

widening the back

Once you've done this, take tracing paper and trace over to make a new pattern piece.

Be sure to also add some onto each back piece. I usually add half of the front increase to each side of the back.

altering the back

If the dress is torso is too short, especially in the armhole area, you can cut the pattern horizontally and divide and make a new pattern piece.

Lengthening the armholes.jpg

If a dress is the correct length but overall too wide, the pattern can be narrowed by cutting down the middle and pushing the two pieces together.

narrowing a doll dress

Be sure to also trim a bit off the center back edges too. If the neck is too narrow you may need to redraw the neck.

Although any one of these steps may get you straight to the a doll dress that perfectly fits your doll, it make take a combination of these steps. If you don't feel like using lots of fabric to sew the size trials, use paper towel.

Hope this helps! Happy sewing (and resizing)!

Featured
Doll Dressmaking Series: Puffy Sleeves
Jan 6, 2018
Doll Dressmaking Series: Puffy Sleeves
Jan 6, 2018
Jan 6, 2018
Fancy sleeves
Jan 5, 2018
Doll Dressmaking: Fancy Sleeves Tutorial
Jan 5, 2018
Jan 5, 2018
Doll Dressmaking Series: Capris
Jun 4, 2017
Doll Dressmaking Series: Capris
Jun 4, 2017
Jun 4, 2017
Snaps and velcro
Feb 6, 2017
Doll Dressmaking Series: Snaps and Velcro
Feb 6, 2017
Feb 6, 2017
Doll Dressmaking Series: Sewing for Smaller Dolls
Oct 27, 2016
Doll Dressmaking Series: Sewing for Smaller Dolls
Oct 27, 2016
Oct 27, 2016
Doll Dressmaking Tutorial: Creating a Cute Bodice with Elastic
Jun 20, 2016
Doll Dressmaking Tutorial: Creating a Cute Bodice with Elastic
Jun 20, 2016
Jun 20, 2016
Doll Dressmaking Series: Long Sleeves for the Peasant Blouse
Apr 26, 2016
Doll Dressmaking Series: Long Sleeves for the Peasant Blouse
Apr 26, 2016
Apr 26, 2016
Doll Dressmaking Series: Long Sleeves
Feb 10, 2016
Doll Dressmaking Series: Long Sleeves
Feb 10, 2016
Feb 10, 2016
Don't Be Afraid of Buttonholes
Jan 29, 2016
Don't Be Afraid of Buttonholes
Jan 29, 2016
Jan 29, 2016
How to resize doll patterns
Jan 12, 2016
Resizing Doll Dress Patterns
Jan 12, 2016
Jan 12, 2016
In Doll Dressmaking 2
17 Comments

Doll Dressmaking Series: My Favorite Suppliers

December 31, 2015 Lisa Press
Doll Dressmaking Supplies

I am frequently asked where I buy supplies for doll dressmaking. Although I buy from a wide range of places, I thought I'd share a few of my favorites. Some day I'll make a comprehensive list.

There are SOOO many great fabrics out there and so many great places to buy fabric.

I frequently shop at Hawthorne Threads, they have a great selection and ship almost immediately.

Fabricworm also has a great selection and often have sales.

For Liberty or other heirloom quality fabric and amazing customer service, Farmhouse Fabrics.

I also love Harts Fabrics. They have a nice selection of cotton knits.

For a discontinued fabric, which I somehow find myself needing frequently, Etsy and Quiltshops searches often find what I want.

For basics with a bit of a discount, Fabric.com

Where to buy doll trim

For trims:

I buy my trims by the roll which is why I love Create For Less. 

For those buying by the yard: Farmhouse Fabrics has a great selection. Also check their ribbon section.

Doll buttons

For buttons, I like eBay. The button hunting on eBay is so fun, the variety is a bit overwhelming.

And for snaps, I suggest Create for Less, they have a huge variety and offer bulk discounts.

Featured
My love of custom dolls
Apr 15, 2016
My love of custom dolls
Apr 15, 2016
Apr 15, 2016
Things I Love: Lillestoff Organic Cotton
Oct 13, 2015
Things I Love: Lillestoff Organic Cotton
Oct 13, 2015
Oct 13, 2015
Things I Love: Crosshatch Fabric
Jun 15, 2015
Things I Love: Crosshatch Fabric
Jun 15, 2015
Jun 15, 2015
How to Use a Ruffler for sewing pleats or gathers
Mar 10, 2015
How to Use a Ruffler for sewing pleats or gathers
Mar 10, 2015
Mar 10, 2015
Liberty of London will be Phoebe's Spring "Thing"
Feb 24, 2015
Liberty of London will be Phoebe's Spring "Thing"
Feb 24, 2015
Feb 24, 2015
Doll Dressmaking Series: Another Tool
Sep 10, 2014
Doll Dressmaking Series: Another Tool
Sep 10, 2014
Sep 10, 2014


In Supplies for Making Tags Stash
4 Comments
← Newer Posts Older Posts →
Instagram
ExtraSmall pajamas in the works. 😴
By Friday, I’m hoping to list 4 medium Phoebes and 3 ExtraSmall. This little redhead is one of the ExtraSmalls.
Still photography, sewing and getting ready to reopen. #etsysellersofinstagram
This Phoebe flew off to the west coast last week ✈️💕
Another shot of two adorables getting acquainted in London. 💕💕
Phoebe happily made it to London in her matching school uniform. 🇬🇧
Thanks @lanelaurenlane for letting people know about Phoebe&Egg ❤️ We have 6 skin colors of dolls.
The black squares will be gone in a few days. Let’s try to do something more long term. #blackouttuesday
Did I mention how happy I am to be doll making? Soooo happy 😊
On her way to a birthday girl🎂😘

Keep up with the patterns

Sign up with your email address to receive news and updates and the patterns.

We respect your privacy.

Thank you!
Blog
Help me find a Home for this Special Phoebe
about 6 years ago
Explaining Phoebe Doll Sizes
about 6 years ago
Kiki, the delivery doll
about 7 years ago
A Few Words About Ruby Bridges
about 7 years ago
Historical Heroines: Pure Inspiration for Young Girls
about 7 years ago
Doll Dressmaking Series: Puffy Sleeves
about 7 years ago
Doll Dressmaking: Fancy Sleeves Tutorial
about 7 years ago
Phoebe is now a new size: 16.5 inches
about 7 years ago
One Small Customer Spreads Creativity and Good
about 7 years ago
Grace O'Malley Crosses the Atlantic
about 7 years ago
  • Studio (2)
  • The Historic Collection (2)
  • Supplies for Making (4)
  • The Doll Friend Project (5)
  • Interviews (7)
  • My Personal Journey (7)
  • Handmade Stories (9)
  • Inspiration (9)
  • The Value of Handmade (11)
  • Materials (14)
  • Teaching a Child to Sew (14)
  • Things I Love (15)
  • Doll Dressmaking 2 (17)
  • Doll Dressmaking 1 (20)
  • Tips (27)


Dolls and Clothing are available in both Etsy Shop.

Powered by Squarespace