

I was a bit derailed by a few days of a flu. I think I'm feeling better, but not entirely sure. I don't have a temp, so that's good. I'm smocking, finishing a few custom dolls and I finished the skirts. All V E R Y S L O W L Y. So have patience I'm still here.


Skirts in the Making
I've been busy with a few custom dolls, a few dolls for children in foster care, and making more clothes.
Today was skirts.
If you sew, skirts are pretty easy. What I love about making skirts is matching fabrics and trims. You can really graphic design the skirts.
Here they are in their raw state, tomorrow when I have good sun again, I'll post the finished skirts.

"Africanish" skirt
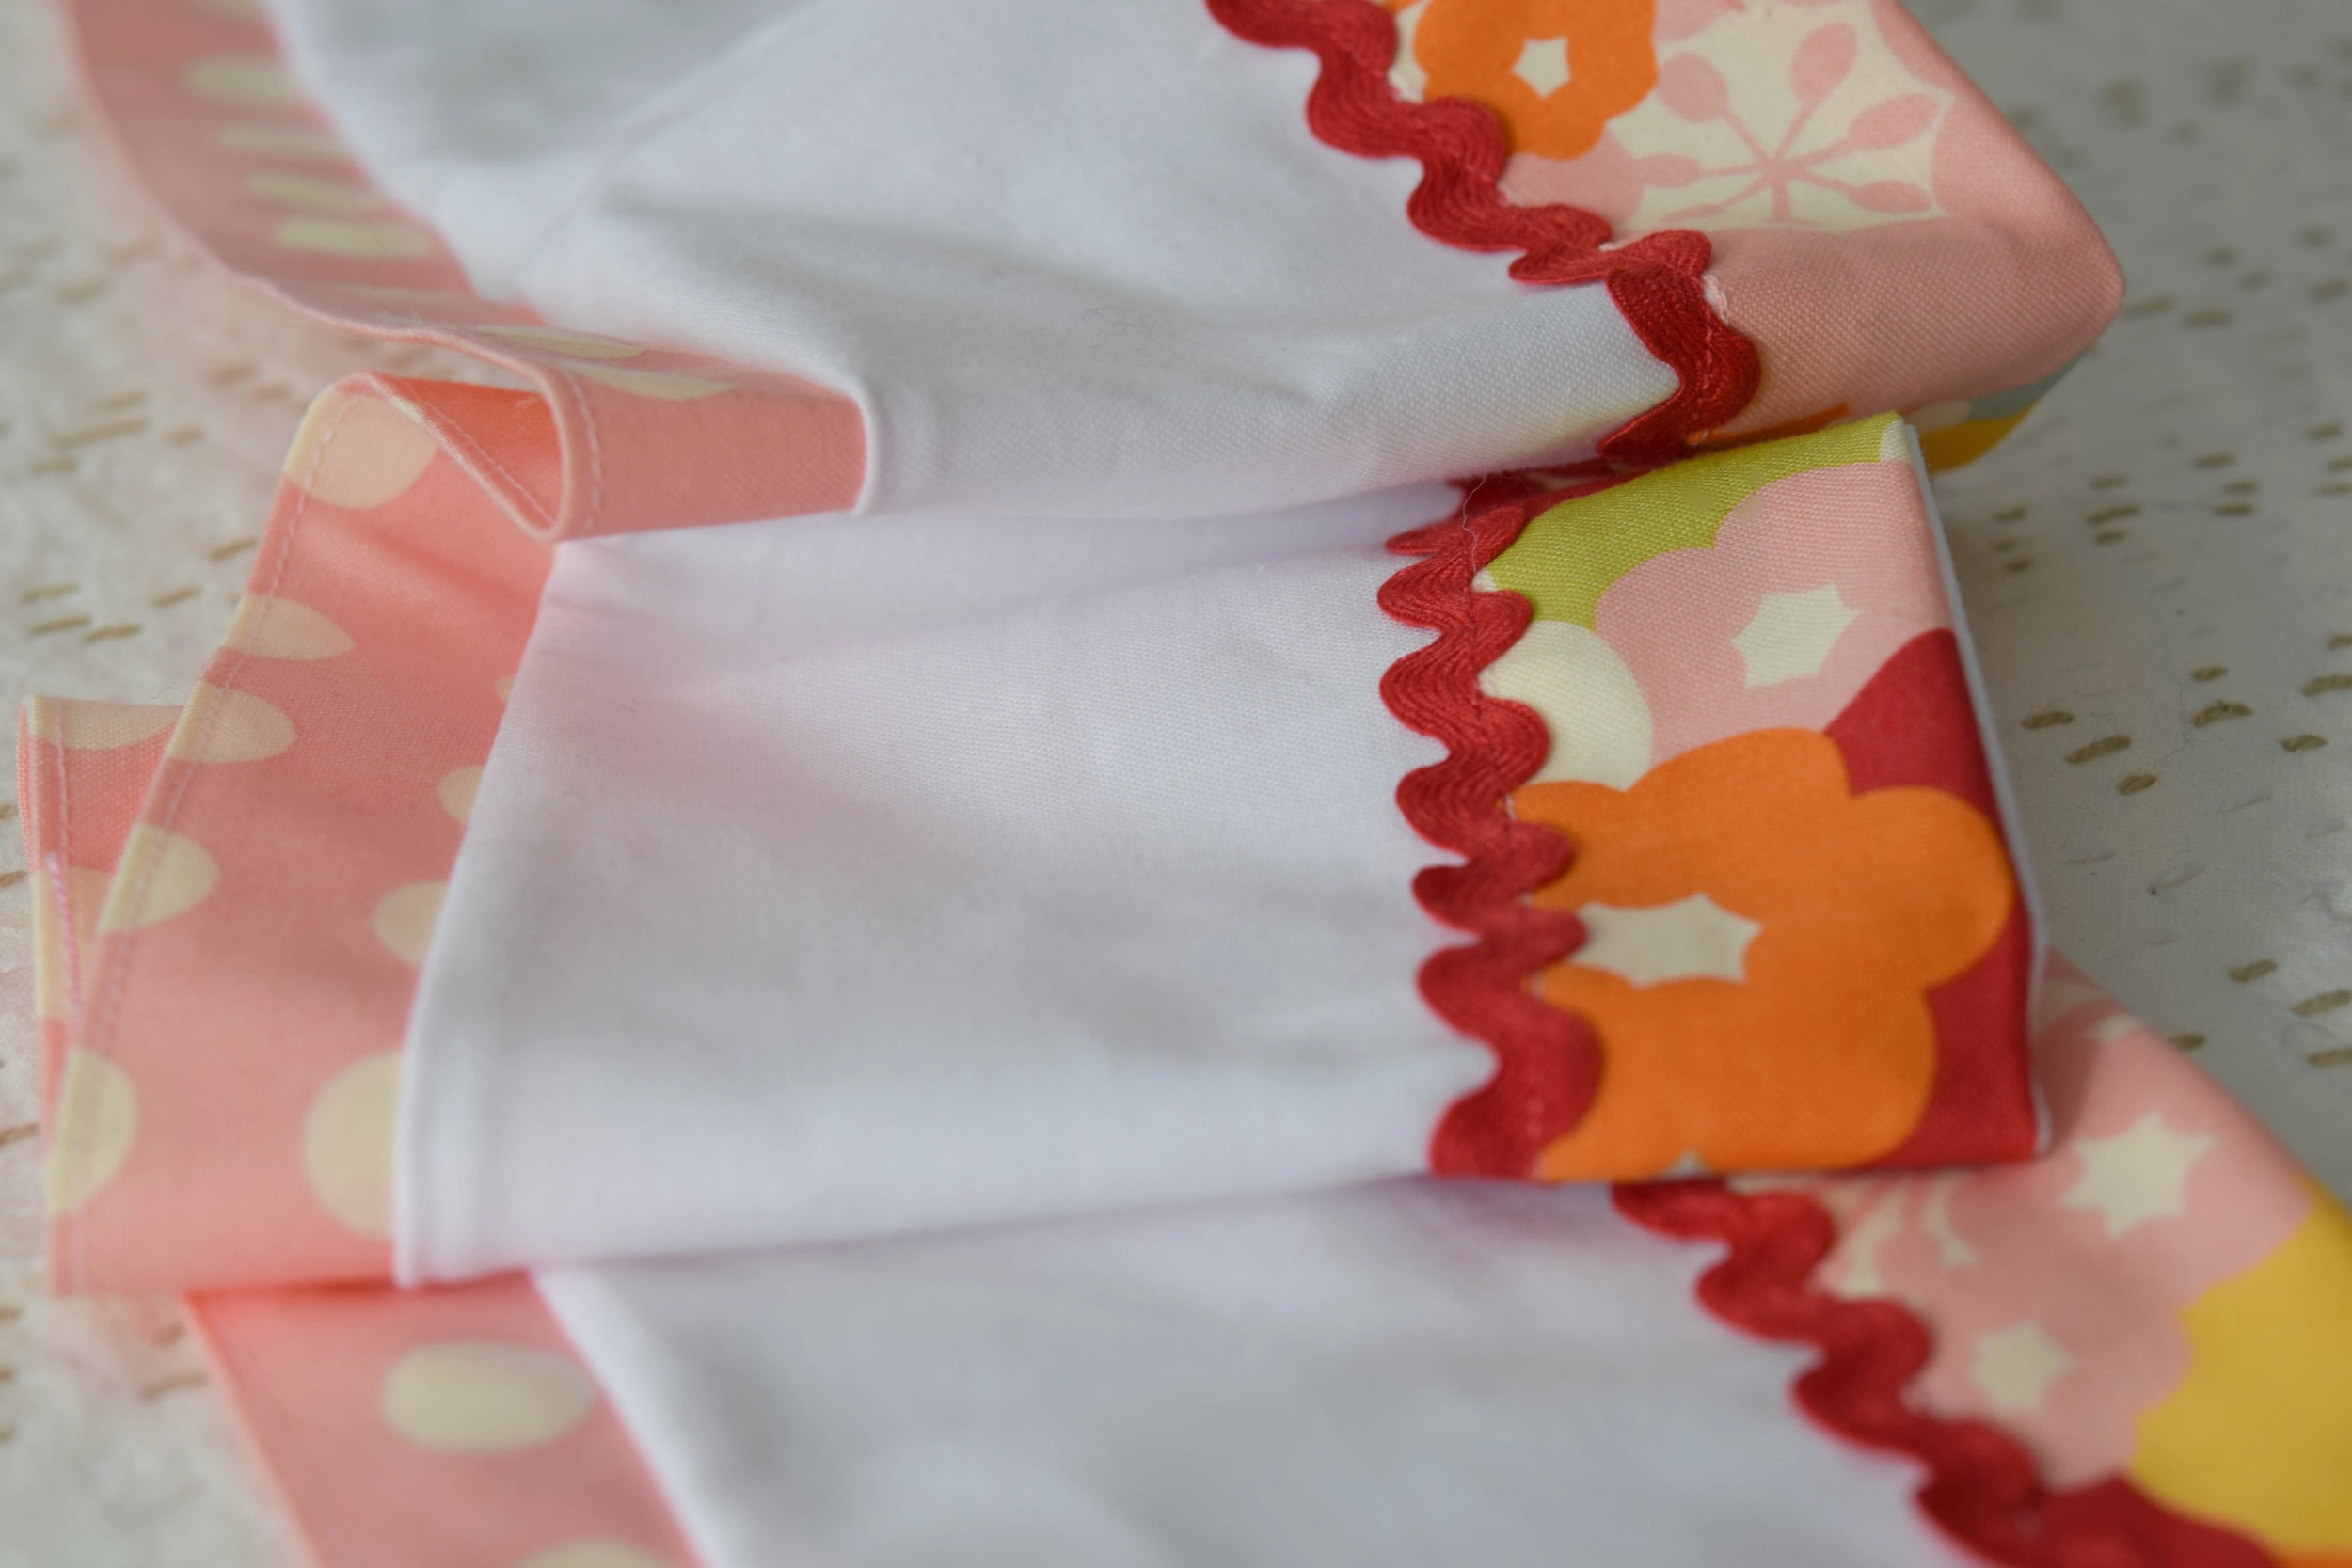
Modernish skirt

Totally retro skirt
Five Things to think About Before Starting Your Child on a Sewing Machine
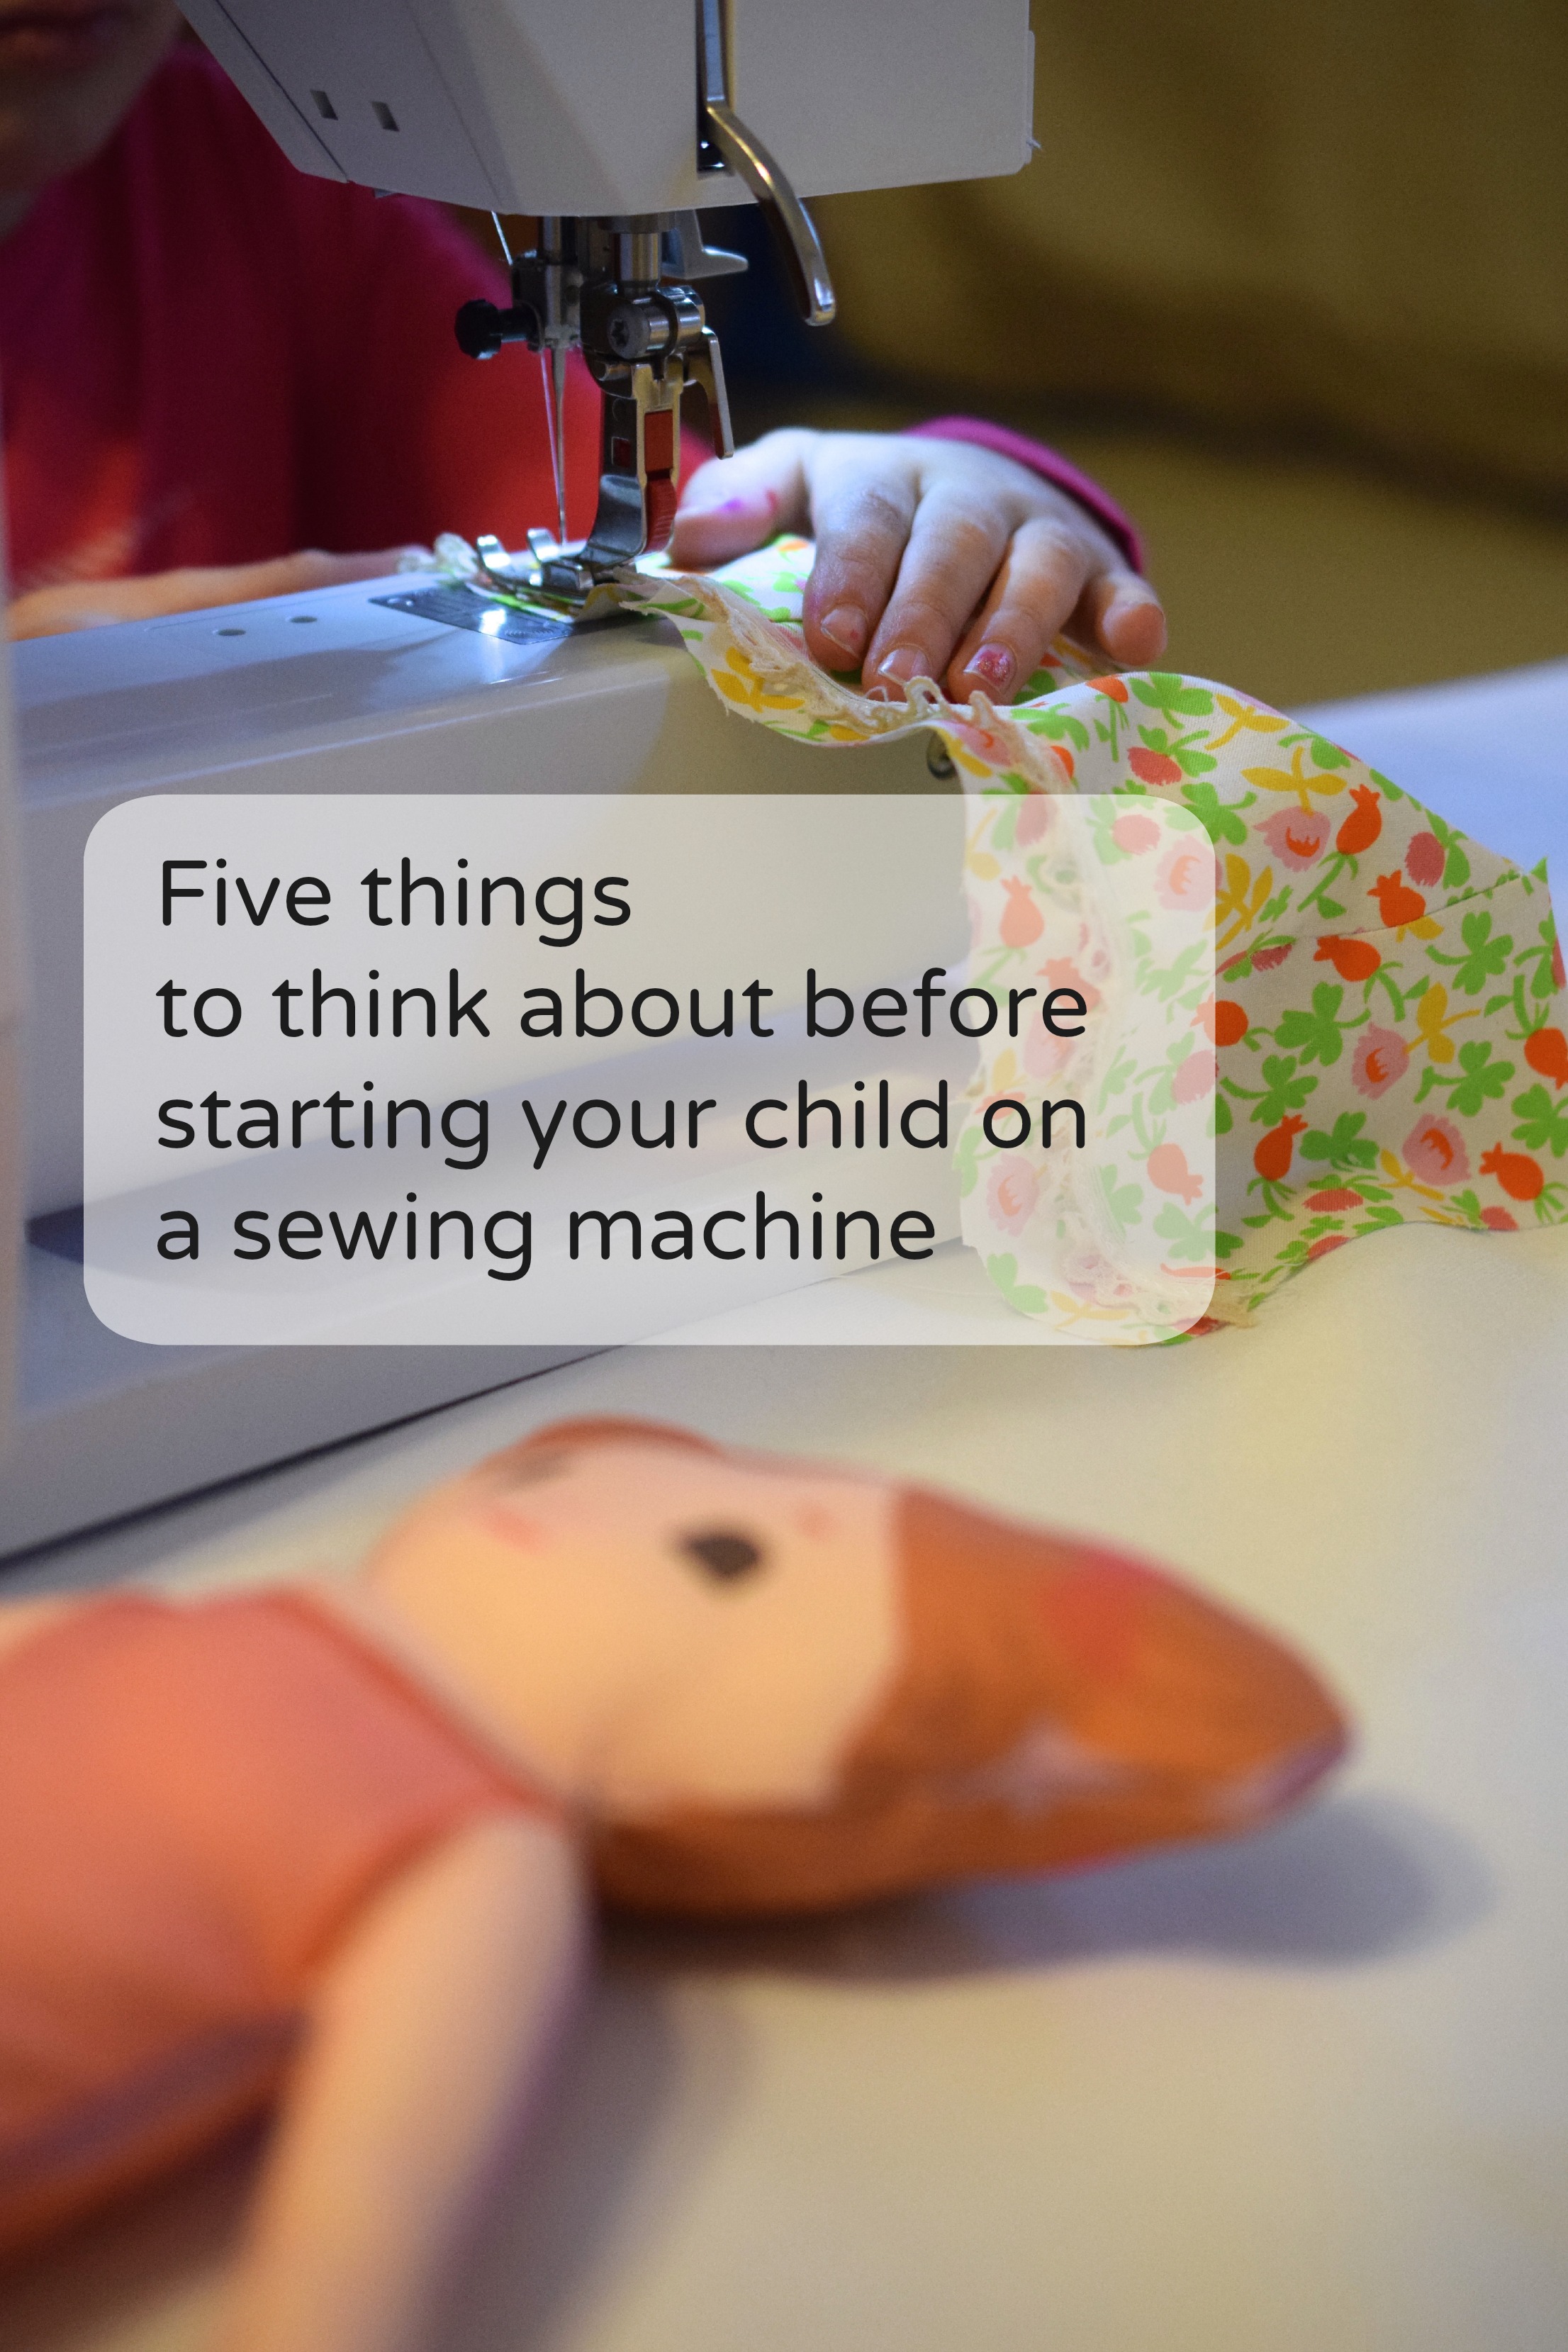
Children seven and older can usually handle a sewing machine, I feel before starting with the machine your child needs to understand the mechanics of sewing. This is best learned through hand sewing. Once they understand about stitches, seams, fabric, thread, pins and needles, or how to attach fabric to fabric, they may be ready to try the machine.
I feel you should get them competent enough to enjoy hand sewing before trying the machine, otherwise they may not master both. To really sew, you need to know both.
But when you and your child are ready to try the machine, here a few things I recommend considering:
1. Test drive your sewing machine. If you already own a sewing machine but don't sew regularly, sit down before promising your child sewing machine time and take it for a test drive. Is it jamming and spewing clumps of thread? Is it making a strange rattling sound? Is the tension out of sorts? Your machine may be in need of a tune up. If you want your child's first sewing experience to be an exhilarating smooth ride, make sure the machine is in good working order.
If you do not yet own a machine and are thinking of buying one, beware, all machines are not equal. Some of the models of certain brands can quickly introduce your child to frustration. Do a little homework before buying.
2. Lower the table or raise the pedal. Most children under eight struggle with being able to reach the pedal. There are two easy solutions to this: either place the sewing machine on a child's height desk or table or place the pedal on a box.

3. Safety: There are a few rules.
For the teacher: If you can control the speed of your machine, put it on slow or half motor. This will still seem very fast for a child. I have children sew long straight seams on strips of fabric (as in from a jelly roll of fabric) to just get comfortable with the machine and hand placement. In the beginning an adult needs to be there watching. If your machine has a "needle down" option use this, it will ensure the needle is down when they stop sewing which keeps the fabric and needle both in a good place.
For the child: Always look at what you are doing while your foot is on the pedal. Not at the dog, the teacher, or your friend who is laughing. If you have to look away, take your foot off the pedal.

4. The speed of machine sewing is your friend and your enemy
Children love the machine for the same reason most prefer downhill skiing to cross-country. It is faster and more exciting. But mistakes can happen faster, too. So machine sewing requires concentration and focus so you don't quickly get into trouble. But the speed can also give you the freedom to try more things and get more creative. If you spend twenty minutes sewing a pillow and you want to try doing a variation, twenty more minutes to try something new is not a problem.
5. Wonderclips
Your machine should not be sewing over pins and pins are pointy and sharp and hurt and tend to make kids worry. Wonderclips are just wonderful.

This post is part of a series done in conjunction with Trixi Symonds who teaches and blogs about hand sewing with children on her blog: Colouredbuttons.com. Part 2 of the series will be a project to start your child hand sewing or machine sewing.
Featured


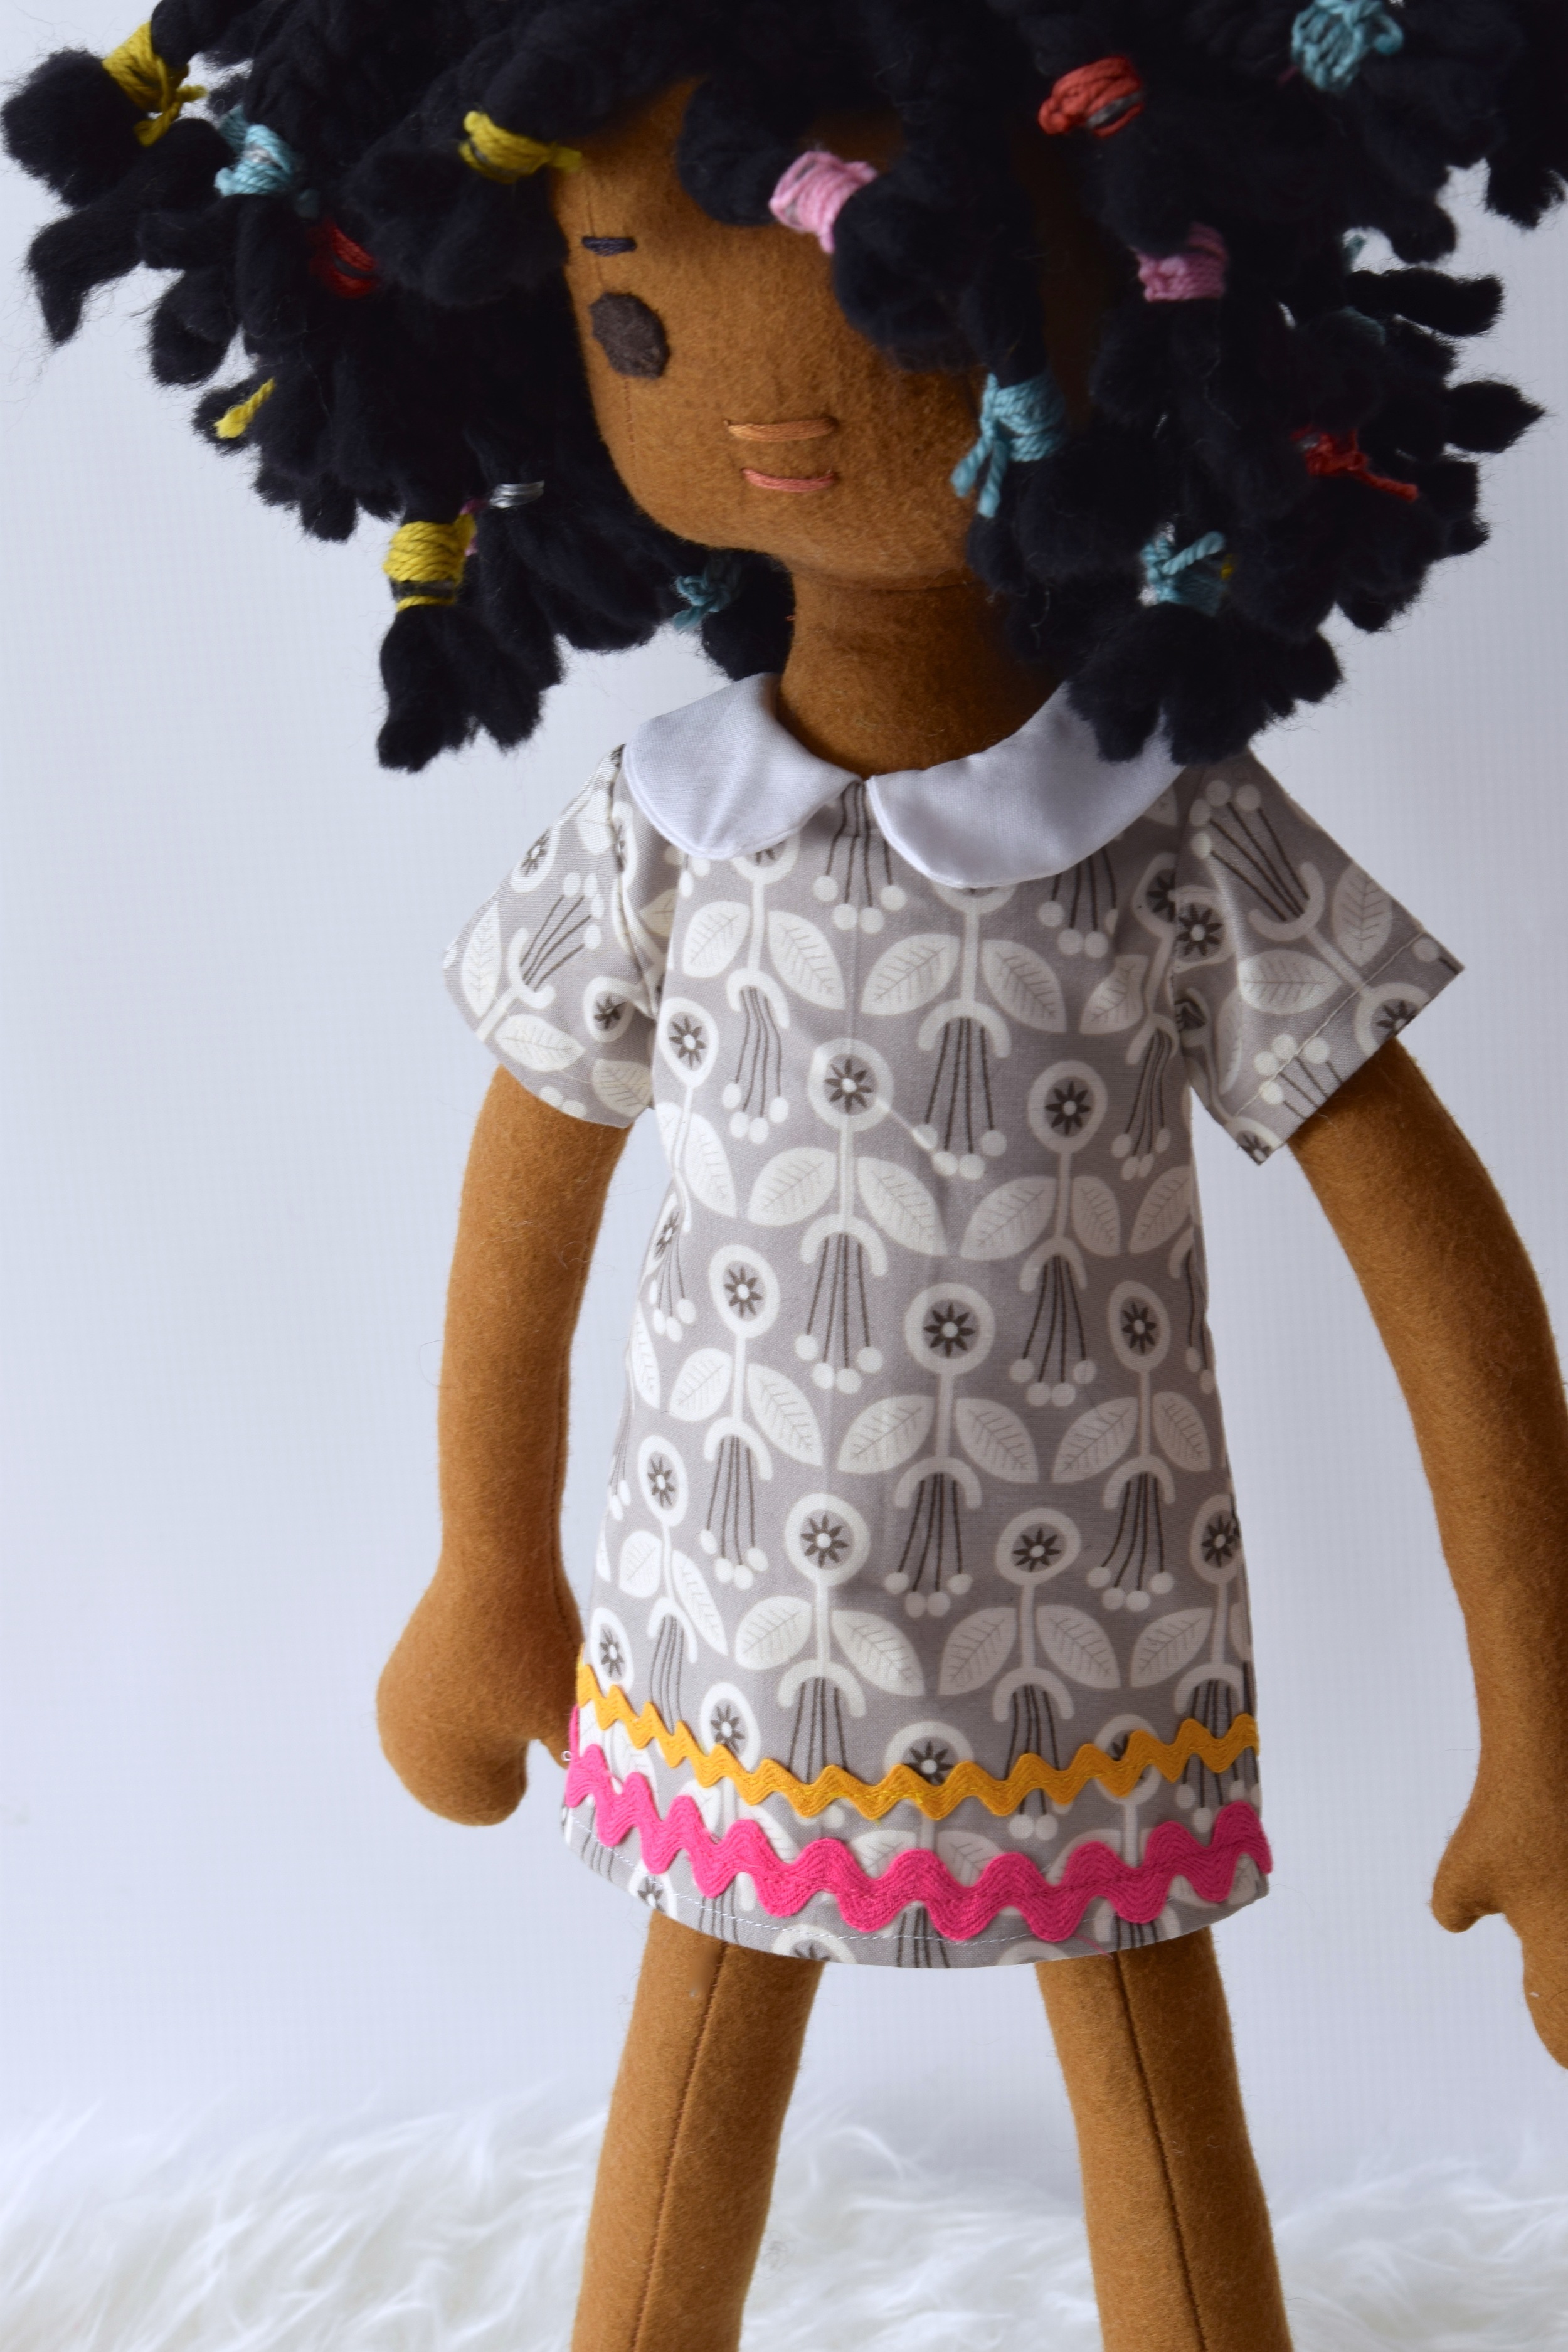
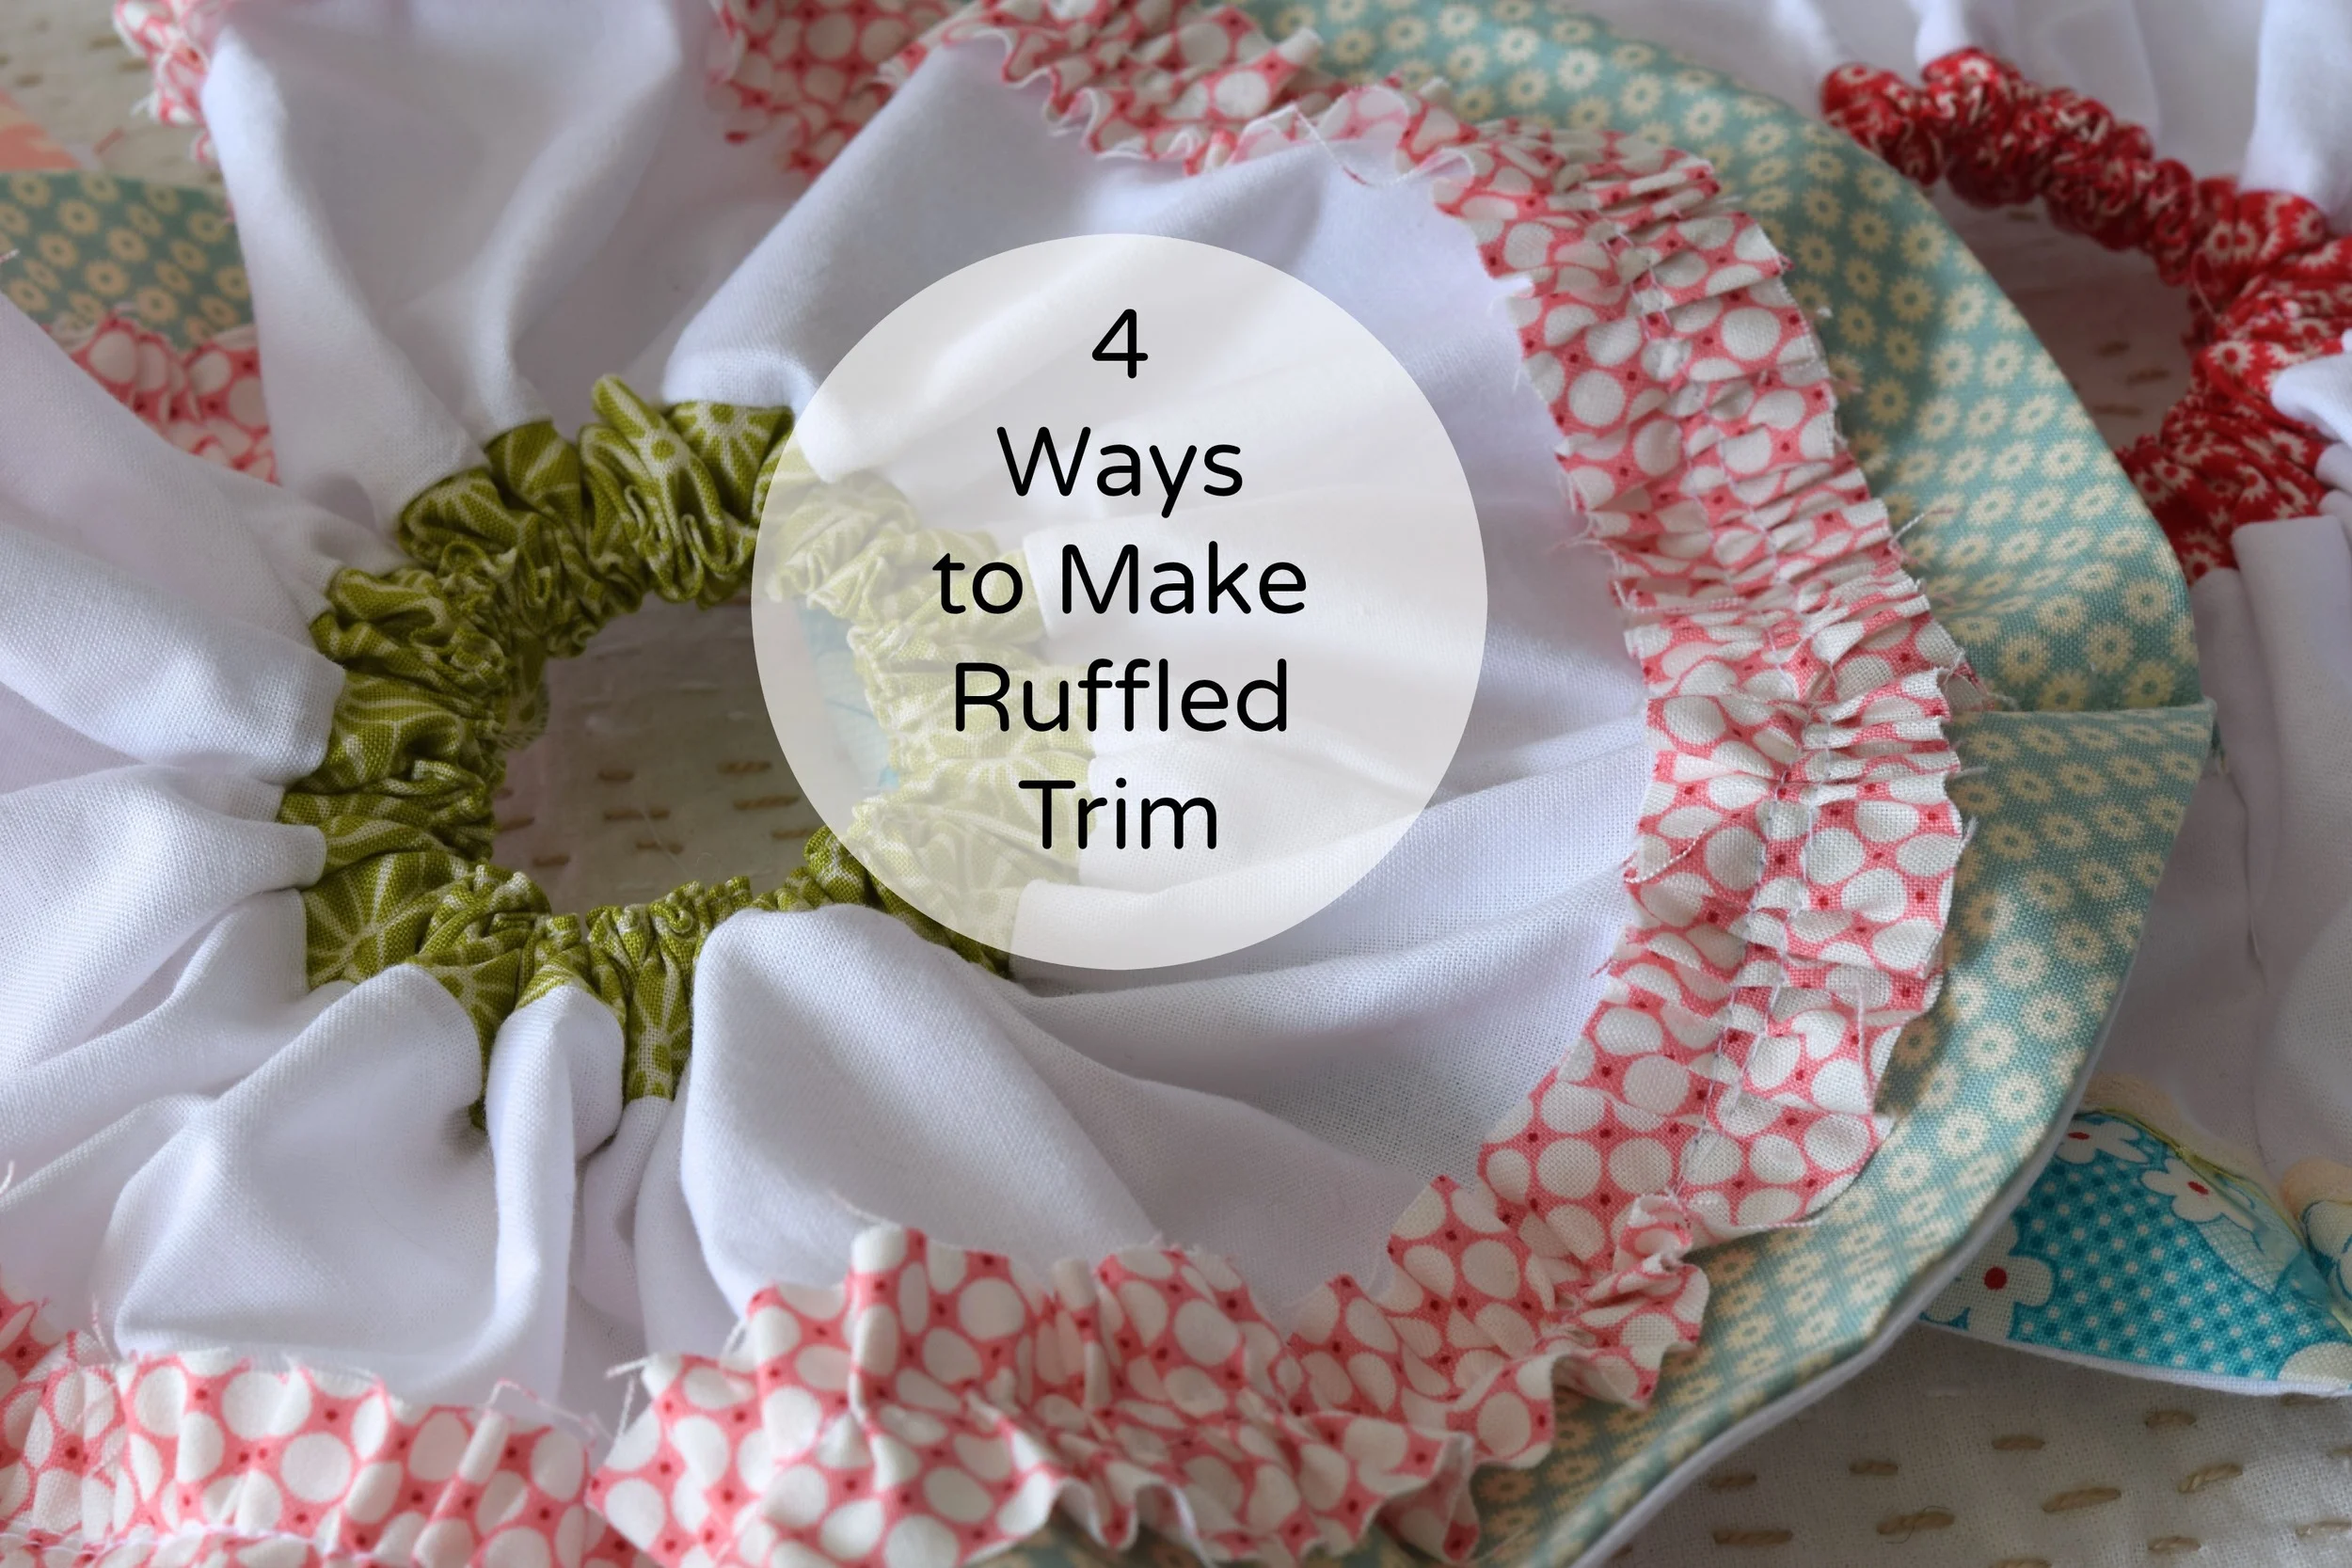
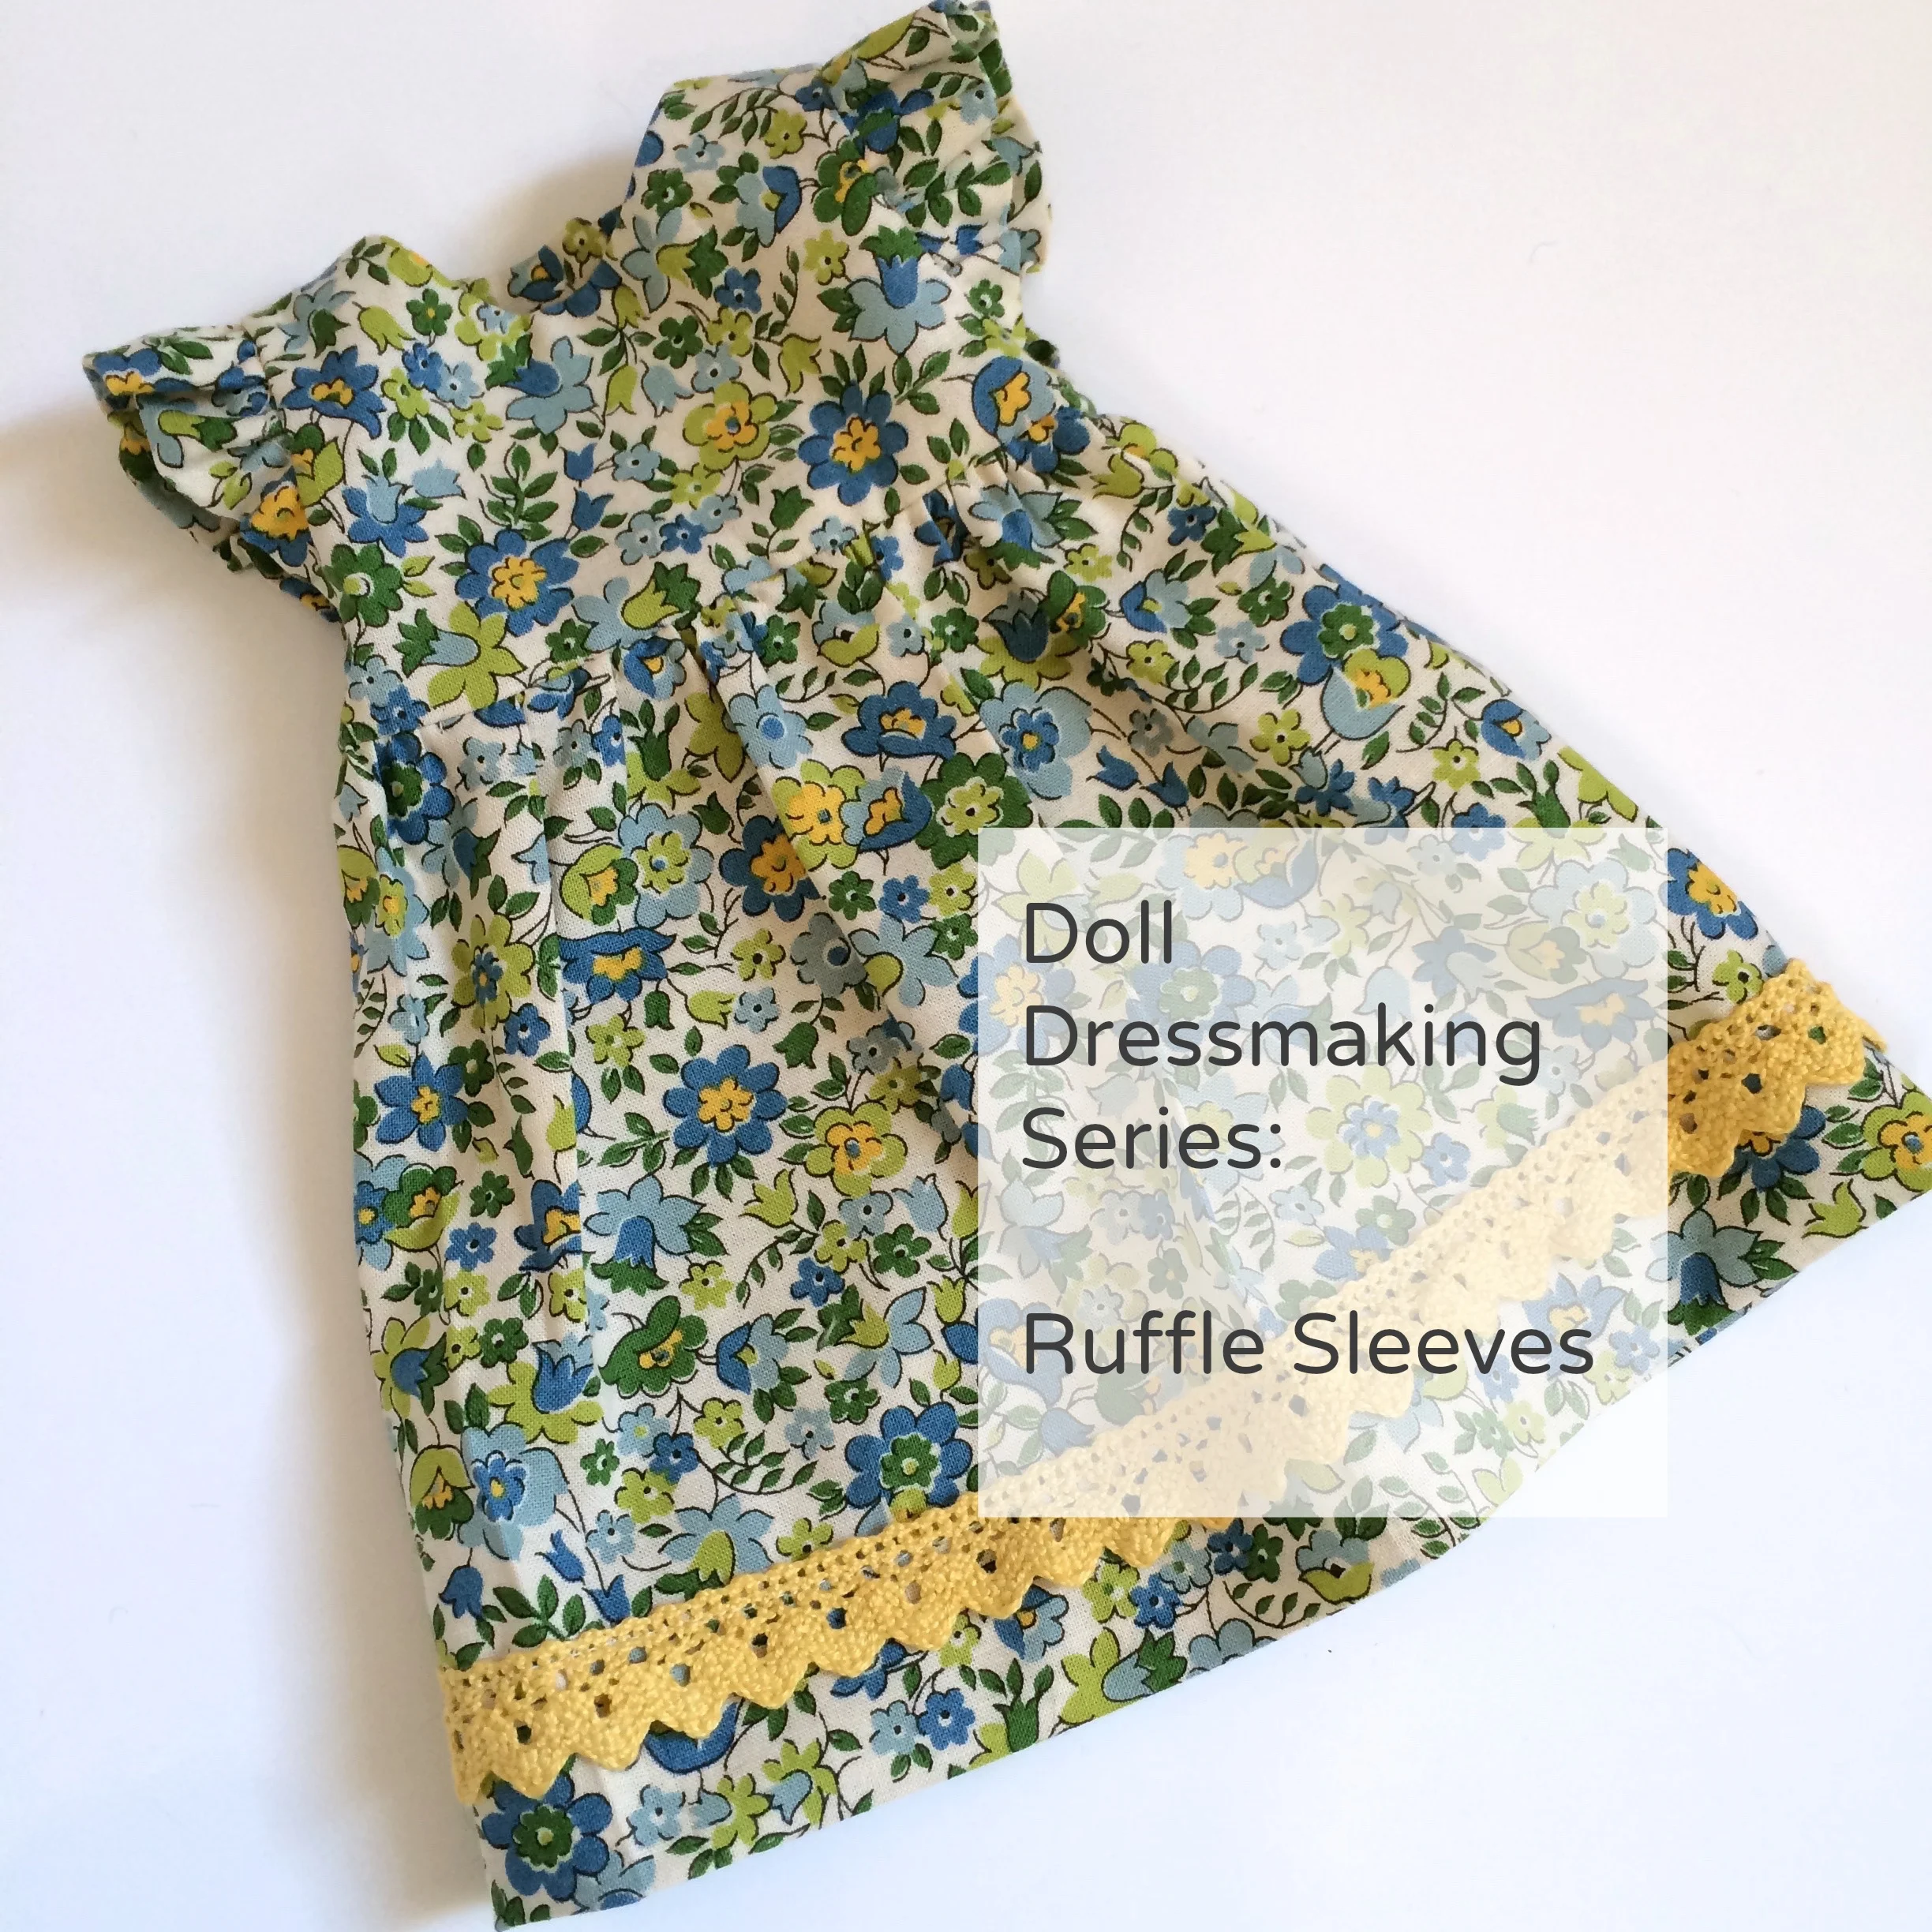
Doll Dressmaking Series: Ruffle Sleeves

Doll Dressmaking Series: Ruffle Sleeves
I have the next sleeve tutorial for you already. There are a lot of ways you can treat sleeves, so i thought I'd keep throwing stuff at you. Along with the basic sleeve, covered in my last post, ruffle sleeves are super easy. They don't require a lot of careful fitting of the sleeve cap to the armhole, which is the trickiest part of sewing sleeves on a small scale.
For this I used the pattern pieces for Dress with a Bodice and Gathered Skirt:
Bodice Front (cut two, the bodice is lined)
Bodice Back, cut 4
Skirt
Ruffle sleeve, cut two, there is a form to get the pattern piece at the end of this post

Doll Dressmaking Series: Ruffle Sleeves
1. Sew front to back pieces together at the shoulder seams for both the bodice and the lining.

Doll Dressmaking Series: Ruffle Sleeves
2. Sew bodices together starting at the bottom corner of the back, up and around the neck and down the other side of the back. DO NOT sew the armholes together as you would for a sleeveless dress with a lined bodice.

Doll Dressmaking Series: Ruffle Sleeves
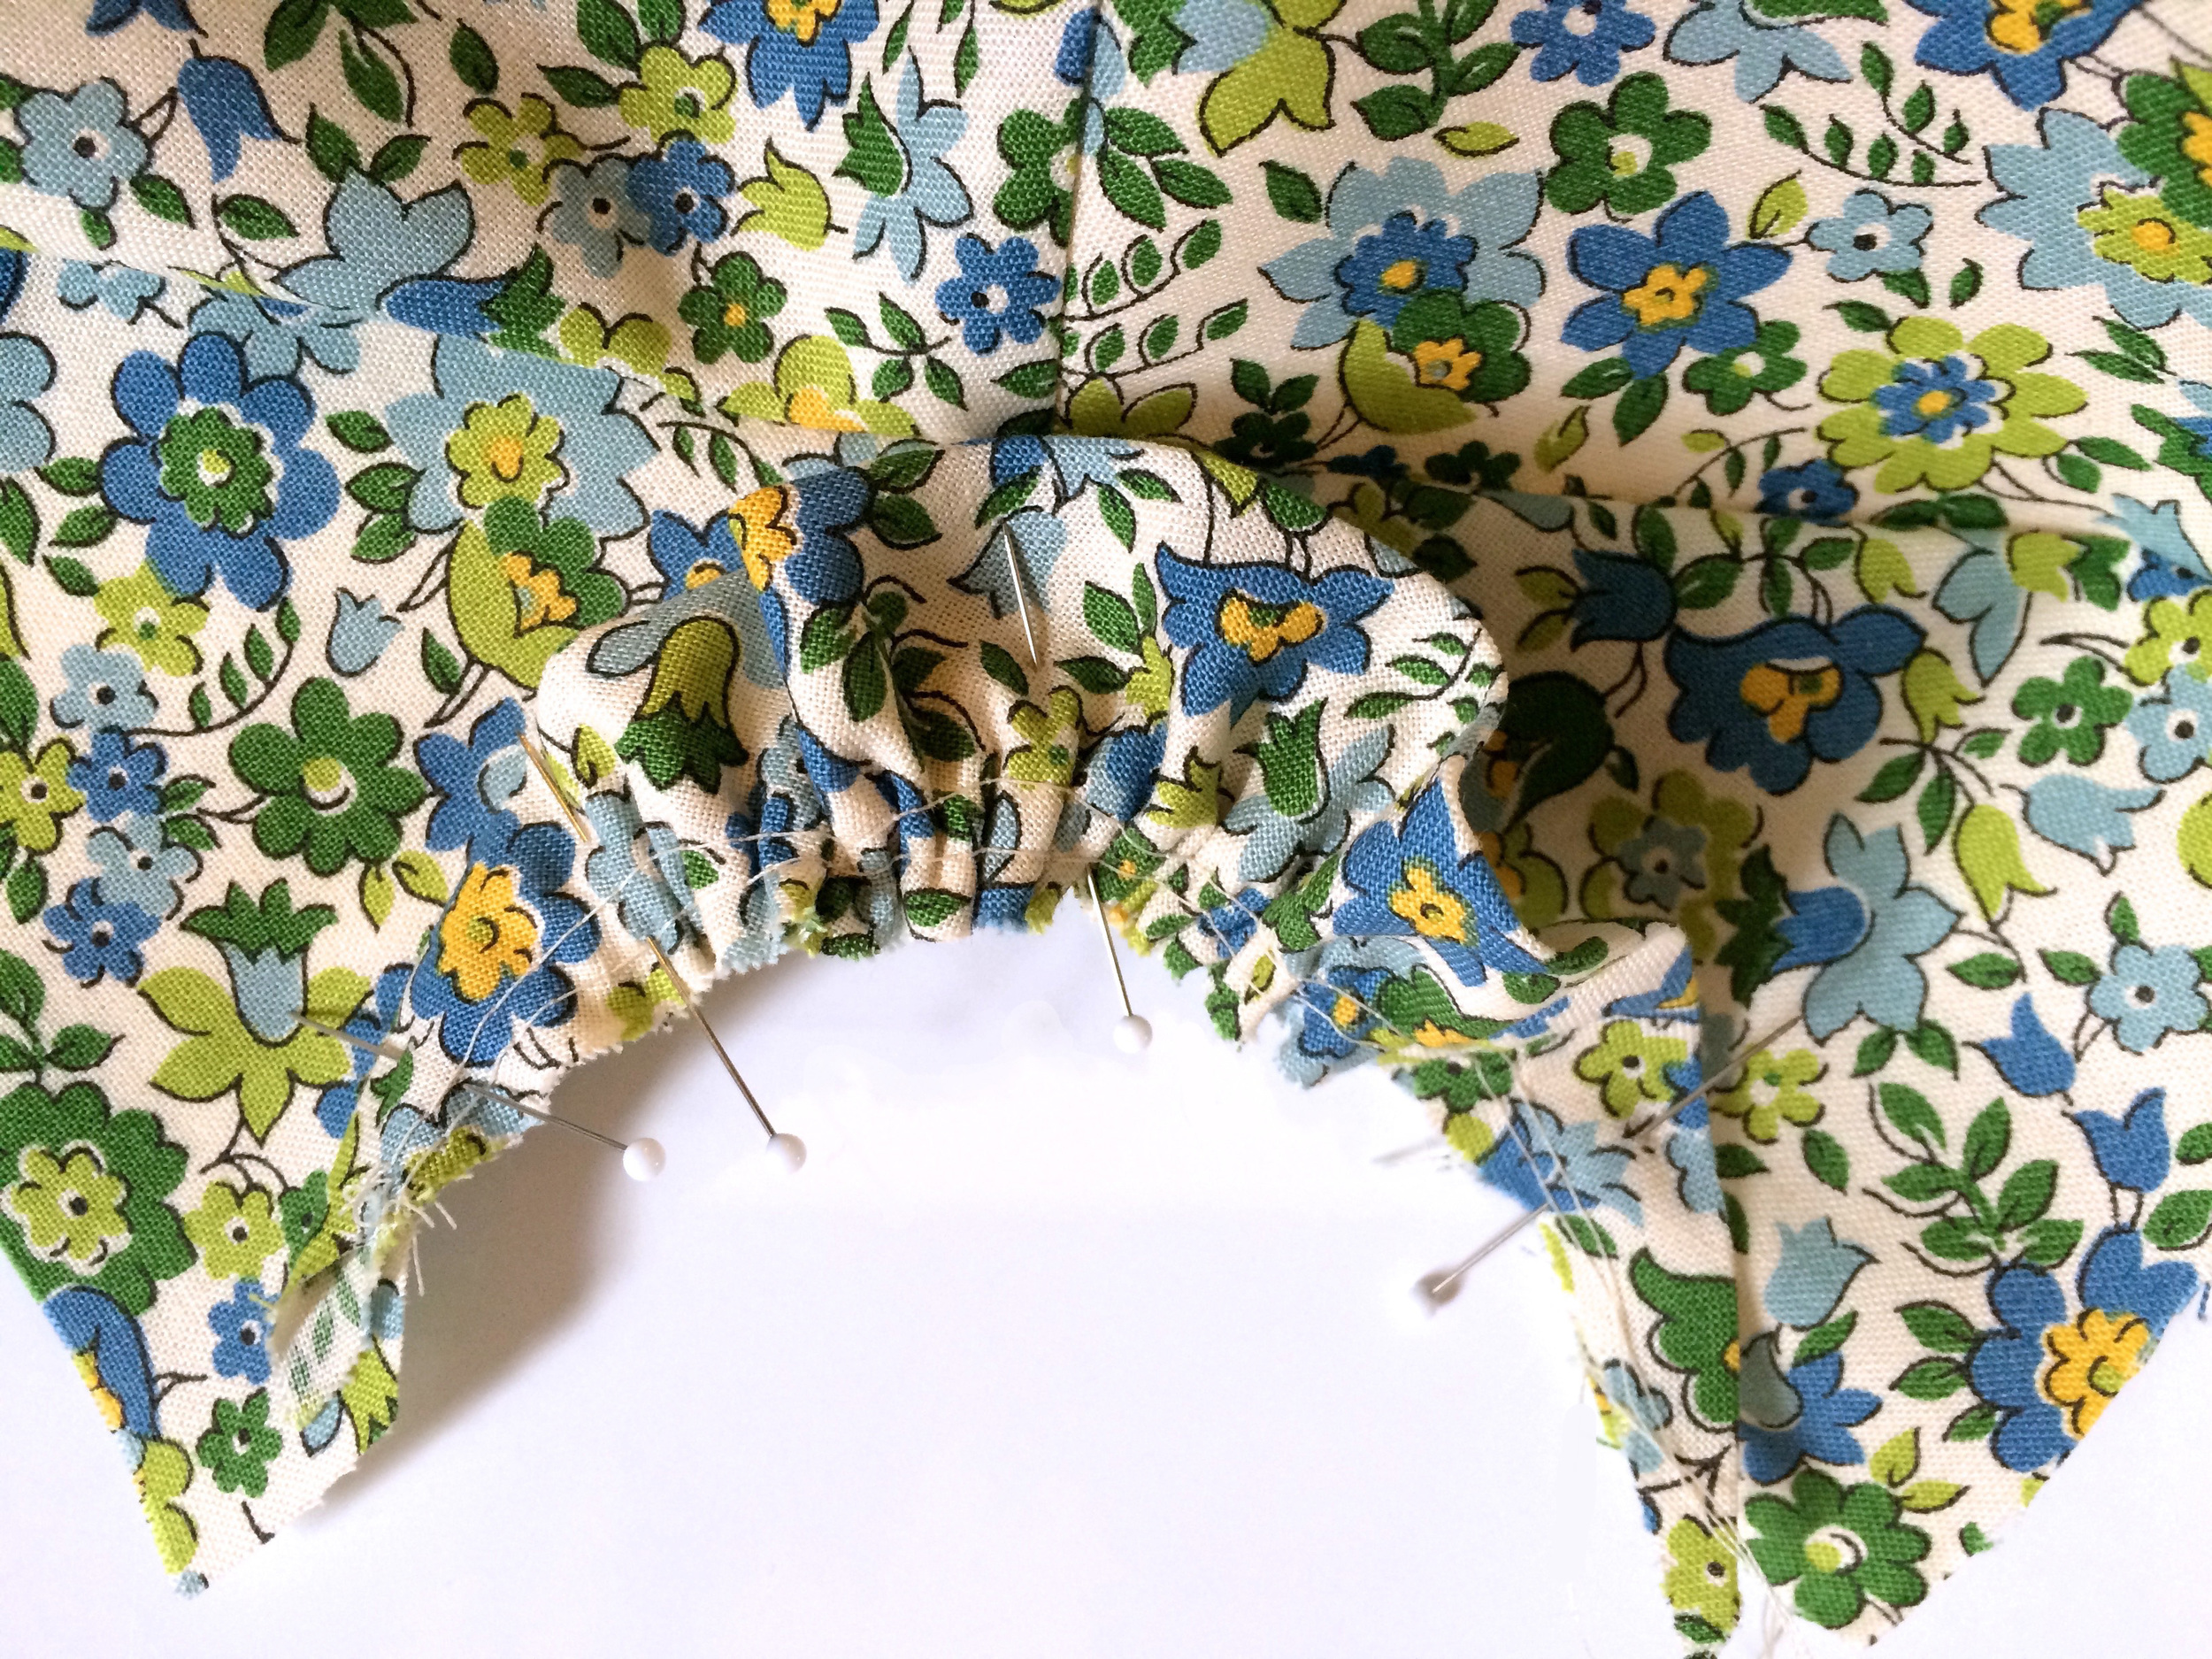
3. Fold sleeve ruffles in half and press.
4. Sew two rows of gathering stitches along the curved edge of each sleeve. Gathering stitches are explained in this lesson.

Doll Dressmaking Series: Ruffle Sleeves

5. Pull gathering threads until sleeve edge is the same length as armhole edge.

6. Pin sleeve to ONE layer of the bodice fabric making sure you have right sides together. The sleeve has two right sides, but the bodice only has one. If you look closely in the photo below, the lining of the bodice is lifted up.
7. Sew sleeve in place to the bodice but not the lining.
Doll Dressmaking Series: Ruffle Sleeves

Doll Dressmaking Series: Ruffle Sleeves
8. Now you can add the lining. Just flip it down and pin it in place. You will then have a bodice, sleeve, bodice lining, sandwich. You are ready to sew these three layers together. It helps to sew with the bodice side up, because you have the stitch line from sewing the sleeve to the bodice to follow.

Doll Dressmaking Series: Ruffle Sleeves
9. Next there is a tiny side seam.
A. Turn bodice right side out and press.
B. Locate the tiny side seams at the base of each armhole.
C. Pin the side seam of the bodice to the side seam of the armhole, matching the bases of the armholes.
D. Stitch.

Doll Dressmaking Series: Ruffle Sleeves
10. Press bodice and sew skirt on as in the Bodice and Gathered Skirt tutorial.
11. Hem and and trim and send pics!

Doll Dressmaking Series: Ruffle Sleeves

All doll dressmaking patterns are available through a subscription to my newsletter. You will then receive all new patterns automatically. Sign up is on the right-hand side of this blog.
Doll Dressmaking Series: Beginners Sleeves

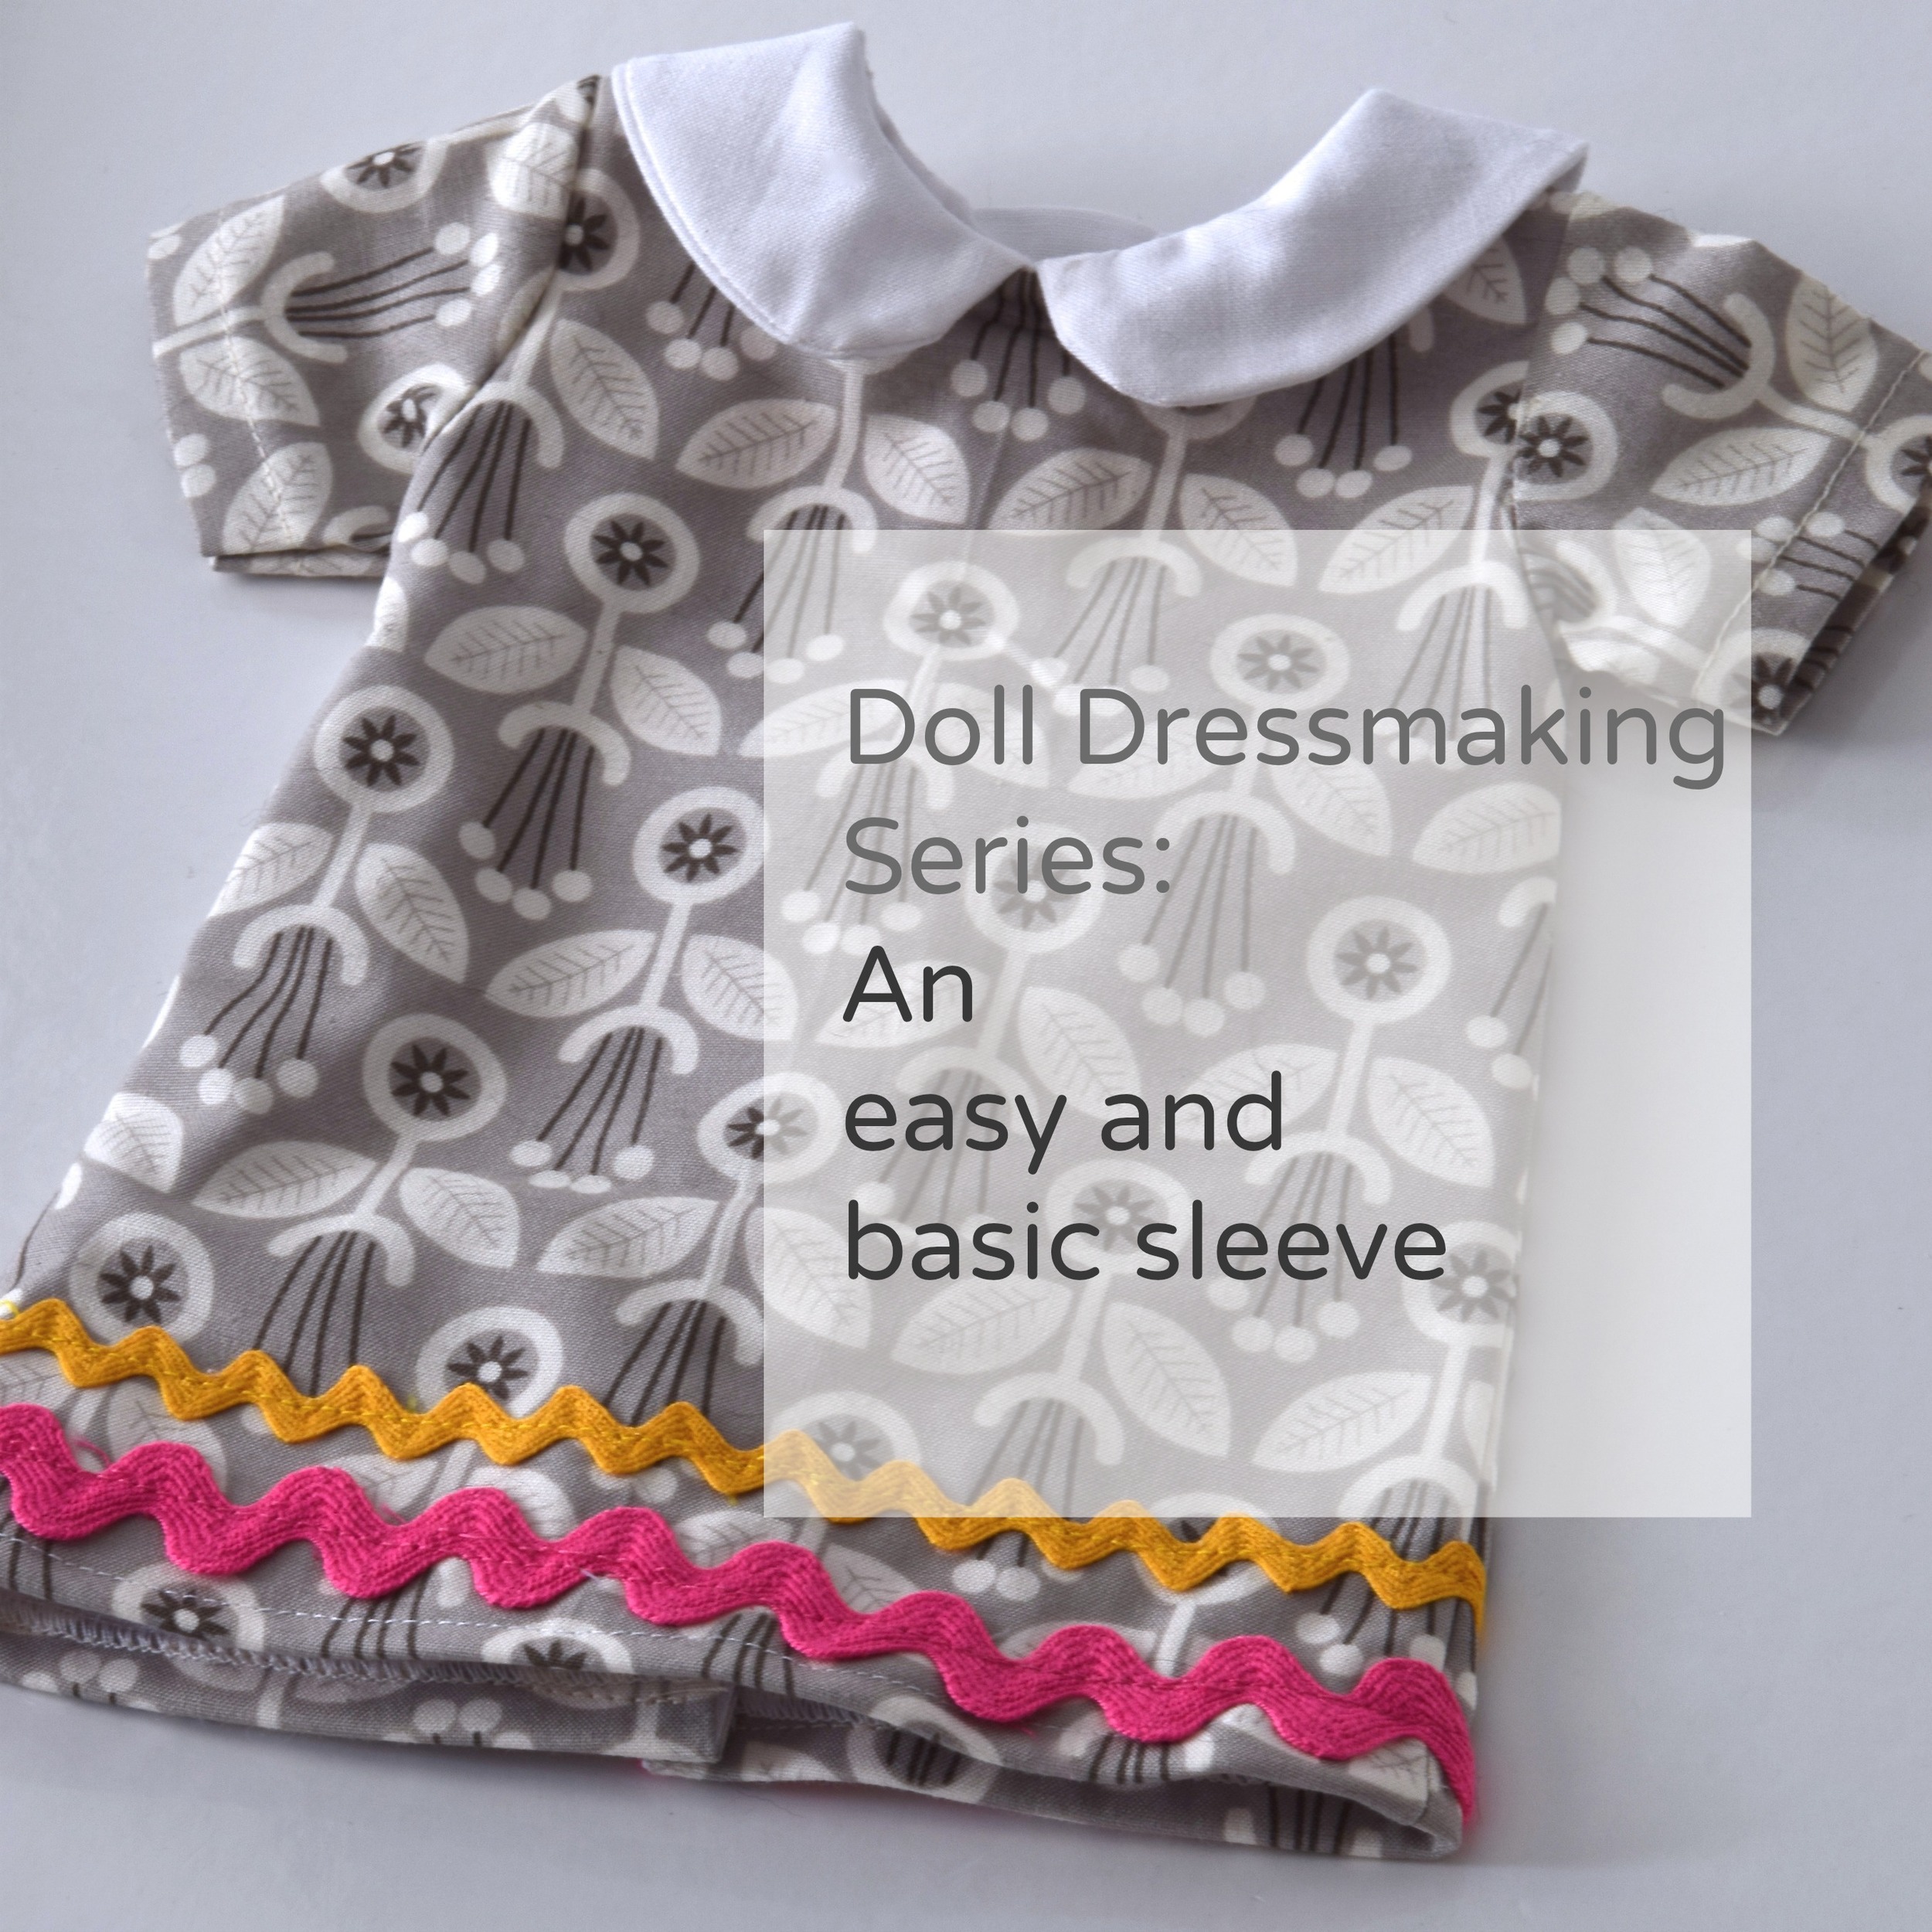
Doll Dressmaking Series: An Easy Basic Sleeve
Includes free dress patterns
There are lots of styles of sleeves: puff sleeves, flutter sleeves, cap sap sleeves, wing, long sleeves, cuffed sleeves, bell sleeves, you get the point. A number of these sleeves work well for doll clothes. In other lessons I will cover kinds of sleeves, tweaking a sleeve, and sleeve construction, but in this post I thought I'd start with an easy sleeve.
There is a form at the end of the post, so you can request the sleeve pattern (or any of the patterns).
Most sleeves require some gathering, or easing (just the slightest of gathers), I designed this sleeve to not need even that step. So although I've broken the process down into micro-steps, this is really a three step sleeve--hem, insert, sew side seam.
Although the sleeve can be attached to either your basic reversible dress, the dress with facings or the dress with the gathered skirt, my instructions or for the Peter Pan collar dress or the Reversible Dress. The beginning instructions are similar, so refer to the Peter Pan collar dress lesson but the armhole instructions are different.

1. Make collar pieces as described in the Peter Pan collar instructions.
2. Sew shoulder seams of dress and lining.
3. Attach the collar pieces as in the Peter Pan collar dress instructions.

Sew armhole fabric and lining eges togther.
Next, you want to sew the lining fabric and the dress fabric together at the armhole edge. It is important that the wrong sides are together. I used a bright visible thread, which can be helpful for aligning the sleeve.
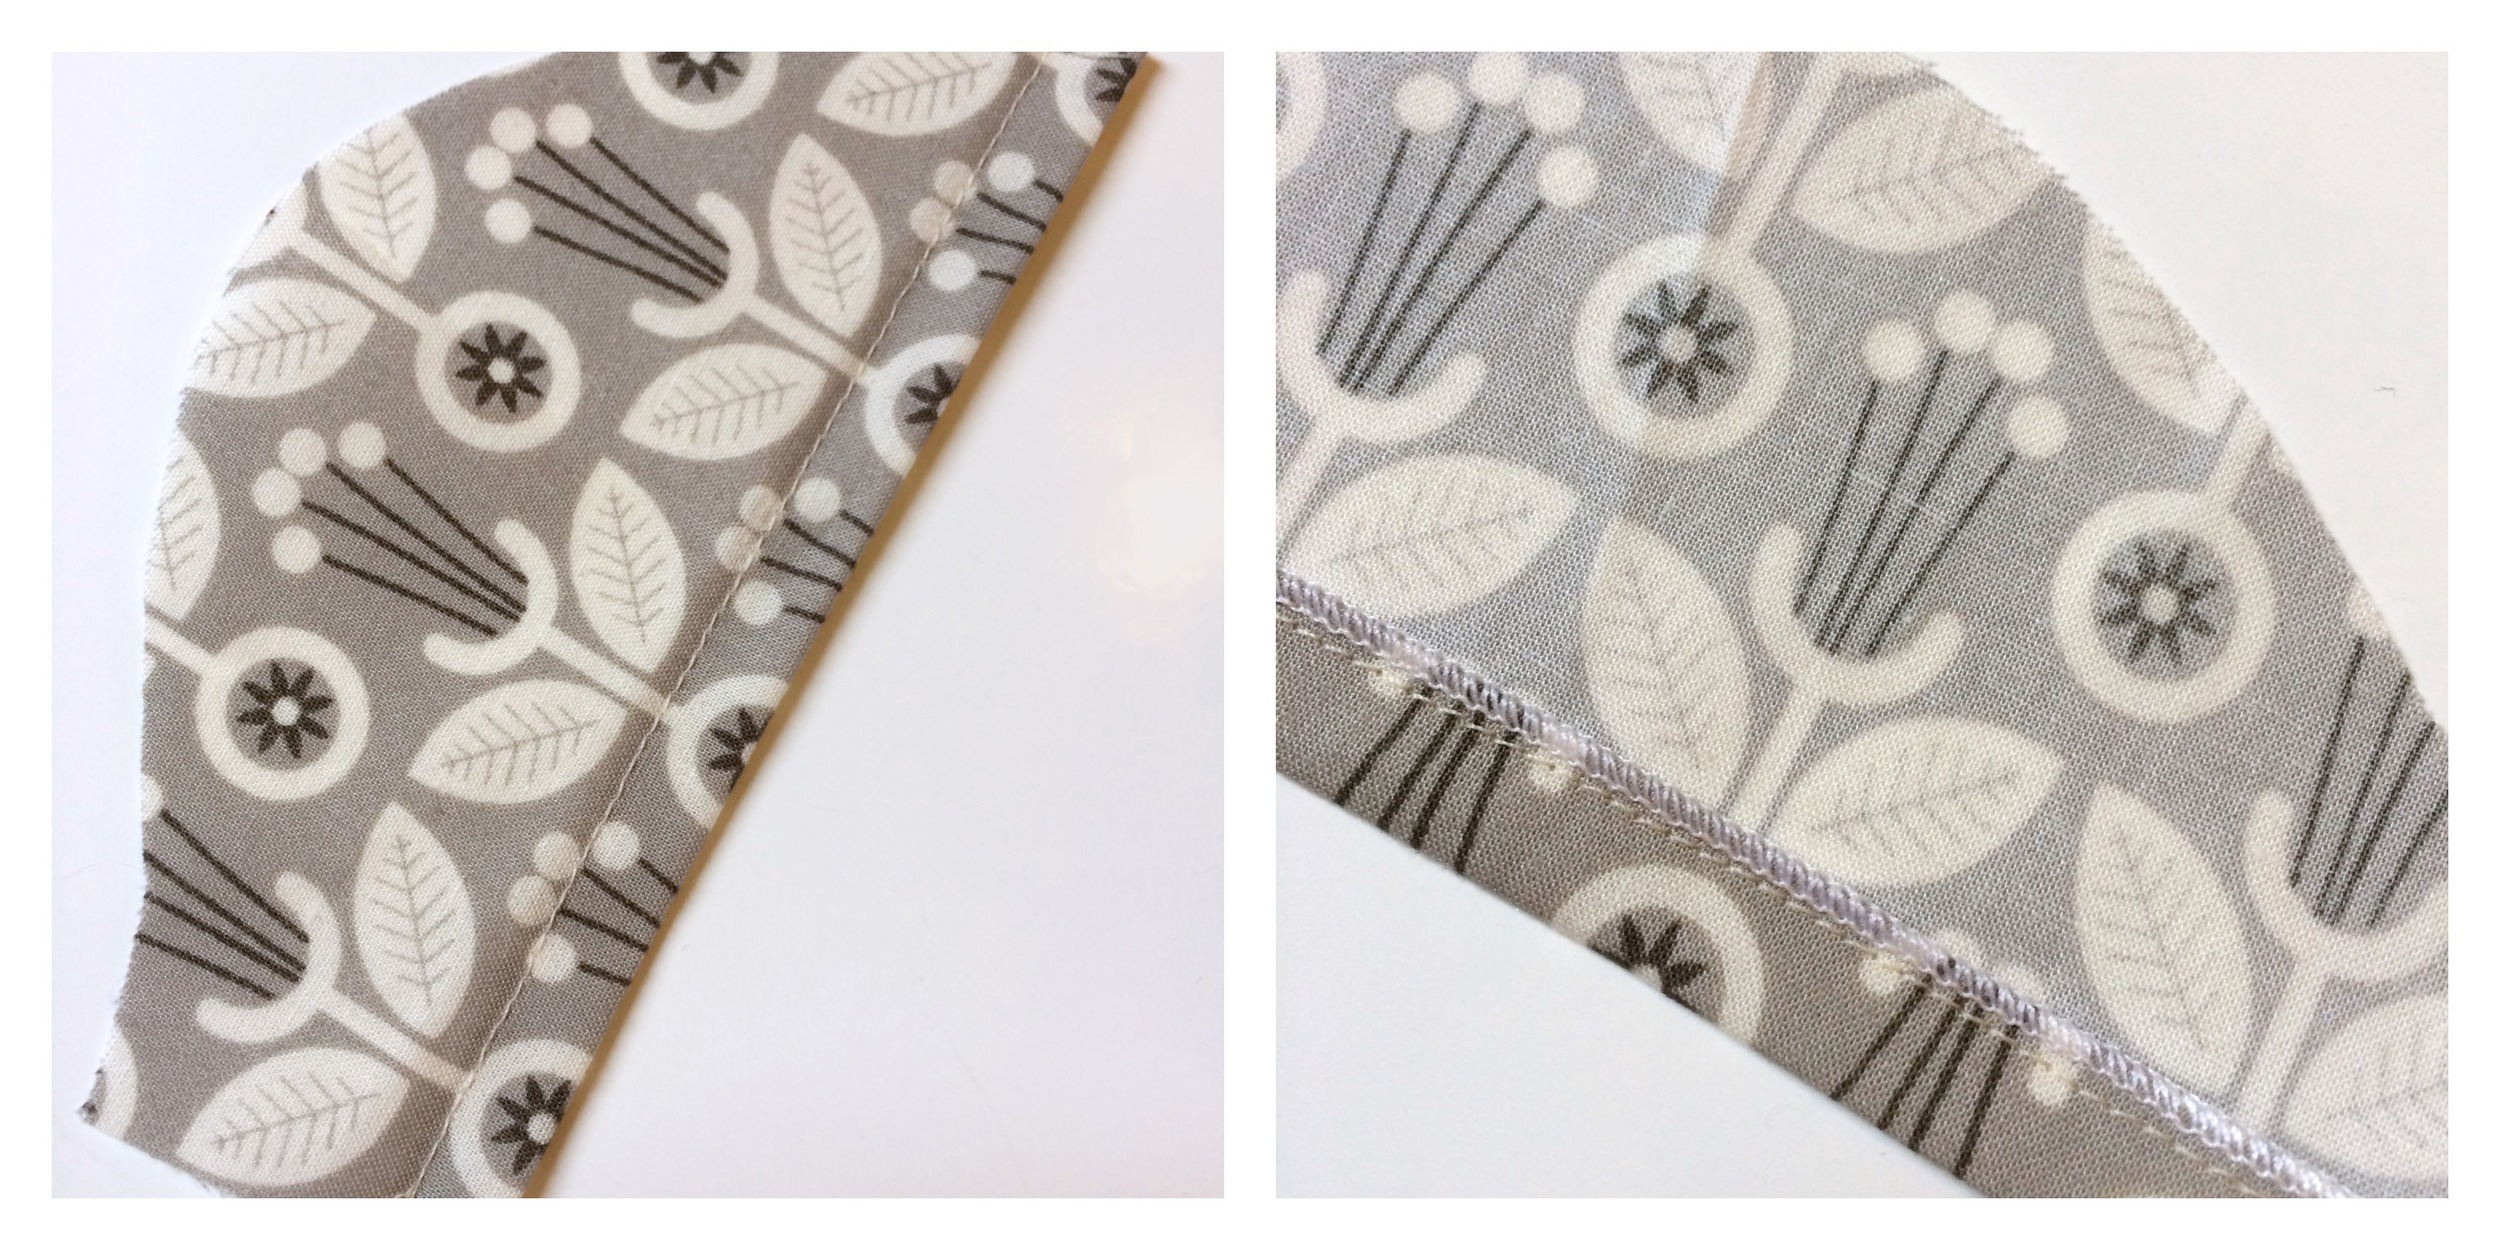
Hem sleeve. I also serged the edge, but I do that with almost everything, you do not need to do this.

Attaching the sleeve to the body of the dress:
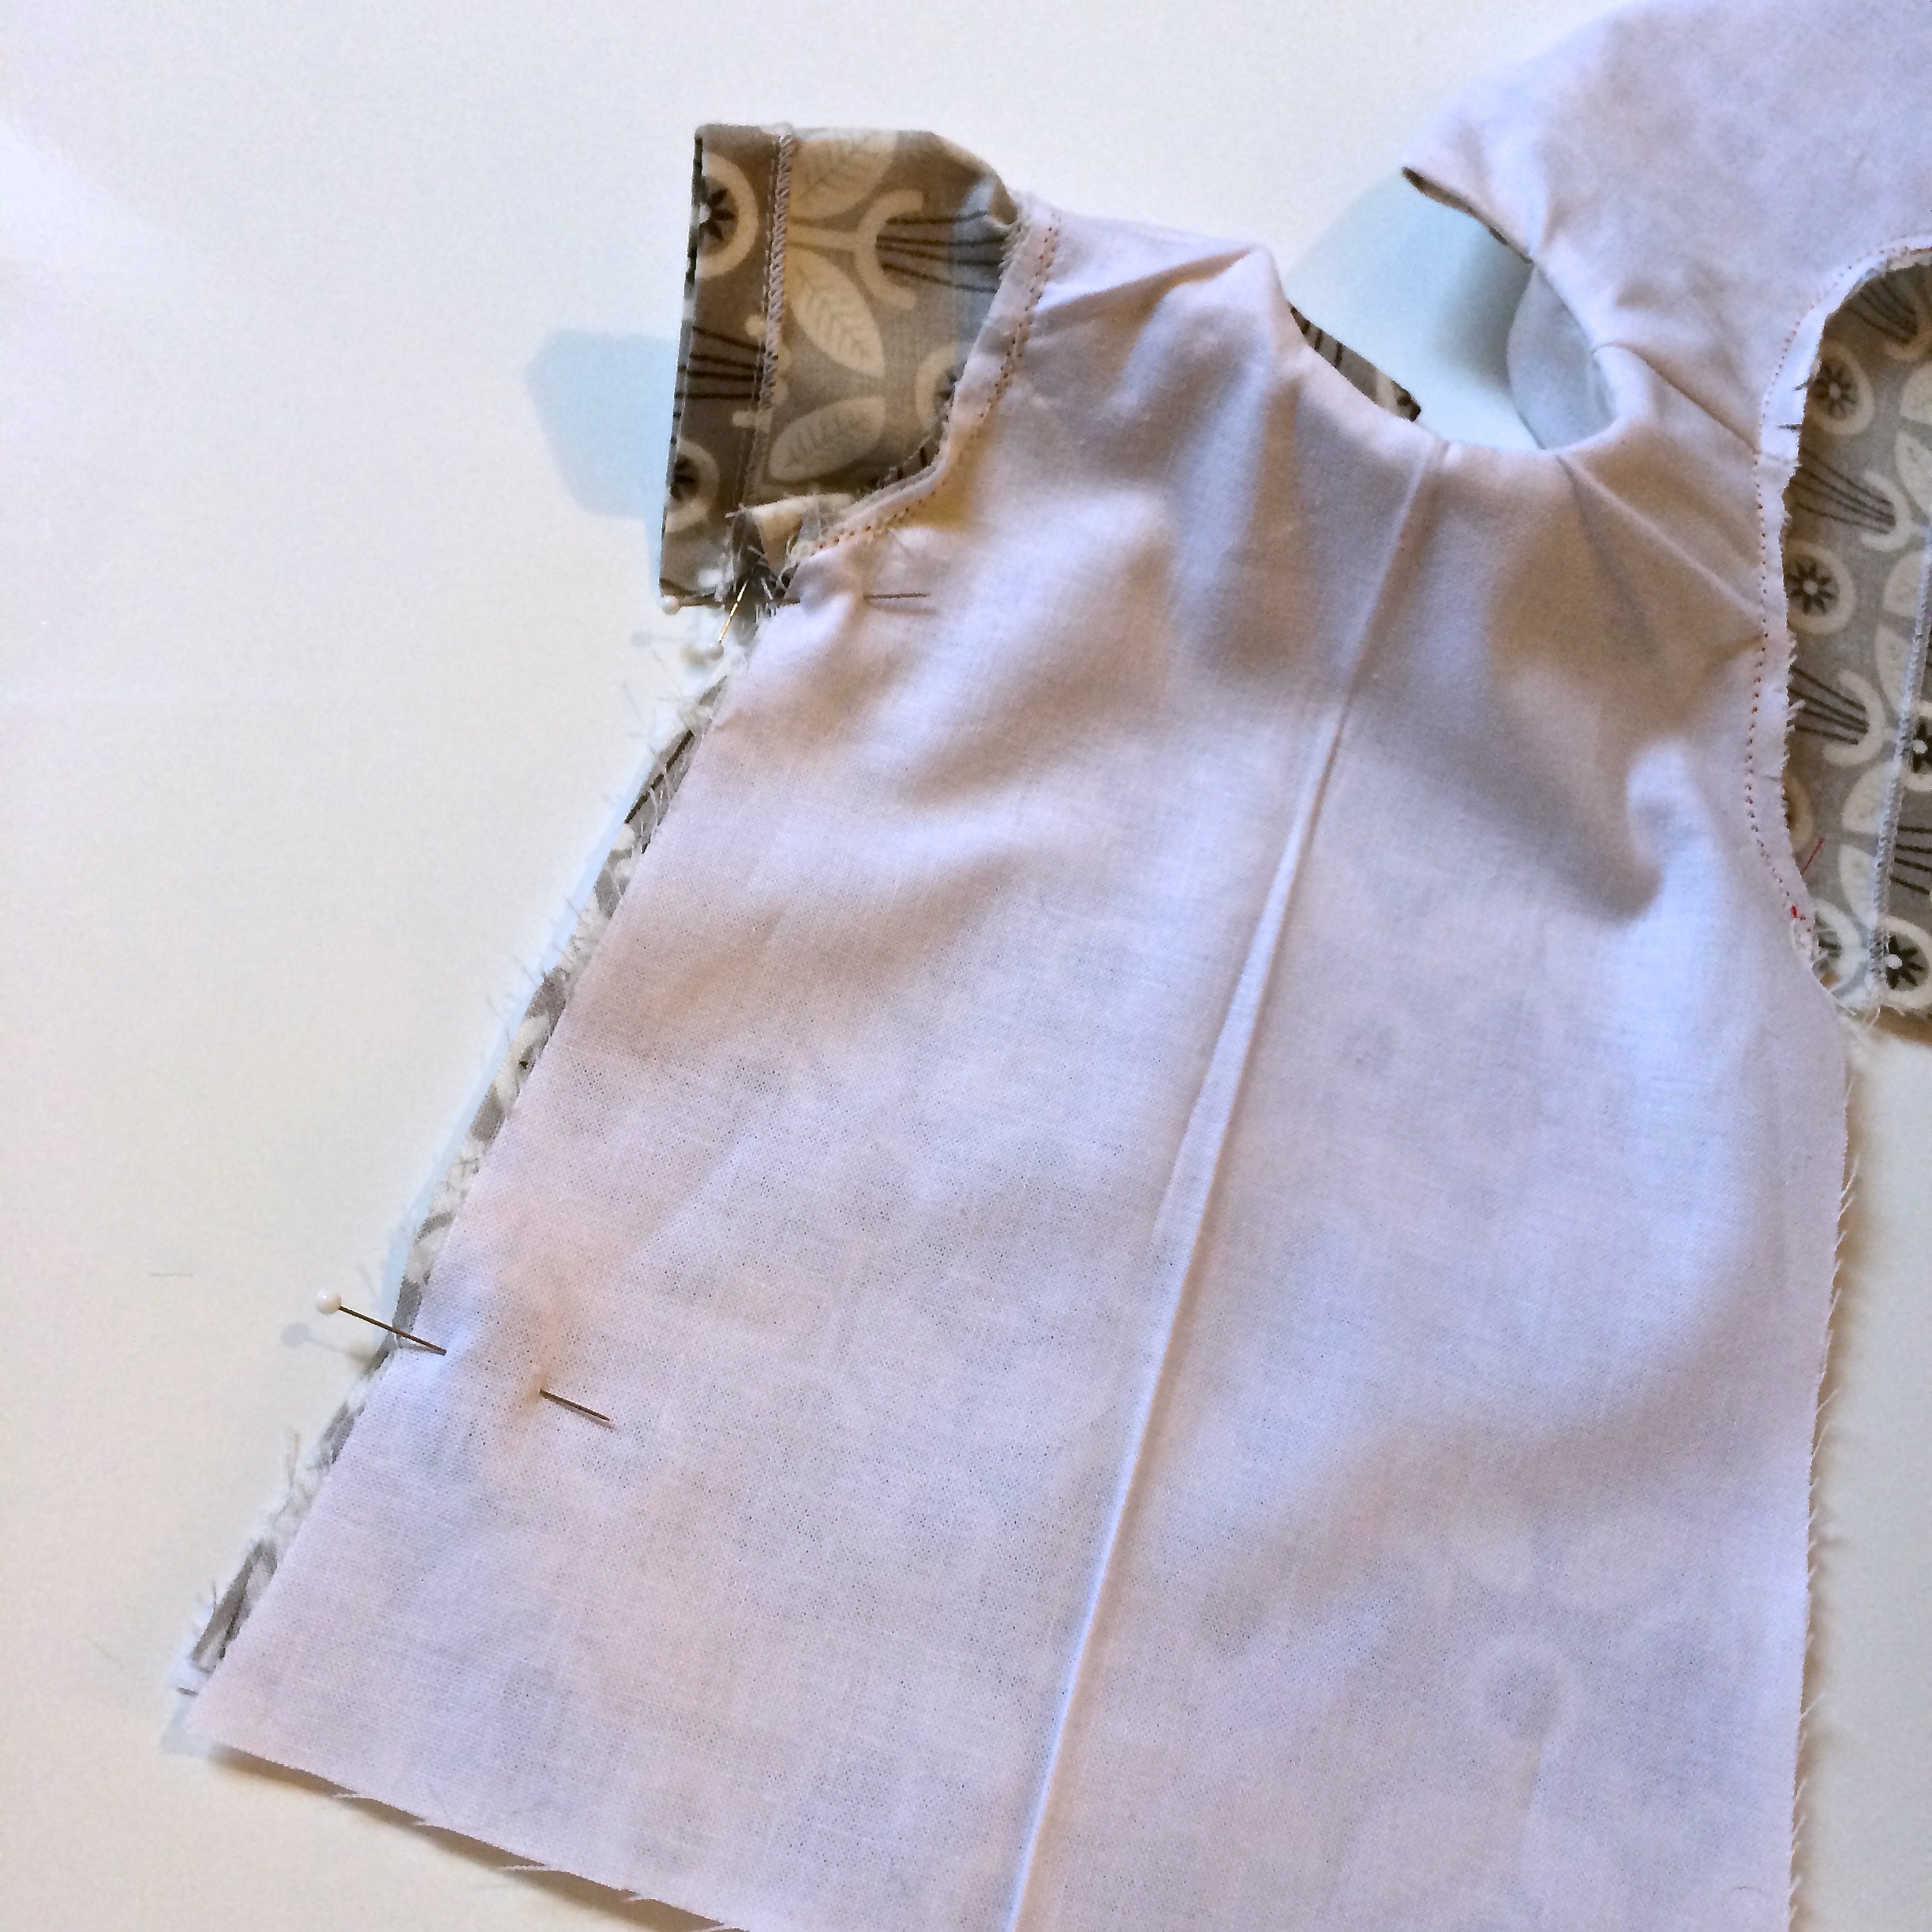
1. Pin center of the sleeve to the shoulder seam, right sides together.
2. Pin the rest of the sleeve to the edge of the armhole. You will need to "help" the fabric along the curve.
3. Sew the sleeve to the body. On the lining side, you can see your bright thread, it can help to use this as your stitching guide.

Doll dress basic sleeve
Your sleeve and dress should now look a bit like the above photo.
Next sew the side seams. When you have added a sleeve you cannot sew them as you would in the reversible dress. the side seam will be visible inside the dress.
Hem. Add trim if you'd like.
Sew side seams.

Hem. I hemmed this dress with the machine.
Doll Dressmaking Series: Sleeves

Doll Dressmaking Series: Sleeves
For this pattern piece and all those past, present and future, subscribe to my newsletter. Sign up is on the right-hand side of this blog.
Featured


Hello 2015
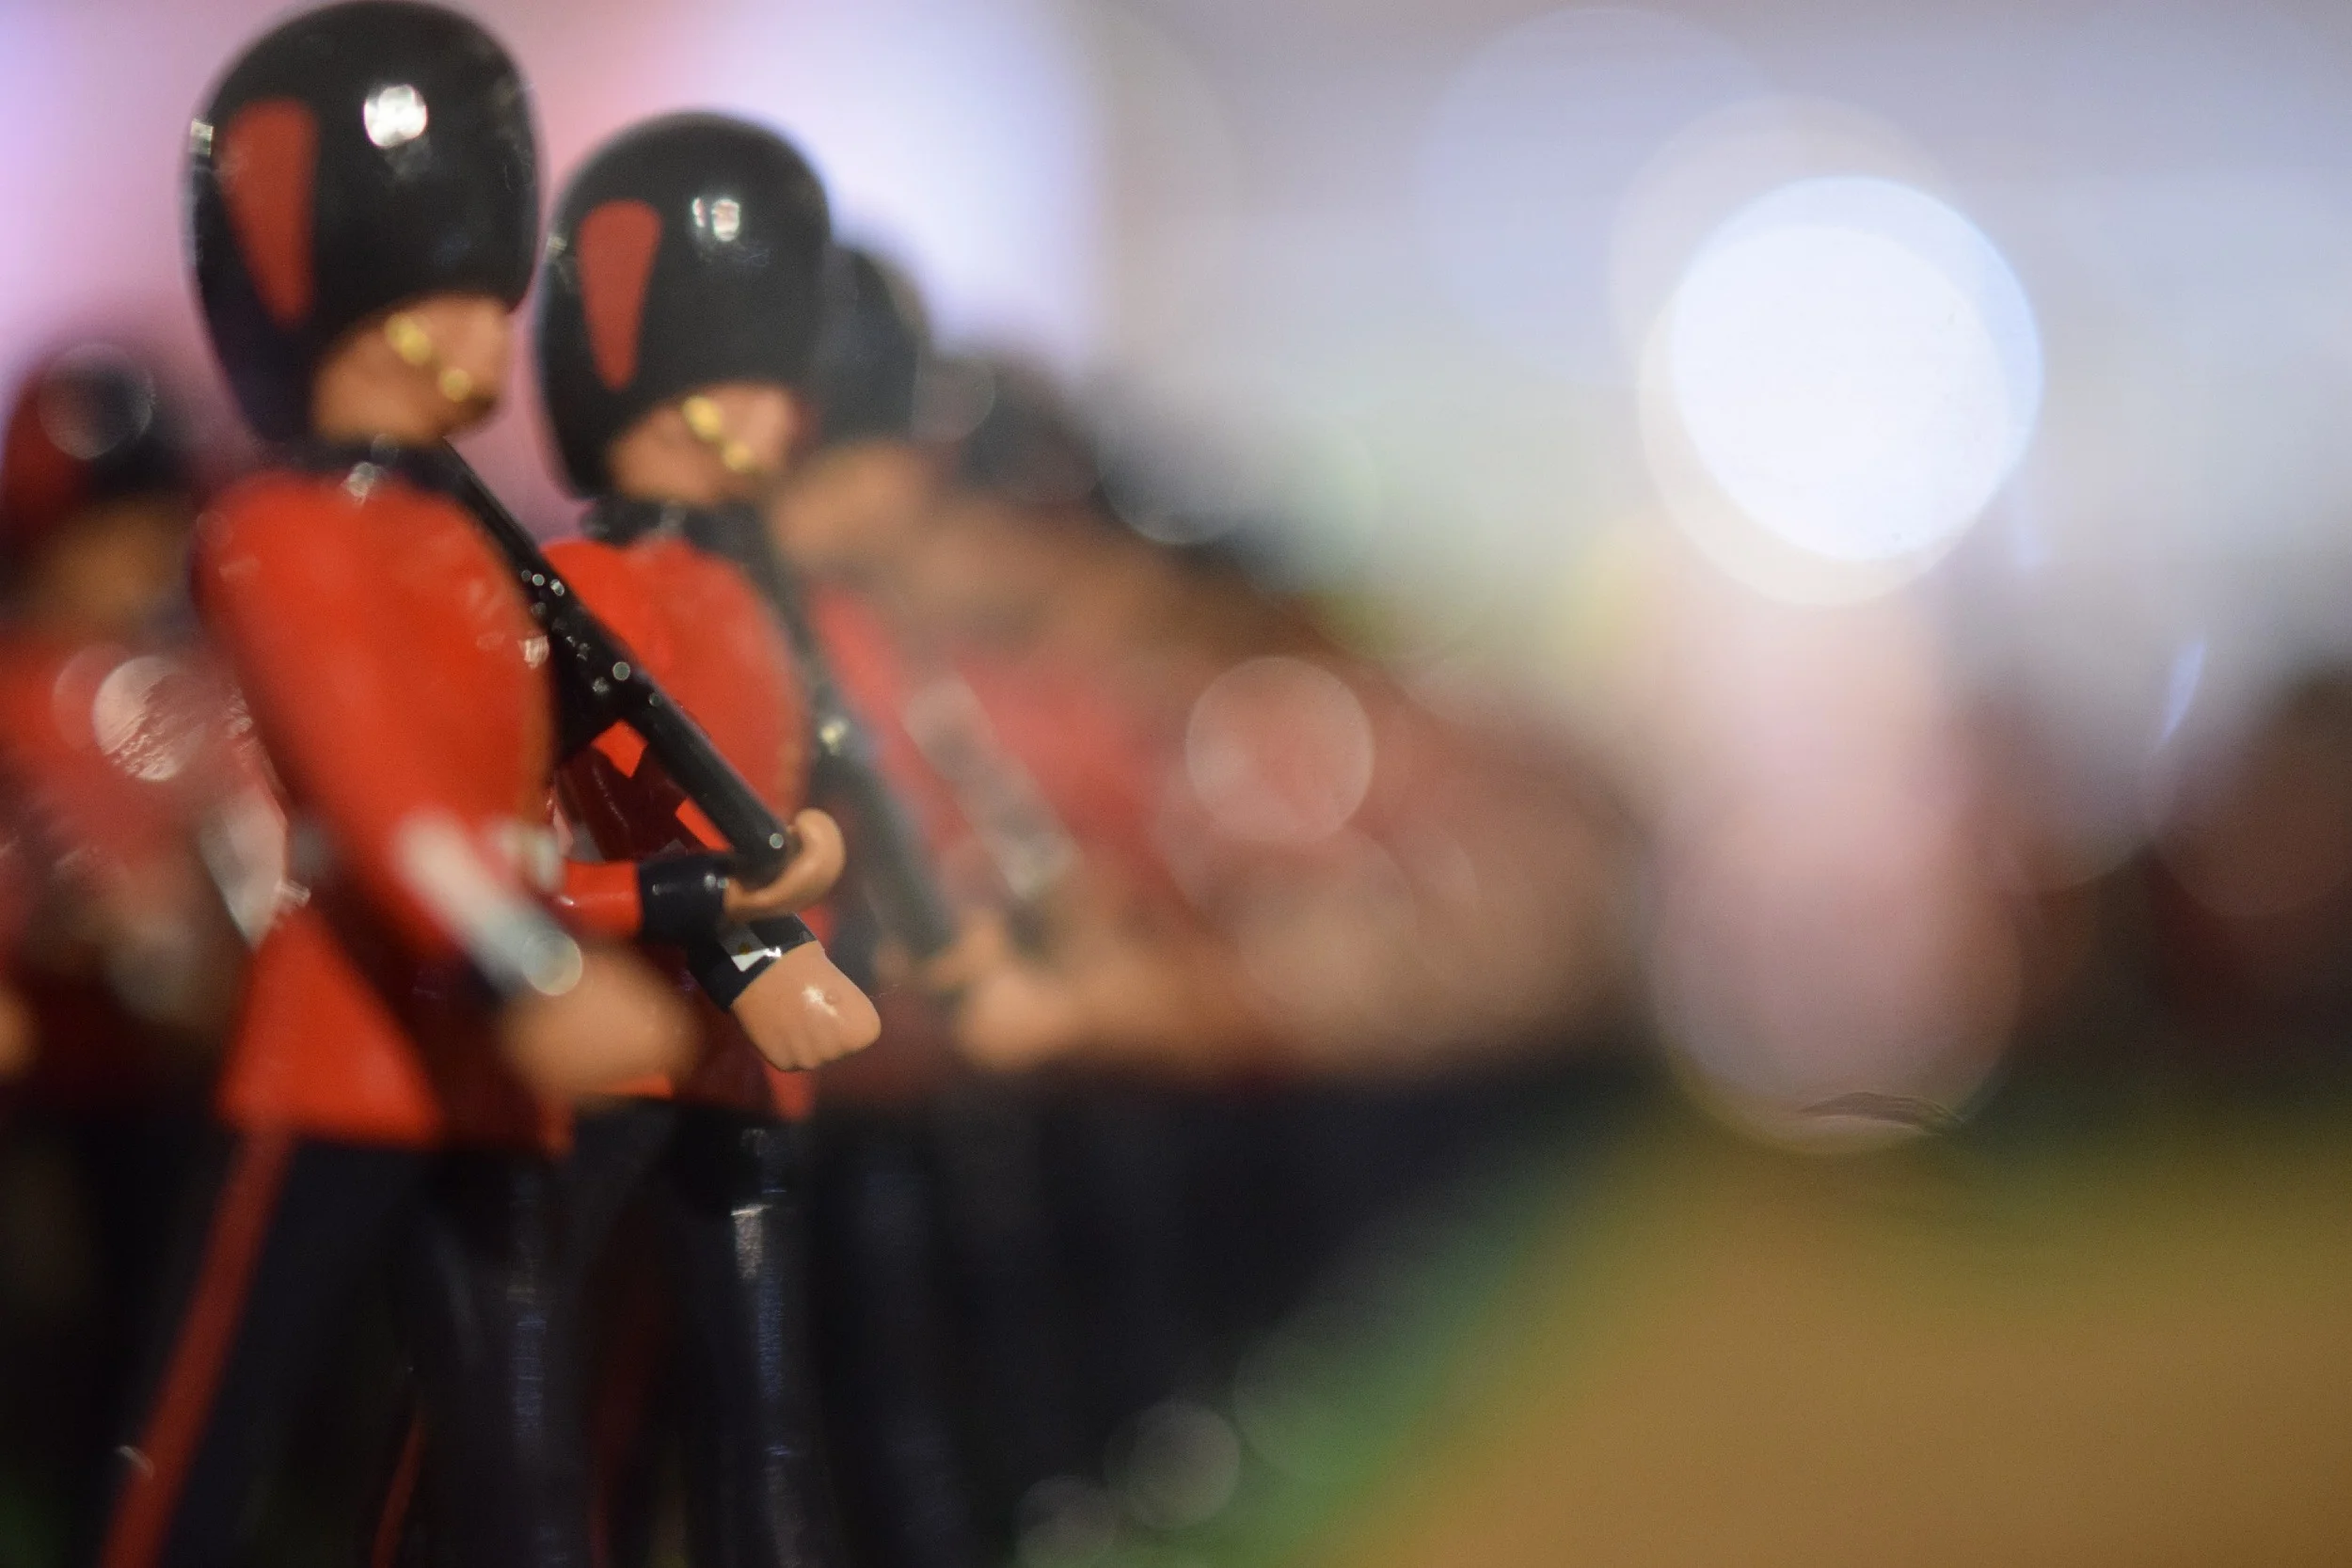
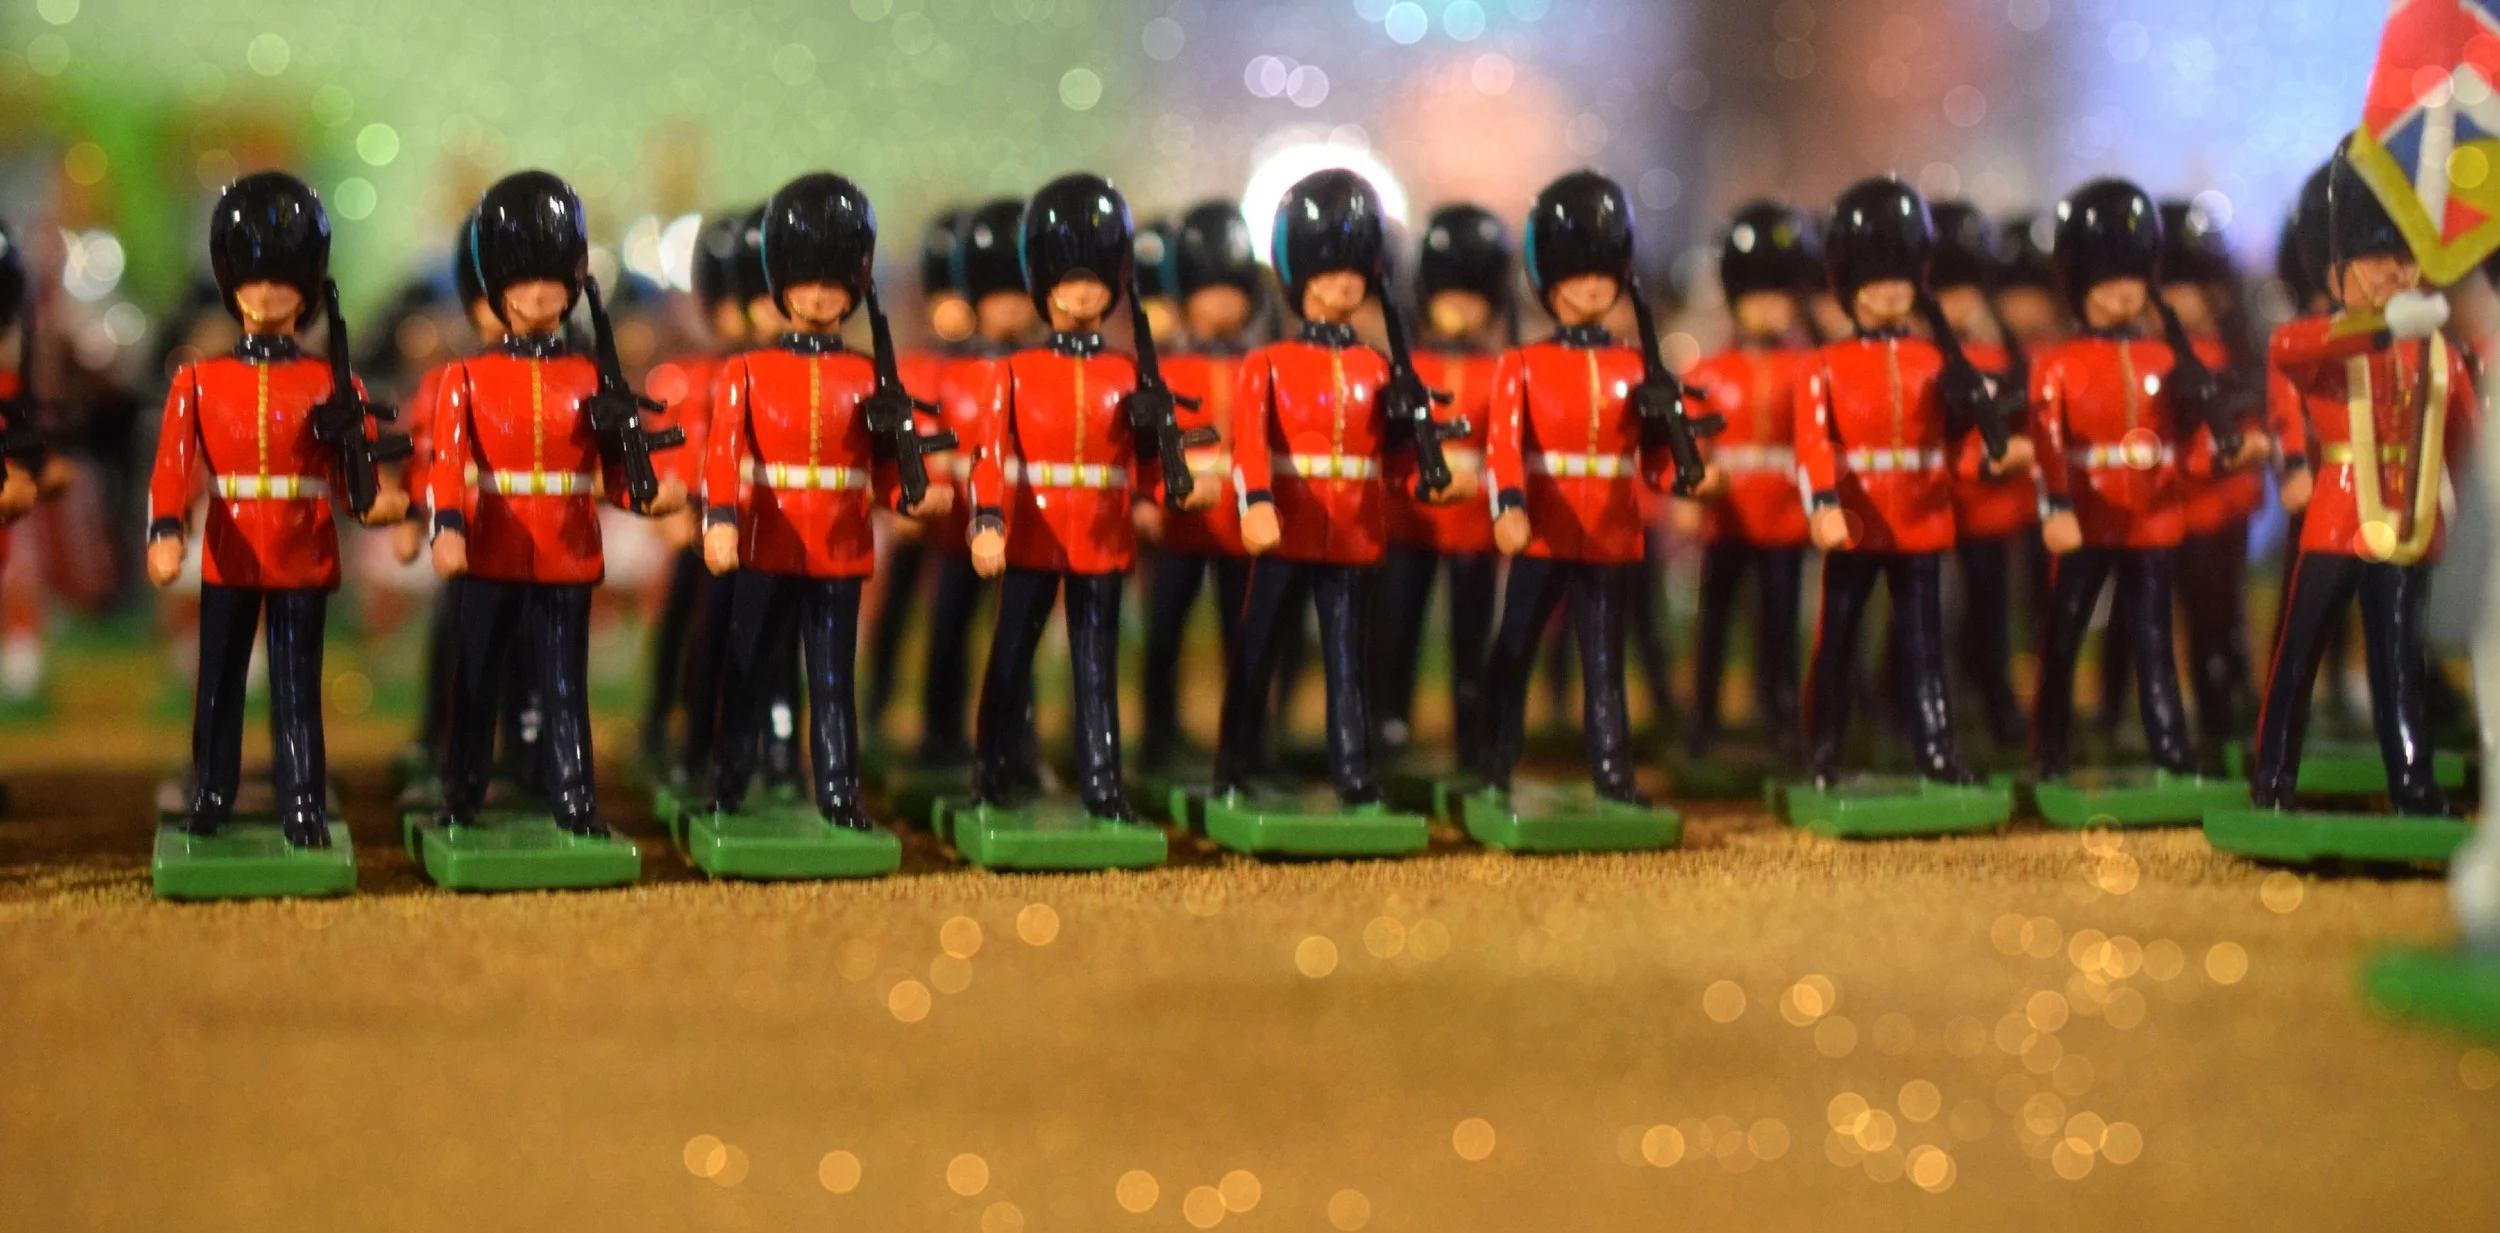
Changing of the Toy Guards at Harrods, photo by Annabelle AKA Egg
I'm back!
Christmas was in London with my husband's family. It was a lovely family time with lots of bonding between my children and their cousins from Italy, England and the US.
Now I'm happy to be back and excited about the new year. Although I have a few new ideas, I am most excited about continuing along in a few directions that I have already started along last year.
Doll Dressmaking. Yes, there was a bit of a hiatus as we approached the holidays, but now that I am over the holiday order hump, we can resume. I think the dresses need some sleeves. So sleeves will be next. The next lesson will be this upcoming weekend.
I am looking forward to continuing with the Doll Friend Project and sewing a doll for a child in foster care for each Phoebe&Egg doll sold. One of my next tasks includes reaching out to additional foster care organizations to increase my list of children who need transitional objects/dolls. I would also like to start to reach out to organizations like the Girls Scouts and Councils on Aging to work their people to make additional doll clothes for these dolls.
A new project I would like to start is a series on making doll quilts. I'm sure all of you making doll clothes from scraps, have scraps from your scraps. I am not a quilter, but am going to teach myself with doll quilts and thought I'd turn my lessons and experiments into your lessons.
And of course there will be new dolls and doll clothing, but more about that in my next post.
Happy 2015 to all of you!!!
Another amazing photo from Annabelle AKA Egg.
Luna Lovegood is off to her new home
Today, Luna Lovegood, a custom request, left for her new home in Arizona. She was so fun to make and inspired me to start thinking about the other Harry Potter characters. Hermione might be next.

Luna Lovegood, A Harry Potter doll

Luna Lovegood, A Harry Potter doll
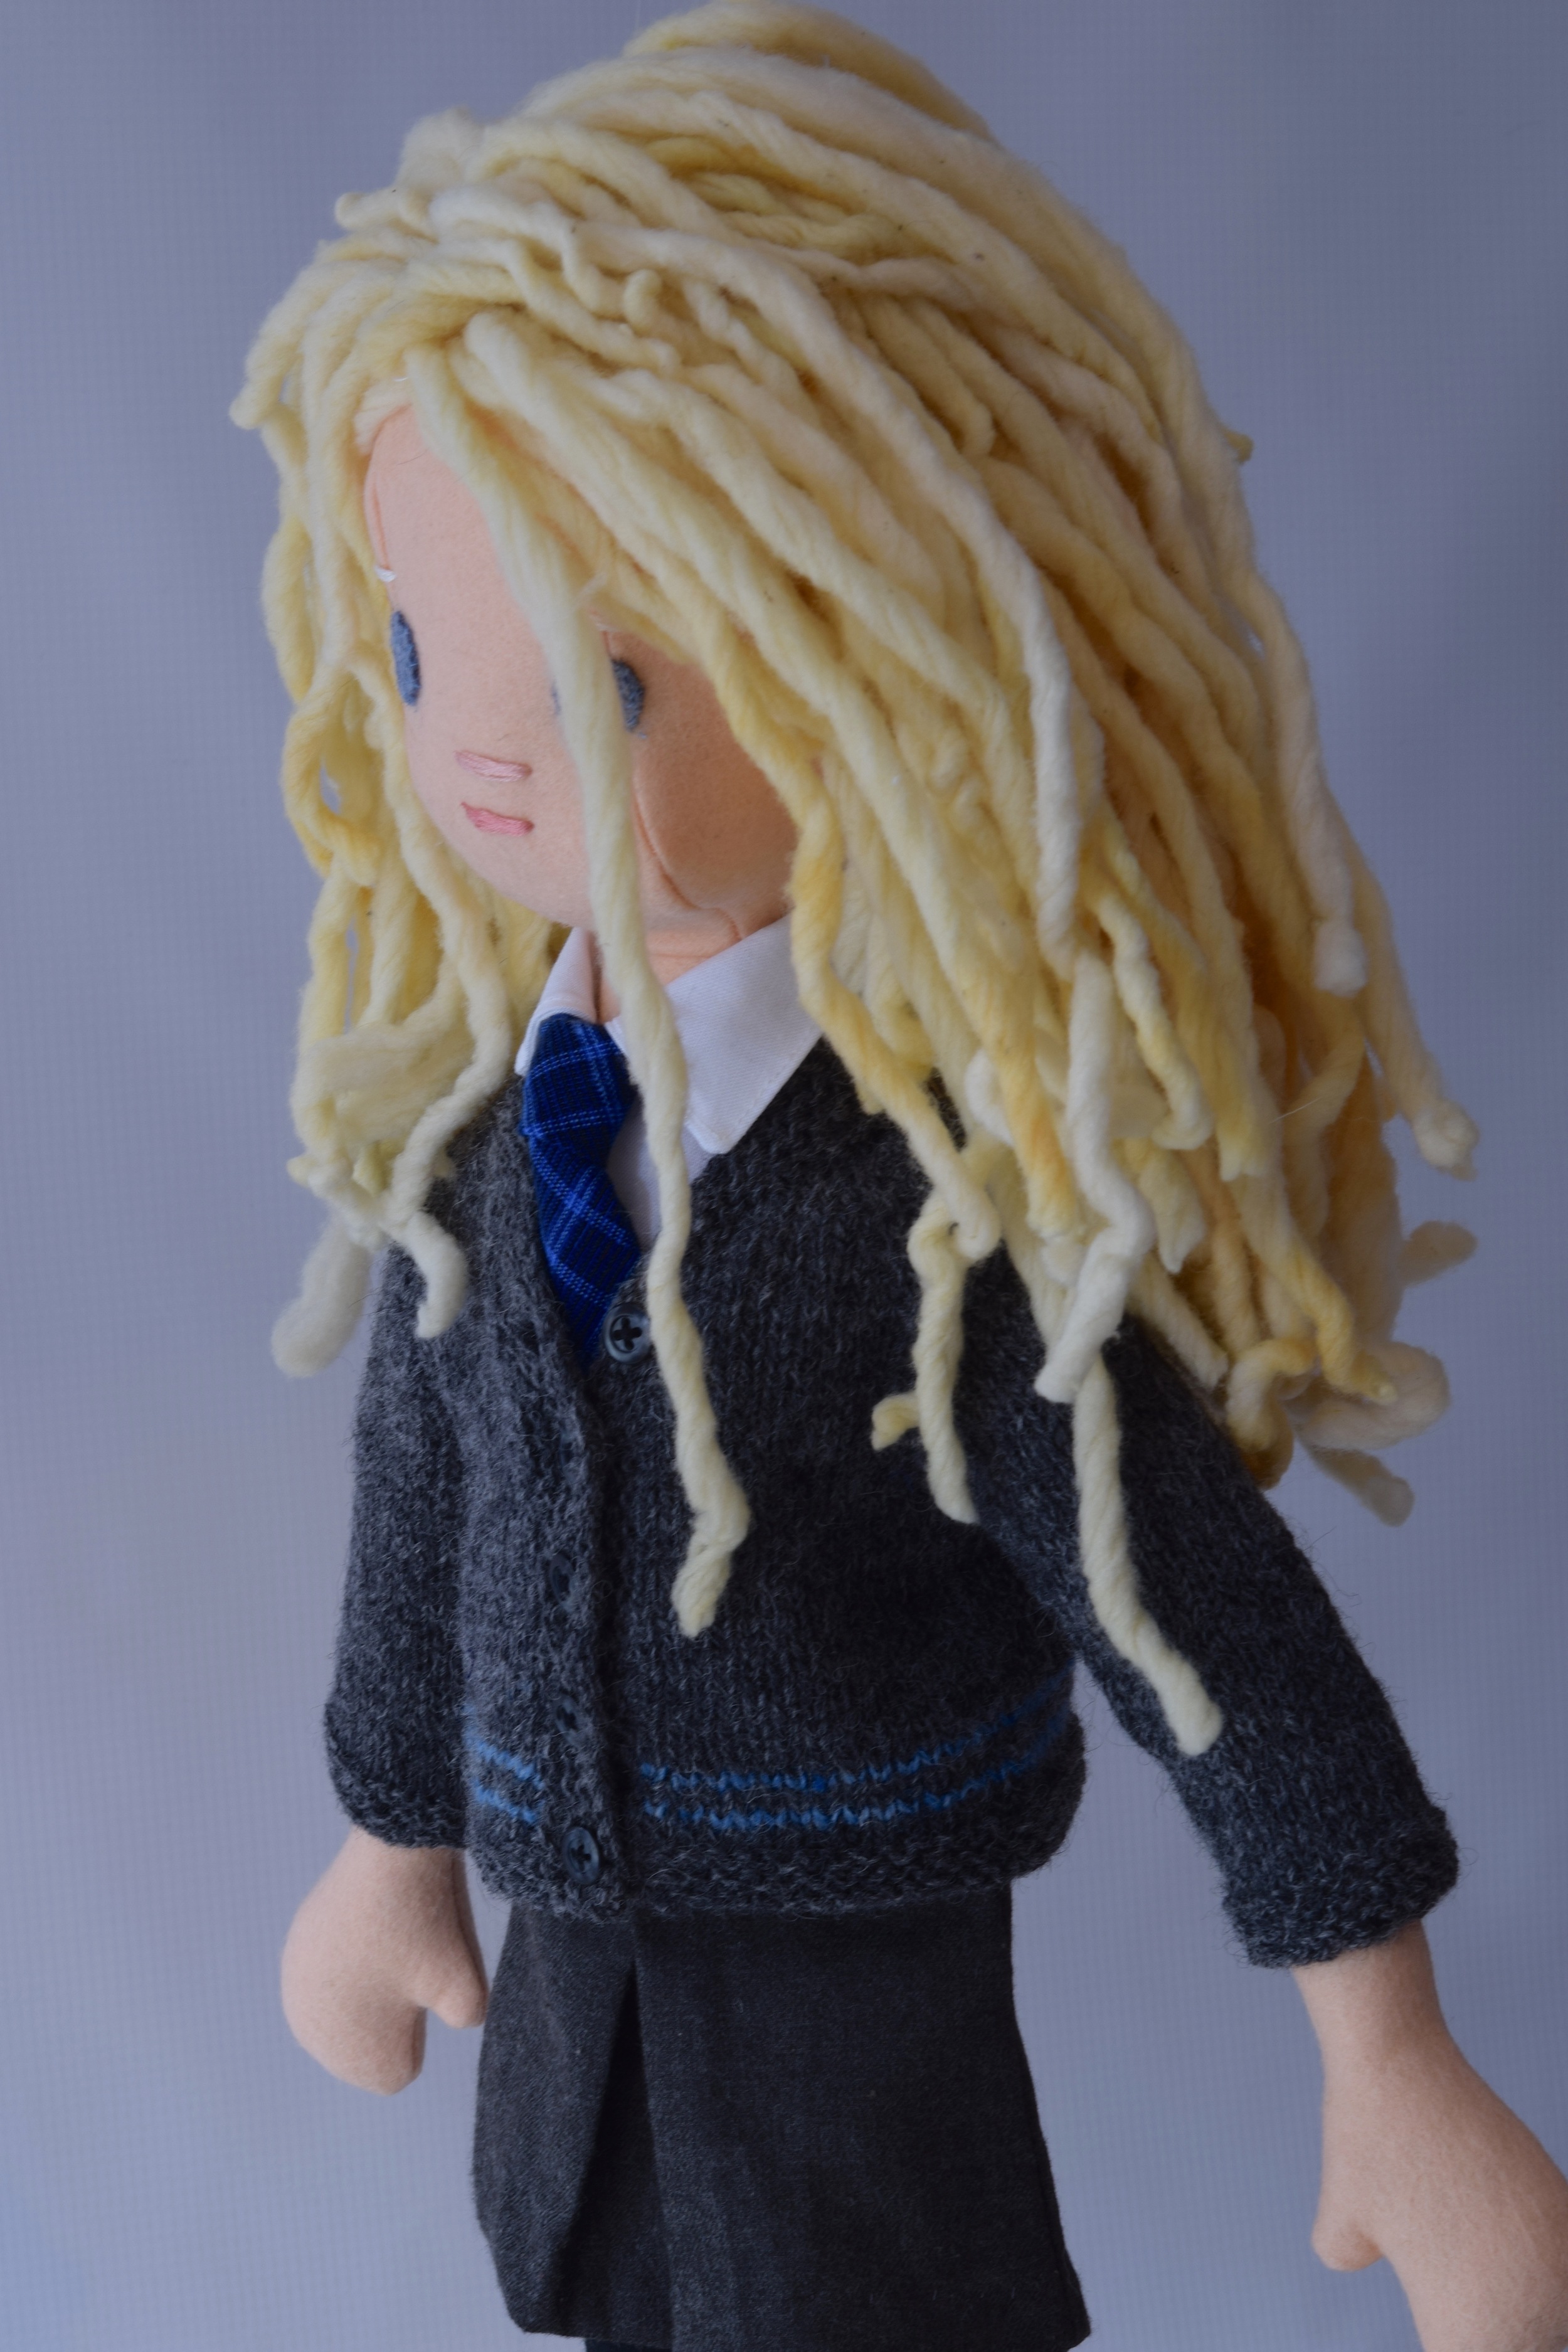
Luna Lovegood, A Harry Potter doll

Luna Lovegood, A Harry Potter doll
Great Podcasts to Listen to While sewing or Knitting

10 Podcasts to enjoy while sewing or knitting
I LOVE listening to podcasts while I sew or knit or clean up my workspace. Great podcasts help keep me focused and help me be more productive. I have noticed if I don't have a podcast in the background, I am more likely to be distracted by things like my phone.
I use the app iCatcher for downloading, listening, organizing and deleting my podcasts. I know there are others that do the same job, but I have no complaints about iCatcher. All of these podcasts can also be listened to straight from your computer, if you are not a smart phone user.
I have a number of favorites and I wanted to share them and hear from others what they recommend, both craft-related and uncraft-related but great to craft to.
Un-craft-related:
The Moth: Their tagline is "True Stories Told Live", which is completely accurate, except the Moth folks do a great job of screening and curating, so the stories really are great. Some of the stories are short, so if you want a continuous stretch of stories, listen to The Moth Radio Hour. Just a heads up if you are listening without head phones and there are young children around, not all stories are PG13.
Freakonomics: The authors of Freakonomics, Superfreak and Think Like a Freak have a podcast. Part social science, part economics, always interesting and always funny. The authors are a lot like your favorite college professors. These two can bring any topic to life.
The Ted Radio Hour: Brought to you by NPR. If you haven't discovered Ted Talks yet, you need to. Wise, inspiring, often witty speakers speak about their thing for 19 minutes, which seems to be the perfect amount of time for most attention spans--except if you are sewing, or knitting, then you may want the Ted Radio Hour, which synthesizes several Ted talks along a theme, weaves them together, along with interviews with the speakers. I love these, except sometimes I just feel very ordinary compared to these people. Today I listened to a Ted Radio Hour that included a woman who rowed across the Atlantic and Pacific, without a lifeline boat trailing.
Serial: It would be hard to miss the Serial hype these days. Everyone is following this podcast, which spun off from NPR's This American Life. This podcast is a story told in serial (week by week) form investigating a murder and conviction that occurred in a Baltimore suburb in 1999. It involves high schoolers, an ex-boyfriend, issues with a defense attorney, who is no longer alive, and a very questionable timeline. Tomorrow is the twelfth and last episode. If you haven't been following, because it is a podcast, you can start anytime, and that is the beauty of podcasts.
Mac OS Ken: I have to admit, this is my husband's favorite podcast. Mac OS Ken covers all things Apple every day. Since Apple products make my life much easier, I have both Mac OS Ken and my husband to thank!
Crafting related:
While She Naps: Every other Monday Abby Glassenberg interviews those at the forefront of the sewing, creating and craft blogging worlds. Jess Brown, Alicia Paulson and Melanie Falick were recent guests. Sometimes if there is time, the guests and Abby recommend products--everything from cookbooks to apps and clothing.
Never Not Knitting: Alana Dakos is not only an amazing knitter and pattern designer but she does a cool podcast. She ruminates about knitting, reviews products, interviews guests and talks about her progress on specific projects and pattern designs. She's a good storyteller and also has an incredibly soothing voice, so this blog will calm you down and remind you to keep knitting.
Explore Your Enthusiasm: Tara Swiger started as a yarn dyer and successfully marketed her yarn. She now helps other makers market their products. She is a great coach/therapist for those of us trying to make and sell. Tara usually thoroughly discusses one aspect of the process. She looks at that process from inspiration to customer in each podcast.
The Unmistakable Creative: Srini Raos interviews people from all different worlds of creating about everything from inspiration, overcoming setbacks, crowdfunding. Very inspiring podcast.
After The Jump: Grace Bonney of DesignSponge does a bit of all of the above podcasts, except the knitting. She interviews people in the design industry and talks about the process.
That's all of my recommendations for now. Would love to hear what you listen to. And who is waiting for the final episode of Serial tomorrow?
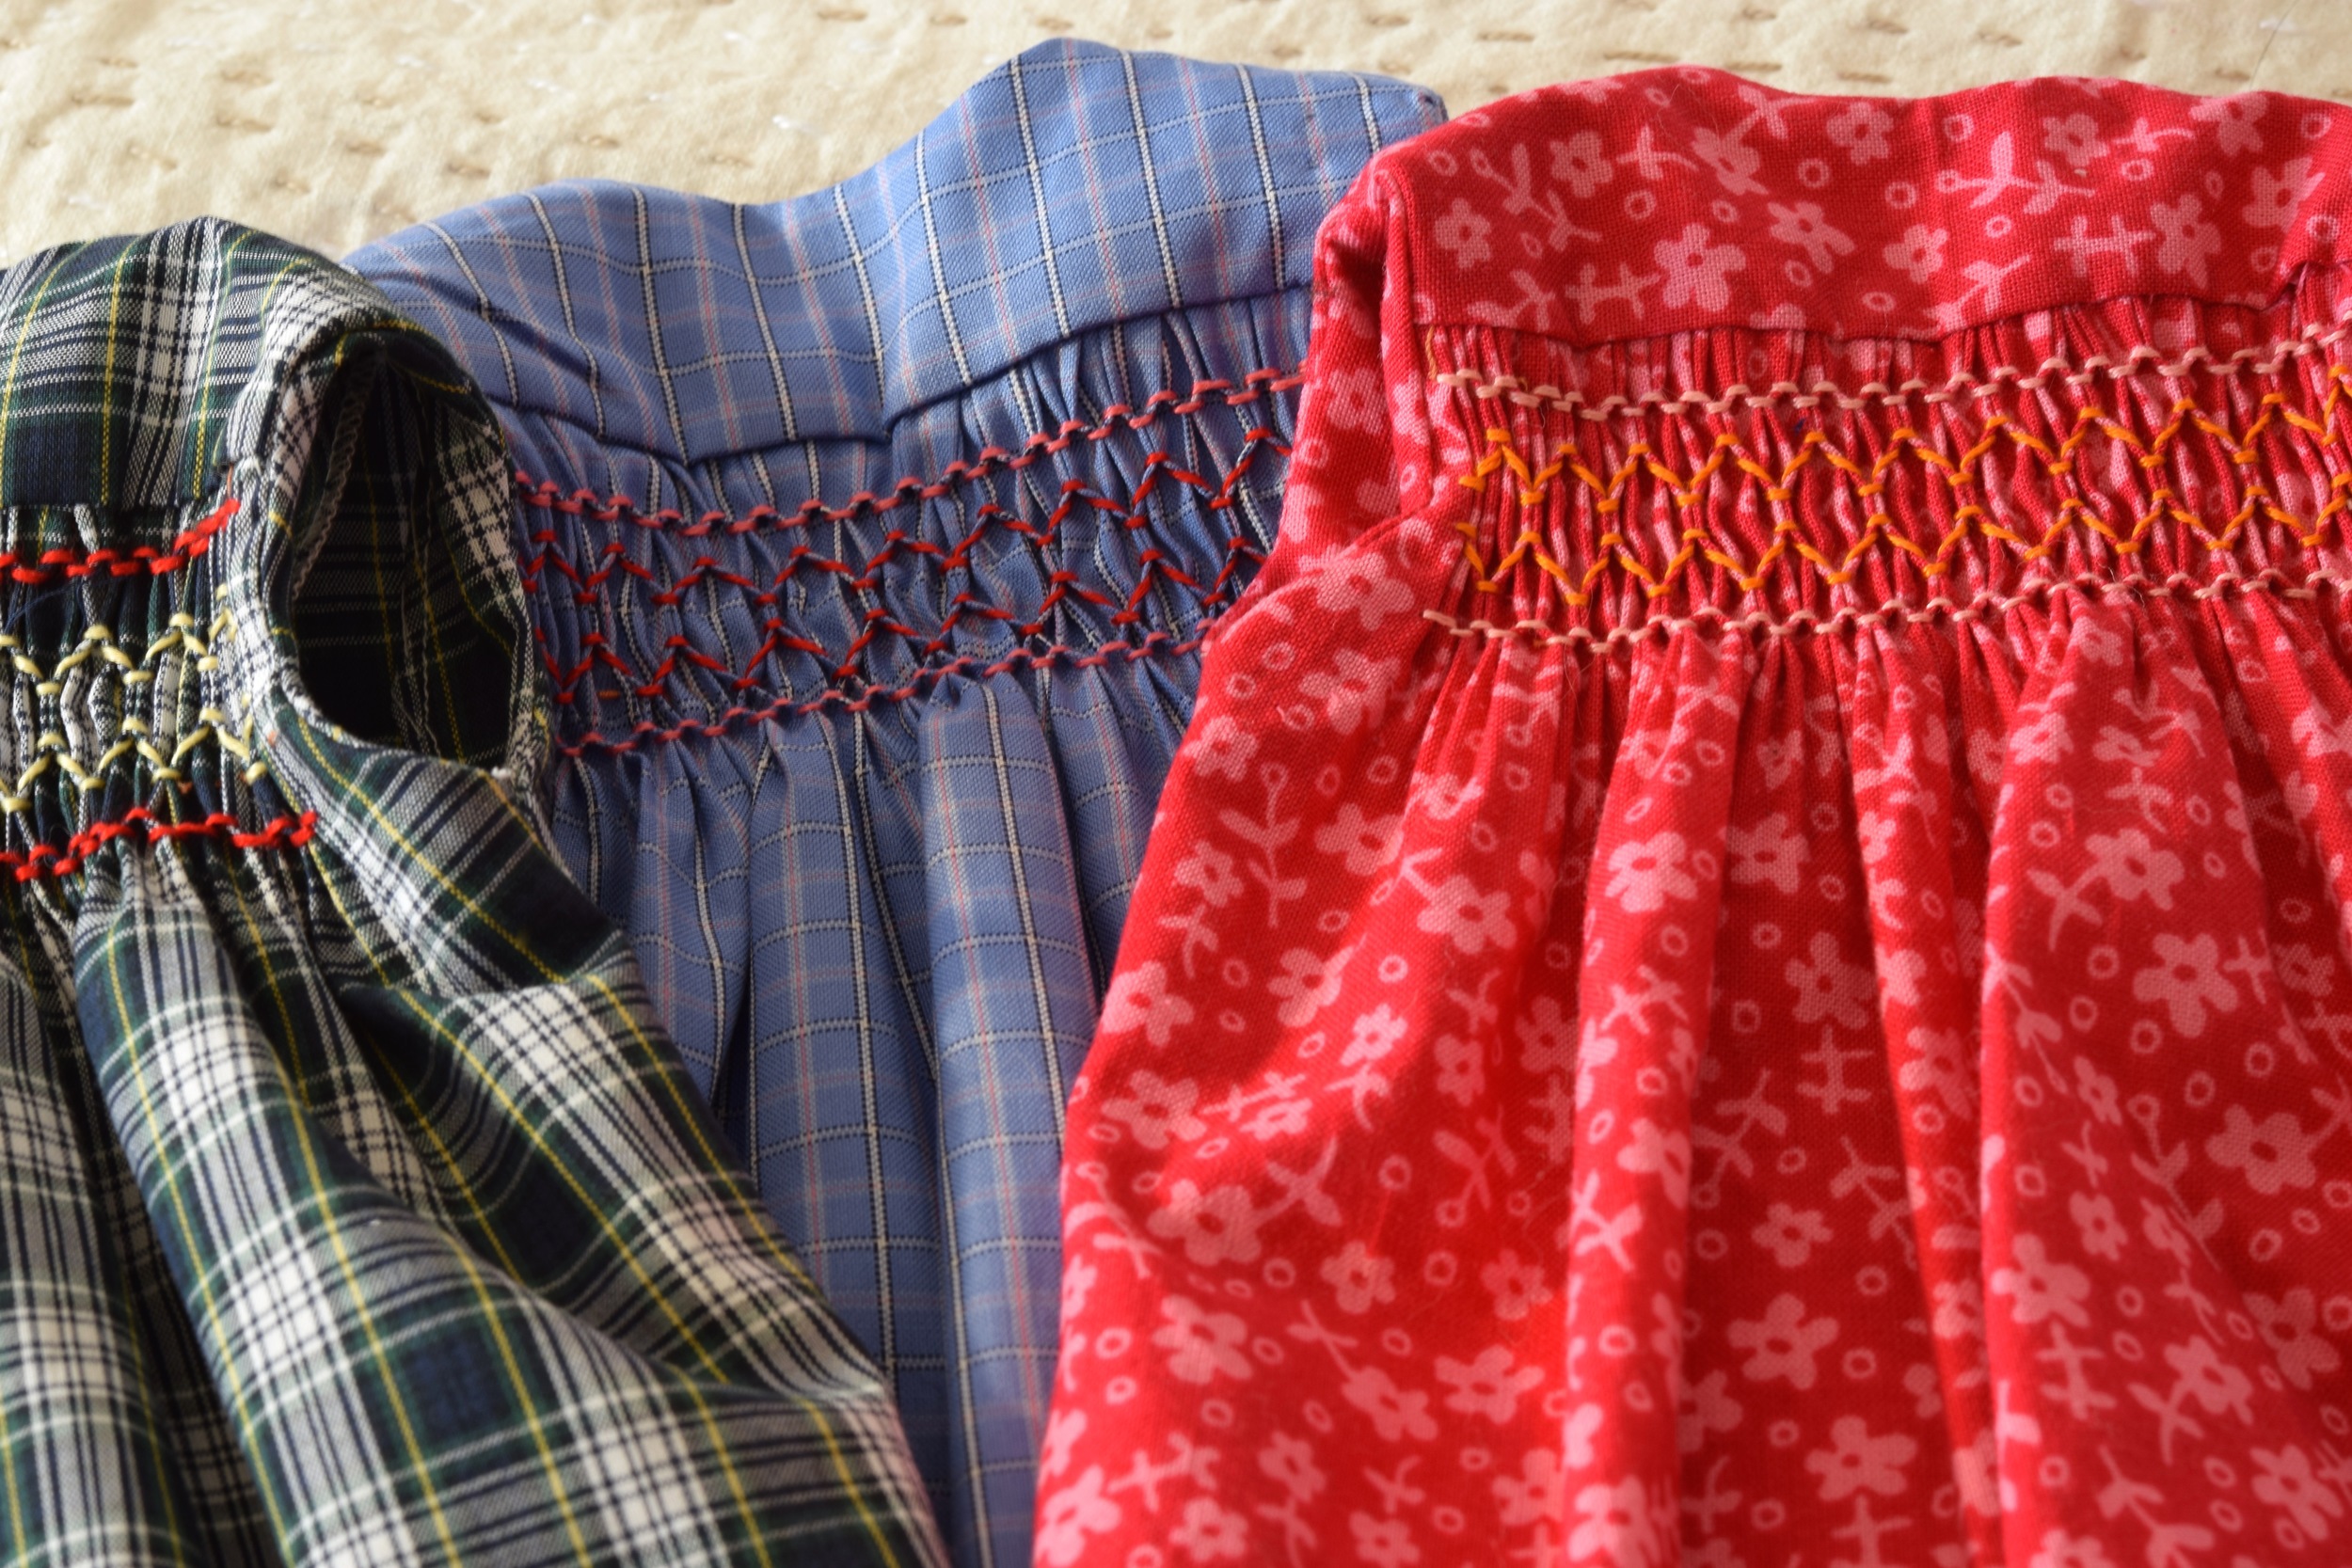
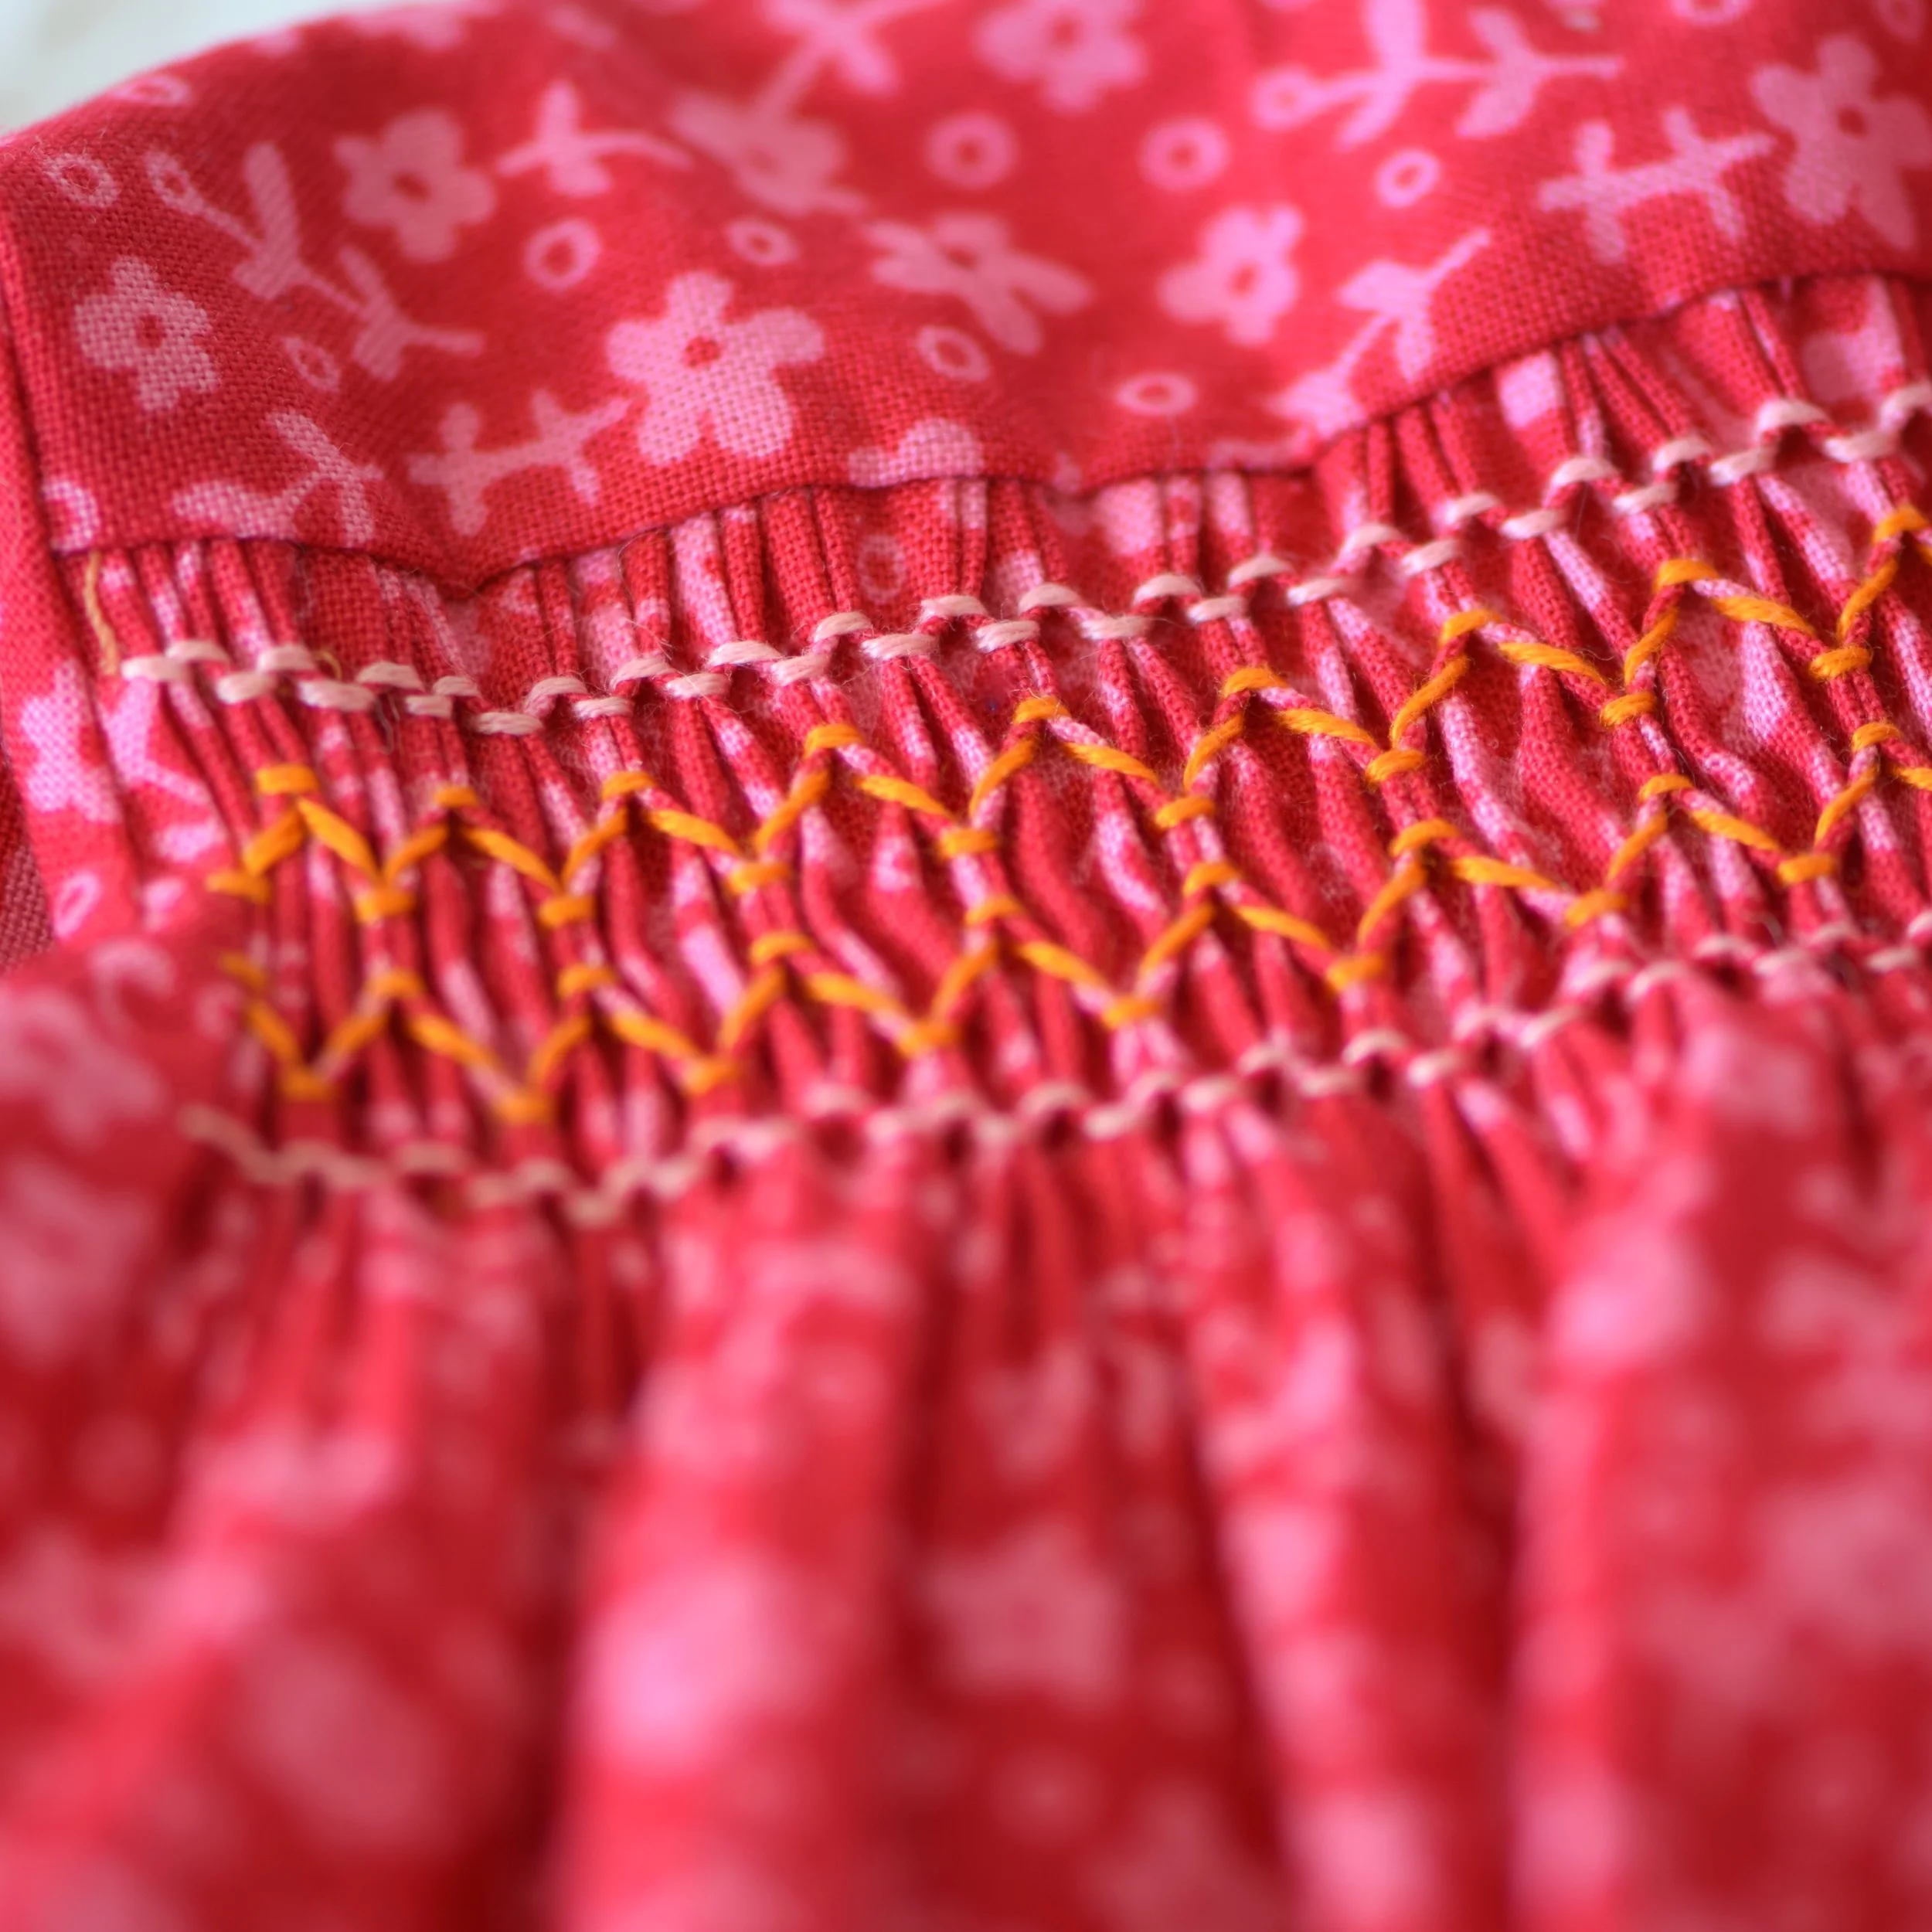
Smocking dresses
Smocking dresses, doll dresses, is one of my favorite things to do. I just shipped a few smocked dresses today.
Hope everyone is enjoying the season.
As soon as I am done with holiday orders Doll Dressmaking will be back on my blog.


Dressing for the Weather
First, apologies, I have not had enough time to do a number of things, including post to my blog. As soon as I have shipped Christmas orders, I will resume the Doll Dressmaking series. Sleeves, pleats, raglan, there's so much more to cover.
In the meantime, it has been cold out there. Today is cold and wet, but mostly it has been cold and windy. I am happy to say that even if my thirteen year old daughter (AKA Egg) will not wear mittens or a hat out, Phoebe and Egg should be pretty warm.
Here's a sneak peek at the winter wear. A few have been sold already and a few need to still be listed on Etsy.


Boot will be included, they are still on the needles.


Long underwear, of course


